Cette page fournit une simple interface de navigation pour trouver des entités décrites par une propriété et une valeur nommée. D’autres interfaces de recherche disponibles comprennent la page recherche de propriété, et le constructeur de requêtes ask.
Liste de résultats
- Laser Setup on Flowline/ZX3 for Laser Holes + ('''How to Setup .'''
This will Cover the … '''How to Setup .'''
This will Cover the Basic Alignment of the receiver and Sender setup.
Focusing the Laser and Setting up the Receiver Sensitivity.
Always Make sure Laser Sender and Receiver are clean and both lenses have been wiped with a soft cloth first.
en wiped with a soft cloth first. <br/>)
- Upgrading Autoflow TwinCAT2 to Win10 and TwinCAT3 + (<div class="annotatedImageDiv" typeof=" … Autoflows from A2001 to A2015 were initially produced with TwinCAT2 software. This has now been superseded with TwinCAT3 which then has the benefit of compatibility with version 6 front end software.
The original PC cannot be used because
*It is not powerful enough to run v6 front end
*The operating system cannot be upgraded to Windows 10
*It cannot be upgraded to TwinCAT3
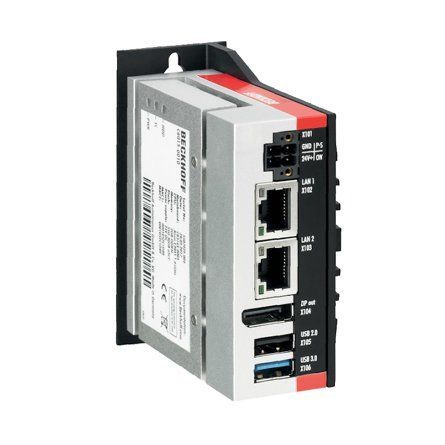
The Beckhoff C6015 PC has been chosen to be the replacement PC. It is compact, yet powerful enough to run the v6 front end and TwinCAT in the same
. It has an upgrade to 1.9Ghz 4 core processor.
Because it has a limited 40Gb SSD memory, a compact 64Gb memory stick is inserted into the USB 3.0 port. This acts as a separate drive for the DDRIVE dynamic storage for all machine setup. The internat drive is for the Operating System only. This mimics the current Autoflow setup of a remote Camera PC, hence the camera PC can be retired after the upgrade
era PC, hence the camera PC can be retired after the upgrade<br/>) - R0000558E Bench Assemble Base and Turntable Part 2 + ('''<u>Tools Required</u>''' … '''Tools Required''' Standard hex key set Standard spanner set Heat gun Large Internal Circlip pliers Standard circlip pliers 8mm hand reamer Grease gun Torque wrench '''Parts Required''' B0000028 Thrust Bearing 140 I/D 180 O/D 31 Long (FAG) x 1 B0000032 Linear Bearing: Ø30 x 50 Compact (Metal Case Only) x 4 B0001087 Angular Contact Bearing 70 I/D 125 O/D 24 Long x 1 B0001088 Circlip 125mm Internal x 1 C0001122K Servo Motor: Beckhoff AM8032-1E10 (Keyed) x 1 C0001179-100 Gearbox NPTO 100-1 x 1 D0004019E Turntable Mk5 (5334E) x 1 D0004033E Alignment Disc Mk5 x 1 D0004147E Turntable Shaft Mk5 x 1 D0004320E Thrust Bearing Housing Mk5 x 1 D0004336 Stay Bar x 2 D0004514E Turntable Base Mk5 x 1 D0004516 Front Bearing Block (5294) x 2 D0010778 Turntable Stop Arm x 1 D0010796 Turntable Housing Cover x 1 H0004631 Shaft 30mm: Base Slide x 2 M0001176 M6 Stainless lock washer x 4 D0015663 SR Axis Motor Guard x 1176 M6 Stainless lock washer x 4 D0015663 SR Axis Motor Guard x 1)
- R0015331 Mount Centralise Assembly + ('''<u>Tools Required</u>'''
… '''Tools Required'''
Standard hex key set
Standard spanner set
Steel rule 600mm
Soft hammer
'''Parts Required'''
D0004672 Centralise Sensor Bracket x 1
D0004972 None Centralise Bracket x 1
D0004622 centralise cylinder spacer x 1
R0000572 Bench Assemble Centralise Assembly
r spacer x 1 R0000572 Bench Assemble Centralise Assembly <br/>) - R0000558E Bench Assemble Base and Turntable + ('''<u>Tools Required</u>'''
… '''Tools Required'''
Standard hex key set
Standard spanner set
Heat gun
Large Internal Circlip pliers
Standard circlip pliers
8mm hand reamer
Grease gun
Torque wrench
'''Parts Required'''
B0000028 Thrust Bearing 140 I/D 180 O/D 31 Long (FAG) x 1
B0000032 Linear Bearing: Ø30 x 50 Compact (Metal Case Only) x 4
B0001087 Angular Contact Bearing 70 I/D 125 O/D 24 Long x 1
B0001088 Circlip 125mm Internal x 1
C0001122K Servo Motor: Beckhoff AM8032-1E10 (Keyed) x 1
C0001179-100 Gearbox NPTO 100-1 x 1
D0004019E Turntable Mk5 (5334E) x 1
D0004033E Alignment Disc Mk5 x 1
D0004147E Turntable Shaft Mk5 x 1
D0004320E Thrust Bearing Housing Mk5 x 1
D0004336 Stay Bar x 2
D0004514E Turntable Base Mk5 x 1
D0004516 Front Bearing Block (5294) x 2
D0010778 Turntable Stop Arm x 1
D0010796 Turntable Housing Cover x 1
H0004631 Shaft 30mm: Base Slide x 2
M0001176 M6 Stainless lock washer x 4
D0015663 SR Axis Motor Guard x 1
ainless lock washer x 4 D0015663 SR Axis Motor Guard x 1 <br/>) - R0015004 Bench Assemble Gripper + ('''<u>Tools Required</u>''' E … '''Tools Required''' External circlip pliers Standard Hex key set Standard spanner set Reed switch setting box Hammer Standard screwdriver set Rule '''Parts Required''' B0001106 x 20 D0015095 x 8 D0015096 x 2 D0015086 x 1 B0000034 x 2 D0015084 x 2 D0015083 x 1 D0015082 x 1 E0000366L x 1 B0001182 x 2 M0001182 x 2 D0015756 x 1 P0001013 x 1 P0001041 x 1 P0001128 x 1 P0001198 x 2 P0001120 x 1 D0015431 x 1 B0000437 x 1 D0015430 x 1 D0015090 x 2 D0015085 x 1 D0015102 x 2 D0015103 x 2 D0015104 x 2 D0015170 x 2 P0000049 x 1 D0015097 x 2 D0015100 x 2 D0015292 x 1 E0000336 x 1 E0001069 x 1 A0001044 x 4015100 x 2 D0015292 x 1 E0000336 x 1 E0001069 x 1 A0001044 x 4)
- R0015037 Bench Assemble SY Assembly Part 2 + ('''<u>Tools Required</u>''' S … '''Tools Required''' Standard Hex Key set Standard Spanner set 1 Meter straight edge Feeler Gauges '''Parts Required''' B0000044 Linear Rail MSB25 260mm Long (AMT) x 2 B0000046 Slide Base Bearing Block (Straight Grease Nipple) x 4 B0000173 blanking cap x 10 B0000234 Straight Grease Nipple M6 ST/ST x 4 B0000245 Needle Bearing 12 D 16 D 10 Long (ENA) x 12 B0001060 Grease Fitting M6x0.75 to Ø4 x 4 B0001061 Grease fitting M6 x 1 to 4mm x 4 B0001123 Double angular contact bearing 6 I/D 17 O/D 9 long x 2 B0001185 Leadscrew nut Igus x 1 C0001005 Stepper Motor AS1050 x 1 D0005184 Guide Roller x 6 D0005186 Guide Pin Washer x 6 D0015172 Centralise Plate (with SY) x 1 D0015173 Saw SY Saddle Brace x 1 D0015174 Roller Fence (With SY) x 2 D0015175 Saw Saddle Carriage Block x 2 D0015176 Cylinder Mount Block x 2 D0015178 Z Block x 2 D0015207 Outer Bearing Housing x 1 D0015208 Leadscrew Bearing Block x 1 D0015209 Leadscrew Attachment Bracket x 1 D0015222 SY Grease Manifold x 2 D0015240 Collar Clamp: SY Axis ZX5 x 1 D0015316 Leadscrew Bearing Block Cover x 1 D0015415 Turret Pickup Arm ZX5 x 2 D0015416 Bracket: Turret Stop RH ZX5 x 1 D0015417 Bracket: Turret Stop LH ZX5 x 1 D0015698 Flag Block x 1 D0015777 Leadscrew SY x 1 D0016336 SY table blower x 1 E0000336 Sensor: M8; 2mm, PNP N/O, M8 conn x 1 H0005185 Shaft 12mm: 90.5 Saw Fence Roller Pin x 6 M0001209 Bracket m8 proximity sensor 90 degree x 1 P0000200 Elbow Adaptor 6mm - M5 x 7 P0001127 Guide cylinder 20 x 30 compact x 2 P0001157 Turret Stop: 6 Station Right Handed Somatec x 1 P0001158 Turret Stop: 6 Station Left Handed Somatec x 1matec x 1 P0001158 Turret Stop: 6 Station Left Handed Somatec x 1)
- R0015037 Bench Assemble SY Assembly + ('''<u>Tools Required</u>'''
… '''Tools Required'''
Standard Hex Key set
Standard Spanner set
1 Meter straight edge
Feeler Gauges
'''Parts Required'''
B0000044 Linear Rail MSB25 260mm Long (AMT) x 2
B0000046 Slide Base Bearing Block (Straight Grease Nipple) x 4
B0000173 blanking cap x 10
B0000234 Straight Grease Nipple M6 ST/ST x 4
B0000245 Needle Bearing 12 D 16 D 10 Long (ENA) x 12
B0001060 Grease Fitting M6x0.75 to Ø4 x 4
B0001061 Grease fitting M6 x 1 to 4mm x 4
B0001123 Double angular contact bearing 6 I/D 17 O/D 9 long x 2
B0001185 Leadscrew nut Igus x 1
C0001005 Stepper Motor AS1050 x 1
D0005184 Guide Roller x 6
D0005186 Guide Pin Washer x 6
D0015172 Centralise Plate (with SY) x 1
D0015173 Saw SY Saddle Brace x 1
D0015174 Roller Fence (With SY) x 2
D0015175 Saw Saddle Carriage Block x 2
D0015176 Cylinder Mount Block x 2
D0015178 Z Block x 2
D0015207 Outer Bearing Housing x 1
D0015208 Leadscrew Bearing Block x 1
D0015209 Leadscrew Attachment Bracket x 1
D0015222 SY Grease Manifold x 2
D0015240 Collar Clamp: SY Axis ZX5 x 1
D0015316 Leadscrew Bearing Block Cover x 1
D0015415 Turret Pickup Arm ZX5 x 2
D0015416 Bracket: Turret Stop RH ZX5 x 1
D0015417 Bracket: Turret Stop LH ZX5 x 1
D0015698 Flag Block x 1
D0015777 Leadscrew SY x 1
D0016336 SY table blower x 1
E0000336 Sensor: M8; 2mm, PNP N/O, M8 conn x 1
H0005185 Shaft 12mm: 90.5 Saw Fence Roller Pin x 6
M0001209 Bracket m8 proximity sensor 90 degree x 1
P0000200 Elbow Adaptor 6mm - M5 x 7
P0001127 Guide cylinder 20 x 30 compact x 2
P0001157 Turret Stop: 6 Station Right Handed Somatec x 1
P0001158 Turret Stop: 6 Station Left Handed Somatec x 1
1 P0001158 Turret Stop: 6 Station Left Handed Somatec x 1 <br/>) - R0015295 Finalise wiring loom for Rotary head + ('''<u>Tools required</u>''' Standard Hex keys '''<u>Parts Required</u>''' D0007788 inspection cover 8 off)
- Laser Setup on Flowline/ZX3 for Laser Holes +
- OBSOLETE DM - Updating Resources + (<div class="icon-instructions caution-i …
All information provided to the service engineers on Device Magic can all be linked to a single Excel document. This document provides all customer names, machine numbers, emails and employee information. Linking this document with Device Magic provides fields that make it easier for engineers to fill out the form.
used internally at Stuga and not be sent to engineers or customers in coordination with Data Protection standards.</div> </div><br/>) - TB0409 Setting Up Windows 10 PC 2018 + (<div class="icon-instructions caution-i … Please use [[Setting Up Windows PC C0000422-KIT 2023]][[Setting Up Windows PC C0000422-KIT 2023]])
- TB0426 Replacement Zebra Printer Setup + (<div class="icon-instructions caution-i … [https://stuga.dokit.app/wiki/TB0452_ZD620_Zebra_Printer_Setup ZD620 Instructions]iv> [https://stuga.dokit.app/wiki/TB0452_ZD620_Zebra_Printer_Setup ZD620 Instructions])
- Setting Up Windows PC C0000422-KIT 2023 + (<div class="icon-instructions idea-icon … stuga.dokit.app/wiki/Setting_Up_C0000422-KIT_-_Full_Hardware_2023</div> </div>)
- R0015336 Pneumatic Output Testing Part 2 + (<u>'''Tools Required'''</u> PCL airline connection 12mm blanking ports Valve Manual over ride tool Standard screwdriver set Additional colleague when setting regulator pressures for outputs <u>'''Parts required'''</u> R0015040 completed module)
- R0015336 Pneumatic Output Testing + (27/08/2025 Moved to Confluence Click [https://stuga-ltd.atlassian.net/wiki/external/ZjJkMDQ0MDA4NWNhNGY1OGE2ODIxN2EwNmZjNGFhZjQ Here])
- R0015333 Fit Clamp Assembly + (<u>'''Tools Required'''</u> Standard hex key set Standard spanner set 1 meter straight edge Feeler gauges Soft hammer Engineers square <u>'''Parts Required'''</u> R0015064 Bench Assemble Clamp Assy ZX5)
- TB0398 Assembly of ZX4 Screen Cover + (== Problem == The previous design of scree … == Problem == The previous design of screen cover was susceptible to cracking and failing. The new design resolves this by having a metal hinge piece and an additional clear plastic plate, with both being joined by 3M VHB (Very High Bond) tape. Parts: D0010965 x1 D0010966 x1 M0001119 x 550mmD0010965 x1 D0010966 x1 M0001119 x 550mm)
- R0015011 Bench assemble Gripper + (==Introduction==
'''<u>Tools Require … ==Introduction==
'''Tools Required'''
External circlip pliers
Standard Hex key set
Standard spanner set
Reed switch setting box
Hammer
Standard screwdriver set
Rule
'''Parts Required'''
B0001106 x 20
D0015095 x 8
D0015096 x 2
D0015086 x 1
B0000034 x 2
D0015084 x 2
D0015083 x 1
D0015082 x 1
E0000366L x 1
B0001182 x 2
M0001182 x 2
D0015756 x 1
P0001013 x 1
P0001041 x 1
P0001128 x 1
P0001198 x 2
P0001120 x 1
D0015431 x 1
B0000437 x 1
D0015430 x 1
D0015090 x 2
D0015085 x 1
D0015102 x 2
D0015103 x 2
D0015104 x 2
D0015170 x 2
P0000049 x 1
D0015097 x 2
D0015101 x 2
D0015292 x 1
E0001069 x 1
A0001044 x 4
7 x 2 D0015101 x 2 D0015292 x 1 E0001069 x 1 A0001044 x 4<br/>) - Changing the Flowline Ops Password + (A password can be set up within FlowlineOps that limits access to the Edit Machining and Edit Profiles buttons, This tutorial will explain how to setup or change this password.)
- ZX5 - ZX3 Hepco alignment Module E Saw Infeed + (Alignment and check procedure for mounting … Alignment and check procedure for mounting of hepco rail To main frame Parts required B0001102 hepco rail D0015492 5 off vertical adjustment plate D0015493 5 off Lateral adjustment plate D0015072 1 off Carriage Plate B0000184 journal wiper 4 off B0000185 journal 2 off B0000186 journal 2off Hepco Levelling Jig Hepco rail v block jigs Hepco rail Drive rack pitching jigk jigs Hepco rail Drive rack pitching jig)
- ZX5 Production R0015040 Module F to R0015001B Module E alignment + (Alignment criteria and steps for correct machine installation)
- ZX5 Production R0015139 Module B to R0015000B Module C alignment + (Alignment details and level settings for correct alignment of module B to module C)
- Monday - Obtaining Customer or Machine Address from a Job + (All machines in the Monday database have their locations stored to make it easy for an engineer to navigate to site using the map features in Android or Apple phones However, it is not intuitively clear how to get to this information)
- R0000728 R0000729 Stroke Assembly Dismantling + (Assemblies fitted to MK1 ZX4 will require … Assemblies fitted to MK1 ZX4 will require refurbishment at some point of life cycle.
The following instructions should be followed to ensure that correct assembly and setting are performed
'''Tools Required'''
Standard hex key set
Standard spanner set
Double pin saw flange spanner
Drifts and punches
Ballpein hammer
Soft hammer
Degreasing bath
pein hammer Soft hammer Degreasing bath <br/>) - Saw machining centre alignment and level check points + (Bullet pointed checks to determine correct alignment of key components within Sawing unit)
- ZX5 Production R0015122 Module A to R0015139 Module B alignment + (Details and steps for correct alignment of Module A to Module B '''<u>Tools Required</u>''' Laser Level 300mm rule 1 meter yellow level 24mm spanner Permanent marker Pipe cutters Ring main connection equipment)
- ZX5 Production R0000548E Module G to R0015040 Module F alignment + (11/09/2025 Moved to Confluance Click [https://stuga-ltd.atlassian.net/wiki/external/NzJiMjYxYjM2ZmZjNDA0NWFjZWM1NzM0NGUxMWNkYzk Here])
- Z Transom Width Measurement + (Difficulty can be had when trying to accurately measure the width of a Z transom profile section. This guide will show you how to accurately measure the width of the Z section to within 0.1mm which is required when setting up Y notching accurately)
- Placing a TwinCAT3 Machine Under Source Control + (<div class="icon-instructions caution-i … Click [https://stuga.dokit.app/wiki/Changing_Version_Control_to_Visual_Studio here] for the latest procedure For many years, the source code for the PLCs has resided on the G:\drive and then a copy on each and every one of the PCs used to edit the code, so at least one on each machine. This is a recipe for disaster because maintaining all the copies and version numbers is incredibly difficult and adds a lot of time overhead to fixes and changes. This has worked because there has been only one developer, but this is set to change in future as more programmers will be trained and tracking versions becomes more difficult From 2020, the PLC code version control has been improved by using an industry standard source control system called "Git" along with "BitBucket" to store the PLC code in the cloud. The program "SourceTree" is used to commit, push and pull the changes [https://www.atlassian.com/git/tutorials/what-is-version-control Click here] for an introduction to version control using Git This tutorial is a step by step guide to setting up an existing machine or diagnostic PC to a standard uses on all Stuga machines to enable quick, easy and stress free version control.standard uses on all Stuga machines to enable quick, easy and stress free version control.)
- Create a TwinCAT Project from Existing Project + (If you are confident and proficient in usi … If you are confident and proficient in using the Visual Studio editor to create TwinCAT projects, you can shortcut a lot of the data inputting by copying and modifying an existing project. This will keep the naming conventions and links exactly the same
ne has exactly the same EtherCAT box, drive and module setup</div> </div><br/>) - Ecoline Site Installation Guide + (Installation of an Ecoline is quite straig … Installation of an Ecoline is quite straight-forward as all of the main levelling and alignment is taken care of inside the main module housing. Installation involves 3 steps # Levelling main module # Attaching and Levelling Infeed Frame # Refitting Infeed coverling Infeed Frame # Refitting Infeed cover)
- TB450 - CMOS Battery replacement + (Internal CMOS batteries are used in PCs to … Internal CMOS batteries are used in PCs to keep a constant power supply to BIOS memory while the main power supply is switched off. These batteries should last up to 5 years when a PC has been left idle. Sometimes these batteries can fall flat before this time either due to being low when sent out or extended use on older machines. The main symptom of a CMOS battery faulting on a Stuga machine is the PC not booting up when mains power is switched on which will be indicated by a “No Signal Detected” message being displayed on the screen. This is due to the BIOS setting “Restore AC Power Loss” going back to its default value of OFF due to the battery faulting. Restoring the BIOS to its original settings is a temporary fix in this situation as it is most likely this will happen again a couple of months down the line (See TB 376 or 213). The battery required is a '''CR2032'''. In the case of the Antec PC, and most commonly, the battery is held in an open housing that can be pushed to release and easily replaced. In PCs such as the Acer Revo the battery needs to be pre-wired with a plug but still easily unclipped and replacedug but still easily unclipped and replaced)
- Stuertz Infeed - Check GY Position Parallelism + (It is important that the parallelism of th … It is important that the parallelism of the GY axis to the backfence is set and maintained along the length of the rack. This tutorial describes how to check this parallelism without the need for measuring equipment
'''General Procedure'''
#Find range of adjustment required
#Zero GY axis to ensure range adjustment can be met
#Move to straight edge resting points, Adjust rollers at these points
#Use straight edge between resting points to adjust the other rollers to a fixed datum
'''Potential Symptoms of a problem'''
*Gripper cannot pick up offcuts
*Gripper /profile end forced away from backfence
*Accuracy problems
*Gripper wobbles after it has released profile
Use the laptop to enable you to control the Service screen whilst inside the infeed table
The gripper setting jig is used to give an accurate and reliable zero to locate the gripper jaw to. Any piece of aluminium reinforcing box section will also work
the gripper jaw to. Any piece of aluminium reinforcing box section will also work <br/>) - IP Camera Viewer exe Setup + (It is useful to be able to see a quick vie … It is useful to be able to see a quick view of all cameras on a machine at once. A freeware program is available to do this IP Camera Viewer.exe
Ensure you have the IP address of the cameras to hand, and that the cameras are active and setup to [[Hikvision Camera Setup]].
The cameras should have a fixed IP address
ras should have a fixed IP address <br/>) - Setting Gripper Nose + (It is very important to ensure the gripper nose and heel is correctly set up. This assembly is subject to a lot of wear and tear and maintenance is very important. Incorrect setting or play in this assembly is a major cause of accuracy issues)
- TM017 Setting Cut Length on Saw + (Moved to Confluence 11/12/2025 [https://stuga-ltd.atlassian.net/wiki/spaces/~5570585b7bb5d1bc31430e886883cbc774c182/pages/82542638/ACC018+-+Adjusting+Saw+Cut+Lengths+on+ZX5-S+and+ZX5-E Setting saw Cut Lengths])
- Setting Arrow Heads on ZX5 or ZX5-E + (Moved to Confluence 11/12/2025 <br/>[https://stuga-ltd.atlassian.net/wiki/spaces/~5570585b7bb5d1bc31430e886883cbc774c182/pages/82706473/ACC017+-+Arrow+Head+Adjustment+on+Saw+with+SY+Axis Setting Arrowheads])
- TB0447 ZX5 Setup - X Axis Beam Calibration + (Moved to Confluence 17/12/2025 [https://stuga-ltd.atlassian.net/wiki/spaces/~5570585b7bb5d1bc31430e886883cbc774c182/pages/89423875/TB0447+ZX5+Setup+-+X+Axis+Beam+Calibration ZX5 Setup - X Axis Beam Calibration] <br/>)
- Setting Ultrasonic Sensor - Horizontal + (Moved to Conlfuence 15/12/2025 [https://stuga-ltd.atlassian.net/wiki/spaces/~5570585b7bb5d1bc31430e886883cbc774c182/pages/85524503/Setting+Ultrasonic+Sensor+-+Horizontal Setting Ultrasonic Sensor - Horizontal])
- Updating Teamviewer Host + (Older versions of Teamviewer are being pha … Older versions of Teamviewer are being phased out by the Teamviewer company from September 15th 2021. The advice on the website suggests you need to upgrade to version 15. However, v15 is not compatible with the older Windows XP machines in the field. The latest XP compatible downloadable version of the Host program is 13.2 and is available [https://download.teamviewer.com/download/version_13x/TeamViewer_Host_Setup.exe here] Regrettably, the update process on older versions is not simple, and frustratingly cannot be done remotely. It needs intervention from an operator at the machine with a small amount of technical know-how with a small amount of technical know-how)
- StuertzCloud - Creating Local SQL Database + (See [[StuertzCloud - Setup Overview]] … See [[StuertzCloud - Setup Overview]] for an overview of the setup.
This tutorial covers the setup of the Local SQL Express database instance and creating a "ProOpt" database structure on it.
*This database installed on the 'Location' local network. *The 'Machines' write their production data to it *The 'Gateway' software uploads this data to the StuertzCloud server See Also [https://stuga.dokit.app/wiki/StuertzCloud_-_Installing_Gateway StuertzCloud - Installing Gateway] [https://stuga.dokit.app/wiki/StuertzCloud_-_Setting_up_Stuga_Machine_to_Write_Production_Data StuertzCloud - Setting up Stuga Machine to Write Production Data] [https://stuga.dokit.app/wiki/StuertzCloud_-_Creating_a_Customer_Location StuertzCloud - Creating a Customer Location]
SQL Server Management Studio (SSMS) installed to manage the databases</div> </div> <br/>) - Setting Profile Detection Laser Sensor + (Setting the profile sensor correctly is im … Setting the profile sensor correctly is important as it will lead to incorrect offcut measurement.
ensure the sensor is set for the range of different colours</div> </div><br/>) - TB0425 Lenovo Tablet Setup + (Setting up all apps for the engineers Lenovo tablets.)
- ACEpc Changing IP address using netedit + (The ACEpcs use two different systems for c … The ACEpcs use two different systems for connecting a network #NETBeui - this was used on earlier machines but reliability depends on the customer network setup. Reconfiguration after initial setup is difficult #IP addressing - A setup system was written using IP addresses to connect. This is a little harder to set up, but is easier to change later. A special program called netedit was written which updates all the correct files in the backgroundes all the correct files in the background)
- Convert TC2 Project to TC3 + (The Beckhoff system provides a system for upgrading to TC3 from a TC2 project. This tutorial goes through the steps required to ensure the links and setup of the original TC2 project are copied through to TC3.)
- PC Recovery Process + (The PCs are now shipped with a memory stick that includes a full recovery image. If the system fails in future, this allows a full recovery of the initial setup of the entire drive. Mouse and Keyboard are required for recovery process.)
- ZX5 Alignment Check + (The ZX5 machine can be tricky to align as there are many adjustments designed into the table to offset manufacturing tolerances. This step by step guide follows the correct protocol to ensure the starting point and sequence of alignment is correct)
- Repairing R axis datum pin + (The datum pin on the old ZX4 at Sidey was … The datum pin on the old ZX4 at Sidey was recommended to be changed at my last service visit. Unfortunately there are quite a few different datum spindle plates and we were having problems tracking down the correct one so it was decided that I would be sent out the new replaceable datum pin carrier as Sidey have a small machine shop I could use to modify the existing plate to make it fit. Unfortunately the mounting holes of the new carrier interfered with the mounting holes of the pneumatic cylinder so it couldn't be used. After taking dimensions of the existing plate for identification I realised there was actually a very small and quick repair that could be carried out until the correct parts were identified. All you need is a cordless drill, a 2.5 and a 3.1mm drill, M3 tap and an M3 x 15mm cap head screw.l, M3 tap and an M3 x 15mm cap head screw.)
- TM018B Microline and ZX3 V Notch Blade Setup + (The engineer will need a reasonable mechan … The engineer will need a reasonable mechanical knowledge, and a working knowledge of the operation of the machine. You will need callipers (+/-0.05mm) and an accurate rule The setting of the V notch blades on a ZX3 Ring revolves around the setting of two groups of parameters: *V and W axis positions *Blade offsets for each blade The rough position of V and W axes is set first, then the individual blade offsets are set, and finally a test is run to tweak the accuracy to gain perfection. There are two “tweaking” parameters for each blade. The two parameters are: *Depth offset – how deep into the bar *X axis offset – position of point of blade relative to the spindle centrelinef blade relative to the spindle centreline)
- TB0422 Commissioning ZX5 Software 2018 + (The first step in commissioning a new mach … The first step in commissioning a new machine is to get the basic software setup correctly installed. Because the software is designed to be very flexible across many machine types, the simplest way to do this is to copy from a recently built similar machine.opy from a recently built similar machine.)
- R0000299 Stroke assembly rebuild Part 2 + (The following instructions should be follo … The following instructions should be followed to ensure that correct assembly and setting are performed '''Tools / consumables Required''' Standard hex key set Standard spanner set Large adjustable spanner Drifts and punches Ballpein hammer Soft hammer FE10 Solvent Hylomar Gasket '''Parts Required''' Kit R0000299 containing B0000043 Double Angular bearing 15 I?D 35 O?D 15.9 long rubber seal 3 x 2 B0000105 Double Angular Bearing 15 I/D 35 O/D 15.9 Long x 1 B0000335 3ph Brake motor 2 pole 3000rpm x 1 B0000380 Double Angular Bearing 25 I/D 52 O/D 20.6 Long + rubber seal x 2 D0000059 Damper Bridge x 1 D0000062 Damper Bridge Boss x 2 D0007730 ZX4 V Notch Mk1 Spindle Shaft x1 D0007867 Bevel Gear (Left) x 1 D0007868 Bevel Gear (Right ) x 1 D0007873 Motor Gear x 1 D0007874 Pinion Gear x 1 D0007875 Pinion Shaft x 1 P0000165 damper x 174 Pinion Gear x 1 D0007875 Pinion Shaft x 1 P0000165 damper x 1)
- Training Laser on Ecoline + (The laser needs to be focused on the work area and not the receiver The smaller the dot for the profile to break/make the more accurate the laser)
- X252 Forward Clamp Out Sensor Setup Stuertz Infeed + (The out sensor used for the vorlaufwagen c … The out sensor used for the vorlaufwagen cannot be a standard reed switch because the cylinder that drives this output is a telescoping version. It is impossible to detect the out position. Therefore, a sensor is fitted that must be programmed to set a high output when it detects the full range has been reached The sensor is a [https://www.pepperl-fuchs.com/global/en/classid_53.htm?view=productdetails&prodid=42559#overview Pepperl+Fuchs VDM28-8-L] Datasheet can be downloaded [https://files.pepperl-fuchs.com/webcat/navi/productInfo/45/452859n.pdf?v=20220926110229 here] '''Function''' The distance measurement device contains one transmitter and one receiver incorporated into a single housing. The transmitter light is reflected back to the receiver from a target. The sensor determines the distance to the target and triggers a switching function or supplies the relevant measured value for processing. '''Assembly instructions''' The sensor can be mounted by means of through holes or by using a mounting bracket or mounting clamp Ensure that the surface is level in order to prevent the housing from becoming distorted when the fittings are tightened. It is advisable to secure the nuts and screws using spring washers in order to prevent the sensor from being incorrectly adjusted. '''Connection''' Connect the device in accordance with the connection diagram in the datasheet. '''Adjustment''' The green LED lights up when the operating voltage is switched on. Adjust the sensor so that the laser point is on the gripper bodyso that the laser point is on the gripper body)
- Stuertz Infeed - Align and dowel GX rack + (The rack on a Stuertz infeed is a helical … The rack on a Stuertz infeed is a helical type and is supplied unpinned, as the motor is not connected before delivery to Stuga The alignment must be checked then dowelled with 5mm roll pins The racks are already located in the "Y" direction with location pins, this procedure is purely to align the racks to each other in the GX directionhe racks to each other in the GX direction)
- VM Upgrade Hardware + (The upgrade is to prep the machine ready for adding a Virtual Mahine (VM) to the setup.)
- PLC Source Control - Working with GIT and TcXaeShell + (These steps outline typical actions that make up a development cycle for changing code on a machine, saving changes locally and saving to the cloud repository using Git as the Source control tool.)
- Alignment guide using wire line + (This dokit is to help with the use of a wi … This dokit is to help with the use of a wire line to set alignment correctly on mechanical build up. Using a wire line correctly will ensure a very accurate straight line is achieved . Accuracy of + - 1 mm over any distance can be achieved using the following method. Using one incorrectly can also easily be done.! The steps shown can be applied to all types of alignment , when you have a vertical face on components that require aligning. face on components that require aligning.)
- Units of Measure modification CIM50 + (This guide is to show how to amend units o … This guide is to show how to amend units of measure of existing stock items. If a new product is created please ensure the Units of measure is always set up correctly from the beginning . The CIM50 guide for Units of Measure setup is [https://cimservices.sharepoint.com/:w:/s/Cim50PartnerMarketing/EZhA_HF6SFJLmkVO5WANYXIBZdMx4hbVnuY3cdIF78p7lg?rtime=FcNQz7GE2Ug here]4hbVnuY3cdIF78p7lg?rtime=FcNQz7GE2Ug here])
- Ecoline - Setting V Notches on winMulti Software + (This is the full setup procedure for V not … This is the full setup procedure for V notches on an Ecoline. This should only be needed on initial commissioning or if the shape of the notch has changed due to some physical intervention, for example -
- Blade Change
- Blade buckled
here is no sense carrying on because you cannot complete this setup unless the machine is consistent and reliable</div> </div> <br/>) - PC Bios Power settings + (This power setting enables the PC to Boot … This power setting enables the PC to Boot up automatically when power is first detected, in other words when the power is “lost” and then “returns”, without the necessity to manually press the power button on the PC. The following description shows how to set the auto power-up on but beware this Technical Bulletin only applies to the “ASUS UEFI Utility BIOS Version 2.x.x”. This document is for the ASUS Pcs For the Dell PCs use [[PC Bios Power Settings - Dell]]ttings - Dell]])
- ACEpc Installing netedit with NetSetGo disk + (This procedure will completely overwrite a … This procedure will completely overwrite any data on the hard drive of the ACEpc.
This is not a problem on a flowline where the data resides on the main MH hard drive in a shared directory c:\saw.
If this process is to be carried out on a standalone saw or router, make sure the data is backed up first.
e sure the data is backed up first. <br/>) - Setting Up C0000422-KIT - Full Hardware 2023 + (This process takes the components to creat … This process takes the components to create a standard "C000422-KIT". This kit can then be stored and pulled off the shelf when required. It will then need to be set up for the particular customer machine using [[Setting Up Windows PC C0000422-KIT 2023]] =Notes= *There are two PCs running on the same hardware, The Host PC and the Virtual machine. **'''Host PC''' (For support) ***The base Windows install running directly on the hardware installed to Dell NVME drive. ***Has its own OEM Windows license supplied by Dell linked directly to the hardware (no product code – stored in the Dell hardware) ***Imaged by Macrium reflect. **'''Virtual PC – Stuga VM''' ***Used for Stuga software - the VM can run on any PC without changing drivers, etc. Host OS version / hardware unimportant as long as it runs Hyper-V. ***A second install of Windows running on a virtual machine, hosted by the Host PC above. It has a dedicated SSD (the Kingston Drive) stored on [:Fichier:///D:/VMPC.vhdx D:\VMPC.vhdx], with 8GB RAM. ***Has its own dedicated Windows 11 PRO license present in the kit, product code stored on Monday and on the license. ***Copied to host and setup manually during install. There is a setup program for the specific client after this process has completed: '''P_Stuga_P… '''on the desktop of the host.'P_Stuga_P… '''on the desktop of the host.)
- Setting Up New Printer - GX420d + (This tutorial requires a basic knowledge o … This tutorial requires a basic knowledge of IP addresses - what are they and what are they forork. This is contained in the Saw Parameters - printerIPAddress. </div> </div>)
- ZX5 Transfer Table Crank set up + (15/12/2025 Moved to Confluence Click [https://stuga-ltd.atlassian.net/wiki/external/OTE4MTgyN2RlYjQ2NGRlYTgyZjRhMDc5ZmIyY2MyMTg here])
- Filling Out An Online Daily Timesheet Form + (We are using Monday.com to handle daily ti … We are using Monday.com to handle daily timesheet entries. The layout of the form has been designed to make data input as minimal as possible. We are looking to improve accuracy of time capture, cut down administration time and to make historical data available without the need to store paperwork or take pictures. You will only be able to view and edit your timesheet when logged into your Monday.com account. Other employees are unable to see your data.her employees are unable to see your data.)
- Ecoline - Datum and MitreOffset Tests + (When an Ecoline is commissioned, the posit … When an Ecoline is commissioned, the positional accuracy needs to be set up.
These are also useful tests to check if the machine is maintaining positional accuracy
tent, repeatable results before making any parameter changes</div> </div><br/>) - R0000299 Stroke assembly rebuild + ( The following instructions should be fol … The following instructions should be followed to ensure that correct assembly and setting are performed '''Tools / consumables Required''' Standard hex key set Standard spanner set Large adjustable spanner Drifts and punches Ballpein hammer Soft hammer FE10 Solvent Hylomar Gasket '''Parts Required''' Kit R0000299 containing B0000043 Double Angular bearing 15 I?D 35 O?D 15.9 long rubber seal 3 x 2 B0000105 Double Angular Bearing 15 I/D 35 O/D 15.9 Long x 1 B0000335 3ph Brake motor 2 pole 3000rpm x 1 B0000380 Double Angular Bearing 25 I/D 52 O/D 20.6 Long + rubber seal x 2 D0000059 Damper Bridge x 1 D0000062 Damper Bridge Boss x 2 D0007730 ZX4 V Notch Mk1 Spindle Shaft x1 D0007867 Bevel Gear (Left) x 1 D0007868 Bevel Gear (Right ) x 1 D0007873 Motor Gear x 1 D0007874 Pinion Gear x 1 D0007875 Pinion Shaft x 1 P0000165 damper x 174 Pinion Gear x 1 D0007875 Pinion Shaft x 1 P0000165 damper x 1)

 Français
 English
 Deutsch
 Español
 Italiano
 Português