Changing the BIOS. Power settings on ASUS PC


Difficulté
Facile
Durée
5 minute(s)
Introduction
This power setting enables the PC to Boot up automatically when power is first detected, in other words when the power is “lost” and then “returns”, without the necessity to manually press the power button on the PC.
The following description shows how to set the auto power-up on but beware this Technical Bulletin only applies to the “ASUS UEFI Utility BIOS Version 2.x.x”.
This document is for the ASUS Pcs
Étape 1 - Turn the PC on using the Power Button
Keep pressing the “DELETE “button on the keyboard until the PC goes into the BIOS mode and you see a screen similar to the ones shown below. If the BIOS screen does not show wait for the PC to LOGIN into windows and then shut-down or restart the PC again and retry using the delete button as described above.
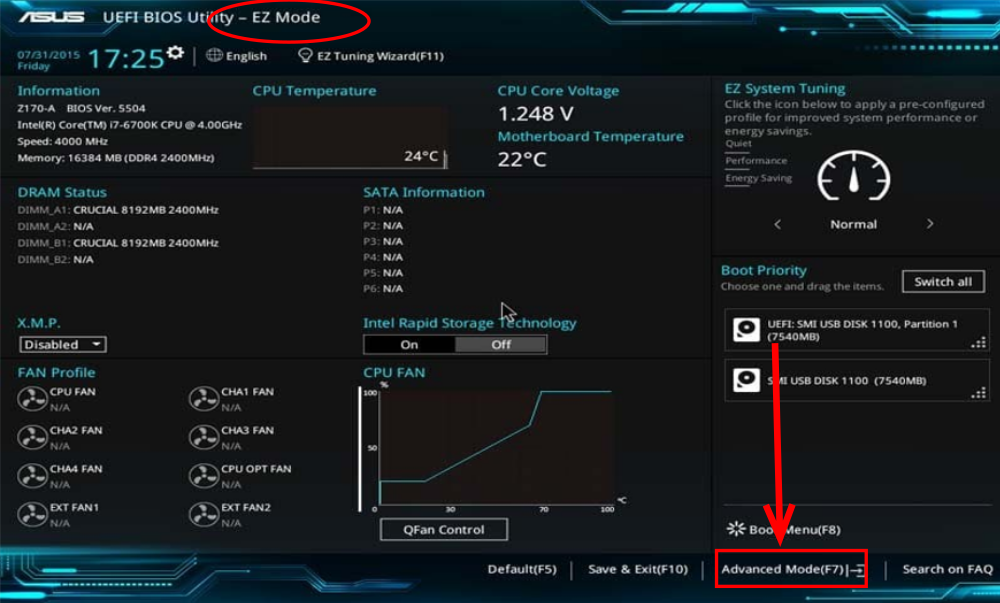
The Menu Will look something similar to this

Étape 3 - Switch To Advanced Mode
Press on the 'Advanced mode' option.
Normally the shortcut is 'F7'
Ignore this step if you already see 'Advanced Mode' on the top left corner..
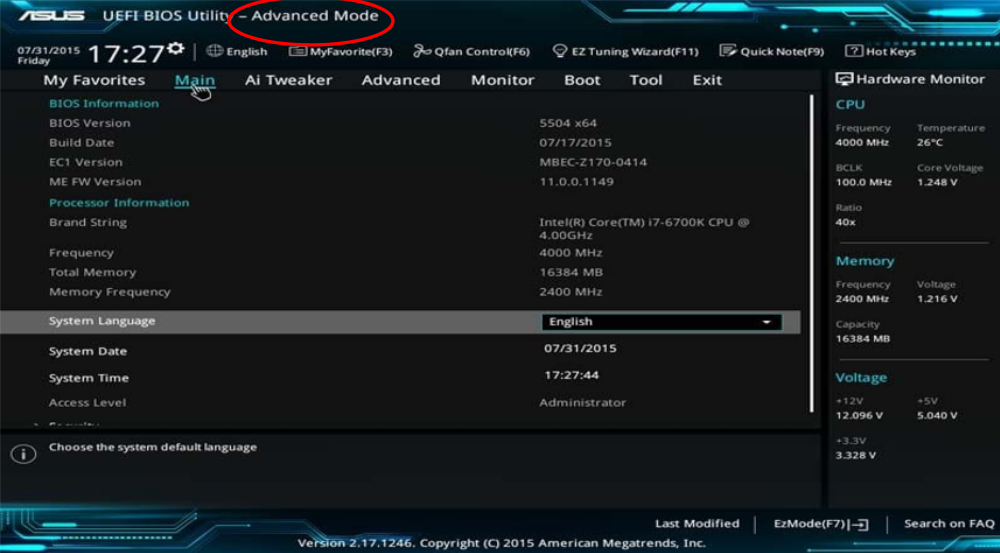
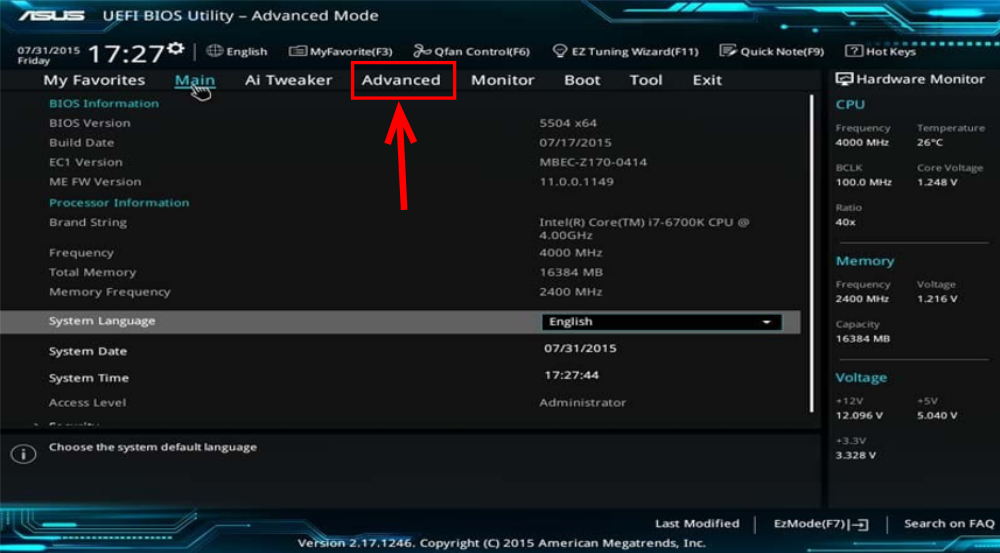
Étape 4 - Go to Advanced tab
Once on the Advance Page the Click the Advance Tab
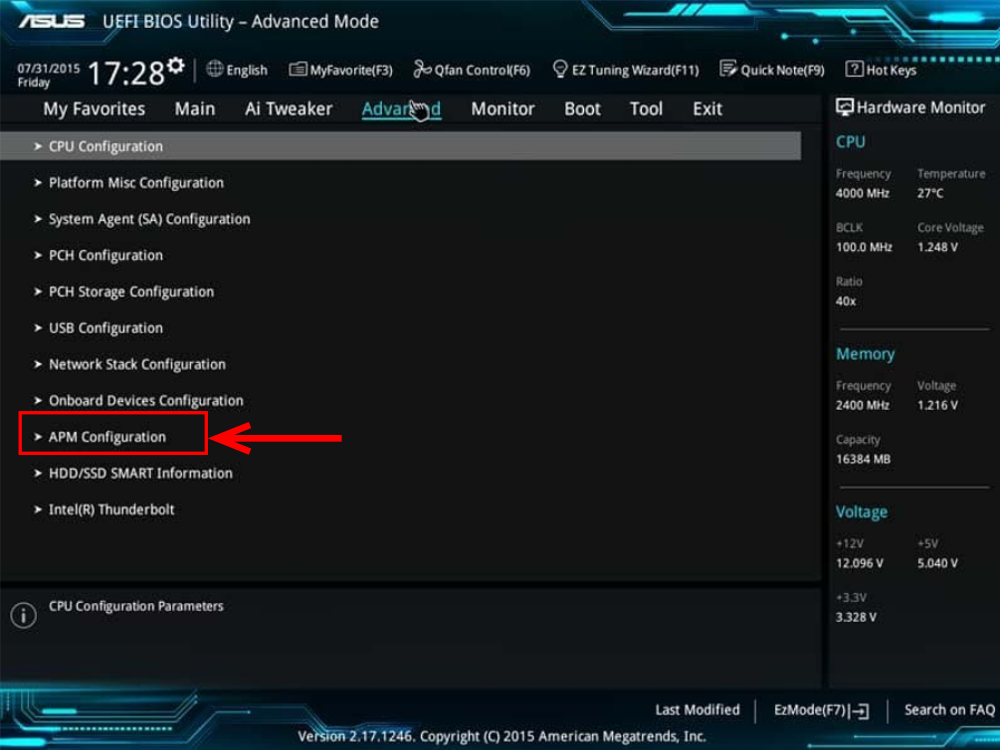
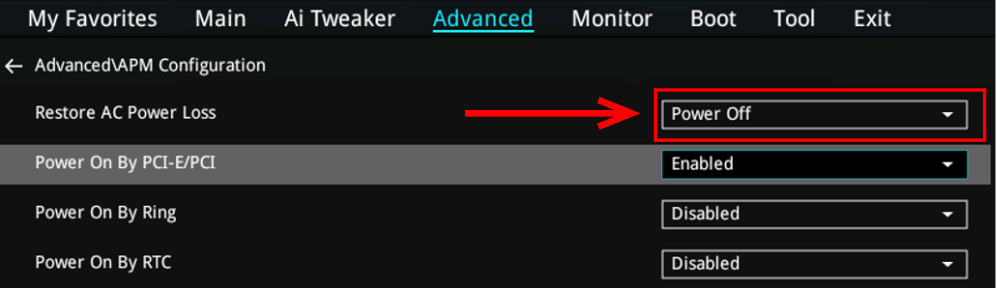
Étape 5 - Go to APM configuration
Next click on the 'APM Configuration'
Étape 6 - Change Restore AC Power Loss setting
Change the Restor eAC power loss from from 'Power off 'to 'Power on'
Étape 7 - Exit and Save
Once Done Exit the BIOS settings by Pressing “F10” on your keyboard and make sure all settings are saved. The PC should then reboot. Allow the PC to boot into windows.
Published
 Français
 English
 Deutsch
 Español
 Italiano
 Português