How to create a TwinCAT project from an existing project on a similar machine

Difficulté
Très difficile
Durée
30 minute(s)
Sommaire
- 1 Introduction
- 2 Étape 1 - Choose a Similar Build and copy the Project
- 3 Étape 2 - Paste the solution
- 4 Étape 3 - Open and rename
- 5 Étape 4 - Update MAC address
- 6 Étape 5 - Update EtherCAT devices
- 7 Étape 6 - TwinSAFE System
- 8 Étape 7 - Check safety options
- 9 Étape 8 - Check safety
- 10 Étape 9 - Copy serial number
- 11 Étape 10 - Verify Safety Project
- 12 Étape 11 - Download Safety Project
- 13 Étape 12 - View Safety Project
- 14 Commentaires
Introduction
If you are confident and proficient in using the Visual Studio editor to create TwinCAT projects, you can shortcut a lot of the data inputting by copying and modifying an existing project. This will keep the naming conventions and links exactly the same
Étape 1 - Choose a Similar Build and copy the Project
The build needs to be the same machine type and have an identical EtherCAT box and drive setup
You can create a backup in three ways
- Create an archive of an open project (you need to run Visual Studio on the desktop of the machine in question)
- Copy the contents of the c:\TwinCAT\Stuga\[BuildNo] folder from the "donor" to your new machine setup
- Use VPN to connect to the back end of the machine and upload the project from the target, then save it locally. this needs a good internet connection and Teamviewer remote VPN installed on the remote Beckhoff PC
Étape 2 - Paste the solution
Paste the solution on the ZX5 front end PC in C:/TwinCAT/Stuga.
Étape 3 - Open and rename
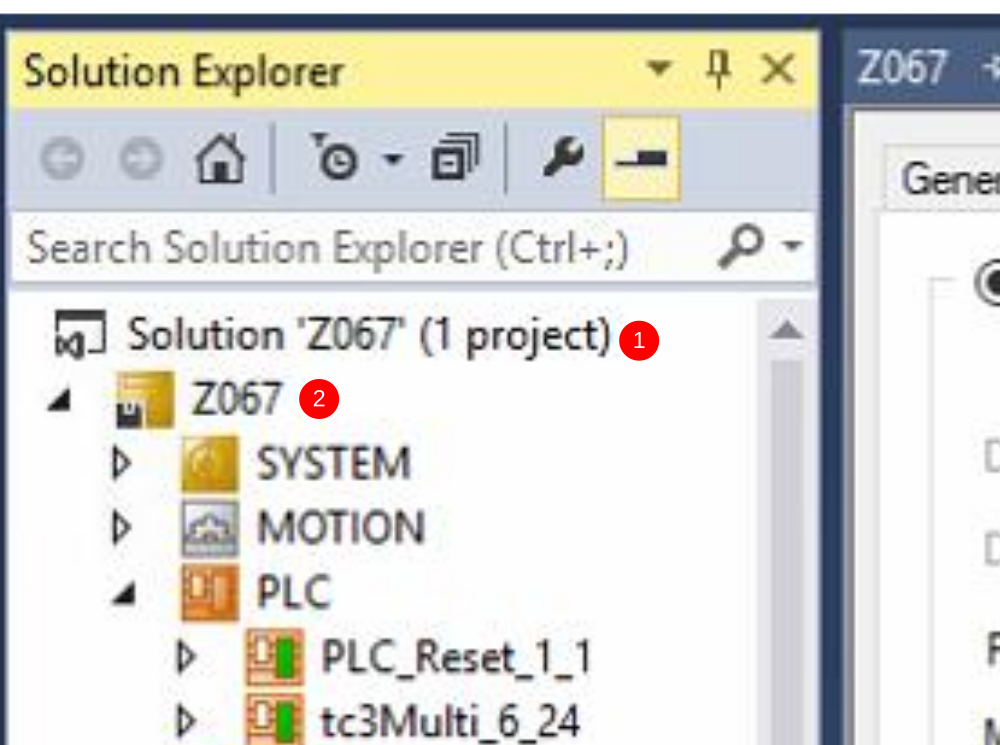
Open Solution and...
1: rename the solution to the current build (i.e. Z067).
2: rename the project to the current build.
Étape 4 - Update MAC address
The hardware can use 1 or 2 devices. For the EtherCAT network port device:
- Double click
- Device MAC Addresses, Device 4 > Adapter > select OS (NDIS) > Search > EtherCAT. This should automatically update the mac address.
For the NDIS (PCI) Device
Device 1 > Adapter > PIC > Search > BUS.


Étape 5 - Update EtherCAT devices
Update EtherCAT devices. This compares the solution’s EtherCAT boxes to the ones on the current build. Any differences between the current solution and the current build will be highlighted and explained by the system. Issues highlighted in RED are completely different to what the solution would expect. Issues highlighted in BLUE are ok, this suggests that a new version of hardware is being used but is compatible with the solution.
To do this right click on the target device and press “Scan”.
NOTE: If this does not work, repeat steps, save changes and online reset (Right click device x).
Étape 6 - TwinSAFE System
AmsNetID the same on SYSTEM > Routes > “Target net ID”, must be the same as: SAFETY > ZX5_2_1 > ZX5_2_1 Project > Target System (Figure 1).

Étape 7 - Check safety options
To get the safety toolbar go to: View > Toolbars > Check TwinCAT Safety. This will show the safety options.
Étape 8 - Check safety
Go to: SAFETY > ZX5_2_1 > ZX5_2_1 Project > Target System. Press the refresh button to update the AmsNetID as it will currently have the ID if the machine that the software was copied from.
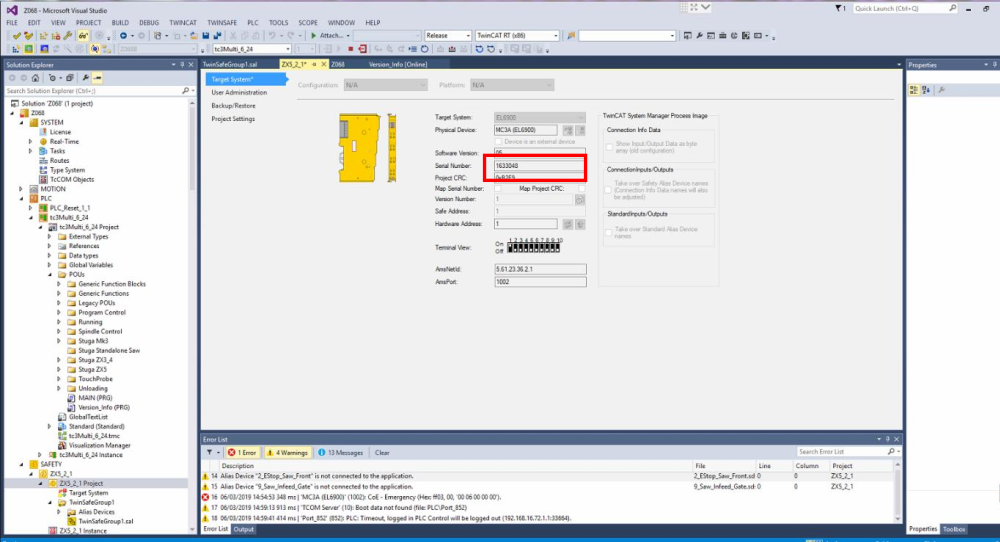
Étape 9 - Copy serial number
Copy the serial number (Figure 2) for use in next step

Étape 10 - Verify Safety Project
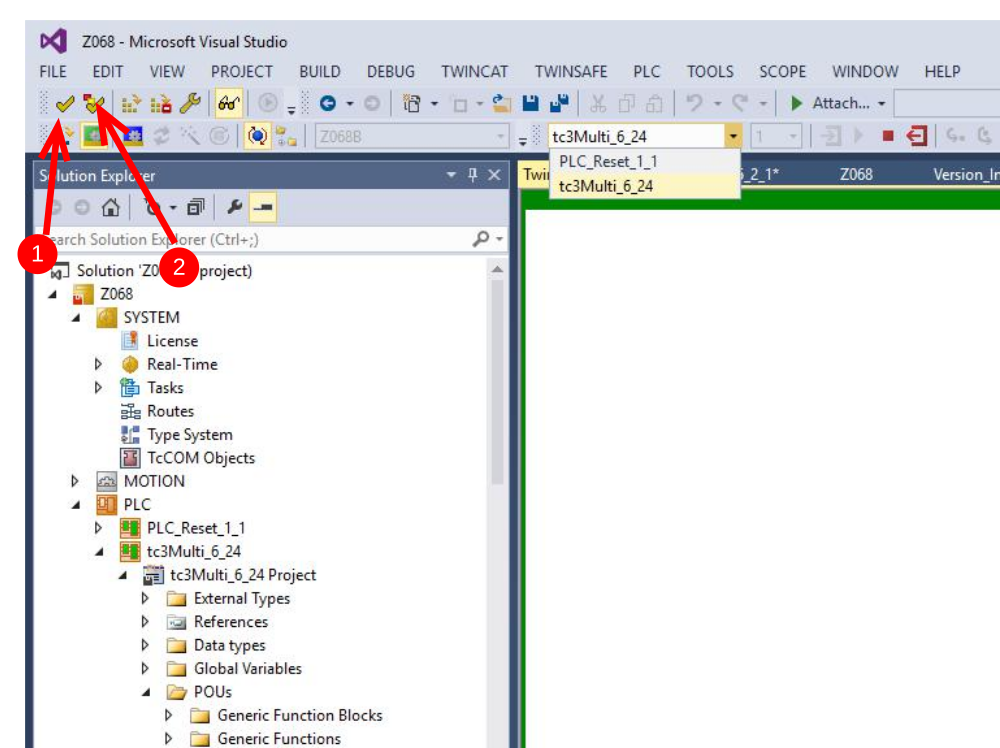
- Verify Complete Safety Project
- Then Verify Complete Safety Project (Hardware Level)
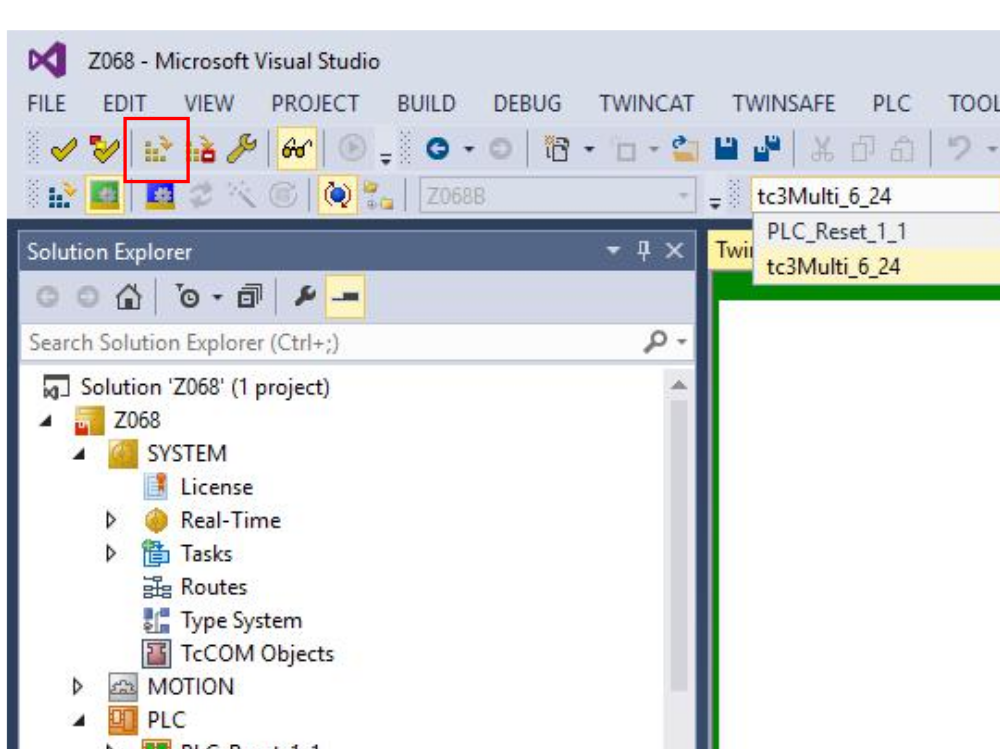
Étape 11 - Download Safety Project
TwinSAFE Wizard:
- When prompted input, username: Administrator,
- Serial Number: (Copied from step above),
- Password: TwinSAFE.
- Then confirm.
Étape 12 - View Safety Project
Go to SAFETY > ZX5_2_1 > ZX5_2_1 Project > TwinSafeGroup1 > TwinSafeGroup1.sal, and press the Safety Goggles Icon (Figure 3). This should show the Estop circuit in green if working correctly.
Draft
 Français
 English
 Deutsch
 Español
 Italiano
 Português