Cette page fournit une simple interface de navigation pour trouver des entités décrites par une propriété et une valeur nommée. D’autres interfaces de recherche disponibles comprennent la page recherche de propriété, et le constructeur de requêtes ask.
Liste de résultats
- ZX3 Counterweight Installation + (This guide explains how to install the counterweight assembly on the current ZX3 ring)
- Upgrading Autoflow TwinCAT2 to Win10 and TwinCAT3 + (<div class="annotatedImageDiv" typeof=" … Autoflows from A2001 to A2015 were initially produced with TwinCAT2 software. This has now been superseded with TwinCAT3 which then has the benefit of compatibility with version 6 front end software.
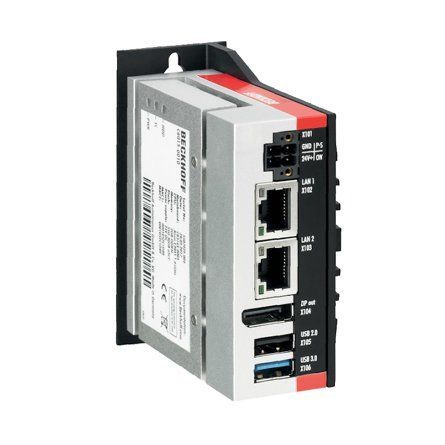
The original PC cannot be used because
*It is not powerful enough to run v6 front end
*The operating system cannot be upgraded to Windows 10
*It cannot be upgraded to TwinCAT3
The Beckhoff C6015 PC has been chosen to be the replacement PC. It is compact, yet powerful enough to run the v6 front end and TwinCAT in the same
. It has an upgrade to 1.9Ghz 4 core processor.
Because it has a limited 40Gb SSD memory, a compact 64Gb memory stick is inserted into the USB 3.0 port. This acts as a separate drive for the DDRIVE dynamic storage for all machine setup. The internat drive is for the Operating System only. This mimics the current Autoflow setup of a remote Camera PC, hence the camera PC can be retired after the upgrade
era PC, hence the camera PC can be retired after the upgrade<br/>) - Autoflow Maintenance - Gripper + (<nowiki>The following preventative m …
The following preventative maintenance tasks should be carried out regularly on the machine. The frequency depends on the machine use, but as a guide: i-Weekly<br />20 Hrs/Week Monthly</pre></div></nowiki>)2-3 Shifts Weekly
40 Hrs/Week Bi-Weekly
20 Hrs/Week Monthly - Autoflow Maintenance - Infeed + (<nowiki>The following preventative m …
The following preventative maintenance tasks should be carried out regularly on the machine. The frequency depends on the machine use, but as a guide: kly<br />20 Hrs/Week Monthly</pre></div><br/></nowiki>)2-3 Shifts Weekly
40 Hrs/Week Bi-Weekly
20 Hrs/Week Monthly - R0015034B ZX5 Module B Wiring Loom installation Part 3 + (4/09/2025 Moved to Confluance Click [https://stuga-ltd.atlassian.net/wiki/external/ZDlmNDI0ZTA1ODg0NDViNDk4MDg4ZTgxMzEyZWMwZjQ Here])
- R0015278 Mount Completed Assemblies + ('''<u>Tools Required</u>'''
… '''Tools Required'''
Standard Hex key set
Standard spanner set
300 mm rule
1000mm rule
'''Parts Required'''
D0008288 Takeup Pad Left (D7339) (Wet/P F Matt) x 1
D0015583 Take Up Beam Joiner x 1
D0015598 Datum Flag: Saw Infeed x 1
D0015717 Energy Chain Angle Bracket Lower x 5
D0015718 Energy Chain Angle Bracket Upper x 5
D0015720 Carriage Bracket x 1
D0015721 Energy Chain Tray Deep Long x 1
D0015723 Energy Chain Tray Shallow x 1
D0015724 Energy Chain Tray Deep x 1
D0015725 Energy Chain Tray Shallow Medium x 1
D0015742 Takeup Pad Right ZX5 x 1
E0000336 Sensor: M8; 2mm, PNP N/O, M8 conn x 1
R0015011 Bench Assemble Gripper
R0015063 Bench Assemble Roller Tables
R0015096 Bench Assemble Transfer Drive Assembly
R0015101 Bench assembly take up assembly
R0015286 Bench Assemble X axis components and energy chain
R0015286 Bench Assemble X axis components and energy chain <br/>) - R0015331 Mount Centralise Assembly + ('''<u>Tools Required</u>'''
… '''Tools Required'''
Standard hex key set
Standard spanner set
Steel rule 600mm
Soft hammer
'''Parts Required'''
D0004672 Centralise Sensor Bracket x 1
D0004972 None Centralise Bracket x 1
D0004622 centralise cylinder spacer x 1
R0000572 Bench Assemble Centralise Assembly
r spacer x 1 R0000572 Bench Assemble Centralise Assembly <br/>) - R0000712E Rotary Trunking + ('''<u>Tools Required</u>''' … '''Tools Required''' Standard set Hex keys Standard socket set Countersink bit and drill Copper/hide hammer Standard hss drill set '''Parts Required''' D0006210 pre assembled energy chain D0003929 Access panel D0003930 Circular guide D0003985 Upper circular guard D0007817 Circular guard D0001171 plug bracket P0001023 6mm y adapter x 9 P0000401 non return valveug bracket P0001023 6mm y adapter x 9 P0000401 non return valve)
- R0015100 Fit Guarding + ('''<u>Tools Required</u>'''
… '''Tools Required'''
Standard hex key set
Standard spanner set
'''Parts Required'''
D0001878 Rear Door Saw Mk4 (1879) x 1
D0004584 Outfeed Side Rest x 3
D0015703 Air Gun Bracket x 1
D0016203 Compliance Guard - Saw Lower Front x 1
D0016204 Compliance Guard - Saw Lower Side x 1
D0016265 Saw Front Door: Bernstein Mount Plate x 1
D0016266 Saw Front Door: Bernstein Guard x 1
E0001569 Guard Lock Switch: Bernstein Radius Actuator (Key) x 1
M0000055 Saw Blade Spanner (24mm Combination) x 1
M0001051 Bullet Catch 70 x 12 x 1
P0000010 Elbow Adaptor 6mm - 1/8 BSPT (Taper thread) x 6
P0001008 Regulator: ARG20 0 - 8.5 Bar c/w Gauge x 3
P0001009 Panel Mount Nut (To suit P0001008) x 3
R0015041 Bench Assemble Top Hood Assembly x 1
R0015337 Bench assemble guarding components x 1
R0015338 Bench assemble serial plate x 1
g components x 1 R0015338 Bench assemble serial plate x 1 <br/>) - R0015278 Mount Completed Assemblies Section two + ('''<u>Tools Required</u>''' … '''Tools Required''' Standard Hex key set Standard spanner set 300 mm rule 1000mm rule '''Parts Required''' D0008288 Takeup Pad Left (D7339) (Wet/P F Matt) x 1 D0015583 Take Up Beam Joiner x 1 D0015598 Datum Flag: Saw Infeed x 1 D0015717 Energy Chain Angle Bracket Lower x 5 D0015718 Energy Chain Angle Bracket Upper x 2 D0015718B Energy Chain Angle Bracket Double Deck x 3 D0015720 Carriage Bracket x 1 D0015721 Energy Chain Tray Deep Long x 1 D0015723 Energy Chain Tray Shallow x 1 D0015724 Energy Chain Tray Deep x 2 D0015725 Energy Chain Tray Shallow Medium x 1 D0015742 Takeup Pad Right ZX5 x 1 D0015862 Energy Chain Tray Deep Long x 1 E0000336 Sensor: M8; 2mm, PNP N/O, M8 conn x 1 R0015011 Bench Assemble Gripper R0015063 Bench Assemble Roller Tables R0015096 Bench Assemble Transfer Drive Assembly R0015101 Bench assembly take up assembly R0015286 Bench Assemble X axis components and energy chainsembly R0015286 Bench Assemble X axis components and energy chain)
- R0015037 Bench Assemble SY Assembly Part 2 + ('''<u>Tools Required</u>''' S … '''Tools Required''' Standard Hex Key set Standard Spanner set 1 Meter straight edge Feeler Gauges '''Parts Required''' B0000044 Linear Rail MSB25 260mm Long (AMT) x 2 B0000046 Slide Base Bearing Block (Straight Grease Nipple) x 4 B0000173 blanking cap x 10 B0000234 Straight Grease Nipple M6 ST/ST x 4 B0000245 Needle Bearing 12 D 16 D 10 Long (ENA) x 12 B0001060 Grease Fitting M6x0.75 to Ø4 x 4 B0001061 Grease fitting M6 x 1 to 4mm x 4 B0001123 Double angular contact bearing 6 I/D 17 O/D 9 long x 2 B0001185 Leadscrew nut Igus x 1 C0001005 Stepper Motor AS1050 x 1 D0005184 Guide Roller x 6 D0005186 Guide Pin Washer x 6 D0015172 Centralise Plate (with SY) x 1 D0015173 Saw SY Saddle Brace x 1 D0015174 Roller Fence (With SY) x 2 D0015175 Saw Saddle Carriage Block x 2 D0015176 Cylinder Mount Block x 2 D0015178 Z Block x 2 D0015207 Outer Bearing Housing x 1 D0015208 Leadscrew Bearing Block x 1 D0015209 Leadscrew Attachment Bracket x 1 D0015222 SY Grease Manifold x 2 D0015240 Collar Clamp: SY Axis ZX5 x 1 D0015316 Leadscrew Bearing Block Cover x 1 D0015415 Turret Pickup Arm ZX5 x 2 D0015416 Bracket: Turret Stop RH ZX5 x 1 D0015417 Bracket: Turret Stop LH ZX5 x 1 D0015698 Flag Block x 1 D0015777 Leadscrew SY x 1 D0016336 SY table blower x 1 E0000336 Sensor: M8; 2mm, PNP N/O, M8 conn x 1 H0005185 Shaft 12mm: 90.5 Saw Fence Roller Pin x 6 M0001209 Bracket m8 proximity sensor 90 degree x 1 P0000200 Elbow Adaptor 6mm - M5 x 7 P0001127 Guide cylinder 20 x 30 compact x 2 P0001157 Turret Stop: 6 Station Right Handed Somatec x 1 P0001158 Turret Stop: 6 Station Left Handed Somatec x 1matec x 1 P0001158 Turret Stop: 6 Station Left Handed Somatec x 1)
- R0000971E Bench Assemble R Axis Gearbox + (03/09/2025 Moved to Confluance Click [https://stuga-ltd.atlassian.net/wiki/external/NDE2NGQzYjdiNzhlNDBiOTg2ZGUyMzg0MWMyNWM0MzU Here] <br/>)
- R0015326 Bench Assemble Roller Backfences + ('''<u>Tools Required</u>'''
… '''Tools Required'''
Standard hex key set
1 meter straight edge
Feeler gauges
Bearing dolly for B0000245 Needle Bearing
'''Parts Required'''
B0000245 Needle Bearing 12 D 16 D 10 Long (ENA) x 20
D0005183 Roller Backfence (D7443) x 1
D0005184 Guide Roller x 10
D0005186 Guide Pin Washer x 10
D0007443 Roller Backfence OH (D5183) x 1
H0005185 Shaft 12mm: 90.5 Saw Fence Roller Pin x 10
3) x 1 H0005185 Shaft 12mm: 90.5 Saw Fence Roller Pin x 10 <br/>) - R0015037 Bench Assemble SY Assembly + ('''<u>Tools Required</u>'''
… '''Tools Required'''
Standard Hex Key set
Standard Spanner set
1 Meter straight edge
Feeler Gauges
'''Parts Required'''
B0000044 Linear Rail MSB25 260mm Long (AMT) x 2
B0000046 Slide Base Bearing Block (Straight Grease Nipple) x 4
B0000173 blanking cap x 10
B0000234 Straight Grease Nipple M6 ST/ST x 4
B0000245 Needle Bearing 12 D 16 D 10 Long (ENA) x 12
B0001060 Grease Fitting M6x0.75 to Ø4 x 4
B0001061 Grease fitting M6 x 1 to 4mm x 4
B0001123 Double angular contact bearing 6 I/D 17 O/D 9 long x 2
B0001185 Leadscrew nut Igus x 1
C0001005 Stepper Motor AS1050 x 1
D0005184 Guide Roller x 6
D0005186 Guide Pin Washer x 6
D0015172 Centralise Plate (with SY) x 1
D0015173 Saw SY Saddle Brace x 1
D0015174 Roller Fence (With SY) x 2
D0015175 Saw Saddle Carriage Block x 2
D0015176 Cylinder Mount Block x 2
D0015178 Z Block x 2
D0015207 Outer Bearing Housing x 1
D0015208 Leadscrew Bearing Block x 1
D0015209 Leadscrew Attachment Bracket x 1
D0015222 SY Grease Manifold x 2
D0015240 Collar Clamp: SY Axis ZX5 x 1
D0015316 Leadscrew Bearing Block Cover x 1
D0015415 Turret Pickup Arm ZX5 x 2
D0015416 Bracket: Turret Stop RH ZX5 x 1
D0015417 Bracket: Turret Stop LH ZX5 x 1
D0015698 Flag Block x 1
D0015777 Leadscrew SY x 1
D0016336 SY table blower x 1
E0000336 Sensor: M8; 2mm, PNP N/O, M8 conn x 1
H0005185 Shaft 12mm: 90.5 Saw Fence Roller Pin x 6
M0001209 Bracket m8 proximity sensor 90 degree x 1
P0000200 Elbow Adaptor 6mm - M5 x 7
P0001127 Guide cylinder 20 x 30 compact x 2
P0001157 Turret Stop: 6 Station Right Handed Somatec x 1
P0001158 Turret Stop: 6 Station Left Handed Somatec x 1
1 P0001158 Turret Stop: 6 Station Left Handed Somatec x 1 <br/>) - R0015335 Mount Electrical Cabinet + (<u>'''Tools Required'''</u>
… '''Tools Required'''
Standard hex key set
Standard spanner set
Standard HSS drill set
Standard Tap set
'''Parts Required'''
D0004391E Left hand side sheet x 1 D0015425 Bracket: Beckhoff Box Right Angle x 1
D0015426 Mounting Plate: Airgun Assy x 1
D0015425 Beckhoff right angle mounting plate x 1
P0000020 Fitting: Plug 1/8" BSP (Grubscrew Type) x 1
P0000021 Airgun Assembly x 1
P0000142 Elbow Adaptor 8mm - 1/8 BSP x 2
P0000277 Fitting: Bulkhead Female 8mm x 1/4 BSP x 1
P0000278 Regulator 0-2 bar x 1
P0000373 Regulator fixing bracket x 1
R0015016C Electrical cabinet wiring Mod F
xing bracket x 1 R0015016C Electrical cabinet wiring Mod F <br/>) - R000560 Bench Assemble Spindle + (<u>'''Tools Required'''</u>
… '''Tools Required'''
Standard hex key set
Heat gun
Copper/Hide hammer
240 grit disc
Fe10 solvent
'''Parts Required'''
B0000027 Ball Bearing 30 I/D 62 O/D 16 Long + seals (Branded) x 3
B0000048 Taperlock Set SPZ 80-2 1210-24 x 1
B0000060 Double Angular Bearing 30 I/D 62 O/D 23.8 Long + seals x 1
D0004026 Bearing Housing x 1
D0004027 Saw Spindle x 1
D0004030 Lock Ring x 1
D0004031 Saw Washer x 1
D0004271 Front Saw Flange x 1
D0004272 Backing Saw Flange x 1
D0004771 Inner Bearing Spacerx 1
D0004772 Outer Bearing Spacer x 1
D0004852 Key for D4027x 1
0004772 Outer Bearing Spacer x 1 D0004852 Key for D4027x 1 <br/>) - TB0444 Renewing CF Card on TwinCAT2 Systems + (<u>Problem</u> These machines … Problem These machines use a CX5020 PC with a 2Gb CF card running TwinCAT2 PLC system. The CF card can fail, which is effectively the windows operating system. The CF card has a very small capacity, so needs to be created from an image. This TB outlines the steps in the process to ensure a successful conclusion. 1. Create a new CF card at stuga using the beckhoff imaging tool on a CX5020 2. Boot up with the CX5020 3. Ensure PLC is set to Enable on start-up (default is config mode) 4. Rename the PC 5. Install TeamViewer host v10 or less from a USB stick 6. If you have a copy of the version of winMulti it was running, copy this in to the c:\ multi folder. If not, a “'''''new version install'''''” will be needed so copy in data from the g:\builds\PC Installs\Autoflow\Multi folder 7. Set up and customer specific network parameters to ensure TeamViewer will work when it is plugged in on site 8. Send to customer Once on site, follow procedure A if the winMulti version is preserved, or B if it is a '''''new version install'''''eserved, or B if it is a '''''new version install''''')
- B0000025 B0001175 Belt Identification + (A Guide to correctly identify the variant of drive belt required for ZX5, ZX4 ,ZX3 S-65 and Flowline saw modules Belts will vary across blade sizes and Pully diameters Key indicator is pulley size, over blade size)
- R0000728 R0000729 Stroke Assembly Dismantling + (Assemblies fitted to MK1 ZX4 will require … Assemblies fitted to MK1 ZX4 will require refurbishment at some point of life cycle.
The following instructions should be followed to ensure that correct assembly and setting are performed
'''Tools Required'''
Standard hex key set
Standard spanner set
Double pin saw flange spanner
Drifts and punches
Ballpein hammer
Soft hammer
Degreasing bath
pein hammer Soft hammer Degreasing bath <br/>) - R0000164 Spindle Build + (Clear build instructions for the assembly of R0000164 spindle assembly)
- R0000711 Rotary Base Assembly REV2 + (Detailed steps to correctly install rotary … Detailed steps to correctly install rotary gear and journals Checks for correct installation of oil feed system Tolerance limits and requirements '''Tools Required''' Standard hex key set 0-25mm micrometer Ring support blocks for assembly Work Table Mag Base and D.T.I Hepco flat spanner 17mm socket Torque Wrench '''Parts required''' D0006423-2mod Drive ring x 1 D0007651 Face plate x 1 B0000185 journal x 6 B0000186journal x 2 D0006503 Journal washer x 8 D00007692 wiper x 4 D0006521 x2 D0007693 x 2 D0007713 rotary ring cap x 1iper x 4 D0006521 x2 D0007693 x 2 D0007713 rotary ring cap x 1)
- ZX5 Production R0015122 Module A to R0015139 Module B alignment + (Details and steps for correct alignment of Module A to Module B '''<u>Tools Required</u>''' Laser Level 300mm rule 1 meter yellow level 24mm spanner Permanent marker Pipe cutters Ring main connection equipment)
- Z Transom Width Measurement + (Difficulty can be had when trying to accurately measure the width of a Z transom profile section. This guide will show you how to accurately measure the width of the Z section to within 0.1mm which is required when setting up Y notching accurately)
- R0019264 Autoflow Mk 4,1 Infeed Safe moving equipment + (Due to unbalanced nature of Autoflow 4.1 infeed frame, The following Guidance is for use of supplied parts within Assembly R0019264 for allowing safe movement of Infeed frame)
- Placing a TwinCAT3 Machine Under Source Control + (<div class="icon-instructions caution-i … Click [https://stuga.dokit.app/wiki/Changing_Version_Control_to_Visual_Studio here] for the latest procedure For many years, the source code for the PLCs has resided on the G:\drive and then a copy on each and every one of the PCs used to edit the code, so at least one on each machine. This is a recipe for disaster because maintaining all the copies and version numbers is incredibly difficult and adds a lot of time overhead to fixes and changes. This has worked because there has been only one developer, but this is set to change in future as more programmers will be trained and tracking versions becomes more difficult From 2020, the PLC code version control has been improved by using an industry standard source control system called "Git" along with "BitBucket" to store the PLC code in the cloud. The program "SourceTree" is used to commit, push and pull the changes [https://www.atlassian.com/git/tutorials/what-is-version-control Click here] for an introduction to version control using Git This tutorial is a step by step guide to setting up an existing machine or diagnostic PC to a standard uses on all Stuga machines to enable quick, easy and stress free version control.standard uses on all Stuga machines to enable quick, easy and stress free version control.)
- Installation Procedure - Autoflow Mk4 + (General Procedure is * Prepare Area * Unload from Transport * Locate and level infeed table * Locate, level and align machining module * Locate, level and align outfeed table * Fix to floor * Locate waste conveyor system * Guard fencing assembly)
- Disabling a Tool Home or Tool Out Sensor + (If there is a failure of a tool out or too … If there is a failure of a tool out or tool home sensor on the Stuga spindle ring, it is important to be able to quickly disable the input so the machine can continue production until the problem can be properly resolved. The software has an inbuilt functionality to do this - this tutorial takes you through the necessary stepsrial takes you through the necessary steps)
- Setting Motor Overload Relays + (It is important to set the Motor Overload … It is important to set the Motor Overload Relays to the correct values according to the motor as if the current is set too low, the motor will continually trip the MCB and if it set too high then the motor will not trip the MCB under fault conditions, leading to the motor burning out.ditions, leading to the motor burning out.)
- Setting Gripper Nose + (It is very important to ensure the gripper nose and heel is correctly set up. This assembly is subject to a lot of wear and tear and maintenance is very important. Incorrect setting or play in this assembly is a major cause of accuracy issues)
- Assembly - R0000377B Mk11 Gripper + (Mk11 Gripper was designed to give a variab … Mk11 Gripper was designed to give a variable stop height position for the Mk10 gripper assembly. This is needed on systems with multiple chambers, where there is no "sweet spot" for the open grip position to suit all chambers. A Somatec turret stop is used to provide different stop heights
The design details are here [https://stugaltd.monday.com/boards/315478853/pulses/640717084 Design Notes]
853/pulses/640717084 Design Notes] <br/>) - TB0301 Autoflow Saw Head Reinforcement - Additional Enhancements + (On Autoflow 2 Sawing Centres following 5 y … On Autoflow 2 Sawing Centres following 5 years of use., it has been found that the internal saw centre framework can lose its rigidity. this is probably due to "bruising" or denting of the aluminium joints introducing a slight amount of play. This is exacerbated by the design where it is attached and driven on from the base up A retrofit kit of parts has previously been created to allow additional reinforcement to be introduced within the structural framework. This kit builds upon the first kit to provide further accuracy enhancements by #Adding left right stability with additional slide rails at the top of the subframe #Adding front / back stability by moving the SY axis leadscrew to the same height as the saw table ====Parts required: ==== R0010272 Kit: Saw Frame Rigidity Pt 2 This kit consists of 2 carriage assemblies, specifically designed to provide further rigidity to the top of the Saw Head Assembly. In addition, 2 mounting blocks required to relocate the Saw Y Axis Assembly are also included. This allows the Saw Y Axis Assembly to continue to operate accurately, but improves the life of associated components. See also [[TB0259 Autoflow Saw Head Reinforcement]][[TB0259 Autoflow Saw Head Reinforcement]])
- 500mm Saw Blade Upgrade + (Step by step guide of how to carry out the … Step by step guide of how to carry out the 400mm to 500mm saw blade upgrade including long reach clamps. Time to complete is very dependant on condition of the machine, ie rusted or rounded off bolts which may need to be drilled out and holes re-tapped. Replace all screws with Loctite except grub screws on taper lock pulleys, grub screws for shafts on clamp pads and slit strip retaining screws or where a locking nut is used on cylinder rods.re a locking nut is used on cylinder rods.)
- R0019228 Autoflow R Axis Ring Seal Protection + (The Autoflow R axis uses a slewing ring which has a seal that is subject to ingress of swarf. Over time, this seal can become dislodged, resulting in a major failure of the machine.)
- Beckhoff AX8000 Flowline Upgrade + (The Flowline range (Mk3, ZX3, ZX4) are Stu … The Flowline range (Mk3, ZX3, ZX4) are Stuga built and designed machines for prepping and cutting uPVC windows and doors. The Flowline is the first machine of the Stuga 'U' shaped machines which has prepping and cutting working in the same machine package. The Flowline is still a fantastic machine for the industry, however, due to the age of the machines and older control systems becoming obsolescent, we have had to find an upgrade route that does not only keep the machine going, but also provides improvements from the original model and up-to-date technology to future proof the machine. The upgrade that we have developed for the Flowline is supplied from an automation supplier named Beckhoff. We also use Beckhoff on our new build machines. This gives us better lead times, more understanding of the products and better diagnostics/ support for our customers. The drive system that we use is called the AX8000 series. These drives are a compact multi axis servo system that use an EtherCAT interface and STO safety functions. These servo drives, coupled with Beckhoff AM8*** series OCT servo motors provide quicker installations and all round performance increases from any system we have previously used. To drive all of the new system, we are using a Beckhoff IPC controller that runs TwinCAT 3. This links into the system via EtherCAT. All of the machine can now link together via EtherCAT to provide quick and stable communications. This tutorial will give you step by step guides on the physical upgrade requirements needed when upgrading a Flowline Mk3 to a Flowline Mk3 with Beckhoff AX8000 Control. Each step will provide you with written information and pictures to guide you through the upgrade. Each step will contain necessary information which will also provide you with rationale for the design and an idea of the benefits over using different methods. Please always feel free to provide Stuga with any feedback on this document or its contents.feedback on this document or its contents.)
- ZX5 MH Infeed Basic IO Test and Setup + (The MH infeed on a ZX5 is a module which c … The MH infeed on a ZX5 is a module which can be tested individually away from the fully installed machine. Once build stage is complete, to be able to test individually, the Infeed Module needs: - To be connected to mains power & be powered on - An air supply to the main blue line - Network connection (Network Cube) - HDMI & Keyboard dongle to be plugged into the Beckhoff PLC inside the cabinet. Input and output activation when testing the sole module is done through the Twincat project rather than through WinMulti The above is only required If the Machine is not fully installed and connected with power air and network already. The below guide is specifically for a fully installed and connected infeed.ically for a fully installed and connected infeed.)
- ZX5 Alignment Check + (The ZX5 machine can be tricky to align as there are many adjustments designed into the table to offset manufacturing tolerances. This step by step guide follows the correct protocol to ensure the starting point and sequence of alignment is correct)
- TM018B Microline and ZX3 V Notch Blade Setup + (The engineer will need a reasonable mechan … The engineer will need a reasonable mechanical knowledge, and a working knowledge of the operation of the machine. You will need callipers (+/-0.05mm) and an accurate rule The setting of the V notch blades on a ZX3 Ring revolves around the setting of two groups of parameters: *V and W axis positions *Blade offsets for each blade The rough position of V and W axes is set first, then the individual blade offsets are set, and finally a test is run to tweak the accuracy to gain perfection. There are two “tweaking” parameters for each blade. The two parameters are: *Depth offset – how deep into the bar *X axis offset – position of point of blade relative to the spindle centrelinef blade relative to the spindle centreline)
- R0000299 Stroke assembly rebuild Part 2 + (The following instructions should be follo … The following instructions should be followed to ensure that correct assembly and setting are performed '''Tools / consumables Required''' Standard hex key set Standard spanner set Large adjustable spanner Drifts and punches Ballpein hammer Soft hammer FE10 Solvent Hylomar Gasket '''Parts Required''' Kit R0000299 containing B0000043 Double Angular bearing 15 I?D 35 O?D 15.9 long rubber seal 3 x 2 B0000105 Double Angular Bearing 15 I/D 35 O/D 15.9 Long x 1 B0000335 3ph Brake motor 2 pole 3000rpm x 1 B0000380 Double Angular Bearing 25 I/D 52 O/D 20.6 Long + rubber seal x 2 D0000059 Damper Bridge x 1 D0000062 Damper Bridge Boss x 2 D0007730 ZX4 V Notch Mk1 Spindle Shaft x1 D0007867 Bevel Gear (Left) x 1 D0007868 Bevel Gear (Right ) x 1 D0007873 Motor Gear x 1 D0007874 Pinion Gear x 1 D0007875 Pinion Shaft x 1 P0000165 damper x 174 Pinion Gear x 1 D0007875 Pinion Shaft x 1 P0000165 damper x 1)
- Upgrade - R0000173 Conveyor Motor + (The original style of conveyor is used on many machines, but the motor that powers it is no longer available. This guide will allow a different motor/gearbox to be used.)
- X252 Forward Clamp Out Sensor Setup Stuertz Infeed + (The out sensor used for the vorlaufwagen c … The out sensor used for the vorlaufwagen cannot be a standard reed switch because the cylinder that drives this output is a telescoping version. It is impossible to detect the out position. Therefore, a sensor is fitted that must be programmed to set a high output when it detects the full range has been reached The sensor is a [https://www.pepperl-fuchs.com/global/en/classid_53.htm?view=productdetails&prodid=42559#overview Pepperl+Fuchs VDM28-8-L] Datasheet can be downloaded [https://files.pepperl-fuchs.com/webcat/navi/productInfo/45/452859n.pdf?v=20220926110229 here] '''Function''' The distance measurement device contains one transmitter and one receiver incorporated into a single housing. The transmitter light is reflected back to the receiver from a target. The sensor determines the distance to the target and triggers a switching function or supplies the relevant measured value for processing. '''Assembly instructions''' The sensor can be mounted by means of through holes or by using a mounting bracket or mounting clamp Ensure that the surface is level in order to prevent the housing from becoming distorted when the fittings are tightened. It is advisable to secure the nuts and screws using spring washers in order to prevent the sensor from being incorrectly adjusted. '''Connection''' Connect the device in accordance with the connection diagram in the datasheet. '''Adjustment''' The green LED lights up when the operating voltage is switched on. Adjust the sensor so that the laser point is on the gripper bodyso that the laser point is on the gripper body)
- Fitting R0019199 Upgrade: Autoflow Slewing Ring Guard Kit + (This area is prone to collect sharp - cornered offcuts which can pull the seal from the SR axis bearing. The kit will help prevent damage. Use Kit R0019199 Upgrade: Autoflow Slewing Ring Guard Kit <br/>)
- ZX3 Counterweight Installation +
- Units of Measure modification CIM50 + (This guide is to show how to amend units o … This guide is to show how to amend units of measure of existing stock items. If a new product is created please ensure the Units of measure is always set up correctly from the beginning . The CIM50 guide for Units of Measure setup is [https://cimservices.sharepoint.com/:w:/s/Cim50PartnerMarketing/EZhA_HF6SFJLmkVO5WANYXIBZdMx4hbVnuY3cdIF78p7lg?rtime=FcNQz7GE2Ug here]4hbVnuY3cdIF78p7lg?rtime=FcNQz7GE2Ug here])
- R0015146 Pneumatic pipe Installation Part 3 + (This instruction is to incorporate assembl … This instruction is to incorporate assembly R0015033B Module F Wiring loom alongside this See Electrical department for prepared components from above assembly '''Tools Required''' Pipe cutters Pipe identification markers Flush cutters '''Parts Required''' P0000010 6mm 1/8 elbow fitting x 6 P0000046 Fitting: 'Y' Adaptor 6mm x 6 P0000047 Bulkhead Elbow 6mm x 1 P0000159 Fitting: Stem Blanking Plug 6mm x 2 P0000160 Fitting: Flow Controller In Line 6mm x 2 P0000551 6mm inline Quick Exhaust Fitting x 3 P0001030 Fitting: SMC 6mm Equal Tee x 1 P0001008 regulator x 3 P0001009 Regulator nut x 3 P0001107 Fitting 12mm equal tee x 1 P0001166 12mm tube to tube elbow x 17 Fitting 12mm equal tee x 1 P0001166 12mm tube to tube elbow x 1)
- R0015146 Pneumatic pipe Installation + (This instruction is to incorporate assembl … This instruction is to incorporate assembly R0015033B Module F Wiring loom alongside this
See Electrical department for prepared components from above assembly
'''Tools Required'''
Pipe cutters
Pipe identification markers
Flush cutters
'''Parts Required'''
P0000010 6mm 1/8 elbow fitting x 6 P0000046 Fitting: 'Y' Adaptor 6mm x 6
P0000047 Bulkhead Elbow 6mm x 1
P0000159 Fitting: Stem Blanking Plug 6mm x 2
P0000160 Fitting: Flow Controller In Line 6mm x 2
P0000551 6mm inline Quick Exhaust Fitting x 3
P0001030 Fitting: SMC 6mm Equal Tee x 1
P0001008 regulator x 3
P0001009 Regulator nut x 3
P0001107 Fitting 12mm equal tee x 1
P0001166 12mm tube to tube elbow x 1
12mm equal tee x 1 P0001166 12mm tube to tube elbow x 1 <br/>) - R0015146 Pneumatic pipe Installation Part 2 + (This instruction is to incorporate assembl … This instruction is to incorporate assembly R0015033B Module F Wiring loom alongside this See Electrical department for prepared components from above assembly '''Tools Required''' Pipe cutters Pipe identification markers Flush cutters '''Parts Required''' P0000010 6mm 1/8 elbow fitting x 6 P0000046 Fitting: 'Y' Adaptor 6mm x 6 P0000047 Bulkhead Elbow 6mm x 1 P0000159 Fitting: Stem Blanking Plug 6mm x 2 P0000160 Fitting: Flow Controller In Line 6mm x 2 P0000551 6mm inline Quick Exhaust Fitting x 3 P0001030 Fitting: SMC 6mm Equal Tee x 1 P0001008 regulator x 3 P0001009 Regulator nut x 3 P0001107 Fitting 12mm equal tee x 1 P0001166 12mm tube to tube elbow x 17 Fitting 12mm equal tee x 1 P0001166 12mm tube to tube elbow x 1)
- Client Installation of Sage and Cim50 + (This is a step by step guide on how to install Sage50 and Cim50 to a client device Sage must be installed first in order for the link to Cim50 to work as intended)
- Setting Up C0000422-KIT - Full Hardware 2023 + (This process takes the components to creat … This process takes the components to create a standard "C000422-KIT". This kit can then be stored and pulled off the shelf when required. It will then need to be set up for the particular customer machine using [[Setting Up Windows PC C0000422-KIT 2023]] =Notes= *There are two PCs running on the same hardware, The Host PC and the Virtual machine. **'''Host PC''' (For support) ***The base Windows install running directly on the hardware installed to Dell NVME drive. ***Has its own OEM Windows license supplied by Dell linked directly to the hardware (no product code – stored in the Dell hardware) ***Imaged by Macrium reflect. **'''Virtual PC – Stuga VM''' ***Used for Stuga software - the VM can run on any PC without changing drivers, etc. Host OS version / hardware unimportant as long as it runs Hyper-V. ***A second install of Windows running on a virtual machine, hosted by the Host PC above. It has a dedicated SSD (the Kingston Drive) stored on [:Fichier:///D:/VMPC.vhdx D:\VMPC.vhdx], with 8GB RAM. ***Has its own dedicated Windows 11 PRO license present in the kit, product code stored on Monday and on the license. ***Copied to host and setup manually during install. There is a setup program for the specific client after this process has completed: '''P_Stuga_P… '''on the desktop of the host.'P_Stuga_P… '''on the desktop of the host.)
- A2001 - Light Curtain Timer + (This step by step guide will explain how to wire a timer relay into the light curtain and estop circuit on the A2001 Autoflow.)
- PLC Source Control - Git Credential Manager for Windows Install + (When connecting to the tc3Multi repository … When connecting to the tc3Multi repository on BitBucket.org, some times the validation credentials are not accepted. Check that the password you have is correct, if the problem persists , install or update Git Credential manager for windows to the latest version.manager for windows to the latest version.)
- R0000299 Stroke assembly rebuild + ( The following instructions should be fol … The following instructions should be followed to ensure that correct assembly and setting are performed '''Tools / consumables Required''' Standard hex key set Standard spanner set Large adjustable spanner Drifts and punches Ballpein hammer Soft hammer FE10 Solvent Hylomar Gasket '''Parts Required''' Kit R0000299 containing B0000043 Double Angular bearing 15 I?D 35 O?D 15.9 long rubber seal 3 x 2 B0000105 Double Angular Bearing 15 I/D 35 O/D 15.9 Long x 1 B0000335 3ph Brake motor 2 pole 3000rpm x 1 B0000380 Double Angular Bearing 25 I/D 52 O/D 20.6 Long + rubber seal x 2 D0000059 Damper Bridge x 1 D0000062 Damper Bridge Boss x 2 D0007730 ZX4 V Notch Mk1 Spindle Shaft x1 D0007867 Bevel Gear (Left) x 1 D0007868 Bevel Gear (Right ) x 1 D0007873 Motor Gear x 1 D0007874 Pinion Gear x 1 D0007875 Pinion Shaft x 1 P0000165 damper x 174 Pinion Gear x 1 D0007875 Pinion Shaft x 1 P0000165 damper x 1)

 Français
 English
 Deutsch
 Español
 Italiano
 Português