500mm Saw Blade Upgrade

Difficulté
Facile
Durée
4-6 heure(s)
Sommaire
- 1 Introduction
- 2 Étape 1 - Modify Top Door Guard Switch Location (If required)
- 3 Étape 2 - Remove taper lock pulleys
- 4 Étape 3 - Fit new taper lock pulleys, belts and old 300mm saw blade.
- 5 Étape 4 - Replace old slit strip
- 6 Étape 5 - Replace bracket for saw stroke cylinder rod
- 7 Étape 6 - Upgrade top clamp
- 8 Étape 7 - Modify half moon plate
- 9 Étape 8 - Cut slit strip
- 10 Étape 9 - Tune 45/90/135 Rotation Speeds
- 11 Commentaires
Introduction
Step by step guide of how to carry out the 400mm to 500mm saw blade upgrade including long reach clamps.
Time to complete is very dependant on condition of the machine, ie rusted or rounded off bolts which may need to be drilled out and holes re-tapped.
Replace all screws with Loctite except grub screws on taper lock pulleys, grub screws for shafts on clamp pads and slit strip retaining screws or where a locking nut is used on cylinder rods.Avertissement des objets pointus et tranchants
Étape 1 - Modify Top Door Guard Switch Location (If required)
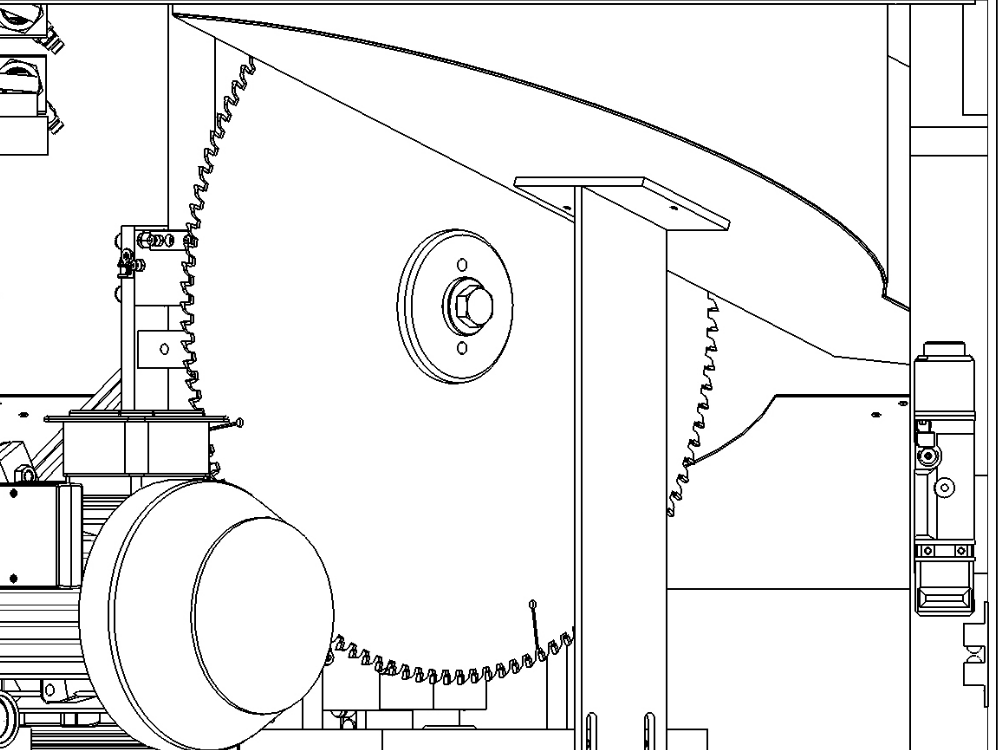
On later machines, the top door guard switch is bigger, and therefore will get cut by the 500mm saw blade at the absolute top of its travel
See this Technical Bulletin for details

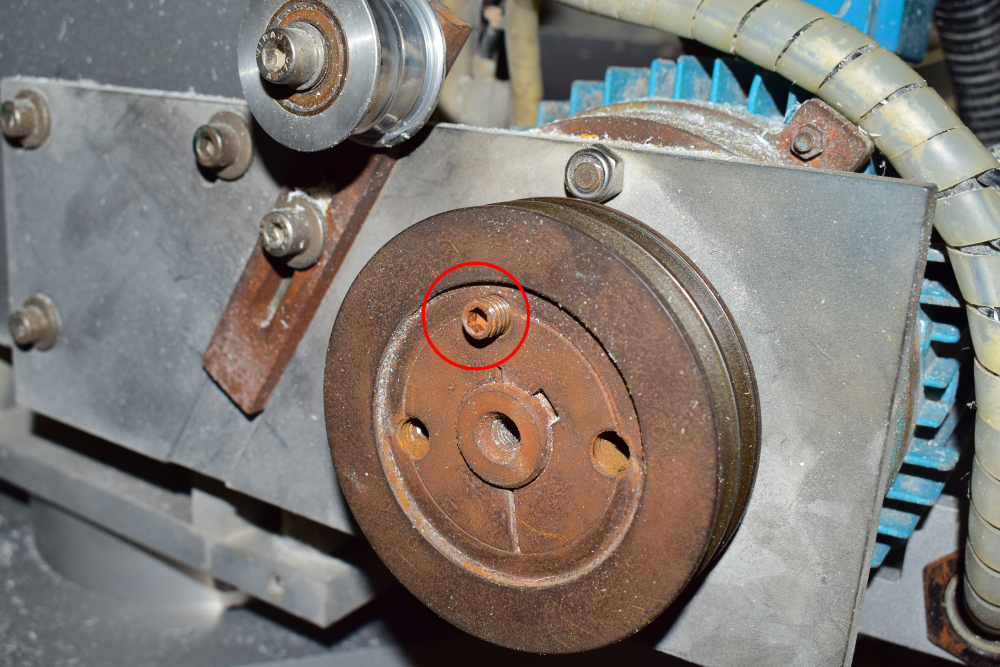
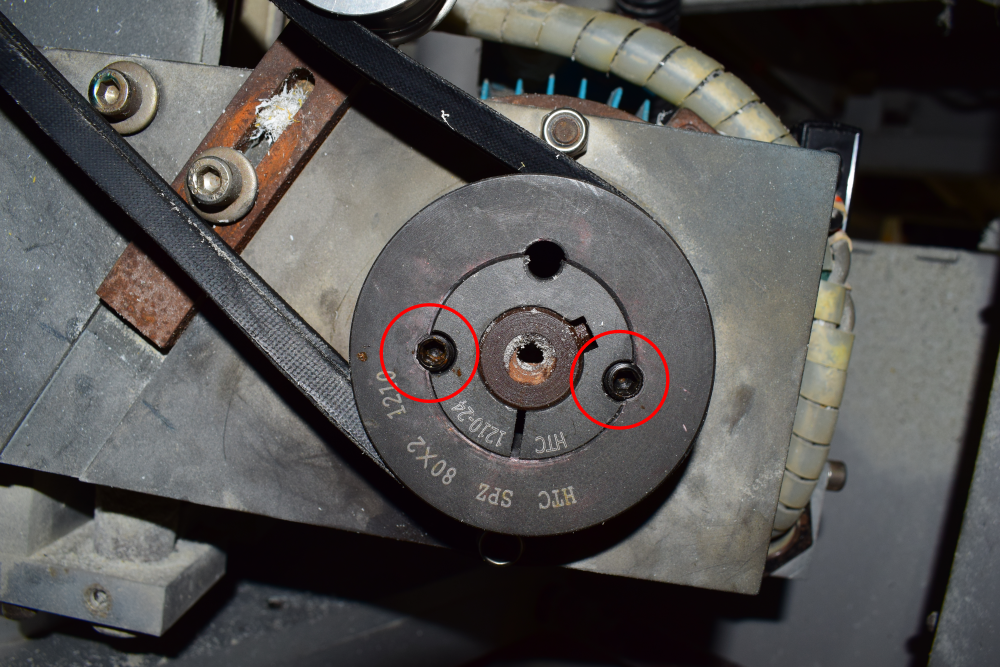
Étape 2 - Remove taper lock pulleys
Remove the two grub screws from the taper lock pulleys and insert one into the hole that was initially empty. Screw in tight to break seal of taperlock and split the two parts. If siezed the outer part can be tapped back with a hammer. These parts are usually very brittle and can shatter with a heavy hammer blow. It can also be useful to have the belts on at this point to stop the pulley from turning.


Étape 3 - Fit new taper lock pulleys, belts and old 300mm saw blade.
Fit the new pulleys and belts, no need for Loctite on the grub screws
Check alignment of belts and tension.
Fit old blade. The old blade can be used to cut a little clearance in the new slit strip before the 500mm blade is fitted. If this is not done then the motor overload may trip as the 500mm blade can be stalled by the tight gap in the slit strip.

Étape 4 - Replace old slit strip
Remove the four countersunk and four dome head allen screws holding the slit strip. These can quite often be siezed and/or be rounded and my need to be drilled out.
Fit new slit strip.
Étape 5 - Replace bracket for saw stroke cylinder rod
Using the old slit strip you can wedge up the assembly to give easier access. Once wedged up place something underneath the assembly to stop it falling on your hands if the slit strip slides off.
Remove the old bracket and replace with the new one.


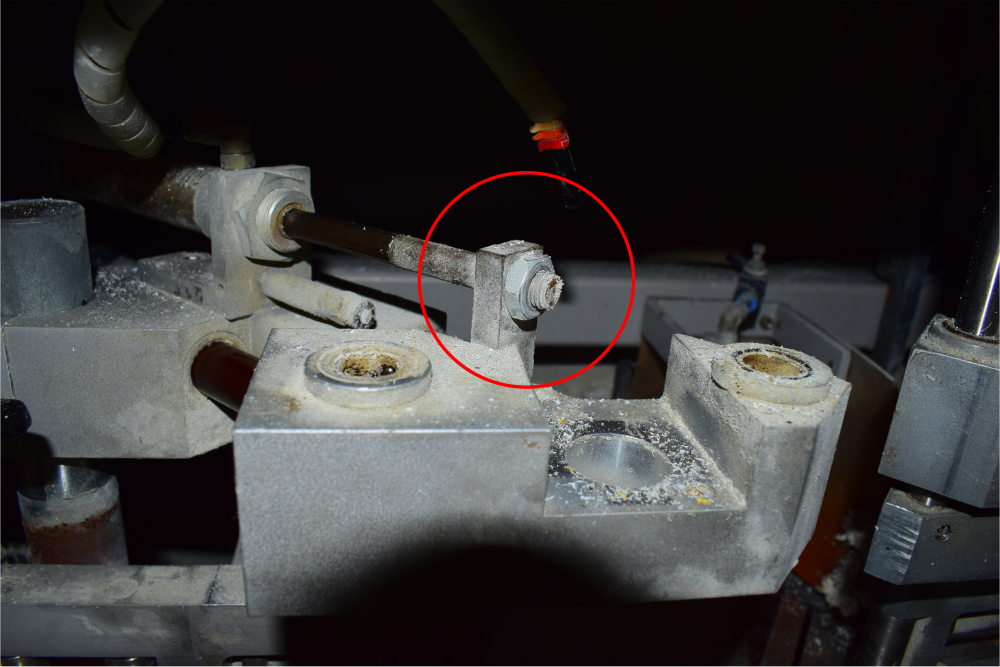
Étape 6 - Upgrade top clamp
Remove clamp pads and pull out old shafts. Remove old cylinders and replace with long reach ones. Lubricate bearings before fitting the nit new shafts and chip deflectors. Spacers may need to be put behind side clamp cylinders as well as cutting 5mm from end of the shafts. The lock nut may also have to be moved to the other side of the bracket. This is only required if the cylinder rod end fouls on the top clamp cyclinder.
Check and adjust stroke of side clamp cylinders when they are in the extended position used when the saw is centralised.


Étape 7 - Modify half moon plate
Remove rear saw door/cover and remove half moon plate. An extra 50-60mm needs to be removed using a jigsaw to allow clearance for the new blade.


Étape 8 - Cut slit strip
With the old 400mm blade fitted operate the saw to widen the gap in the slit strip. WD40 can be applied to the blade as a lubricant which will also help minimise the noise that will be made.
After first cut the saw out sensor will need to be adjusted to allow for the extra stroke length.
IMPORTANT
Before carrying out the next step it is vital to check that the new blade will not cut into the interlock on saw top door.
Remove the 400mm blade and replace it with the new 500mm blade. Apply WD40 to blade and operate the saw blade to fully cut the slit strip.


Étape 9 - Tune 45/90/135 Rotation Speeds
Adjust flow regs for 45/90/135 degrees and also saw out stroke to minimise blade wobble.
Check operation of saw blade at all three angles.
Draft
 Français
 English
 Deutsch
 Español
 Italiano
 Português