How to change the main saw blade on a Stuga machine

Difficulté
Moyen
Durée
10 minute(s)
Sommaire
- 1 Introduction
- 2 Pièces et outils
- 3 Étape 1 - Stop Cutting
- 4 Étape 2 - Open the door
- 5 Étape 3 - Loosen Blade
- 6 Étape 4 - Remove Fastening
- 7 Étape 5 - Remove Blade
- 8 Étape 6 - Fit New Blade
- 9 Étape 7 - Refit Bolt, Plate and Washer
- 10 Étape 8 - Measure new blade thickness (Kerf)
- 11 Étape 9 - Update kerf Parameter
- 12 Étape 10 - Close the door
- 13 Étape 11 - Reset Estop
- 14 Commentaires
Introduction
Stuga recommends this blade be changed after 1-2 weeks of cutting - symptoms to determine if the blade needs changing:
- Awful cutting sound / smell
- Profile dragging (sizes too short)
- Brown burnt swarf
- Smoke coming out of profile end while cutting
- Pièces et outils
Pièces et outils
Spanner 24mm 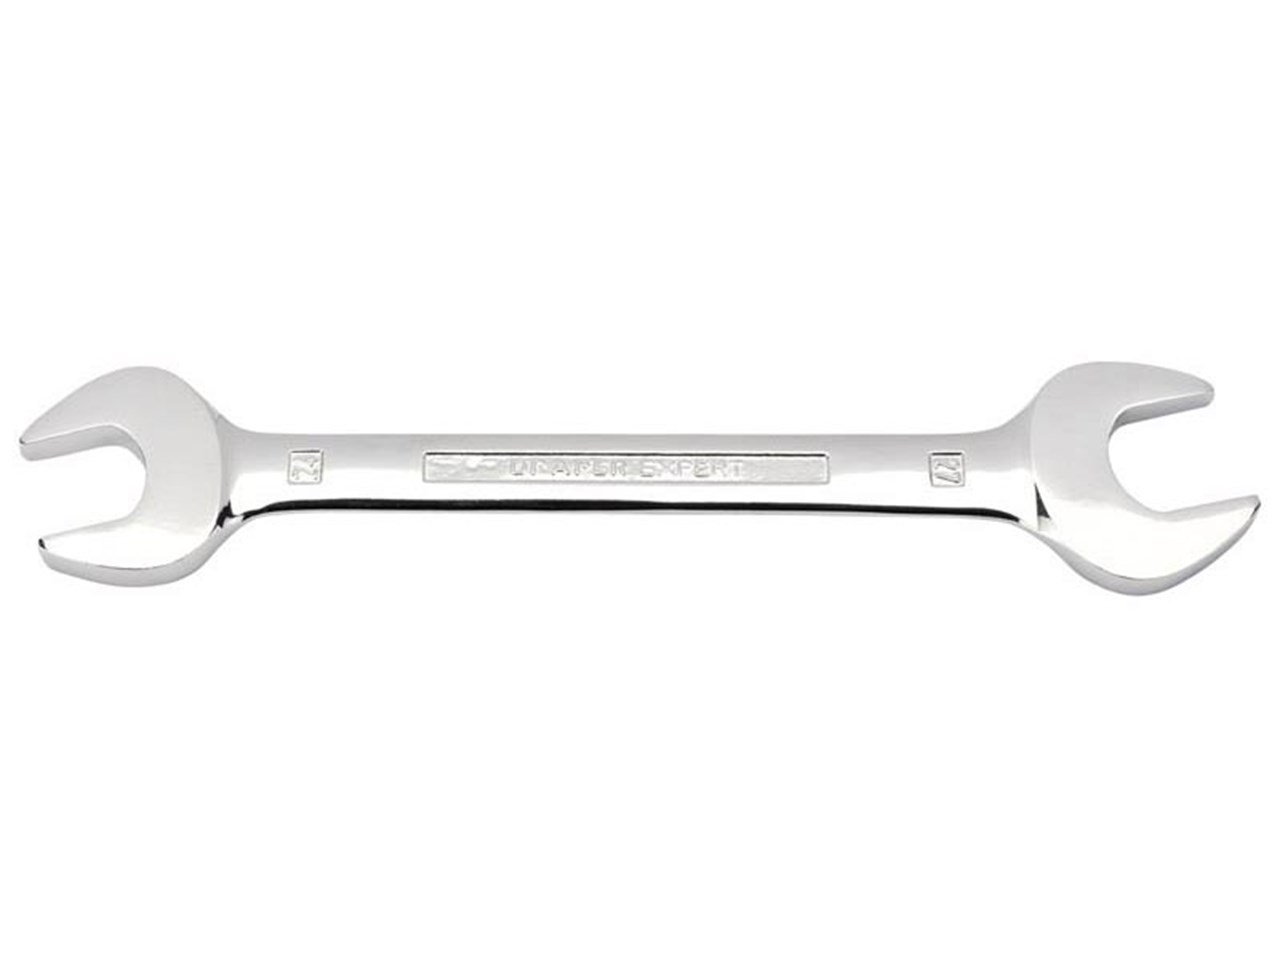

Open ended spanner 24mm
D0005207 Stuga Flange C Spanner 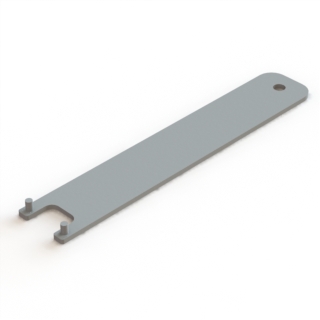

Flange spanner c/w pins for removal of Stuga saw blade
Utiliser des vêtements de protection pour les mains
Avertissement des objets pointus et tranchants
Blessure à la main
Étape 1 - Stop Cutting
Make sure you have stopped cutting and nothing on the machine is moving - press an emergency stop button to ensure this.
Étape 3 - Loosen Blade
Using the saw blade 'C' spanner and the 24mm spanner, loosen and remove the main bolt going through the centre of the saw blade - anti-clockwise to loosen.
Étape 4 - Remove Fastening
Once the bolt is loose; remove the bolt, washer and plate.
Étape 5 - Remove Blade
Now carefully remove the blade, with this blade being 500mm it will be tight. Ensure you take note of which way the blade spins.
Étape 6 - Fit New Blade
Fit the new blade ensuring the teeth are facing the same way it was removed
Étape 7 - Refit Bolt, Plate and Washer
Now fit the plate, washer and bolt ensuring it's tight
Étape 8 - Measure new blade thickness (Kerf)
Measure the thickness of the brand new or sharpened blade - this should be between 3.8mm - 4.1mm
Étape 9 - Update kerf Parameter
Through the winSaw software go into '[F5] Settings' and update the 'Kerf' parameter to what the blade thickness is.
Press 'Save'.
Étape 10 - Close the door
Press '[F10] Reset Saw', now close the main door and ensure it will not open and that the 'Guard' message clears
Étape 11 - Reset Estop
Reset the emergency stop circuit by unlatching emergency stop buttons and pressing the physical blue 'ES RESET' button
Draft
 Français
 English
 Deutsch
 Español
 Italiano
 Português