| [en attente de relecture] | [en attente de relecture] |
| Ligne 46 : | Ligne 46 : | ||
{{Tuto Step | {{Tuto Step | ||
|Step_Title=<translate>Changing Datum Spindle. (If necessary)</translate> | |Step_Title=<translate>Changing Datum Spindle. (If necessary)</translate> | ||
| − | |Step_Content=<translate>If the changed spindle is the datum spindle, this message will appear. A different spindle must be selected in the machines parameters. | + | |Step_Content=<translate>If the changed spindle is the datum spindle, this message will appear. A different spindle must be selected in the machines parameters. |
| + | |||
| + | The Datum tool is a Spindle fitted with a 10mm Tool | ||
<br /></translate> | <br /></translate> | ||
Version actuelle datée du 9 juillet 2024 à 10:59
How to turn off a spindle and change the datum tool.

Difficulté
Facile
Durée
5 minute(s)
Sommaire
- 1 Étape 1 - Open win Multi
- 2 Étape 2 - Press on '[F5] Settings' tab
- 3 Étape 3 - Go to the tab “Tooling”
- 4 Étape 4 - Turning Spindle Off
- 5 Étape 5 - Save Changes
- 6 Étape 6 - Changing Datum Spindle. (If necessary)
- 7 Étape 7 - Parameters Change
- 8 Étape 8 - Setting New Datum Spindle
- 9 Étape 9 - Exit software to windows and restart WinMulti.
- 10 Commentaires
Étape 1 - Open win Multi

Étape 2 - Press on '[F5] Settings' tab


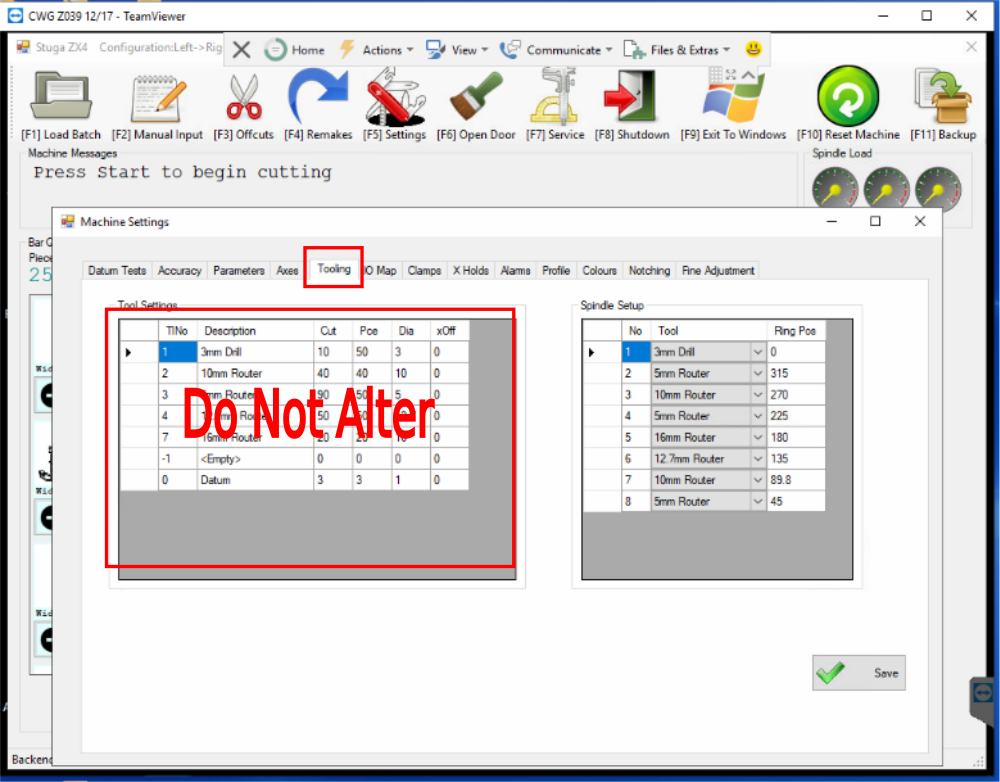
Étape 3 - Go to the tab “Tooling”
Étape 4 - Turning Spindle Off
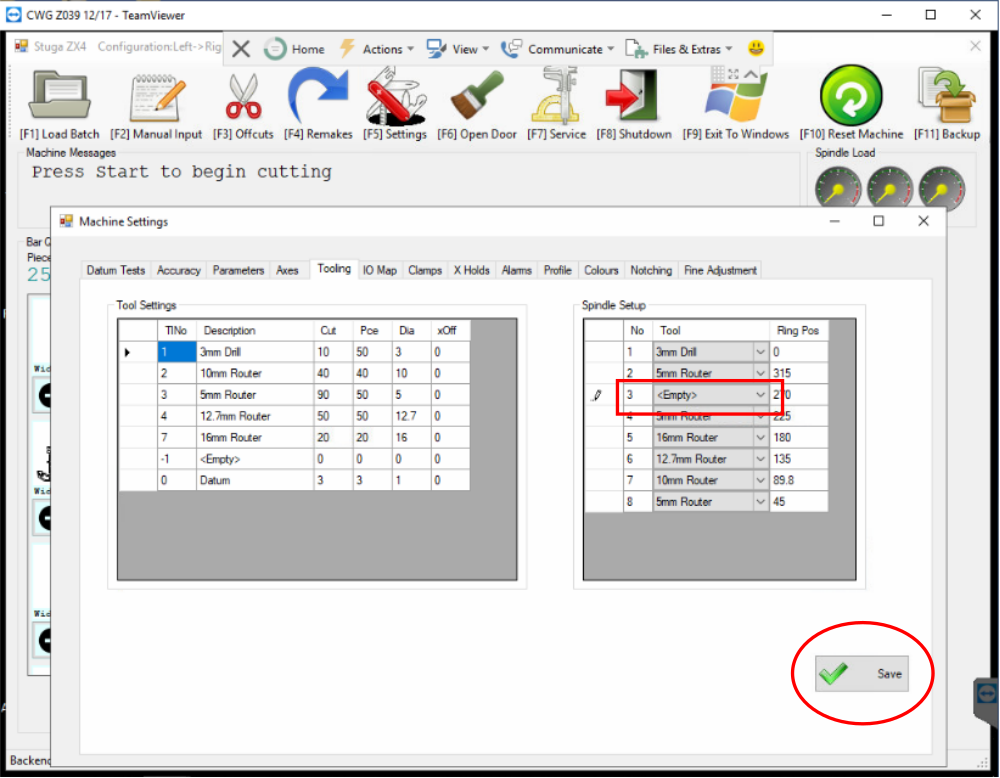
Using the 'Spindle Setup' menu box, select the spindle to be turned off. Using the drop down arrow circled, change the spindle 'Tool' to <Empty>

Étape 5 - Save Changes
The selected spindle's 'Tool' should now be set to <Empty>. Now press Save.
Étape 6 - Changing Datum Spindle. (If necessary)
If the changed spindle is the datum spindle, this message will appear. A different spindle must be selected in the machines parameters.
The Datum tool is a Spindle fitted with a 10mm Tool

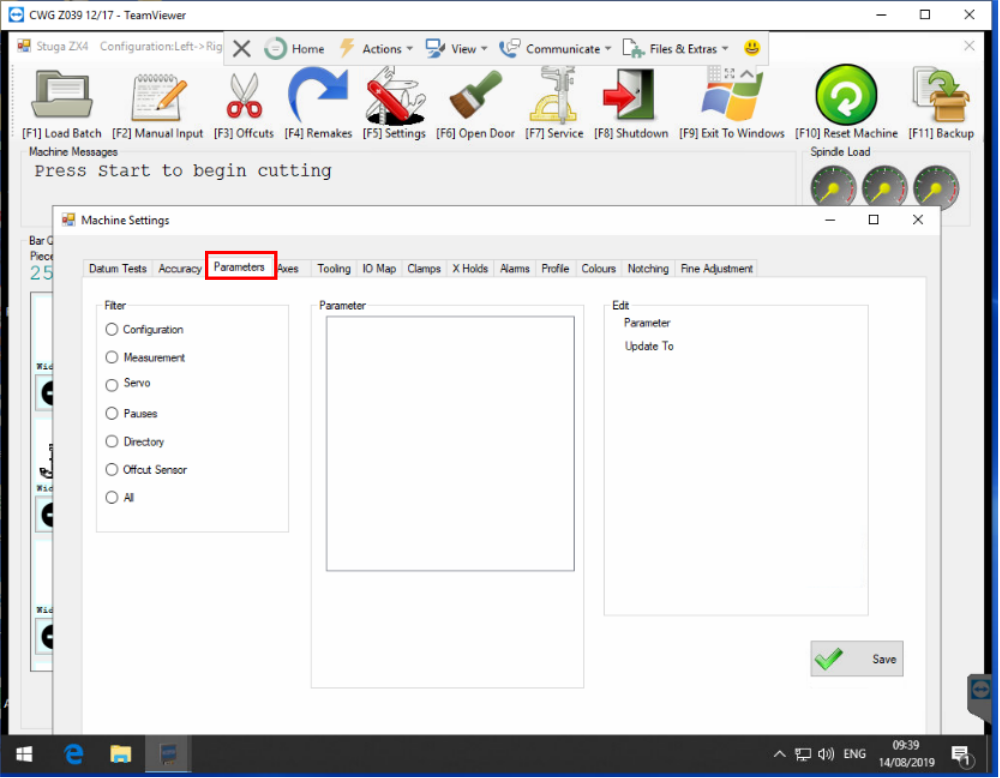
Étape 7 - Parameters Change
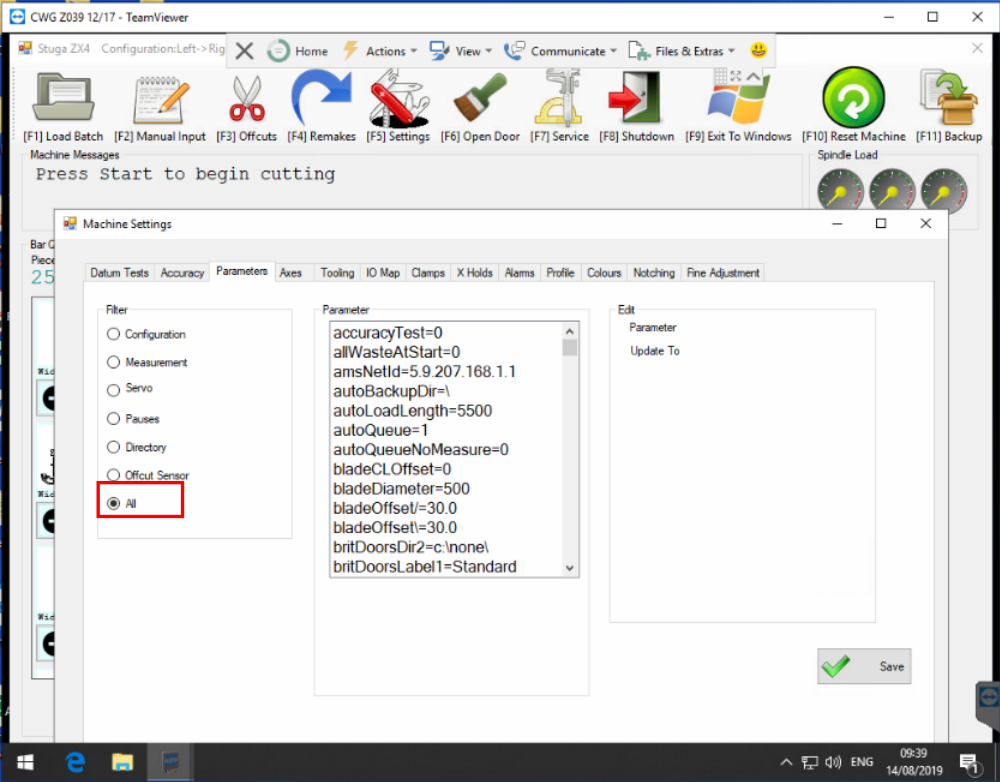
Go to the 'Parameters' tab. Then press on 'All' in the Filter box.
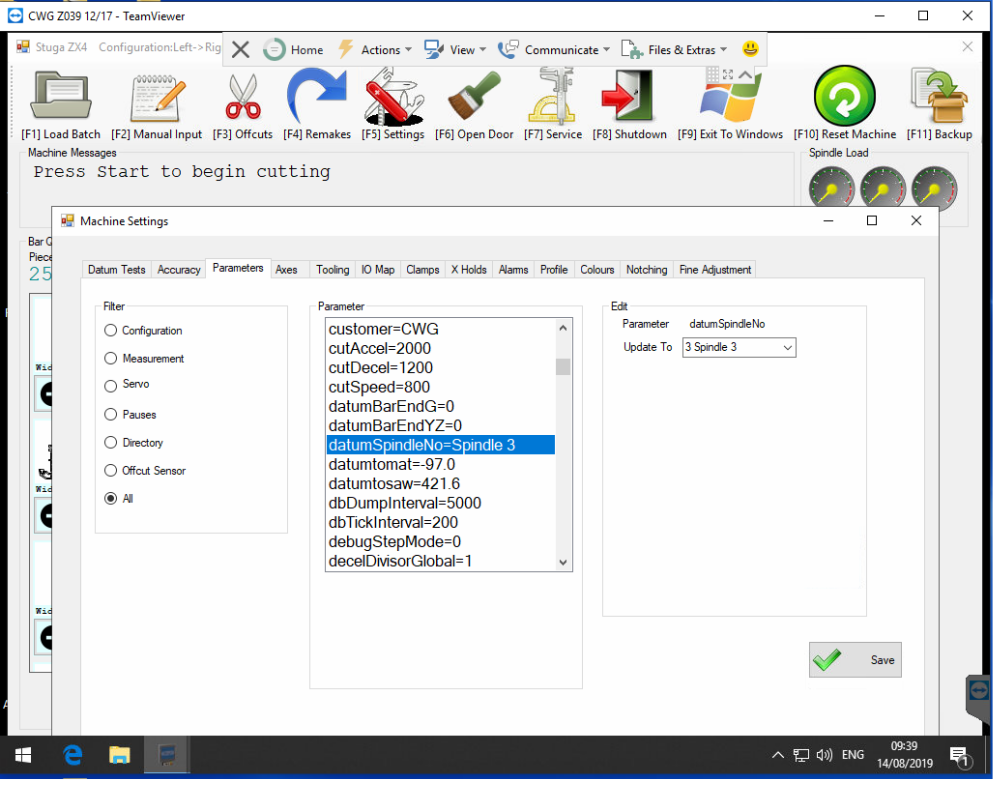
Étape 8 - Setting New Datum Spindle
Find the parameter 'Datum Spindle Number' Click to highlight this field.
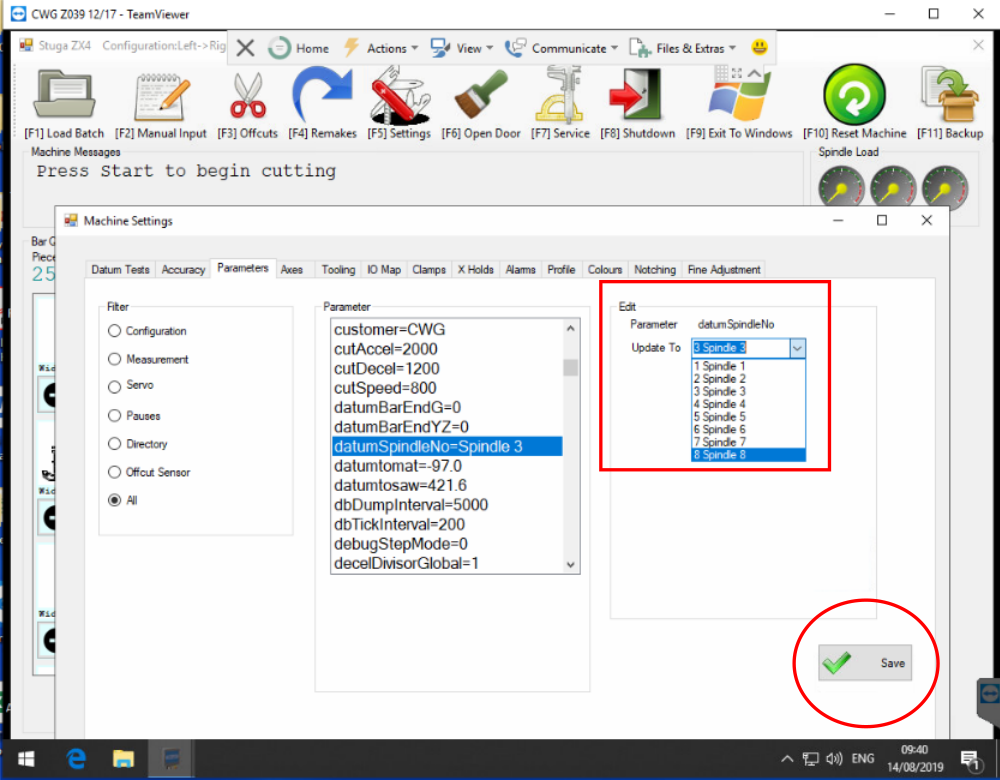
Change the spindle using the drop down box under 'Edit'. Change the datum spindle to a working tool that has not been turned off. Then Press 'Save'
The Parameter will now update.

Étape 9 - Exit software to windows and restart WinMulti.

Published
 Français
 English
 Deutsch
 Español
 Italiano
 Português