How to create a Development Branch within the TwinCAT3 source control
Sommaire
- 1 Introduction
- 2 Tutoriels prérequis
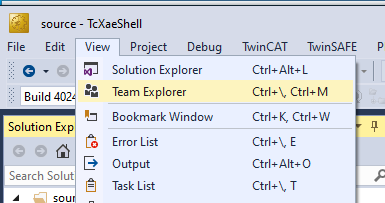
- 3 Étape 1 - Open Team Explorer
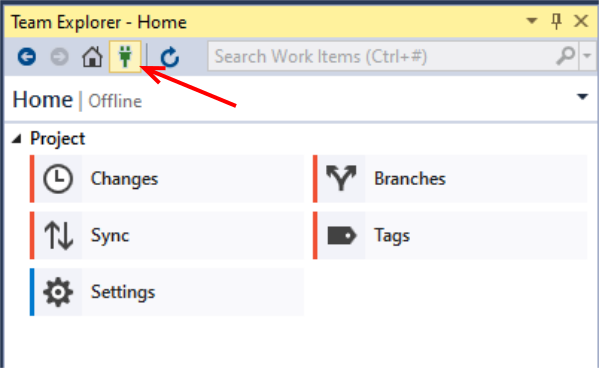
- 4 Étape 2 - Manage Connections
- 5 Étape 3 - Add Repository
- 6 Étape 4 - Select Repository
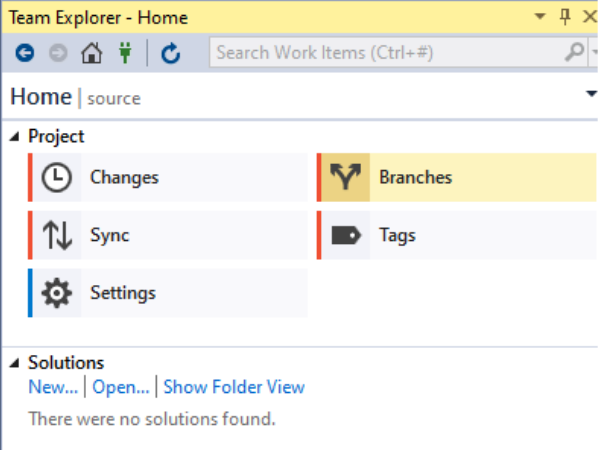
- 7 Étape 5 - Team Explorer Home Screen
- 8 Étape 6 - Branches
- 9 Étape 7 - Branches Detail
- 10 Étape 8 - Working with Git and Tc Xae Shell
- 11 Commentaires
Introduction
These instructions give details of how to set up a repository so that any changes made to the core project will be tracked. For the git source control to work it is important that GIT has been chosen as the source control program. see Prerequisits.
The instructions start from : The project has been created and PLC code has been loaded in to the TwinCAT Xae Shell program.- Tutoriels prérequis
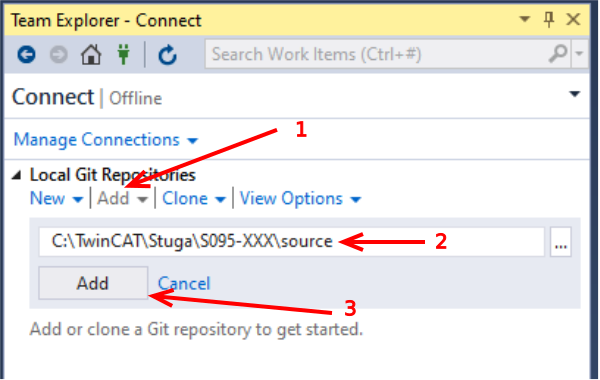
Étape 3 - Add Repository
1 Select the Add Option
2. Enter the path of the source folder for your project
3. Press Add button to add the repository
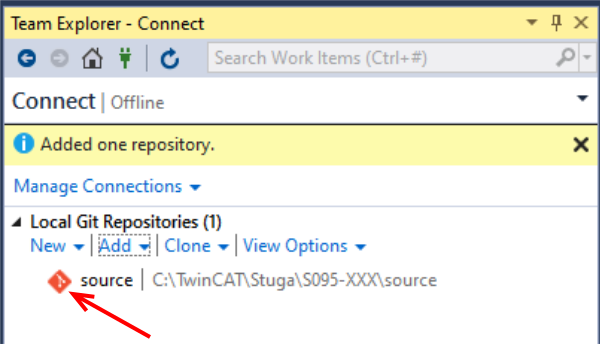
Étape 4 - Select Repository
The Repository has been added
1. Select Connections Icon by
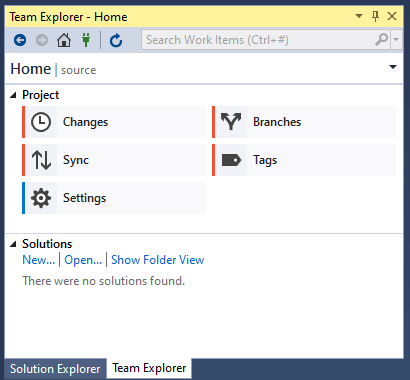
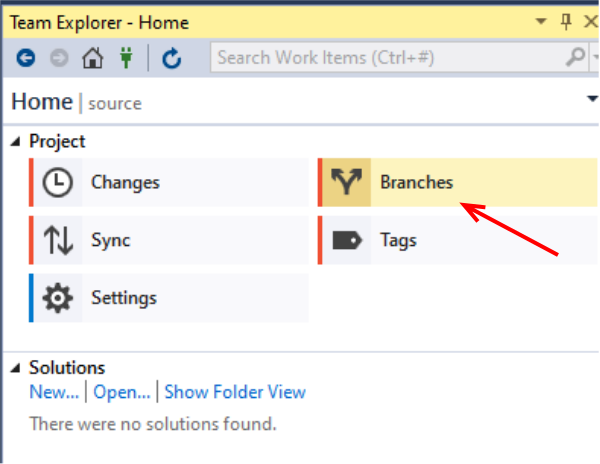
selecting the red square to show the project.
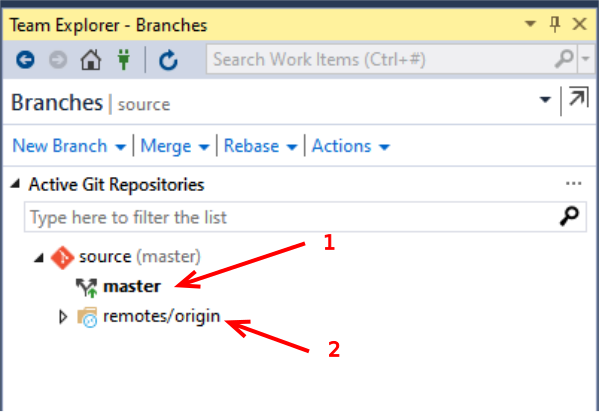
Étape 7 - Branches Detail
This panel now shows the Branches Available
- The master branch this is the main copy of the program in the local folders.
- The remote/origin this is the remote repository
Étape 8 - Working with Git and Tc Xae Shell
For more information on Source Control and working with Tc Xae Shell . follow the link.
PLC Source Control - Working with GIT and TcXaeShell#Introduction
Draft
 Français
 English
 Deutsch
 Español
 Italiano
 Português