
Setting up the Hikvision cameras and recording system

Difficulté
Moyen
Durée
30 minute(s)
Sommaire
[masquer]- 1 Introduction
- 2 Pièces et outils
- 3 Étape 1 - Open SADPTool
- 4 Étape 2 - Activate Camera
- 5 Étape 3 - Open in Internet Explorer + Download Plugin
- 6 Étape 4 - Web Browser User Interface
- 7 Étape 5 - Setup SD Card Storage
- 8 Étape 6 - Schedule Settings
- 9 Étape 7 - Events
- 10 Étape 8 - Flipping the Image
- 11 Étape 9 - Information Shown on Stream
- 12 Étape 10 - Video Quality
- 13 Étape 11 - Time Settings
- 14 Étape 12 - Saving Locally
- 15 Commentaires
Introduction
These are the Hikvision DS-2CD2343G0-I Cameras (C0001152) that will replace the obsolete UCAMs that have been used on previous machines.
Connected via a multi way PoE injector (C0001238).
And with SD card (C0001239).- Pièces et outils
Pièces et outils
C0001239 Toshiba 32GB SD Card 

SD card used in the Hikvision Cameras
C0001238 Tenda TEF1105P 5 Port PoE Switch 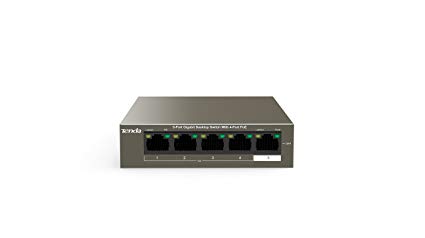

POE Ethernet switch used for the Hikvision cameras
Étape 1 - Open SADPTool


Étape 2 - Activate Camera
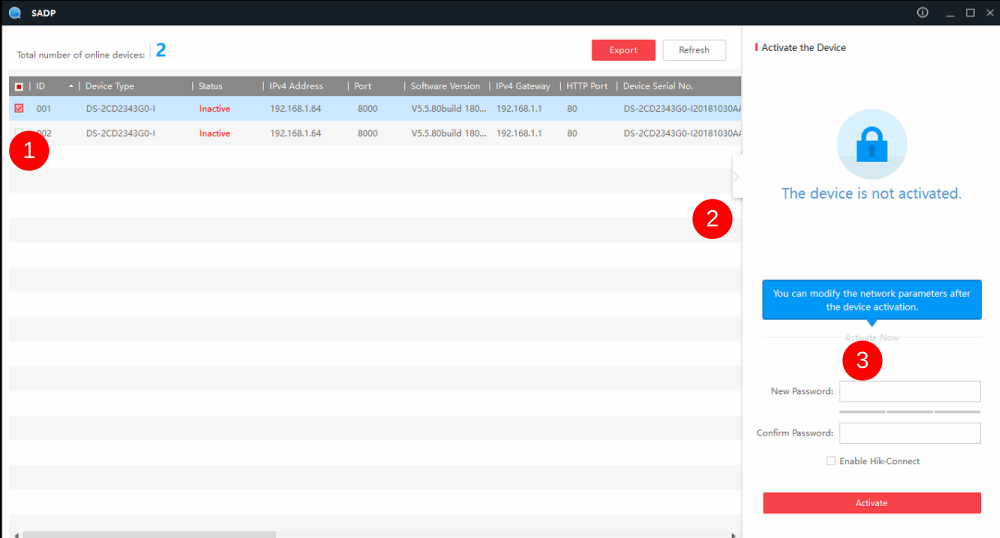
When open, the SADP Tool will display all Hikvision cameras connected to the local network. If the IP address has not been modified before going to site the camera needs to be Activated,.
- To do this select the current inactive camera.
- Then open the side sub menu on the far right.
- Input the password: Stuga001 and click Activate.
{{Tuto Step |Step_Title=Security Questions |Step_Content=You will be prompted two answer three security questions. {{ |Step_Picture_00=Hikvision_Camera_Setup_hik_sadp3.png }}
Étape 3 - Open in Internet Explorer + Download Plugin
- Using internet explorer type the IP address into the web address bar.
- Type in the username: admin and password: Stuga001
- Click on the link to download a plugin. When prompted, click Run.


Étape 4 - Web Browser User Interface
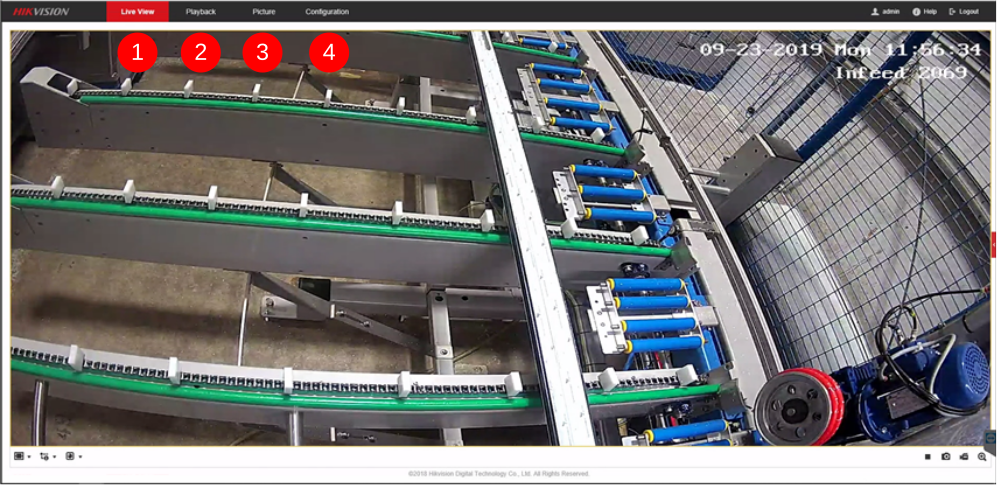
- The initial screen is the Live View
- Playback is where recordings that are saved to the SD card are viewed and downloaded.
- Picture (is not used) for the snapshot function.
- Configuration used to change settings and set up SD card.
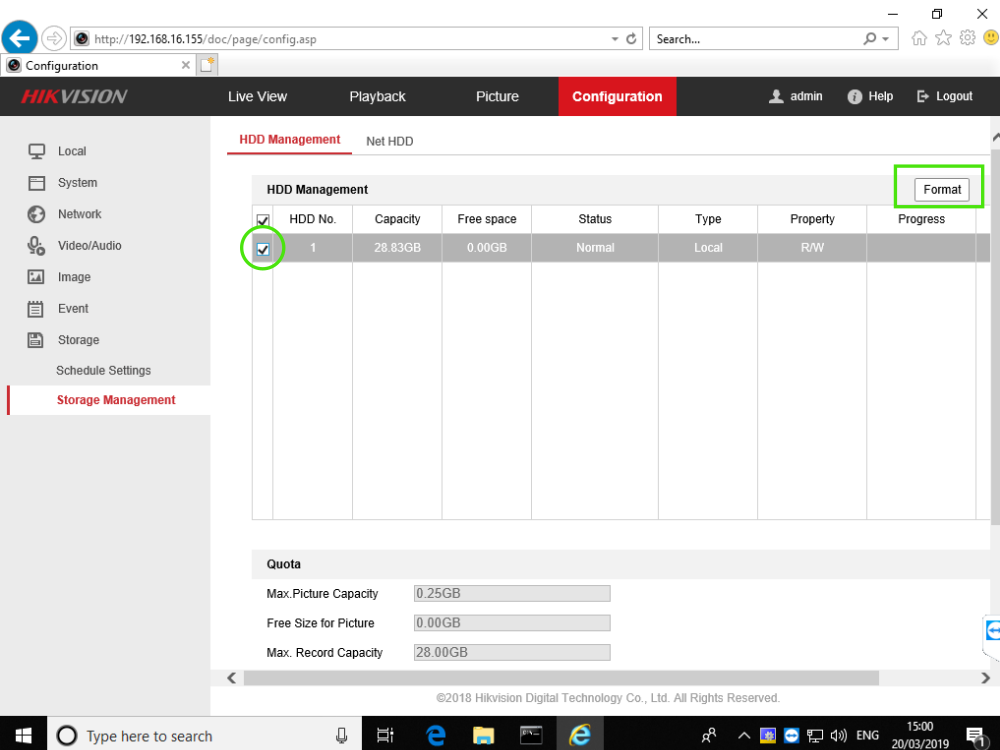
Étape 5 - Setup SD Card Storage
- Go to the Configuration tab.
- On the left menu go to Storage.
- Then go to the sub-menu Storage Management.
- If the SD card has been installed correctly it will show under the HDD Management box. Select the SD card.
- Now click Format. This process can take up to 2 minutes.
- Click SAVE
Étape 6 - Schedule Settings
- Go to the next sub-menu Schedule Settings.
- Delete the default schedule.
- On the drop down menu select Motion.
- Highlight the entire week in this (Green)
- Go to Advanced in the top right.
- Change Post Record to 1 minute and press OK.
- Press SAVE.


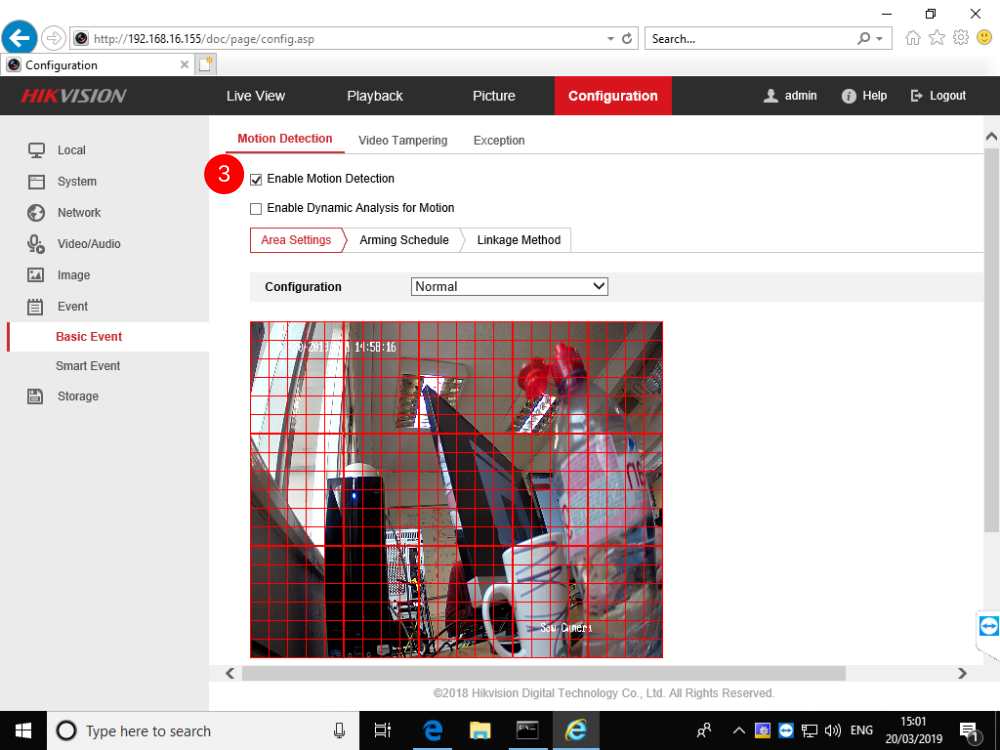
Étape 7 - Events
- Go to the Event tab on the side menu.
- Then go to the Basic Event sub-menu.
- Now select the check box Enable Motion Detection.
- SAVE!
- Draw an area for the camera motion detect. (Right click on the last corner of the shape to save)
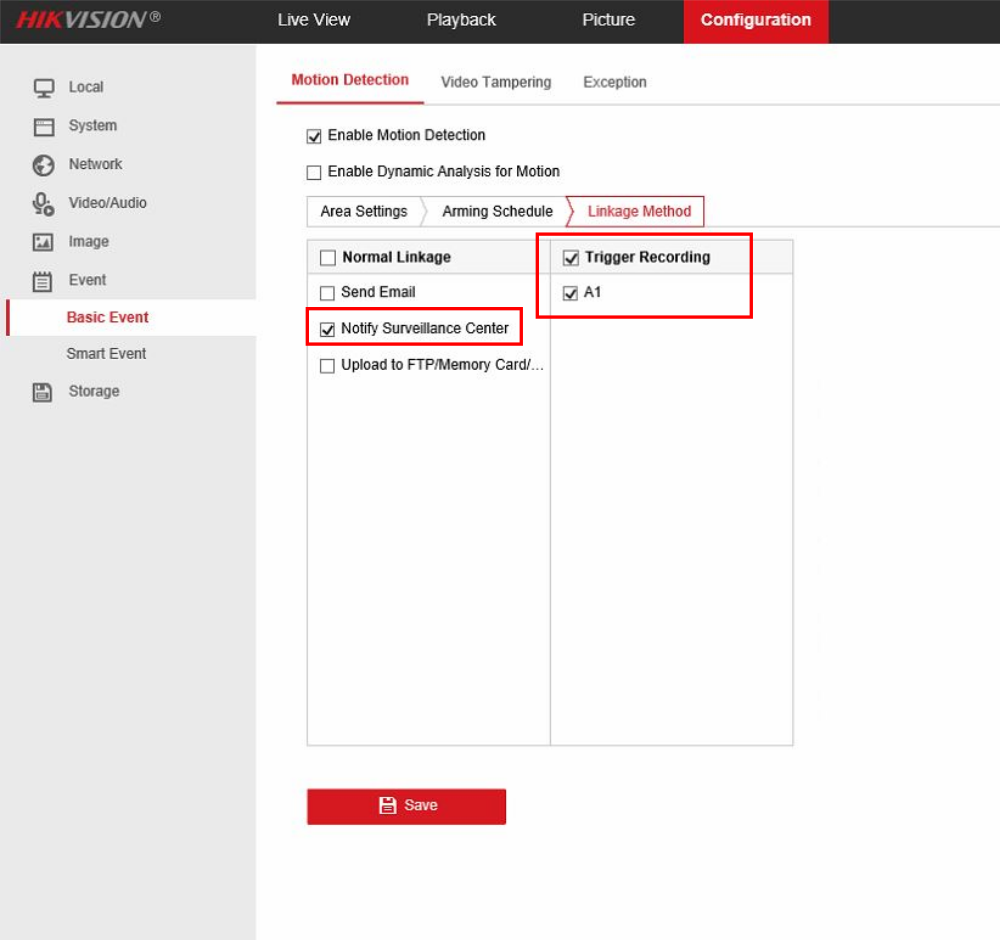
- Go To Linkage Method Tab
- Check that 'Notify Surveillance Center' & 'Trigger recording/ A1' are ticked

Étape 8 - Flipping the Image
Sometimes the cameras are required to to be installed in a different position than standard. This may cause the image on Live View to be inverted. If this is required please follow this step, if not move onto step 10.
- Go to the Image tab on the side menu.
- Go to the sub-menu Video Adjustment.
- Using the Mirror option choose to flip the image Up/Down or Left/Right.
- SAVE!

Étape 9 - Information Shown on Stream
- Go to the Image tab.
- Go to the OSD Settings along the top tab.
- Change the Camera Name to one that represents the cameras position i.e. "Saw Camera" or "Infeed Camera".
- To add any additional information such as IP address. Fill in a row under Text Overlay and check mark the box next to it. Any information put on this will also show on recordings.
- SAVE!

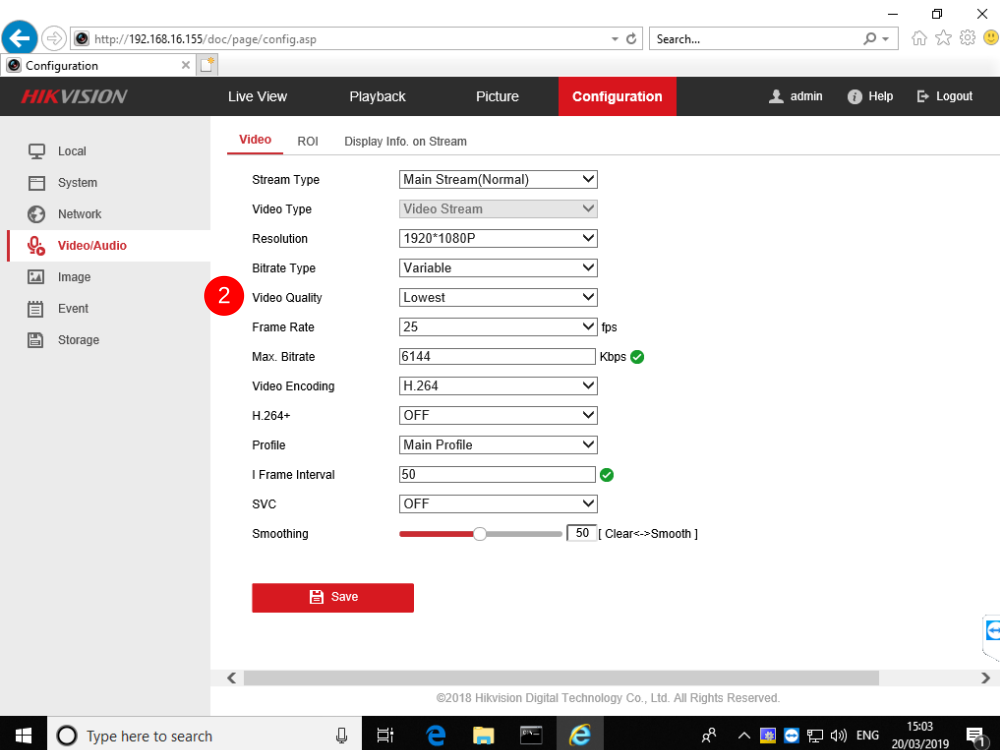
Étape 10 - Video Quality
- Go to the Video/Audio tab on the side menu.
- Make sure Video Quality is set to Lowest.
- SAVE!
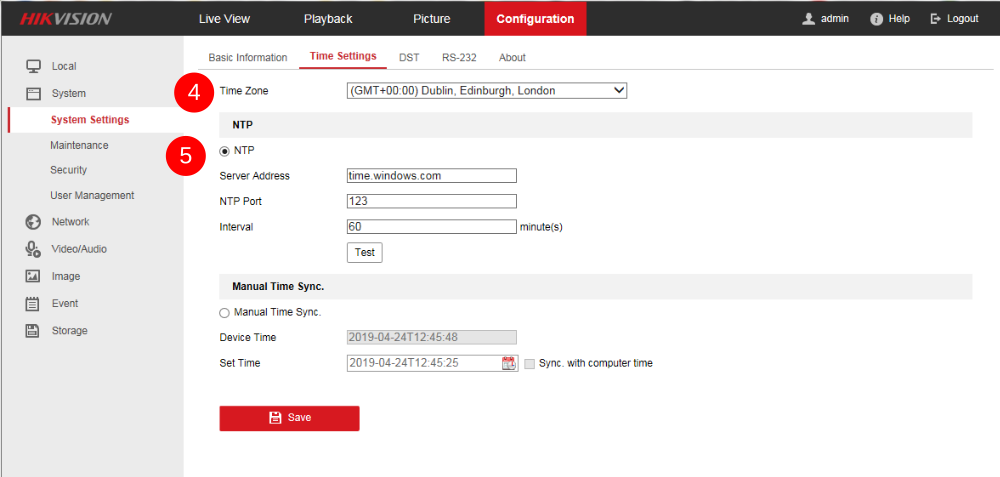
Étape 11 - Time Settings
- Go to the System tab on the side menu.
- Go to the side sub-menu System Settings.
- Go to the top tab Time Settings.
- Set the Time Zone to GMT +00:00.
- Make sure NTP is checked and testes.
- SAVE!
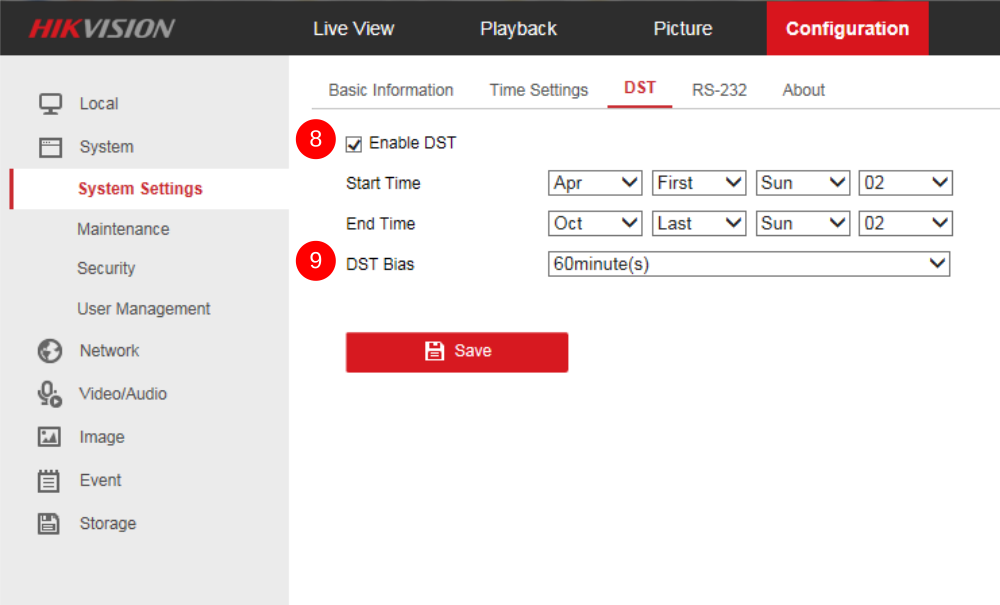
- Then on the top tab go to DST.
- Select the Enable DST checkbox.
- Change DST Bias to 60minute(s).
- SAVE!
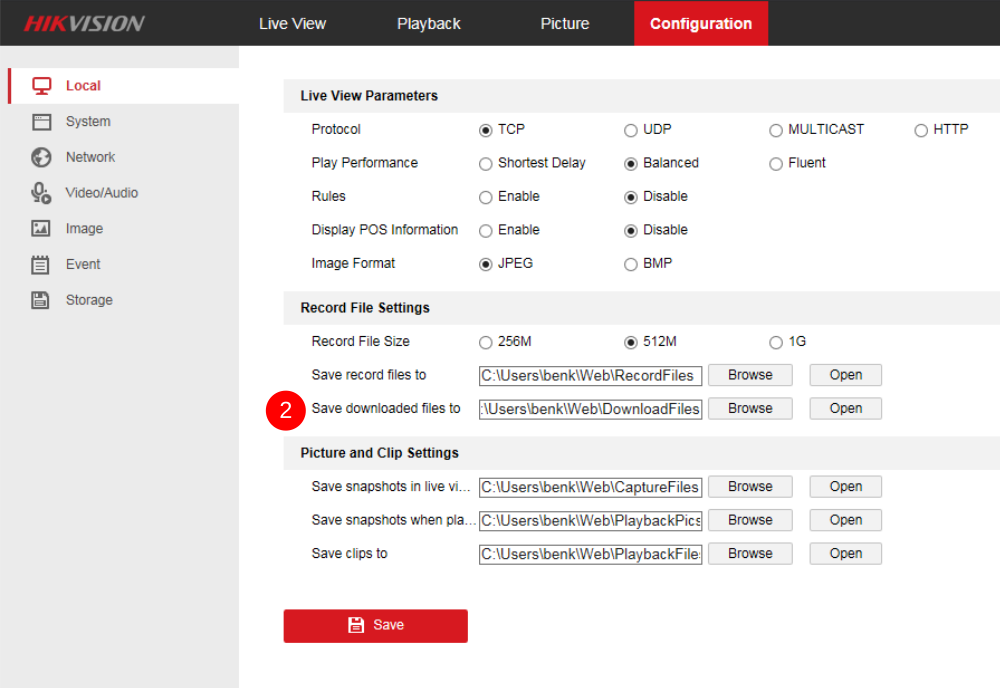
Étape 12 - Saving Locally
- Go to the Local tab on the side menu
- Under Record File Settings change the Save Downloaded Files to path a known camera location on the C:\ Drive.
- All cameras on the network will save to the same place.
- SAVE!
Published
 Français
 English
 Deutsch
 Español
 Italiano
 Português