Things to look out for and check when setting up ZX5 energy chains on the ZX5 MH Outfeed or Saw Infeed


Difficulté
Moyen
Durée
1 heure(s)
Introduction
The main problems we’ve had during commissioning with these energy chains is that if they are not positioned well enough , the chain will clip the button heads that hold the trays to the L brackets
To get over this the brackets sometimes need adjusting on the slots along with possibly bending into a better shape or by adjusting the chain bracket position on the slots in the ‘finger’ bracket
Things to look out for:
There should be three links which are reversed at the bracket end of the energy chain.
Servo cable and the pipes and cables from the energy chain are fixed with cable ties to the fingers on the bracket to minimise possible movement and twisting which changes where the energy chain sits in the trays, meaning it could start clipping the button heads.
Tray heights and energy chain length, there should be a consistent gap all the way along between the energy chain and the top tray (viewed from inside the tray) and when at the full travel either end the chain shouldn’t be tight hitting the fence too much at the end.
It is also worth checking if all of the links fitted are the same radius type, as we have had occasions where some have been a smaller radius meaning at certain points down the rack the radius of the bend becomes smaller and falls out from the support of the top tray, especially when the gripper is at either end of the rack. There is a code on the side of each link in the energy chain.
A last thing to be weary of is is the end corners of the trays may require bending out, there have been occasions where one chain tray has been slightly more bent in than the other meaning when the chain moves from one tray to the next it clips the corner of the next tray
Étape 1 - Check Length of the Energy Chain
MH outfeed -177 Links approx
Saw infeed - 154 Links approx
Make sure when the gripper is pushed to the end (back) of the rack, the bend of the chain isn't either falling out of the trays or too tight and riding up against the guarding fence.
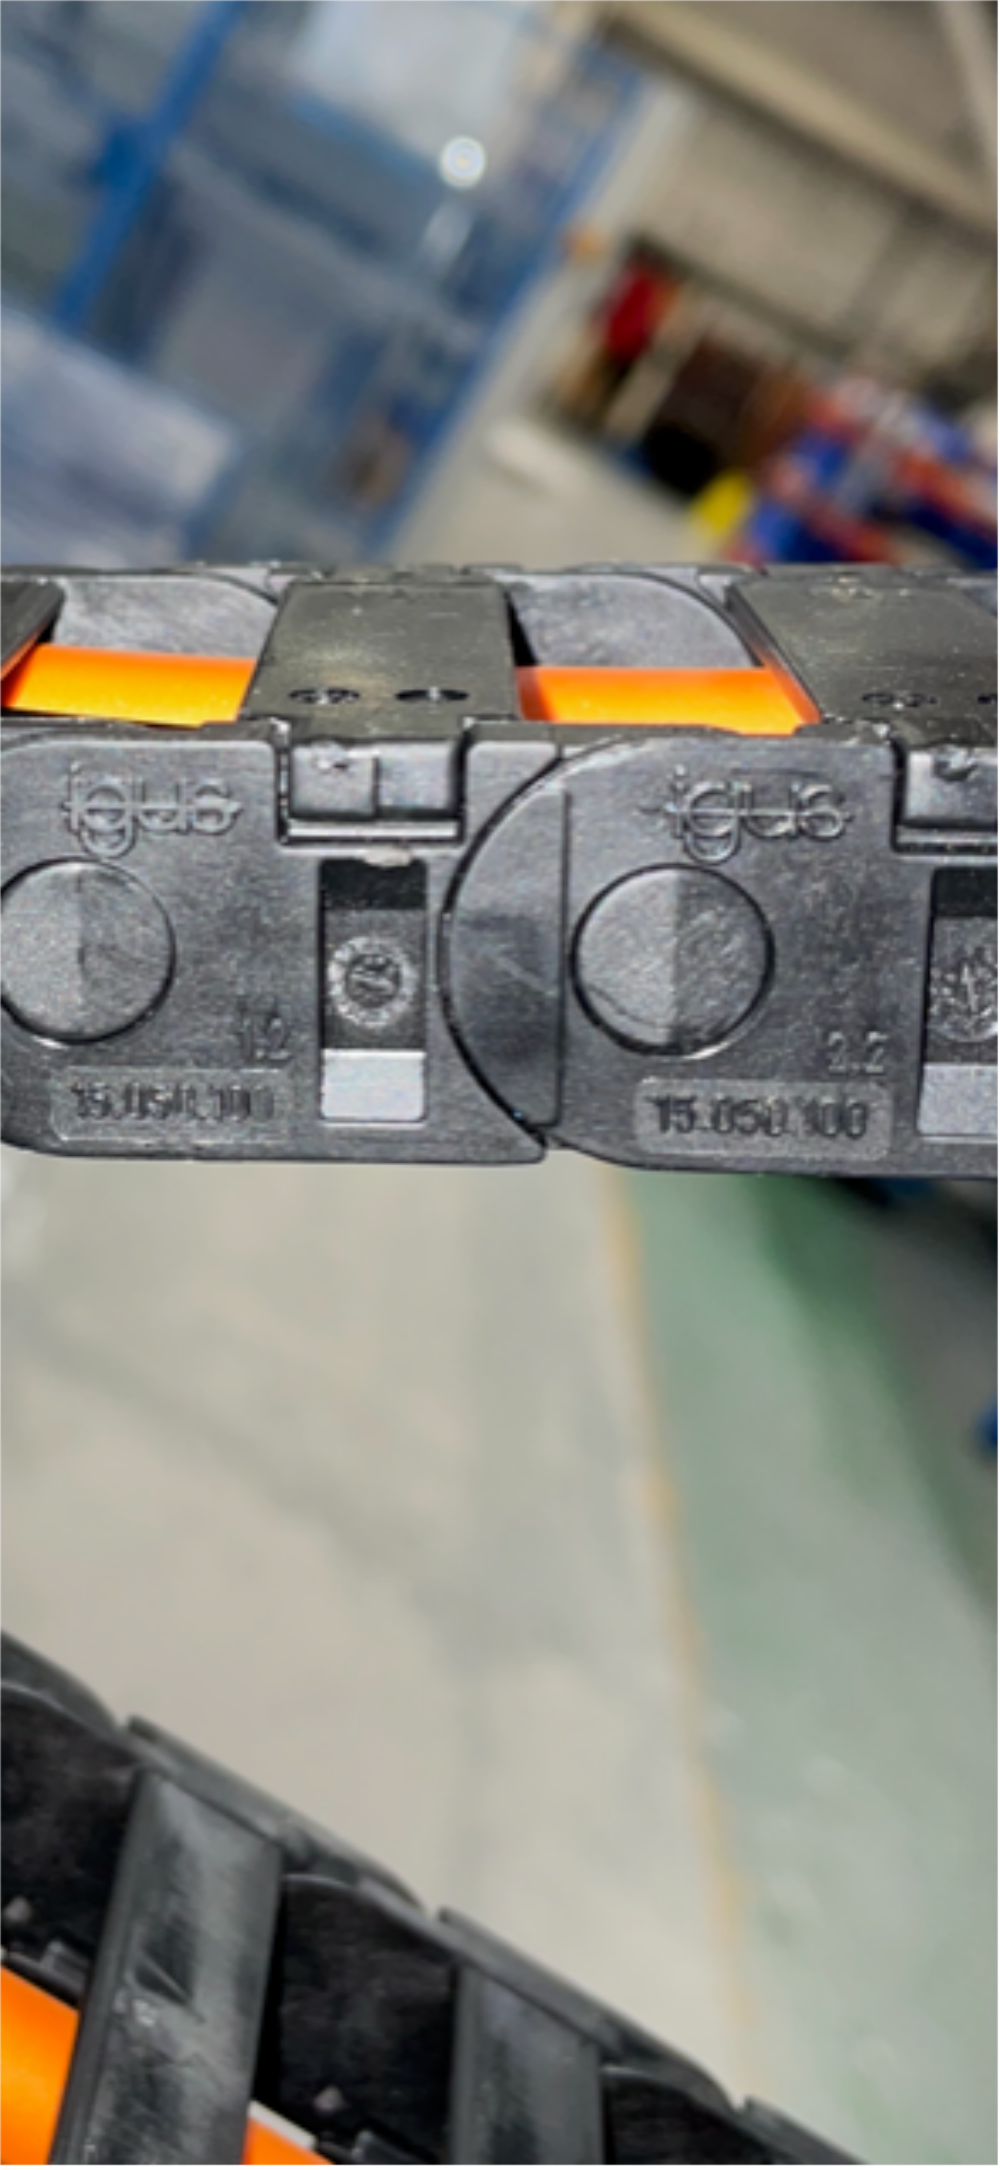
Étape 2 - Check Link type
Link type should be Igus code 15.050.0100 for the correct radius on the bend.
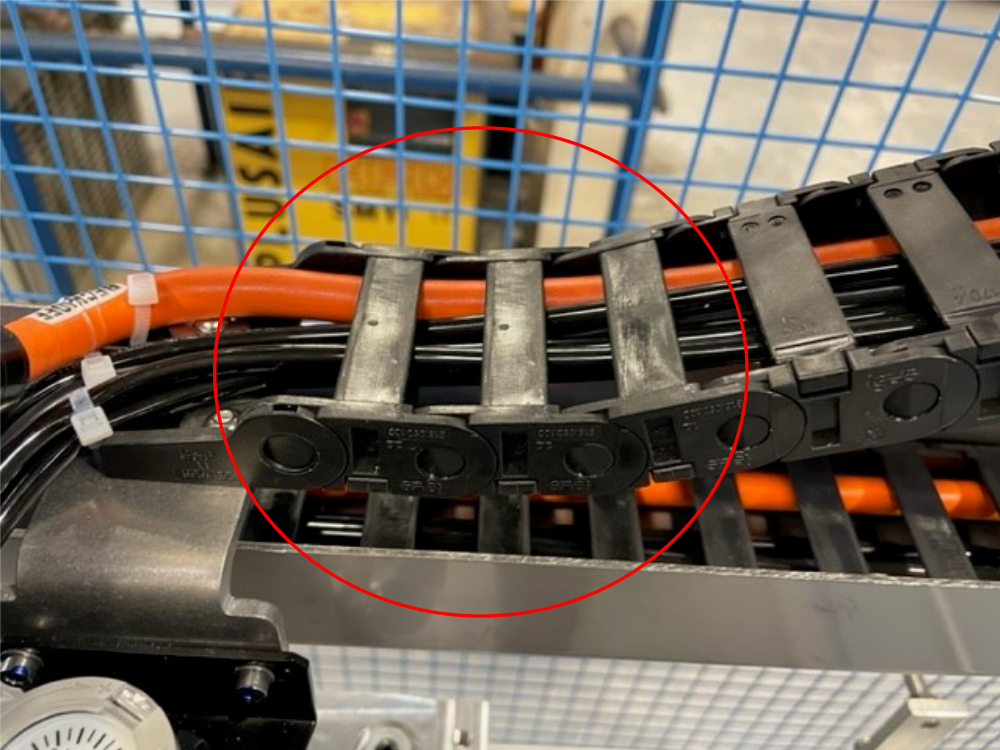
Étape 3 - 3 reversed links
There should be 3 reversed links at the motor end of the chain leading to the 'finger' bracket
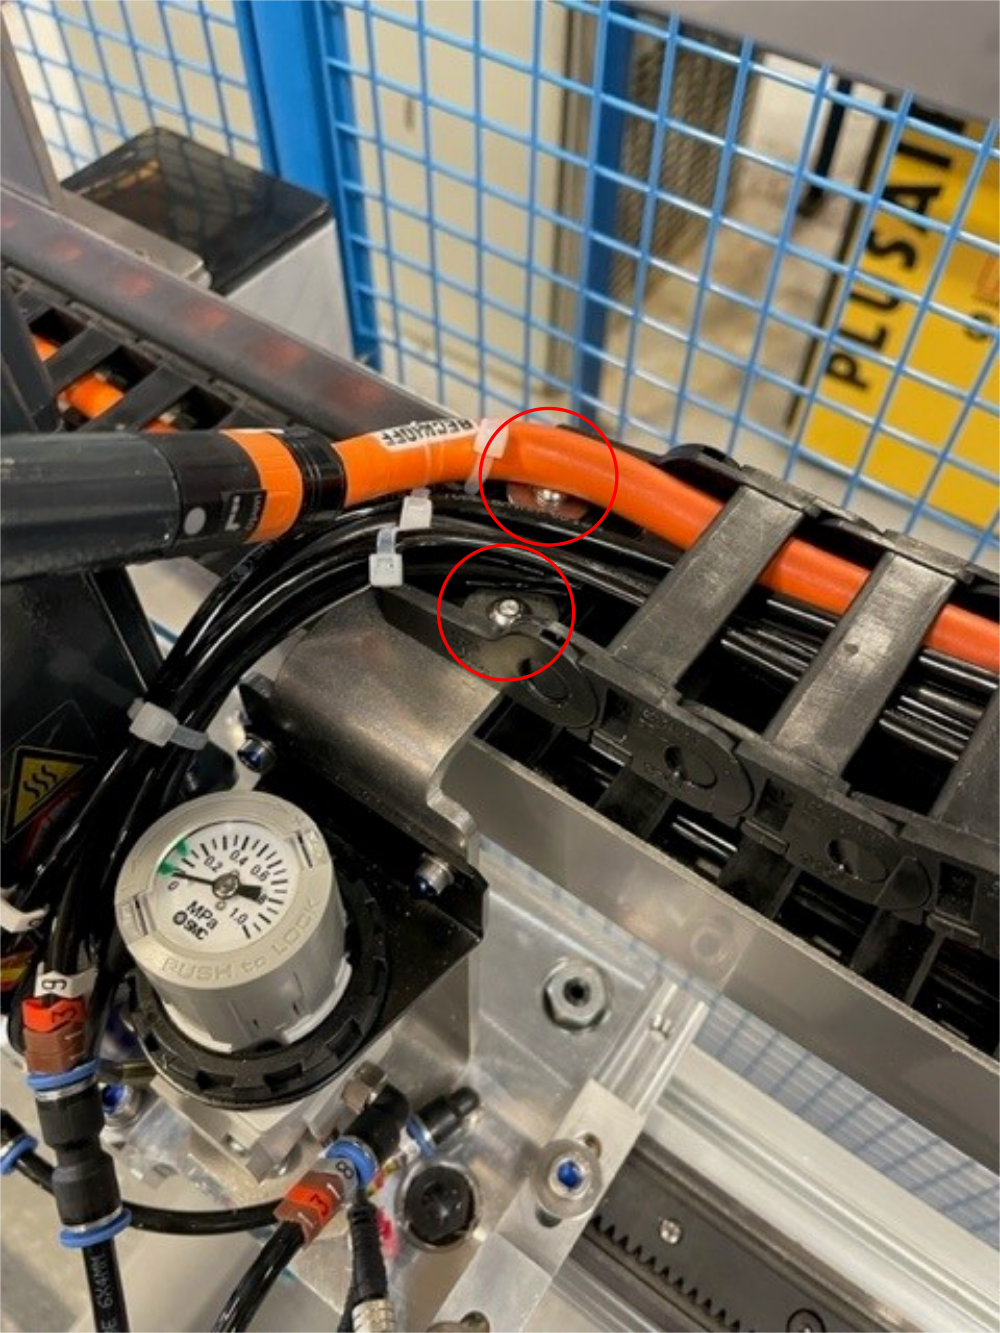
Étape 4 - Fixed cables and pipes on the 'finger' bracket
Make sure the cables and piped are fixed with cable ties to the fingers of the bracket to avoid movement or twisting inside the energy chain.

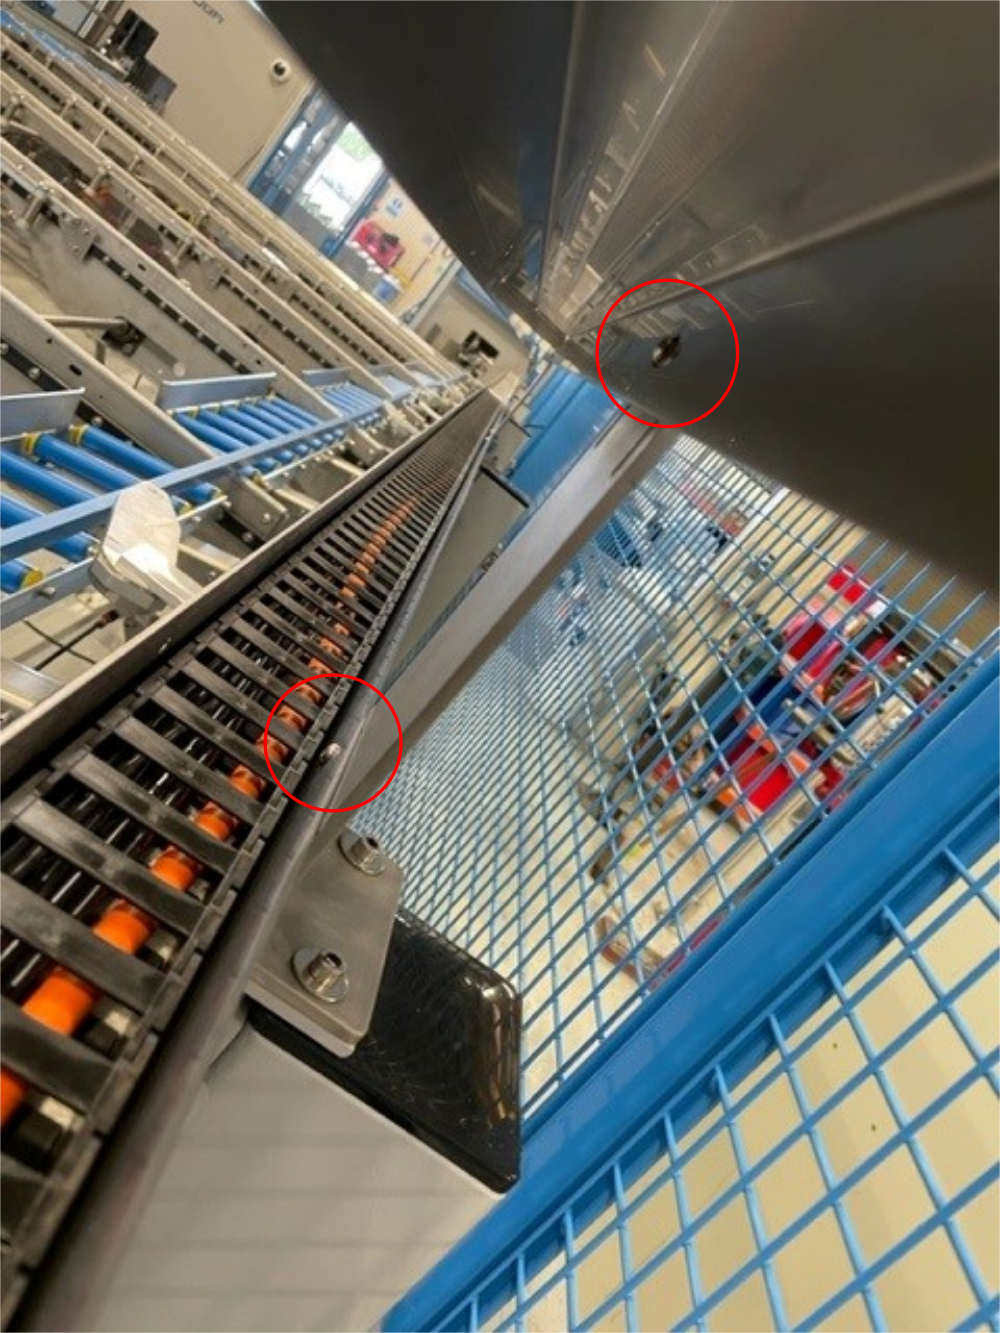
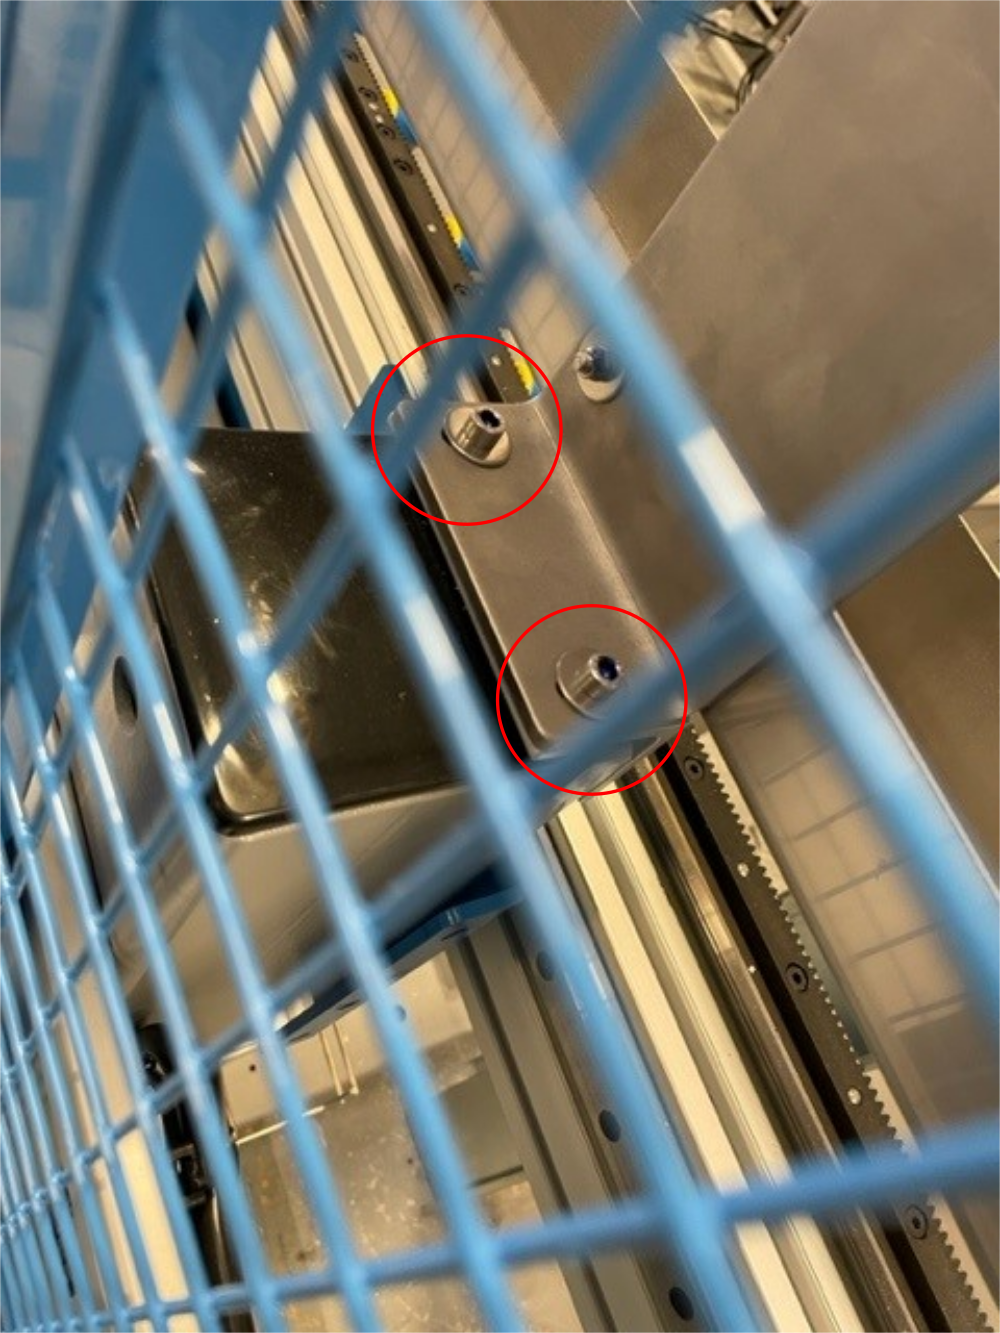
Étape 5 - Bracket position
The Bracket to which the finger energy chain bracket fixes to should not rub or catch on the trays during movement
Also the fold of the energy chain shouldn't ride along the side of the trays when moving towards the multi or saw end
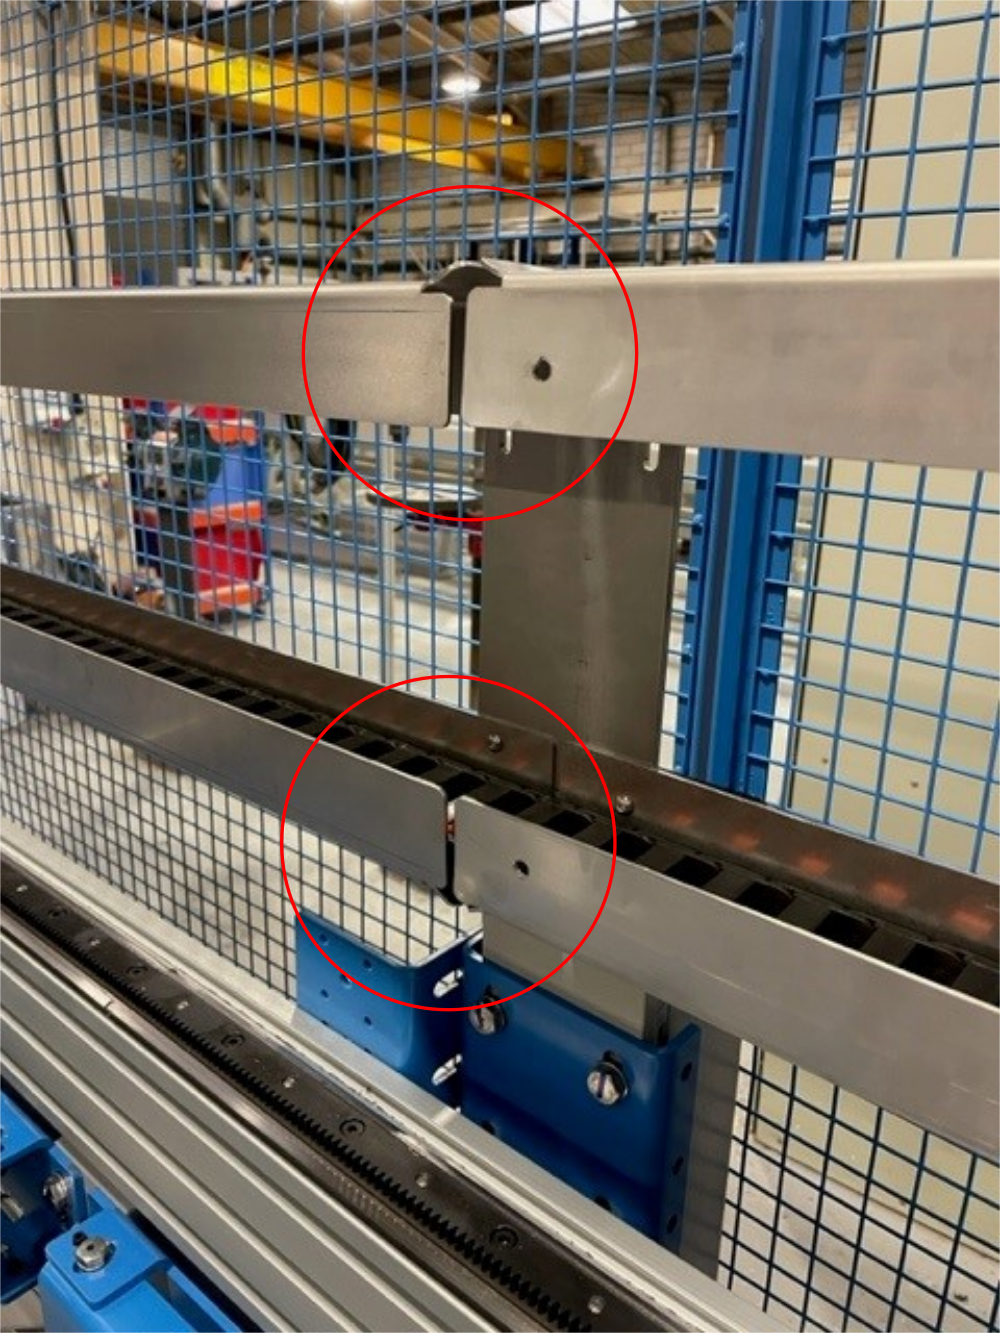
Étape 6 - Tray positioning
To avoid any contact with the button heads which fix the trays to the 'L' brackets adjust the brackets on the slots.
Tray heights are also important, make sure there is a consistent gap (consistent as possible) between the top of the bend and the top tray all the way along.
The end corners of the trays may require bending out slightly, there have been occasions where one chain tray has been slightly more bent in than the other meaning when the chain moves from one tray to the next it clips the corner of the next tray.

Étape 7 - Testing
Test this by moving the gripper up and down on a reversing cycle in twincat.
Start slow and work up to full speed
Published
 Français
 English
 Deutsch
 Español
 Italiano
 Português