| [version en cours de rédaction] | [version en cours de rédaction] |
| Ligne 2 : | Ligne 2 : | ||
|Main_Picture=WinMulti_-_Remakes_Label.jpg | |Main_Picture=WinMulti_-_Remakes_Label.jpg | ||
|Main_Picture_annotation={"version":"2.4.6","objects":[{"type":"image","version":"2.4.6","originX":"left","originY":"top","left":9,"top":114,"width":428,"height":166,"fill":"rgb(0,0,0)","stroke":null,"strokeWidth":0,"strokeDashArray":null,"strokeLineCap":"butt","strokeDashOffset":0,"strokeLineJoin":"miter","strokeMiterLimit":4,"scaleX":1.38,"scaleY":1.38,"angle":0,"flipX":false,"flipY":false,"opacity":1,"shadow":null,"visible":true,"clipTo":null,"backgroundColor":"","fillRule":"nonzero","paintFirst":"fill","globalCompositeOperation":"source-over","transformMatrix":null,"skewX":0,"skewY":0,"crossOrigin":"","cropX":0,"cropY":0,"src":"https://stuga.dokit.app/images/3/30/WinMulti_-_Remakes_Label.jpg","filters":[]}],"height":449.6894409937888,"width":600} | |Main_Picture_annotation={"version":"2.4.6","objects":[{"type":"image","version":"2.4.6","originX":"left","originY":"top","left":9,"top":114,"width":428,"height":166,"fill":"rgb(0,0,0)","stroke":null,"strokeWidth":0,"strokeDashArray":null,"strokeLineCap":"butt","strokeDashOffset":0,"strokeLineJoin":"miter","strokeMiterLimit":4,"scaleX":1.38,"scaleY":1.38,"angle":0,"flipX":false,"flipY":false,"opacity":1,"shadow":null,"visible":true,"clipTo":null,"backgroundColor":"","fillRule":"nonzero","paintFirst":"fill","globalCompositeOperation":"source-over","transformMatrix":null,"skewX":0,"skewY":0,"crossOrigin":"","cropX":0,"cropY":0,"src":"https://stuga.dokit.app/images/3/30/WinMulti_-_Remakes_Label.jpg","filters":[]}],"height":449.6894409937888,"width":600} | ||
| − | |Description=<translate>This will inform the operator how to remake pieces in winMulti | + | |Description=<translate>This will inform the operator how to remake pieces in winMulti. |
| + | |||
Setting up A password for Remakes on Winmulti Version MK6 software - Added 2022</translate> | Setting up A password for Remakes on Winmulti Version MK6 software - Added 2022</translate> | ||
|Categories=Operation, Software | |Categories=Operation, Software | ||
Version actuelle datée du 18 février 2022 à 17:45
This will inform the operator how to remake pieces in winMulti. Setting up A password for Remakes on Winmulti Version MK6 software - Added 2022

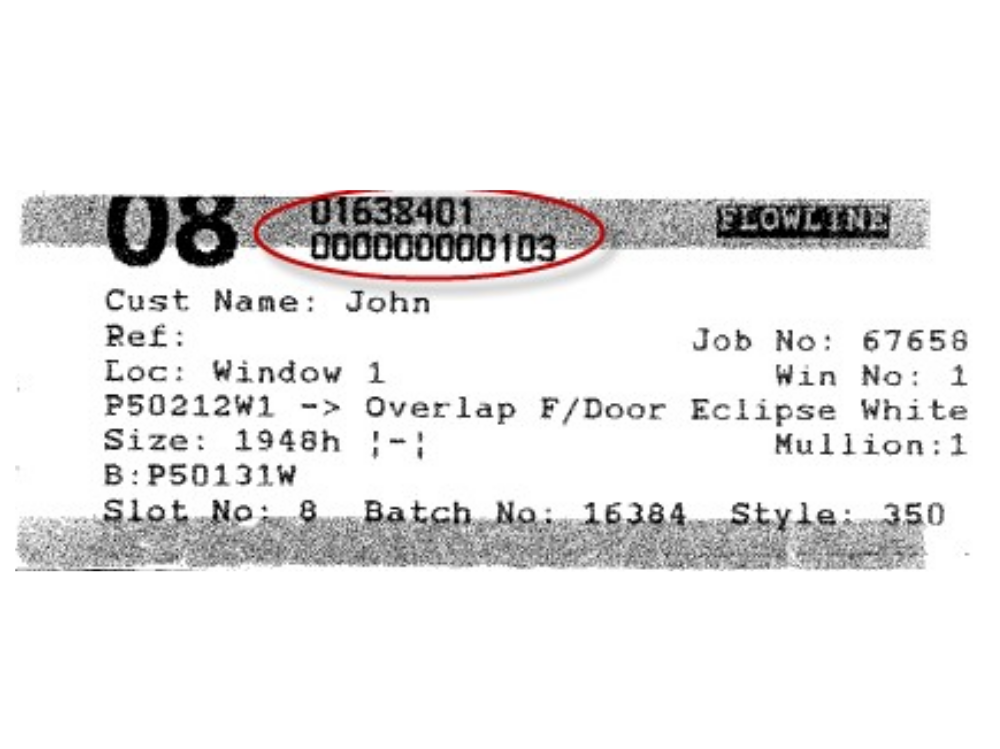
This area of the program is concerned with re prepping and cutting pieces from the numbers on the label

The first number circled is the batch number, and the second is the piece number within that batch. The labels produced on your machine may be slightly different depending on setup.
Once you have these numbers, select the batch and piece number on the remakes screen shown below.

Both the Batch and field numbers can be filtered down to make the lists shorter. Once the correct piece is found, select it and tap on the Add button to add it to the list of pieces to be remade, on the right. Pieces from many different batches can be included. Once all the pieces requiring remanufacture are entered, click the Batch button in the lower right hand corner.
The system will then require you to enter your initials and a reason for the remake (below).


This data is stored and can be queried to identify where issues are in the production process, so they can be addressed. Once this data has been entered, the remake will be added to the bar queue as with a new Rmk batch number as shown below.

The required piece or pieces can then be loaded, prepped and cut just as any other batch, the labels from the original batch will be re printed, plus a remake label to identify that this piece has been remade.
Setting up a Password for Remakes
On Winmulti Version MK6 software from version number 6.3.61.0 in September 2018 you can set a Password for Remakes.
Find in c:\ddrive\params.saw
"remakesPassword=none"
Change the none to the password required and save the file.
can also be changed via Front end using F5 - Settings then all.
To Return to the main menu, please click WinMulti Software Operating Guide
Published
 Français
 English
 Deutsch
 Español
 Italiano
 Português