This document outlines the setup of the new ZD620 printers to replace the older Zebra 420d printers that are obsolete.

Difficulté
Facile
Durée
10 minute(s)
- Pièces et outils
Pièces et outils
C0001209 Zebra ZD620D Printer 

Label printer for Stuga Machines from 2019 onwards. Replaces 420Q
C0001216 Peel Off Module for ZD620 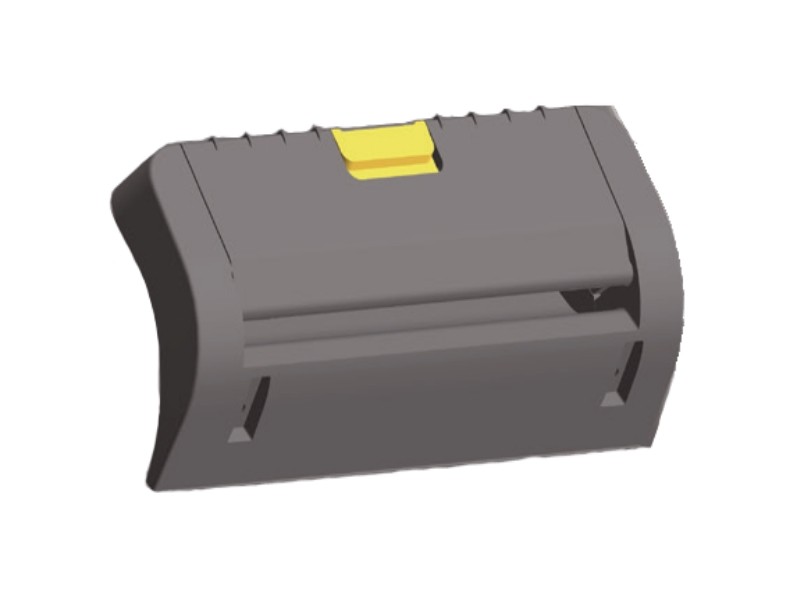

Additional item for ZD620 printer to allow peel off function. Called Label Dispenser officially.
Étape 1 - Auto Power - Power Recovery Mode
One difference between the GX420d and the ZD620d is the lack of a dedicated power switch. The newer ZD620d opts for a power button that must be pressed in order to turn on the printer after power is supplied. As our machines are fully un-powered after a machine is closed down it causes the operator to intervene and manually turn on the printer after power up.
Ideally the Zebra ZD620d has an Power Recovery Mode that acts as a permanent switch in case of power failure. We can use this on the machines to allow the printer to turn on upon power up.
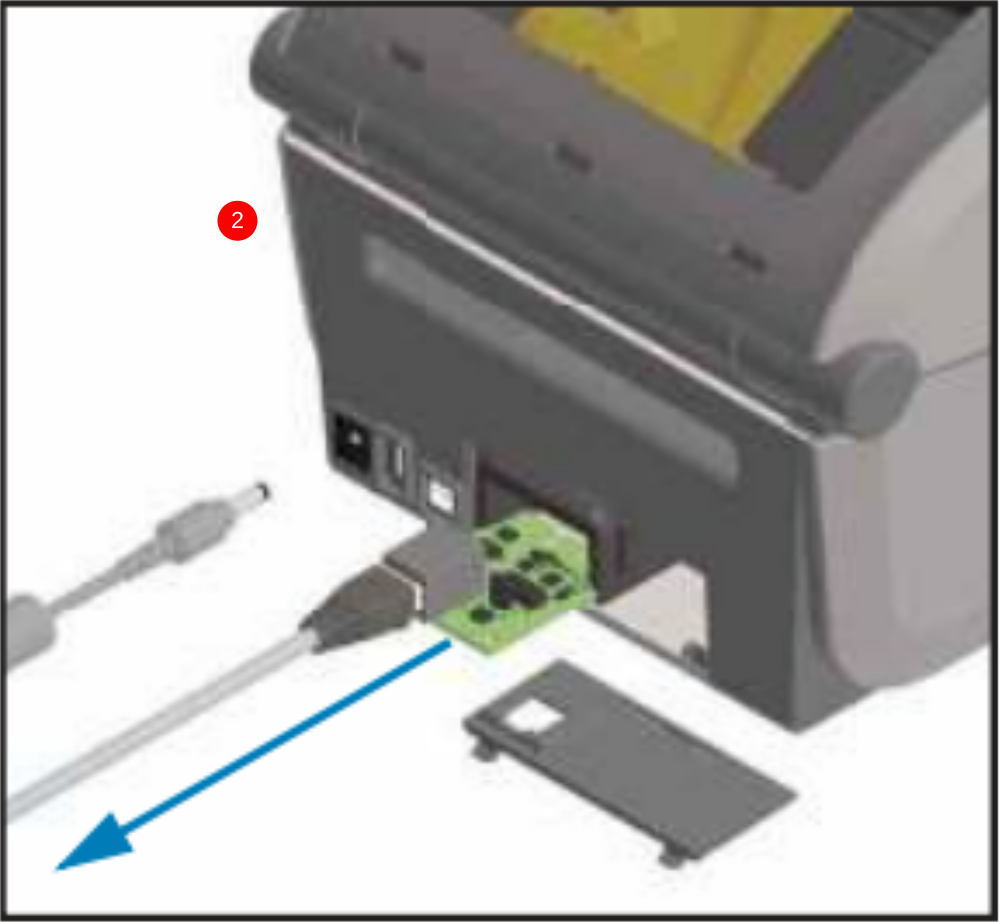
1. Disconnect from power.
2. Remove module door and use Ethernet cable to remove (plug in and pull).
3. Move the switch that is annotated AUTO to the ON position.
4. Reinstall the module.
5. Reconnect power, this should now turn on.

Étape 2 - Power On
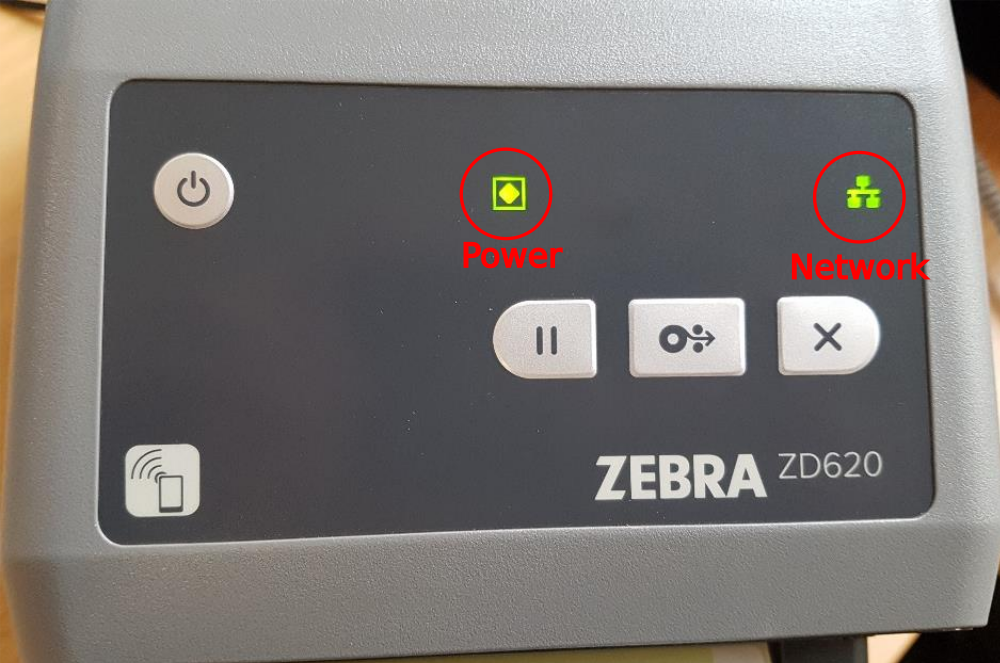
Plug in power and Ethernet cable connected to network to the printer. As the printer boots up there will be a red light displayed on the front. After around 30 seconds this will turn green as the printer completes boot up.
Étape 3 - Installing the Peel-Off Module
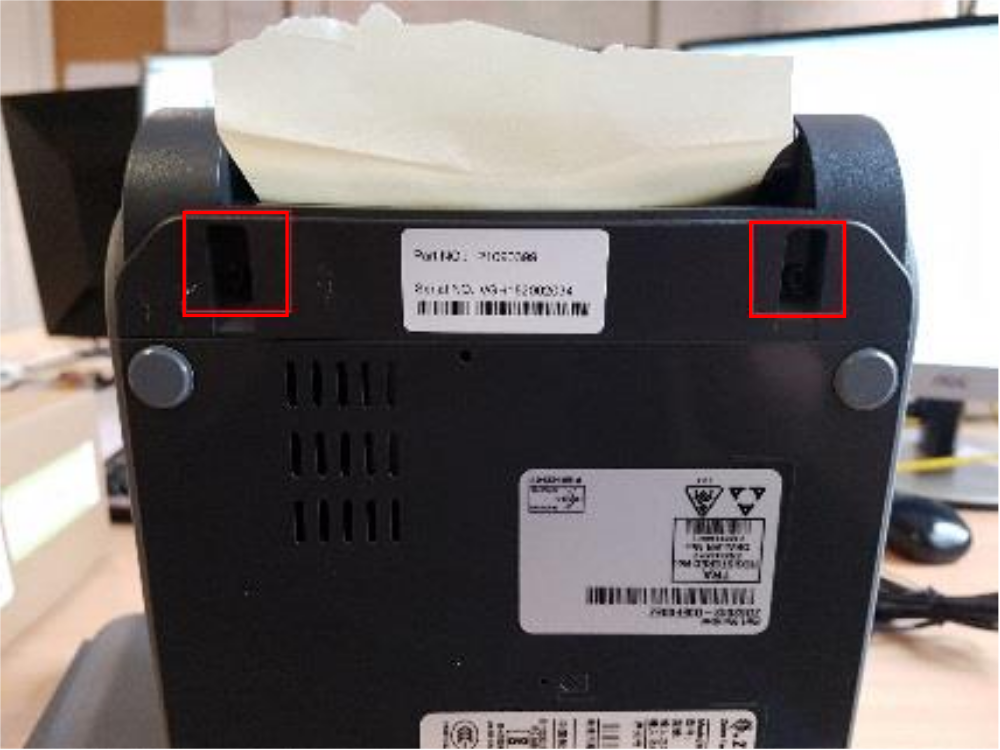
Underneath the printer will be two screws that hold the front label dispenser in place. Undo these using the tool provided in the peel off module box. When these are undone, slide the dispenser downwards to release. When this is off, slide the peel off module onto the printer. Reattach the screws and tighten
Étape 4 - How to Load labels
Using the latches on the sides, open the printer and place in a label reel as shown. Open the peel off module using the yellow latch on the front. Thread the labels through the module and tuck labels under latches by the wheel. Check labels are parallel to the printer, close and shut peel off module.

Étape 5 - How to Print a configuration label
Hold down the dispenser and cancel buttons (1 and 2) for two seconds. This will printout labels with various parameters on them, look for the label with IP Address as shown.


Draft
 Français
 English
 Deutsch
 Español
 Italiano
 Português