| [version en cours de rédaction] | [version en cours de rédaction] |
| Ligne 74 : | Ligne 74 : | ||
<br />{{Info|If you type the IP address into the browser and get the Bing search engine place http:// before the IP address.}}<br /></translate> | <br />{{Info|If you type the IP address into the browser and get the Bing search engine place http:// before the IP address.}}<br /></translate> | ||
| + | |Step_Picture_00=TB0452_ZD620_Zebra_Printer_Setup_printer11.PNG | ||
| + | |Step_Picture_00_annotation={"version":"2.4.6","objects":[{"type":"image","version":"2.4.6","originX":"left","originY":"top","left":0,"top":0,"width":859,"height":62,"fill":"rgb(0,0,0)","stroke":null,"strokeWidth":0,"strokeDashArray":null,"strokeLineCap":"butt","strokeDashOffset":0,"strokeLineJoin":"miter","strokeMiterLimit":4,"scaleX":0.7,"scaleY":0.7,"angle":0,"flipX":false,"flipY":false,"opacity":1,"shadow":null,"visible":true,"clipTo":null,"backgroundColor":"","fillRule":"nonzero","paintFirst":"fill","globalCompositeOperation":"source-over","transformMatrix":null,"skewX":0,"skewY":0,"crossOrigin":"","cropX":0,"cropY":0,"src":"https://stuga.dokit.app/images/5/5d/TB0452_ZD620_Zebra_Printer_Setup_printer11.PNG","filters":[]}],"height":43,"width":600} | ||
| + | |Step_Picture_01=TB0452_ZD620_Zebra_Printer_Setup_printer5.png | ||
| + | |Step_Picture_01_annotation={"version":"2.4.6","objects":[{"type":"image","version":"2.4.6","originX":"left","originY":"top","left":0,"top":0,"width":1365,"height":651,"fill":"rgb(0,0,0)","stroke":null,"strokeWidth":0,"strokeDashArray":null,"strokeLineCap":"butt","strokeDashOffset":0,"strokeLineJoin":"miter","strokeMiterLimit":4,"scaleX":0.44,"scaleY":0.44,"angle":0,"flipX":false,"flipY":false,"opacity":1,"shadow":null,"visible":true,"clipTo":null,"backgroundColor":"","fillRule":"nonzero","paintFirst":"fill","globalCompositeOperation":"source-over","transformMatrix":null,"skewX":0,"skewY":0,"crossOrigin":"","cropX":0,"cropY":0,"src":"https://stuga.dokit.app/images/2/24/TB0452_ZD620_Zebra_Printer_Setup_printer5.png","filters":[]}],"height":286,"width":600} | ||
}} | }} | ||
{{Tuto Step | {{Tuto Step | ||
| Ligne 83 : | Ligne 87 : | ||
#Put the parameter '''Print Mode''' to '''Peel Off''' | #Put the parameter '''Print Mode''' to '''Peel Off''' | ||
#'''Submit Changes'''</translate> | #'''Submit Changes'''</translate> | ||
| + | |Step_Picture_00=TB0452_ZD620_Zebra_Printer_Setup_printer6.png | ||
| + | |Step_Picture_01=TB0452_ZD620_Zebra_Printer_Setup_printer7.png | ||
}} | }} | ||
{{Tuto Step | {{Tuto Step | ||
| Ligne 90 : | Ligne 96 : | ||
# Change the parameter '''Head Close''' to '''Feed.''' | # Change the parameter '''Head Close''' to '''Feed.''' | ||
# '''Submit Changes.'''</translate> | # '''Submit Changes.'''</translate> | ||
| + | |Step_Picture_00=TB0452_ZD620_Zebra_Printer_Setup_Printer8.png | ||
}} | }} | ||
{{Tuto Step | {{Tuto Step | ||
| Ligne 96 : | Ligne 103 : | ||
# Change the parameter '''Print Width''' to '''800.''' | # Change the parameter '''Print Width''' to '''800.''' | ||
# '''Submit Changes.'''</translate> | # '''Submit Changes.'''</translate> | ||
| + | |Step_Picture_00=TB0452_ZD620_Zebra_Printer_Setup_Printer9.png | ||
}} | }} | ||
{{Tuto Step | {{Tuto Step | ||
| Ligne 106 : | Ligne 114 : | ||
# Change '''IP Protocol''' to '''Permanent.''' | # Change '''IP Protocol''' to '''Permanent.''' | ||
# '''Submit Changes.'''</translate> | # '''Submit Changes.'''</translate> | ||
| + | |Step_Picture_00=TB0452_ZD620_Zebra_Printer_Setup_Printer10.png | ||
}} | }} | ||
{{Tuto Step | {{Tuto Step | ||
| Ligne 112 : | Ligne 121 : | ||
# When done with setup click '''Save Current Configuration.''' | # When done with setup click '''Save Current Configuration.''' | ||
# Then click '''Reset Network.''' The IP address is now fully transferred to the one input on step 10. If already on site test this by putting the new IP address into the browser search bar.</translate> | # Then click '''Reset Network.''' The IP address is now fully transferred to the one input on step 10. If already on site test this by putting the new IP address into the browser search bar.</translate> | ||
| + | |Step_Picture_00=TB0452_ZD620_Zebra_Printer_Setup_printer6.png | ||
}} | }} | ||
{{Notes}} | {{Notes}} | ||
Version du 24 septembre 2019 à 17:08
This document outlines the setup of the new ZD620 printers to replace the older Zebra 420d printers that are obsolete.

Difficulté
Facile
Durée
10 minute(s)
Sommaire
- 1 Pièces et outils
- 2 Étape 1 - Auto Power - Power Recovery Mode
- 3 Étape 2 - Power On
- 4 Étape 3 - Installing the Peel-Off Module
- 5 Étape 4 - Load labels
- 6 Étape 5 - Print a configuration label
- 7 Étape 6 - Type IP Address in Browser
- 8 Étape 7 - General Setup
- 9 Étape 8 - Calibration
- 10 Étape 9 - Media Setup
- 11 Étape 10 - Network Settings
- 12 Étape 11 - Submit + Reset
- 13 Commentaires
- Pièces et outils
Pièces et outils
C0001209 Zebra ZD620D Printer 

Label printer for Stuga Machines from 2019 onwards. Replaces 420Q
C0001216 Peel Off Module for ZD620 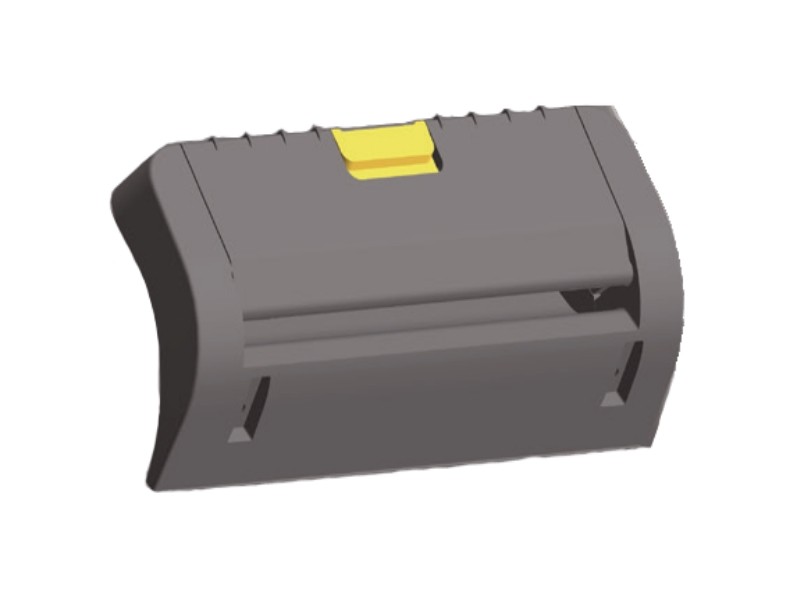

Additional item for ZD620 printer to allow peel off function. Called Label Dispenser officially.
Étape 1 - Auto Power - Power Recovery Mode
One difference between the GX420d and the ZD620d is the lack of a dedicated power switch. The newer ZD620d opts for a power button that must be pressed in order to turn on the printer after power is supplied. As our machines are fully un-powered after a machine is closed down it causes the operator to intervene and manually turn on the printer after power up.
Ideally the Zebra ZD620d has an Power Recovery Mode that acts as a permanent switch in case of power failure. We can use this on the machines to allow the printer to turn on upon power up.
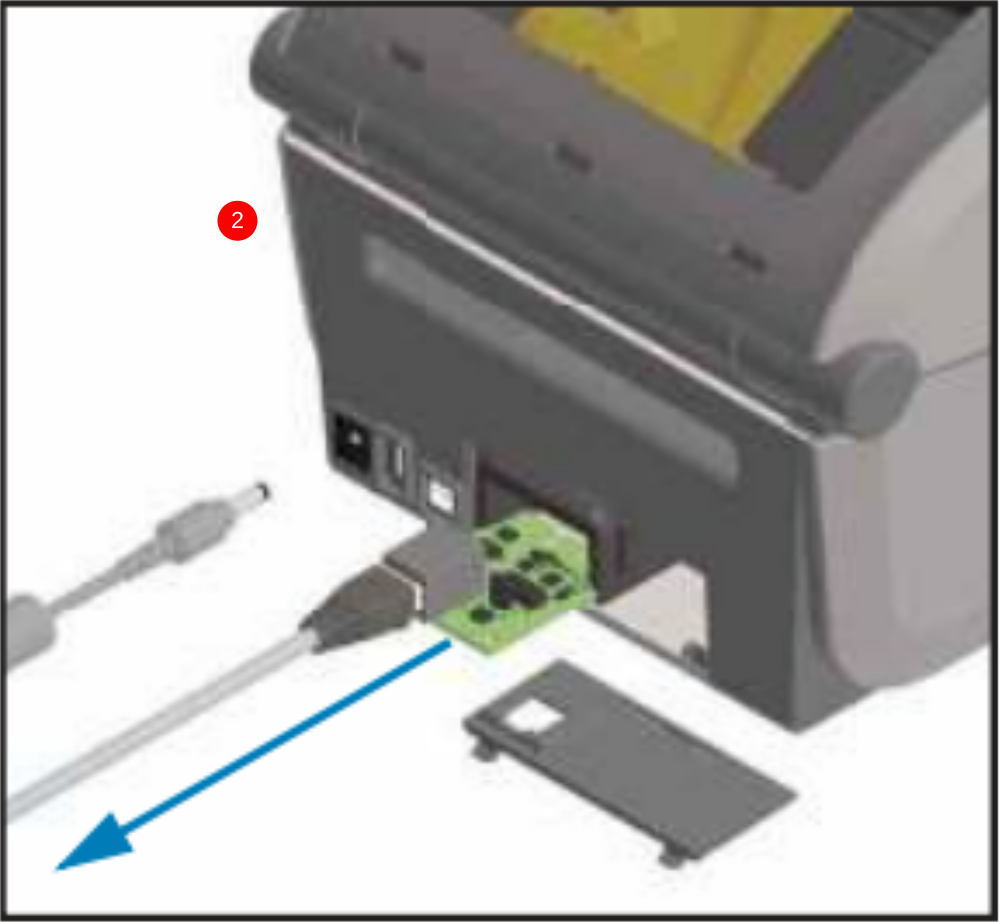
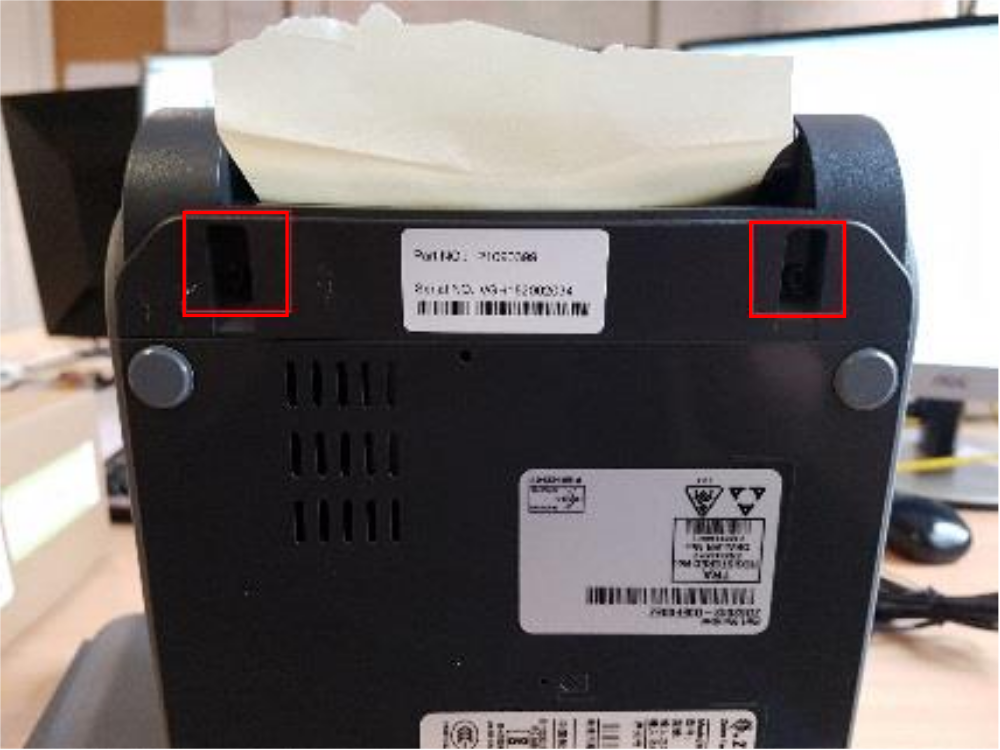
1. Disconnect from power.
2. Remove module door and use Ethernet cable to remove (plug in and pull).
3. Move the switch that is annotated AUTO to the ON position.
4. Reinstall the module.
5. Reconnect power, this should now turn on.

Étape 2 - Power On
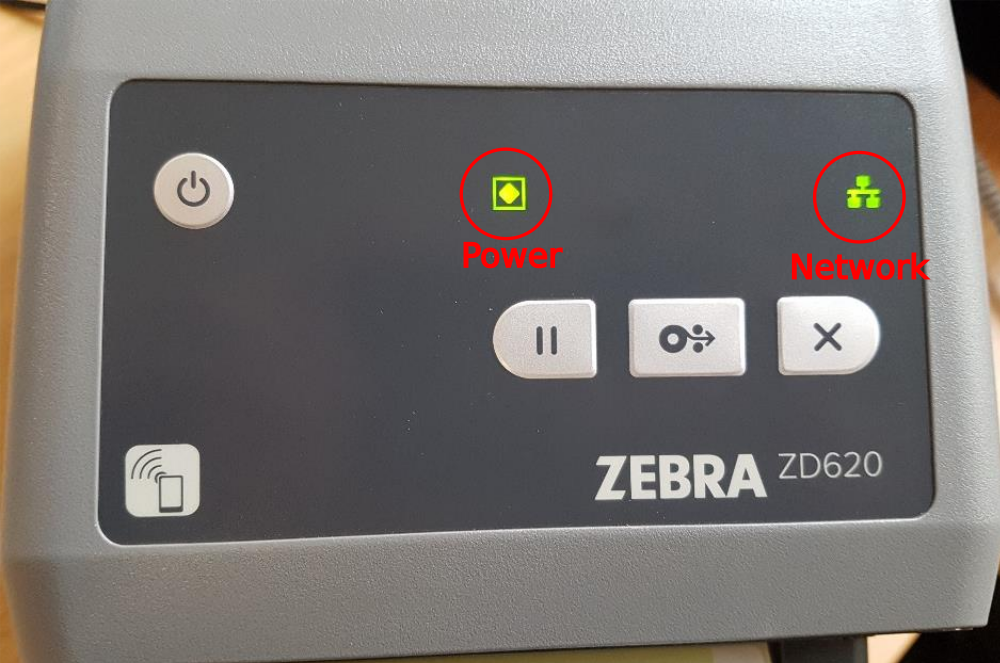
Plug in power and Ethernet cable connected to network to the printer. As the printer boots up there will be a red light displayed on the front. After around 30 seconds this will turn green as the printer completes boot up.
Étape 3 - Installing the Peel-Off Module
Underneath the printer will be two screws that hold the front label dispenser in place. Undo these using the tool provided in the peel off module box. When these are undone, slide the dispenser downwards to release. When this is off, slide the peel off module onto the printer. Reattach the screws and tighten
Étape 4 - Load labels
Using the latches on the sides, open the printer and place in a label reel as shown. Open the peel off module using the yellow latch on the front. Thread the labels through the module and tuck labels under latches by the wheel. Check labels are parallel to the printer, close and shut peel off module.

Étape 5 - Print a configuration label
Hold down the dispenser and cancel buttons (1 and 2) for two seconds. This will printout labels with various parameters on them, look for the label with IP Address as shown.


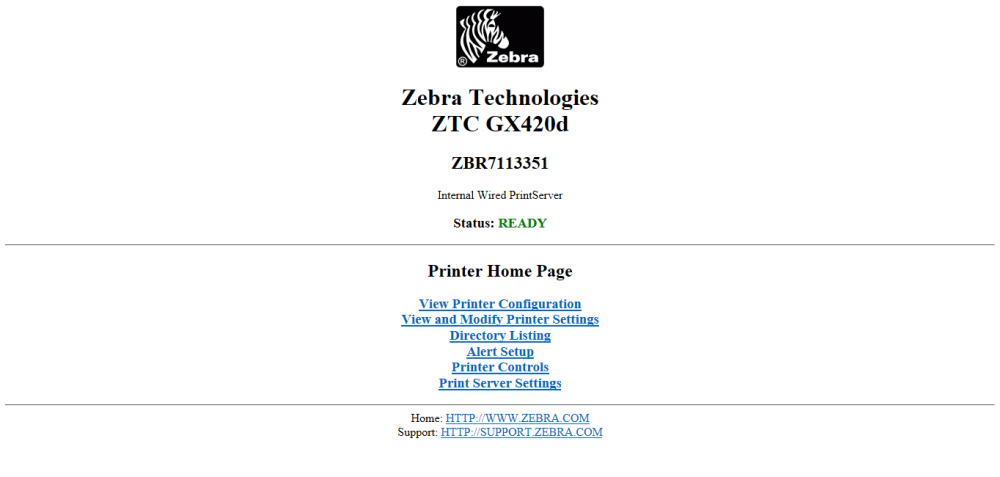
Étape 6 - Type IP Address in Browser
Open the most available browser on the network and type the IP address gathered in the search bar. This should open the Zebra Web Home Page.

Étape 7 - General Setup
- From the home page press on View and Modify Printer Settings.
- You maybe prompted for a password type: 1234
- Go to General Setup
- Put the parameter Darkness to 30
- Put the parameter Print Mode to Peel Off
- Submit Changes


Étape 8 - Calibration
- Go to Calibration
- Change the parameter Power up to Calibration.
- Change the parameter Head Close to Feed.
- Submit Changes.

Étape 9 - Media Setup
- Go to Media Setup
- Change the parameter Print Width to 800.
- Submit Changes.

Étape 10 - Network Settings
This should always be done last as changing the IP address to outside of the local range will make the printer settings inaccessible.
- Go to Network Settings.
- Then TCP/IP Settings.
- Input the desired IP Address of the printer.
- Change IP Protocol to Permanent.
- Submit Changes.

Étape 11 - Submit + Reset
- Go to View and Modify Computer Settings.
- When done with setup click Save Current Configuration.
- Then click Reset Network. The IP address is now fully transferred to the one input on step 10. If already on site test this by putting the new IP address into the browser search bar.
Draft
 Français
 English
 Deutsch
 Español
 Italiano
 Português