| [version en cours de rédaction] | [version en cours de rédaction] |
| Ligne 13 : | Ligne 13 : | ||
|Step_Title=<translate>Lift uprights into position</translate> | |Step_Title=<translate>Lift uprights into position</translate> | ||
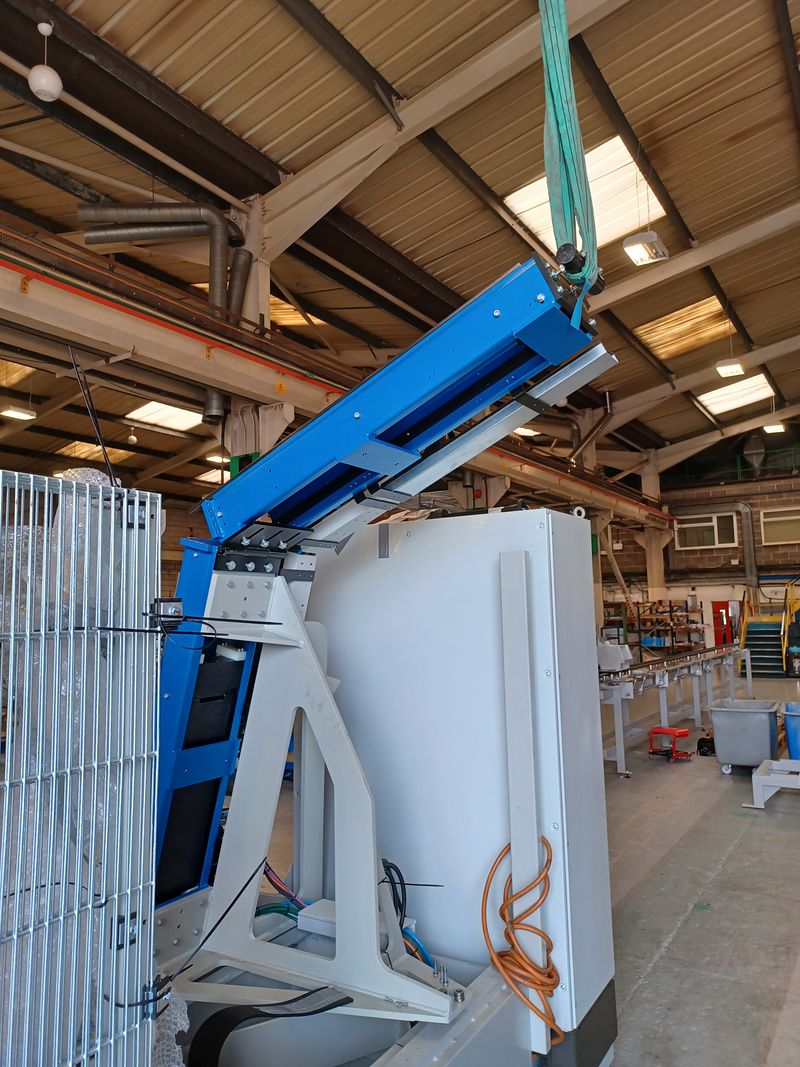
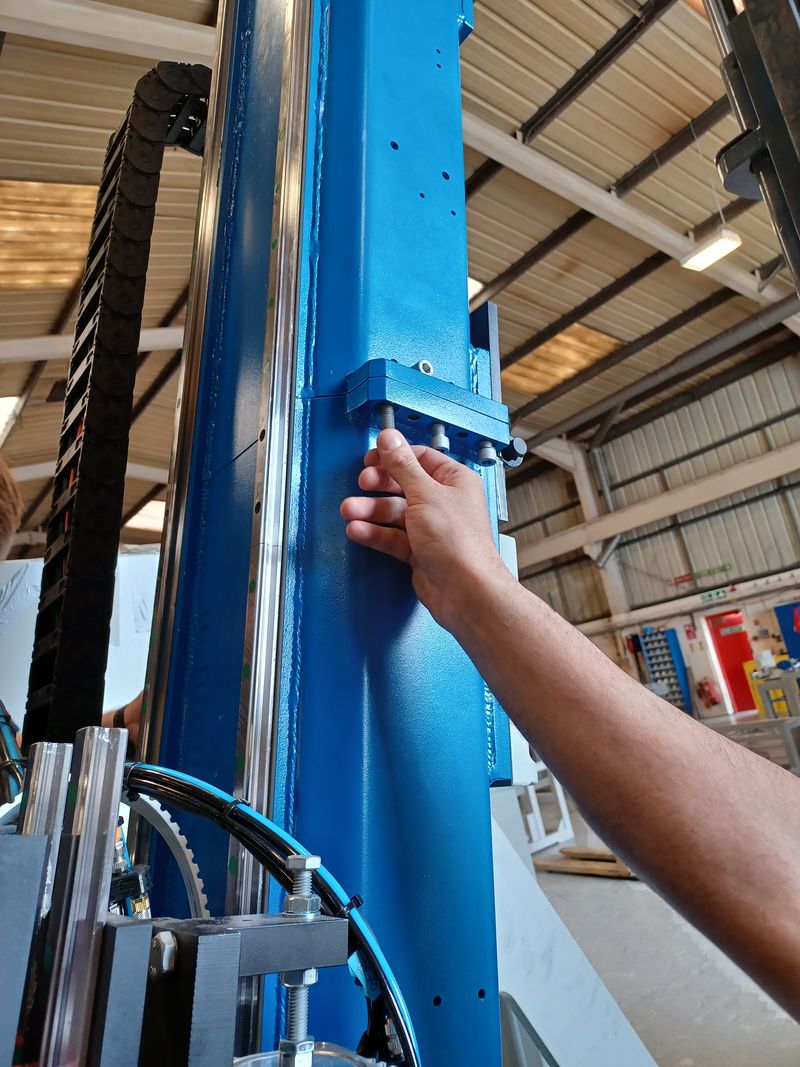
|Step_Content=<translate>Lift uprights into positions and fix with 3 x bolts each side on each upright. Fit 2 x cap heads on each rail each side</translate> | |Step_Content=<translate>Lift uprights into positions and fix with 3 x bolts each side on each upright. Fit 2 x cap heads on each rail each side</translate> | ||
| + | |Step_Picture_00=Sturtz_Welder_Installation_16526966003281360186334525355507.jpg | ||
| + | |Step_Picture_01=Sturtz_Welder_Installation_16526967047069070529421084468718.jpg | ||
}} | }} | ||
{{Tuto Step | {{Tuto Step | ||
|Step_Title=<translate>Run in belts and chain</translate> | |Step_Title=<translate>Run in belts and chain</translate> | ||
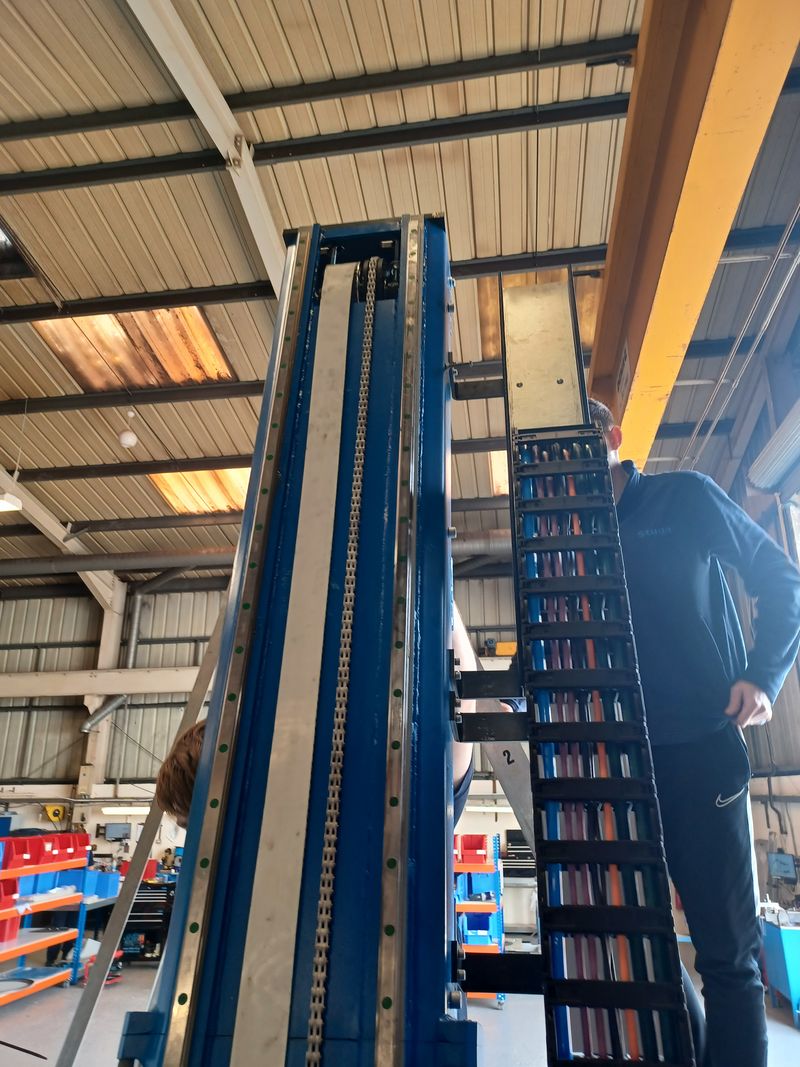
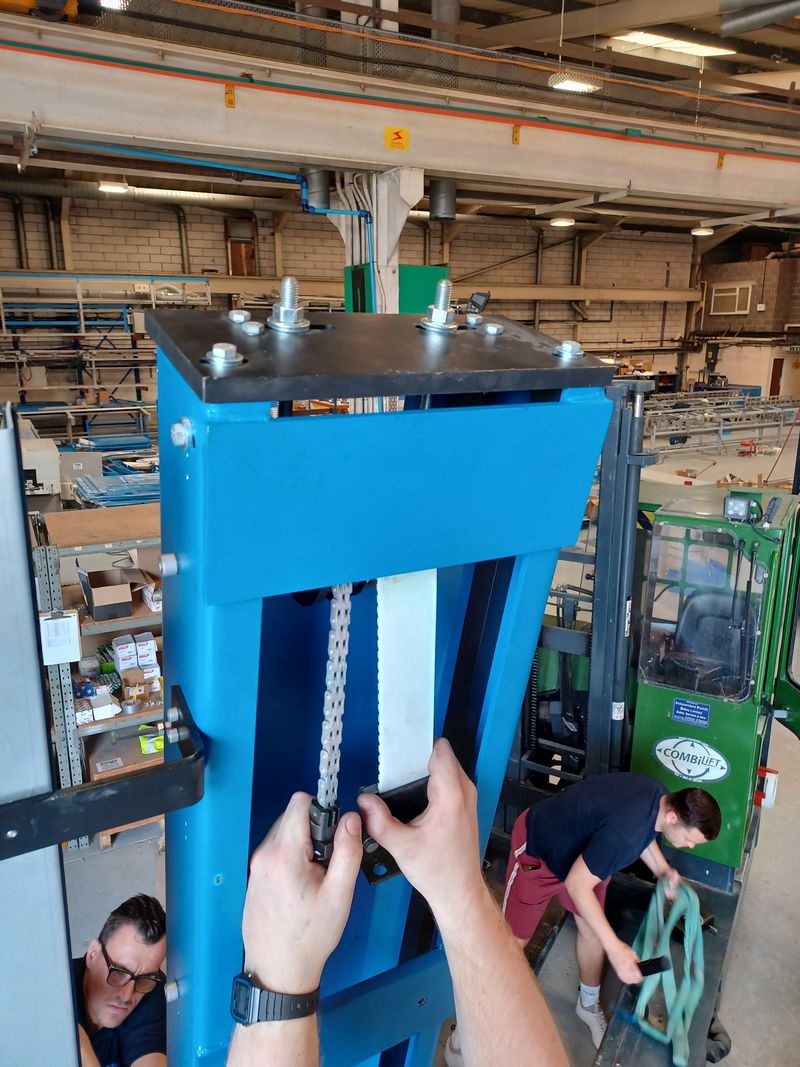
| − | |Step_Content=<translate>Run belts and chains through onto pulleys, | + | |Step_Content=<translate>Run belts and chains through onto pulleys, tensioner may need to be slackened off to fit the brackets through. |
| − | Fix chain bracket first. then belt bracket. | + | Lift the top head to be able to lower the chain and belt brackets at the rear of the uprights. |
| + | |||
| + | Fix brackets to upright. | ||
| + | |||
| + | Always fix chain bracket first. then belt bracket. | ||
{{Idea|Always use fully threaded bolts without a shoulder}}<br /></translate> | {{Idea|Always use fully threaded bolts without a shoulder}}<br /></translate> | ||
| + | |Step_Picture_00=Sturtz_Welder_Installation_20220516_115202.jpg | ||
| + | |Step_Picture_01=Sturtz_Welder_Installation_20220516_115144.jpg | ||
}} | }} | ||
{{Tuto Step | {{Tuto Step | ||
Version du 16 mai 2022 à 16:52
Step by step guide for installing Sturtz Welder
Sommaire
- 1 Étape 1 - Lift uprights into position
- 2 Étape 2 - Run in belts and chain
- 3 Étape 3 - Tension chain and belts
- 4 Étape 4 - Fit light curtain arms
- 5 Étape 5 - Fit guarding
- 6 Étape 6 - Connect console
- 7 Étape 7 - Connect power and air
- 8 Étape 8 - Align safety light curtain
- 9 Étape 9 - Lift bottom heads and remove stop bolts
- 10 Commentaires
Étape 1 - Lift uprights into position
Lift uprights into positions and fix with 3 x bolts each side on each upright. Fit 2 x cap heads on each rail each side
Étape 2 - Run in belts and chain
Run belts and chains through onto pulleys, tensioner may need to be slackened off to fit the brackets through.
Lift the top head to be able to lower the chain and belt brackets at the rear of the uprights.
Fix brackets to upright.
Always fix chain bracket first. then belt bracket.
Étape 3 - Tension chain and belts
Tension using the threaded bars nuts at the top of the uprights. Ensure pulley are level.
Étape 4 - Fit light curtain arms
Fix in place with 2 x cap head bolts. Cabinet side connect cable to light curtain and clip to arm.
Étape 5 - Fit guarding
Étape 6 - Connect console
Connect console and network cable.
Also fit keyboard tray.
Étape 7 - Connect power and air
Étape 8 - Align safety light curtain
Étape 9 - Lift bottom heads and remove stop bolts
Using the referencing process, once clear remove the bolts from behind the heads.
Draft


 Français
 English
 Deutsch
 Español
 Italiano
 Português