Setting up the Hikvision cameras and recording system
Sommaire
- 1 Introduction
- 2 Pièces et outils
- 3 Étape 1 - Open SADPTool
- 4 Étape 2 - Activate Camera
- 5 Étape 3 - Security Questions
- 6 Étape 4 - Open in Internet Explorer + Download Plugin
- 7 Étape 5 - Web Browser User Interface
- 8 Étape 6 - Setup SD Card Storage
- 9 Étape 7 - Schedule Settings
- 10 Étape 8 - Events
- 11 Étape 9 - Flipping the Image
- 12 Étape 10 -
- 13 Commentaires
Introduction
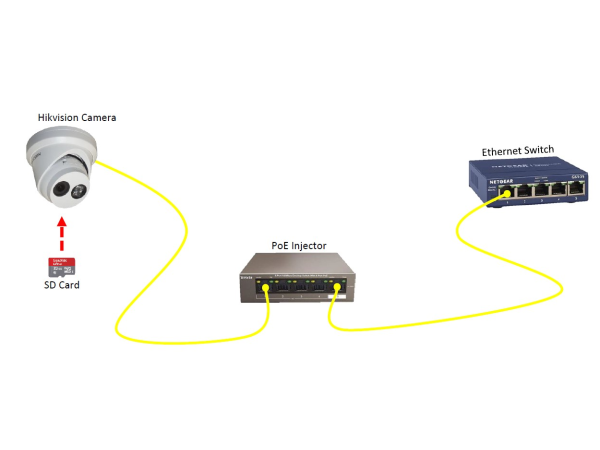
These are the Hikvision DS-2CD2343G0-I Cameras (C0001152) that will replace the obsolete UCAMs that have been used on previous machines.
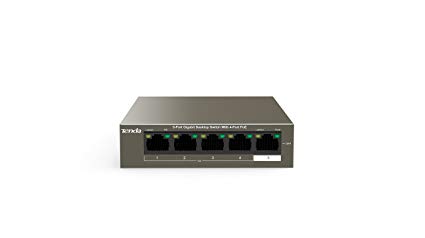
Connected via a multi way PoE injector (C0001238).
And with SD card (C0001239).- Pièces et outils
Pièces et outils
Étape 1 - Open SADPTool
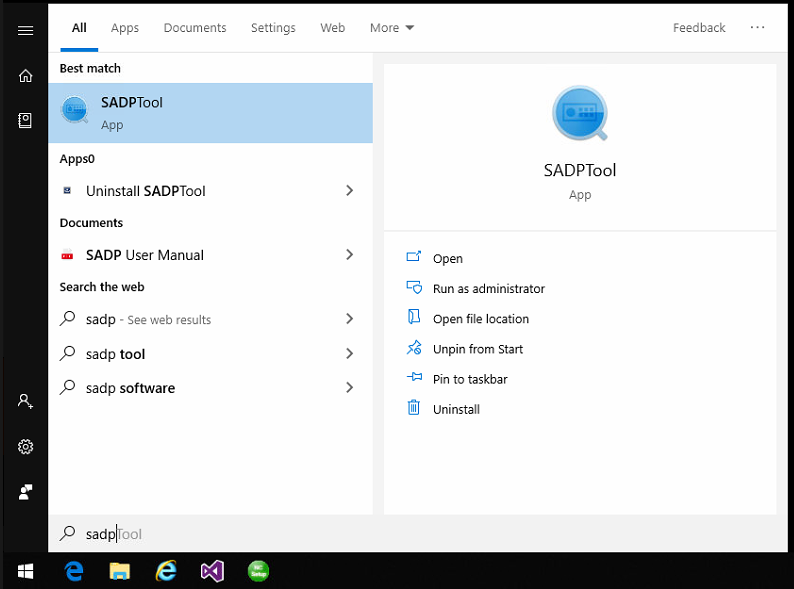
On the machine open the “SADPTool” . This is our camera finder and IP address modifier for the cameras
Étape 2 - Activate Camera
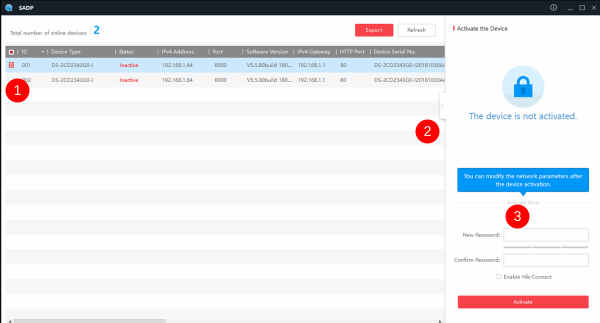
When open, the SADP Tool will display all Hikvision cameras connected to the local network. If the IP address has not been modified before going to site the camera needs to be Activated,.
- To do this select the current inactive camera.
- Then open the side sub menu on the far right.
- Input the password: Stuga001 and click Activate.
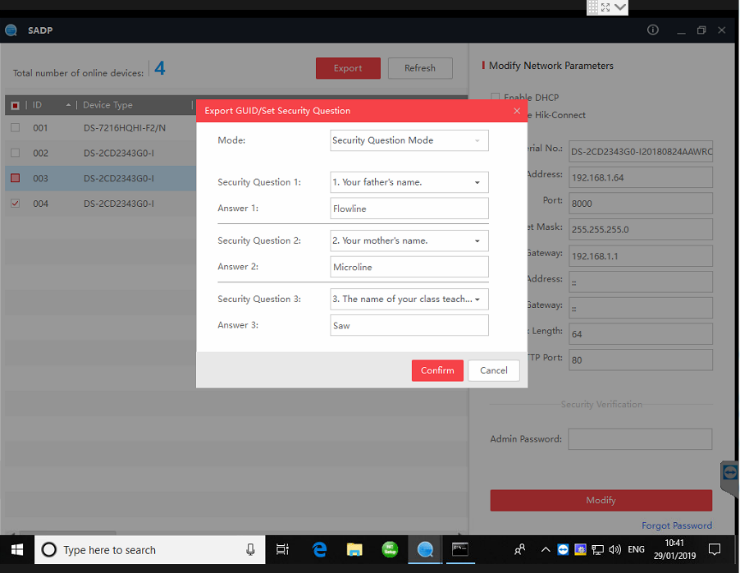
Étape 3 - Security Questions
Security Question 1:Your Father’s Name?
Answer 1: Flowline
Security Question 2: Your Mother’s Name?
Answer 2: Microline
Security Question 3: Name of your Class Teacher?
Answer 3: Saw
After this, you will be asked to set the ip address in the IP address section.
Étape 4 - Open in Internet Explorer + Download Plugin
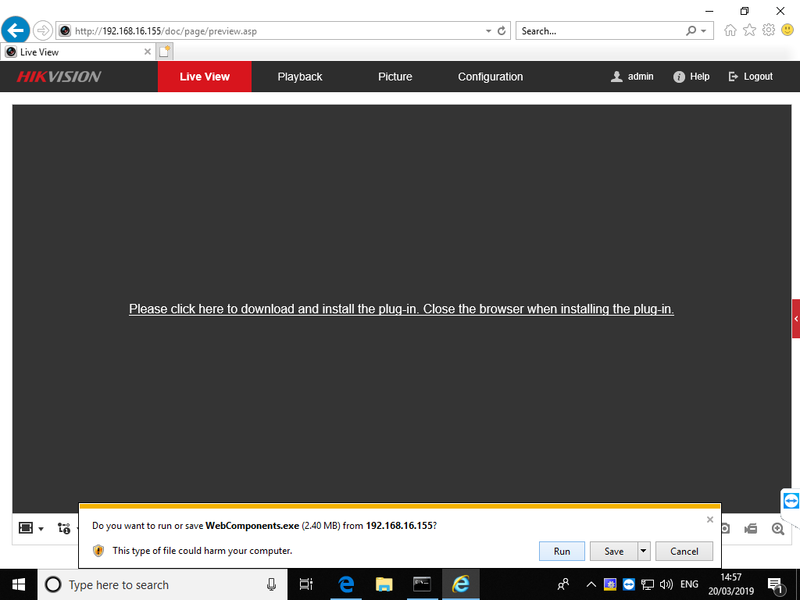
- Using internet explorer type the IP address into the web address bar.
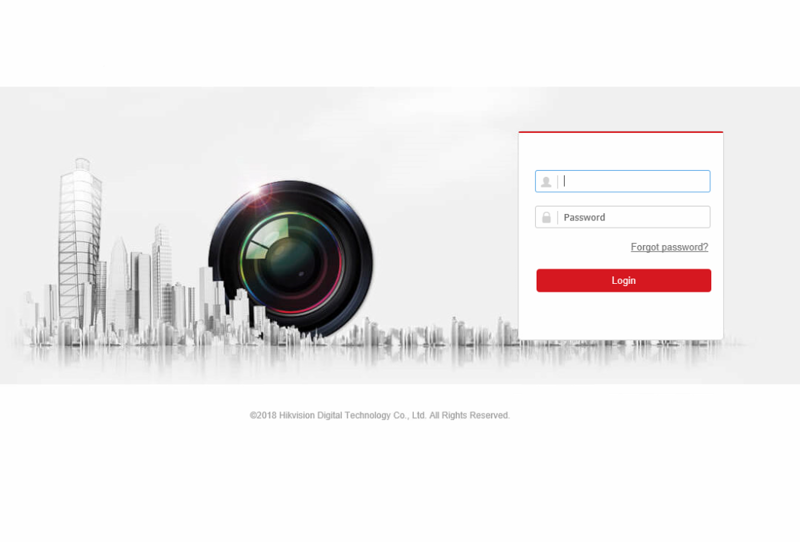
- Type in the username: admin and password: Stuga001
- Click on the link to download a plugin. When prompted, click Run.
Étape 5 - Web Browser User Interface
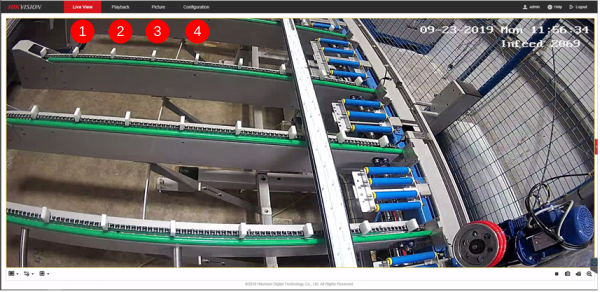
- The initial screen is the Live View
- Playback is where recordings that are saved to the SD card are viewed and downloaded.
- Picture (is not used) for the snapshot function.
- Configuration used to change settings and set up SD card.
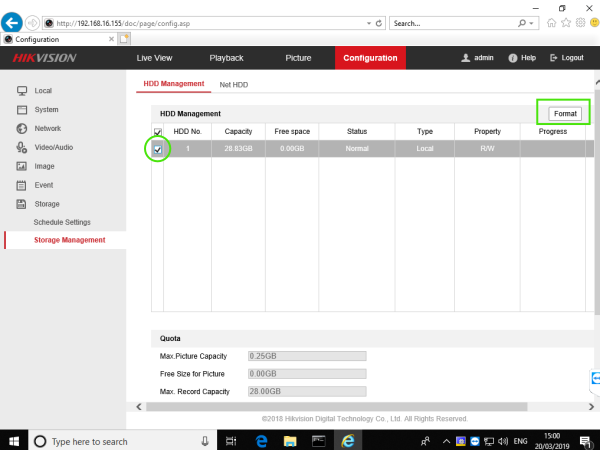
Étape 6 - Setup SD Card Storage
- Go to the Configuration tab.
- On the left menu go to Storage.
- Then go to the sub-menu Storage Management.
- If the SD card has been installed correctly it will show under the HDD Management box. Select the SD card.
- Now click Format. This process can take up to 2 minutes.
- Click SAVE
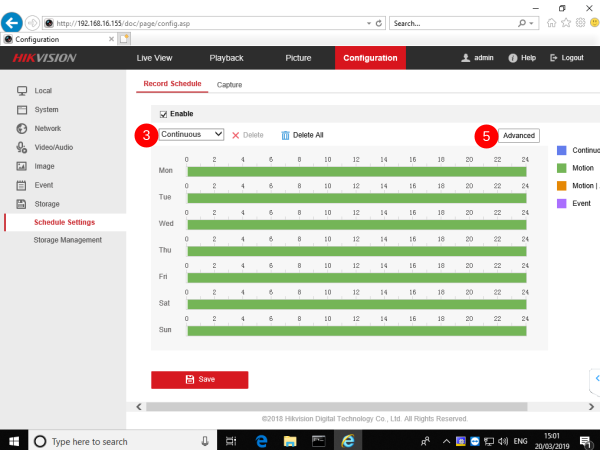
Étape 7 - Schedule Settings
- Go to the next sub-menu Schedule Settings.
- Delete the default schedule.
- On the drop down menu select Motion.
- Highlight the entire week in this (Green)
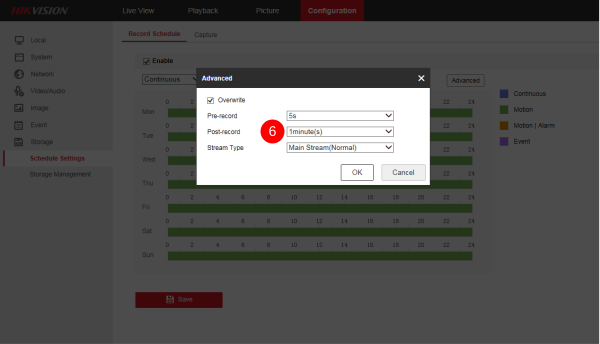
- Go to Advanced in the top right.
- Change Post Record to 1 minute and press OK.
- Press SAVE.
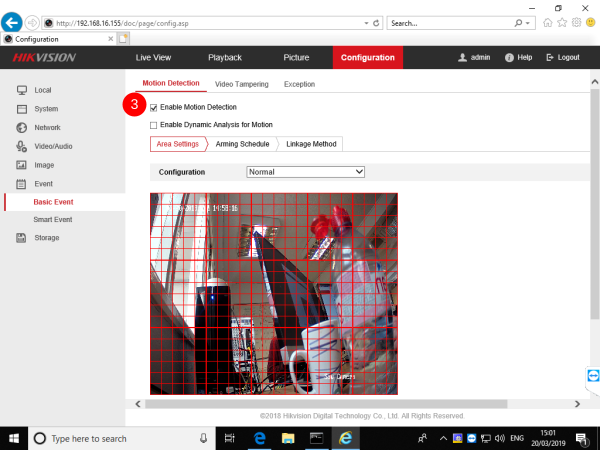
Étape 8 - Events
- Go to the Event tab on the side menu.
- Then go to the Basic Event sub-menu.
- Now select the check box Enable Motion Detection.
- SAVE!
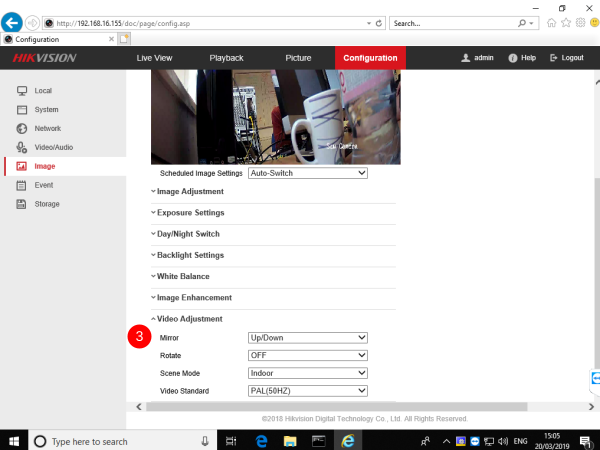
Étape 9 - Flipping the Image
Sometimes the cameras are required to to be installed in a different position than standard. This may cause the image on Live View to be inverted. If this is required please follow this step, if not move onto step 10.
- Go to the Image tab on the side menu.
- Go to the sub-menu Video Adjustment.
- Using the Mirror option choose to flip the image Up/Down or Left/Right.
- SAVE!
Étape 10 -
Draft


 Français
 English
 Deutsch
 Español
 Italiano
 Português