Tutorial that outlines the steps that make up a typical TcXaeShell development cycle with GIR source control

Difficulté
Difficile
Durée
1 heure(s)
Sommaire
- 1 Introduction
- 2 Tutoriels prérequis
- 3 Étape 1 - Making a branch
- 4 Étape 2 - Saving the changes
- 5 Étape 3 - Pushing changes to the Cloud Repo
- 6 Étape 4 - Add More Changes and Commit
- 7 Étape 5 - Pushing the changes to the Remote Repository
- 8 Étape 6 - Setting up for Merging the Branched code
- 9 Étape 7 - Merge
- 10 Étape 8 - Sync
- 11 Étape 9 - Up to date
- 12 Commentaires
Introduction
These steps outline typical actions that make up a development cycle for changing code on a machine, saving changes locally and saving to the cloud repository using Git as the Source control tool.
- Tutoriels prérequis
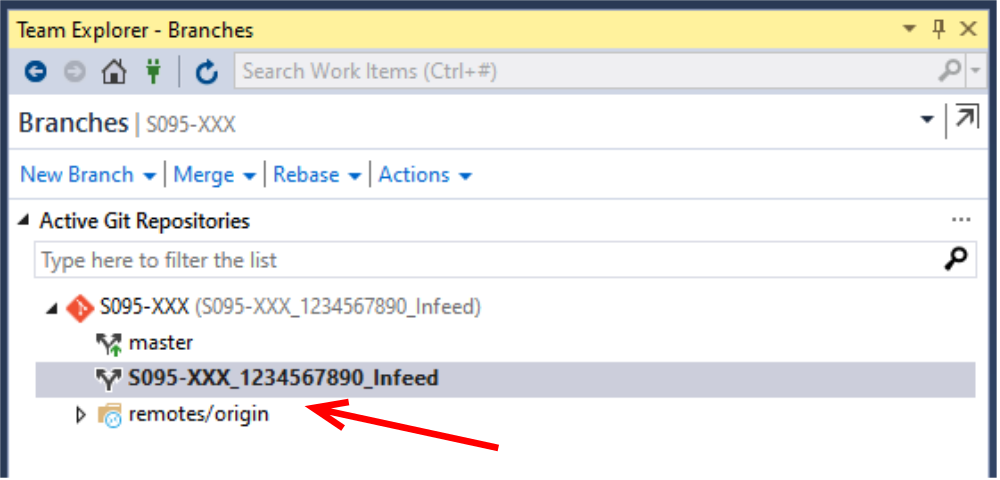
Étape 1 - Making a branch
Create a branch locally to hold the code involved with the changes.
See document for Making a Branch
The branch name is made up of three parts:
- Machine Reference S095_ followed by an underscore character _
- Service Job Number 1234567890_ followed by an underscore character _
- Text that identifies the change eg. Infeed Mod, Outfeed Bug Bix, Timer Mod.
There may be more than one branch for the changes under the service job. This method of naming aids traceability. For example S095_123454321_ClampMod and S095_123454321_InfeedTiming are two branches under the same job number.
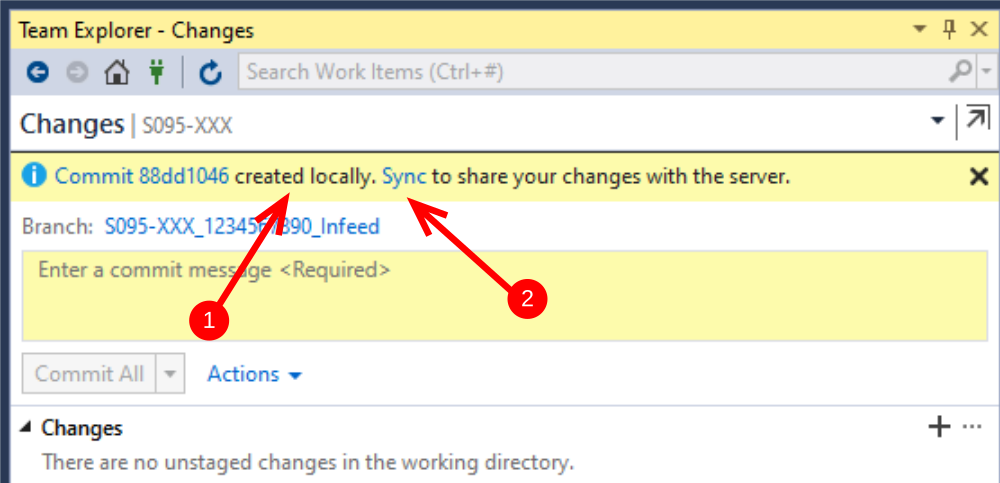
Étape 2 - Saving the changes
- The change has been saved as a local change.
- Press Sync to save the changes to the cloud repository. This ensures that the local Branch is now being tracked as a branch being attached to Remote repository
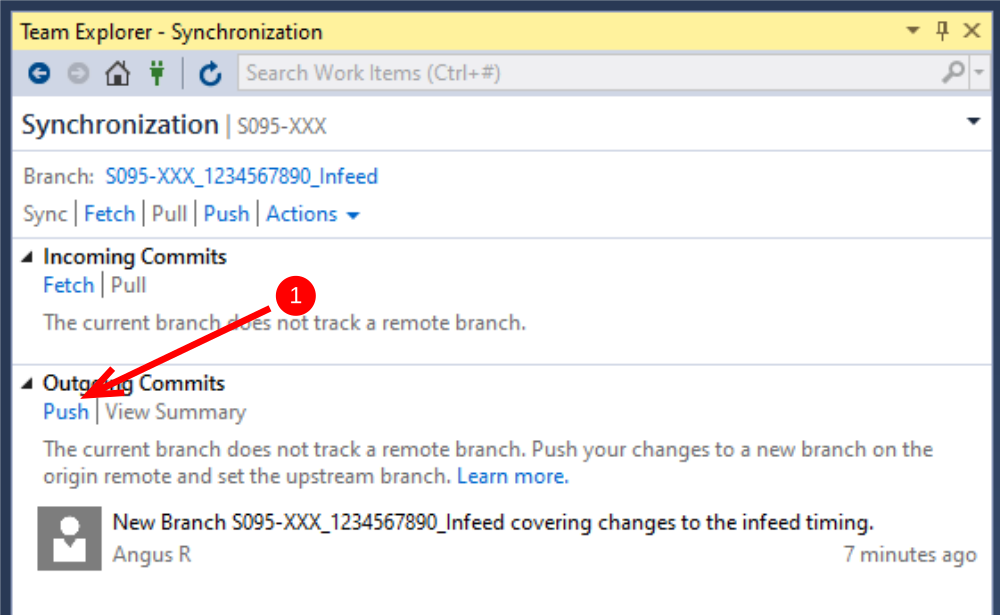
Étape 3 - Pushing changes to the Cloud Repo
- Select Push
- Message appears showing the successful push to the Origin which is in the remote cloud Repo
2.

Étape 4 - Add More Changes and Commit
- Add more changes to the code,
- Select Home then Changes this shows the commit message (Required)
- Enter the message and add the Machine and Job Number to the message
- Push Commit , this Commits the changes Locally
This cycle of changing code and pushing to the cloud can be extensive and can cover many hours work. By pushing to the cloud the work is backed up and code can be restored if needed.
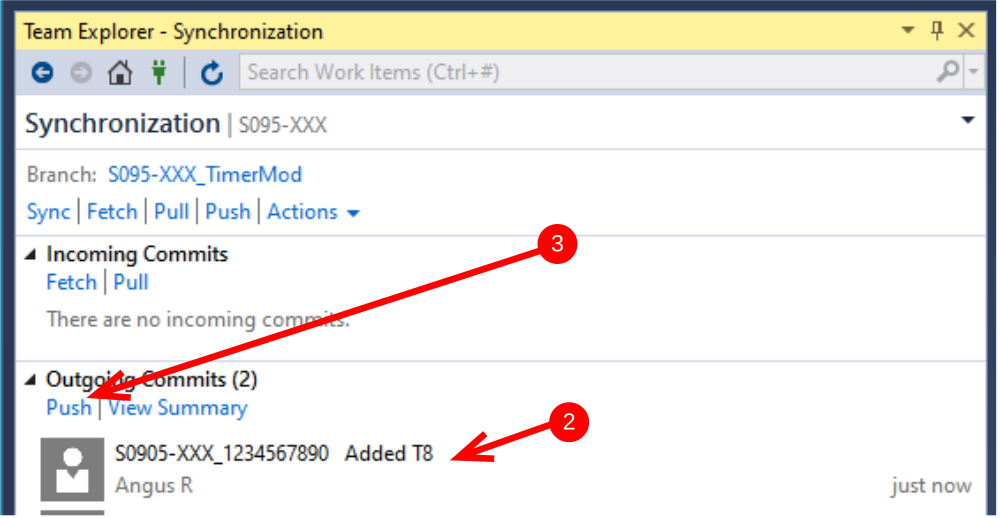
Étape 5 - Pushing the changes to the Remote Repository
- To save the changes to the remote repository select Sync
- Commits ready to be pushed to the Cloud
- Select Push to send the changes
When complete the remote branch repository will contain all the changes made and committed to the local branch
Steps 4 and 5 can repeat many times during a development cycle
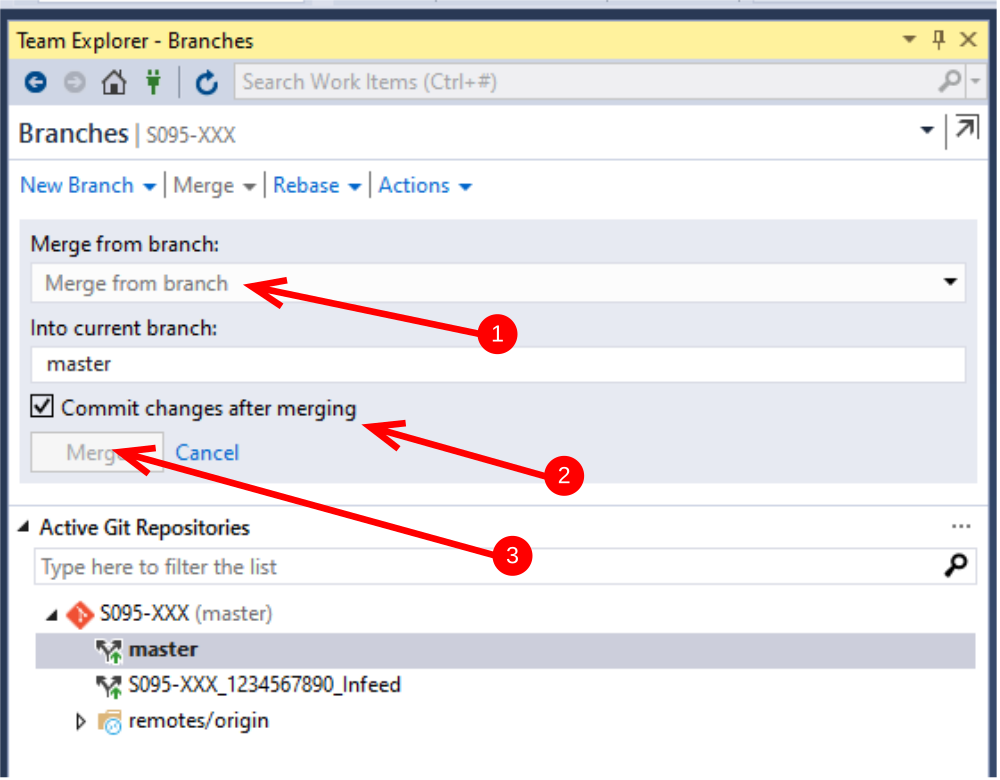
Étape 6 - Setting up for Merging the Branched code
- Make sure all changes have been committed and pushed steps 4 and 5
- Select Home then select Branches
- Mouse click on master when it is selected it will be in bold text. If this does not work and there is an error message, the most likely cause is there are committed changes waiting to be pushed to the cloud Repo. go back to steps 4 and 5
- Press Merge to open the merge window.

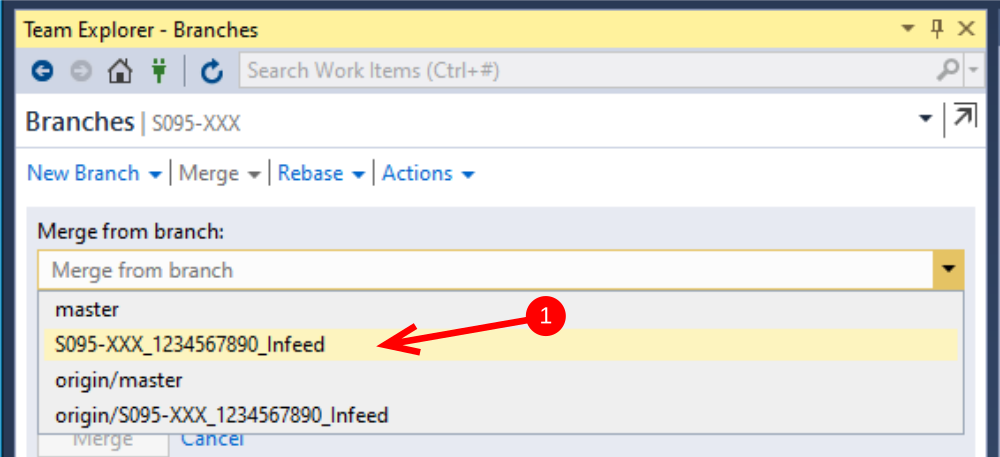
Étape 7 - Merge
- From the dropdown Menu select the branch to be merged
- Keep the option to Commit changes after merging
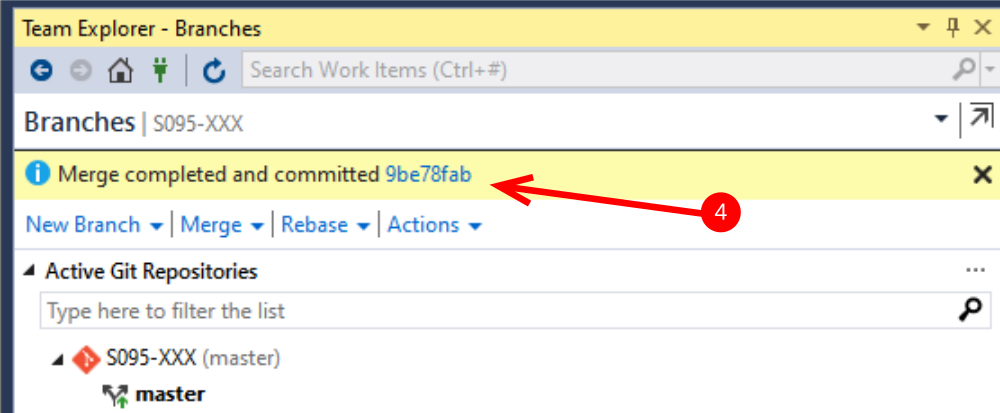
- Press merge
- Message to say merge is complete.
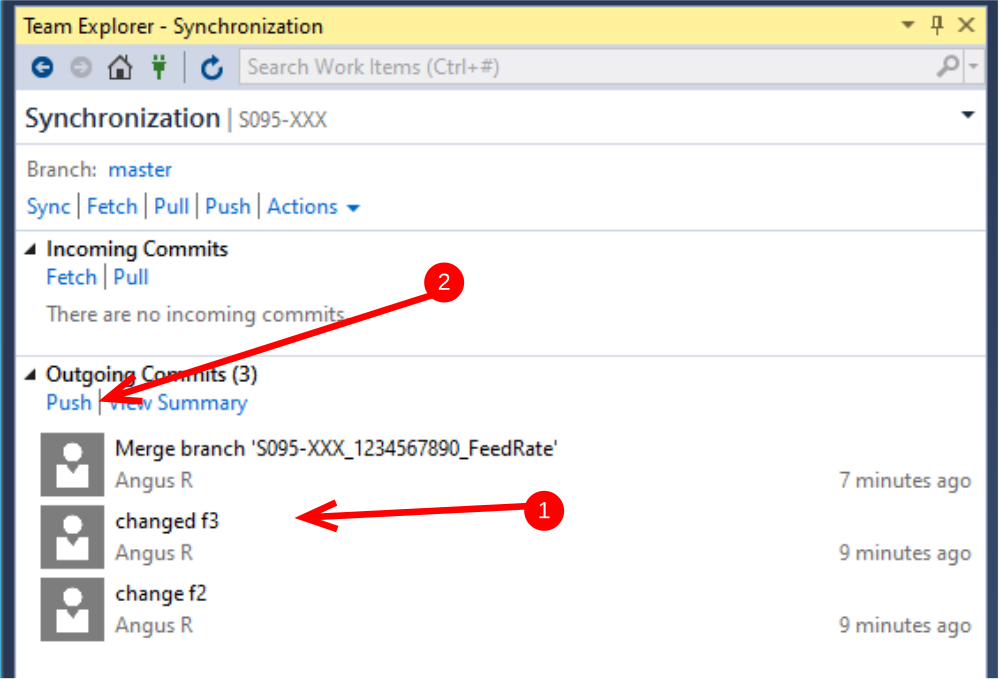
Étape 8 - Sync
- Sync lists the commits that need to be pushed to the Remote Repo Origin
- Press Push
- Message indicating successful push to origin master

Étape 9 - Up to date
The local branch has been updated and merged with the local master and the remote branch and master repository match (same change level)
Draft
 Français
 English
 Deutsch
 Español
 Italiano
 Português