| [version en cours de rédaction] | [version en cours de rédaction] |
| Ligne 20 : | Ligne 20 : | ||
Please always feel free to provide Stuga with any feedback on this document or its contents.</translate> | Please always feel free to provide Stuga with any feedback on this document or its contents.</translate> | ||
}} | }} | ||
| − | {{Materials}} | + | {{Materials |
| + | |Tuto_Attachments={{Tuto Attachments | ||
| + | |Attachment=Beckhoff_AX8000_Flowline_Upgrade_R0010201D.pdf | ||
| + | }} | ||
| + | }} | ||
| + | {{Tuto Step | ||
| + | |Step_Title=<translate>Familiarisation</translate> | ||
| + | |Step_Content=<translate>The first step does not involve being on site or carrying out any physical tasks. However, trying to gain some familiarisation before carrying out the upgrade can save time and confusion down the line. | ||
| + | |||
| + | |||
| + | Please read through this tutorial before upgrading the machine. The attached files and steps will walk you through the upgrade that somebody else has already experienced. This will give you a free look at any issues or learnings that have already been made.</translate> | ||
| + | }} | ||
{{Tuto Step | {{Tuto Step | ||
|Step_Title=<translate>Parts Identification and Rectification</translate> | |Step_Title=<translate>Parts Identification and Rectification</translate> | ||
| Ligne 35 : | Ligne 46 : | ||
| − | If all parts have been cross referenced, move on to step | + | If all parts have been cross referenced, move on to step 3. However, if some parts are missing or damaged, please report them to stugaparts@stuga.co.uk and send across the necessary information/ evidence so we can get parts to you. Once this has been sent, move onto step 3.</translate> |
| − | |||
}} | }} | ||
{{Notes}} | {{Notes}} | ||
Version du 16 septembre 2019 à 16:50
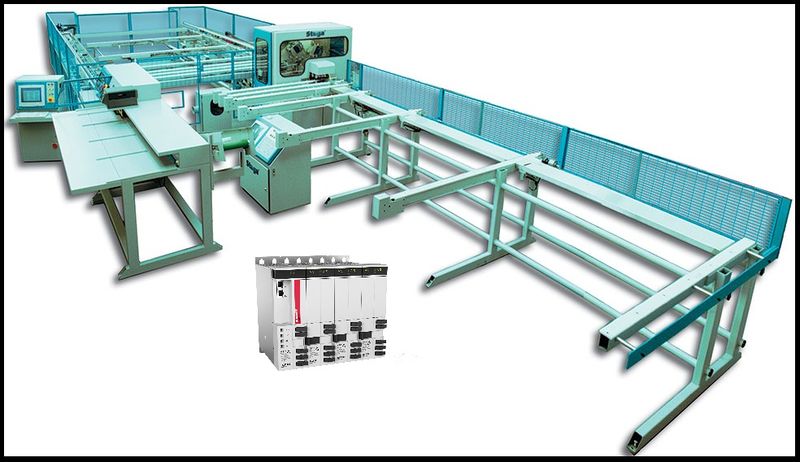
On site upgrade of Flowline Mk3 with Beckhoff AX8000 drives, EtherCAT IO slices and TwinCAT 3 IPC.
Introduction
The Flowline Mk3 is a Stuga built and designed machine for prepping and cutting uPVC windows and doors. The Flowline is the first machine of the Stuga 'U' shaped machines which has prepping and cutting working in the same machine package. The Flowline is still a fantastic machine for the industry, however, due to the age of the machines and older control systems becoming obsolescent, we have had to find an upgrade route that does not only keep the machine going, but also provides improvements from the original model and up-to-date technology to future proof the machine.
The upgrade that we have developed for the Flowline is supplied from an automation supplier named Beckhoff. We also use Beckhoff on our new build machines. This gives us better lead times, more understanding of the products and better diagnpostics/ support for our customers. The drive system that we use is called the AX8000 series. These drives are a compact multi axis servo system that use an EtherCAT interface and STO saftey functions. These servo drives, coupled with Beckhoff AM8*** series OCT servo motors provide quicker installations and all round performance increases from any system we have previously used. To drive all of the new system, we are using a Beckhoff IPC controller that runs TwinCAT 3. This links into the system via EtherCAT. All of the machine can now link together via EtherCAT to provide quick and stable communications.
This tutorial will give you step by step guides on the physical upgrade requirements needed when upgrading a Flowline Mk3 to a Flowline Mk3 with Beckhoff AX8000 Control. Each step will provide you with written information and pictures to guide you through the upgrade. Each step will contain necessary information which will also provide you with rationale for the design and an idea of the benefits over using different methods.
- Fichiers
Étape 1 - Familiarisation
The first step does not involve being on site or carrying out any physical tasks. However, trying to gain some familiarisation before carrying out the upgrade can save time and confusion down the line.
Please read through this tutorial before upgrading the machine. The attached files and steps will walk you through the upgrade that somebody else has already experienced. This will give you a free look at any issues or learnings that have already been made.
Étape 2 - Parts Identification and Rectification
This upgrade is covered by BoM R0010201D. This BoM contains all of the parts necessary to complete the upgrade on the machine. This BoM has been created from previous upgrades and from the knowledge of Stuga engineers.
If any extra parts were identified at the time of ordering, they will appear on a seperate BoM for the specific machine build.
Parts will have been picked and checked at Stuga before despatch. However, the first step when arriving on site is to check that all of the parts have arrived and no parts have been damaged or misplaced. The BoM sheets for the parts will be in the boxes with the parts and should be used to cross reference what has been sent.
Attached to this step is a .pdf document that lists all the parts required to complete this upgrade.
If all parts have been cross referenced, move on to step 3. However, if some parts are missing or damaged, please report them to stugaparts@stuga.co.uk and send across the necessary information/ evidence so we can get parts to you. Once this has been sent, move onto step 3.
Draft

 Français
 English
 Deutsch
 Español
 Italiano
 Português