OBSOLETE - Please use confluence

Difficulté
Moyen
Durée
5 minute(s)
Sommaire
- 1 Introduction
- 2 Étape 1 - Connect
- 3 Étape 2 - Naming
- 4 Étape 3 - Install Teamviewer Host
- 5 Étape 4 - Set the Date and Time
- 6 Étape 5 - Set the Region
- 7 Étape 6 - Change Network Adaptor Names
- 8 Étape 7 - Add to the Company Teamviewer Account
- 9 Étape 8 - Change Password
- 10 Étape 9 - Run TcRteInstall for EtherCat
- 11 Commentaires
Introduction
OBSOLETE -
C6015 PC Now in Confluence - click hereÉtape 1 - Connect
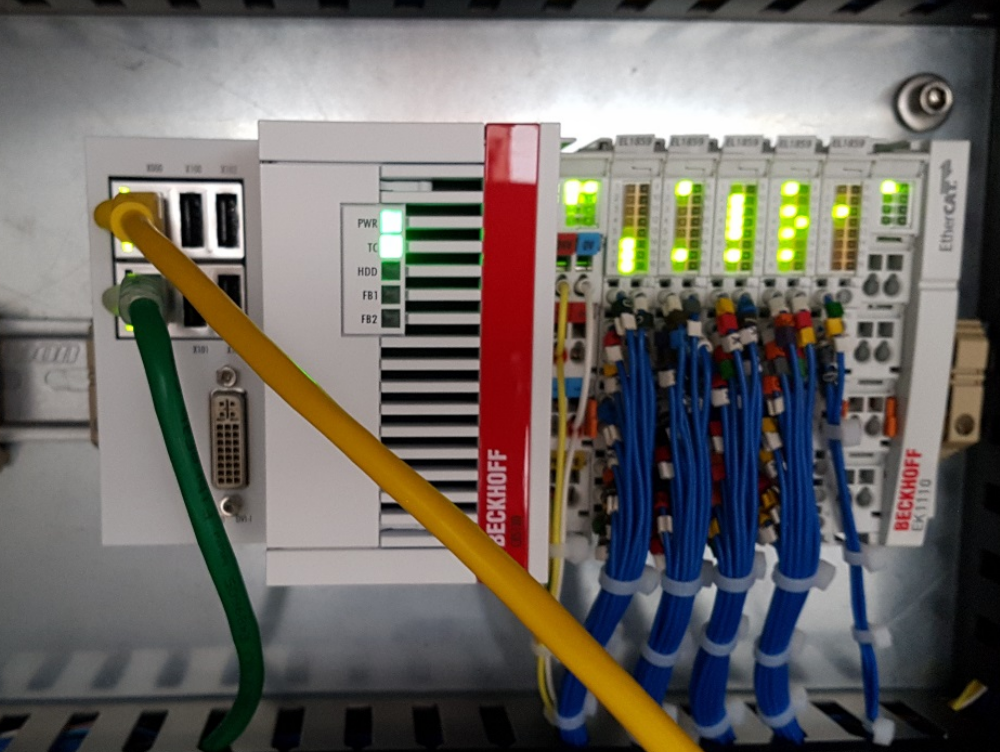
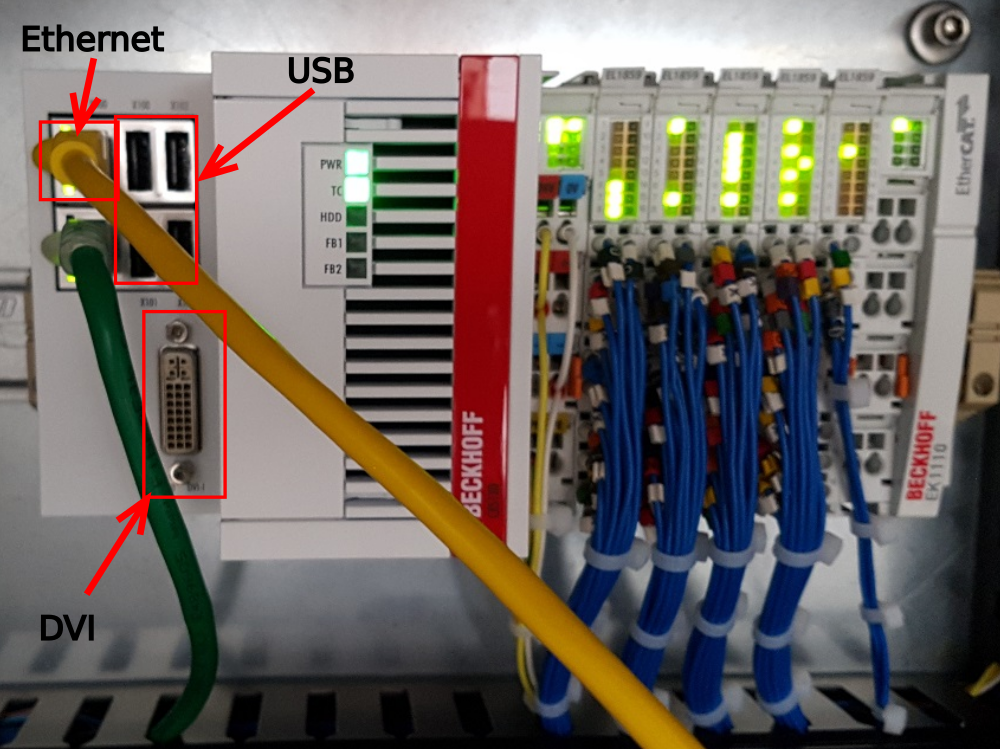
Plug in the Ethernet, DVI, Keyboard and Mouse to the Beckhoff PLC. This can be done on a machine (as shown) or before installation (without etherCAT or slices).
Étape 2 - Naming
Go to Control Panel ->System
Computer description Stuga ZX5 Beckhoff (or whichever machine)
Change name to the build number with the suffix BE
Change WORKGROUP to "Stuga"
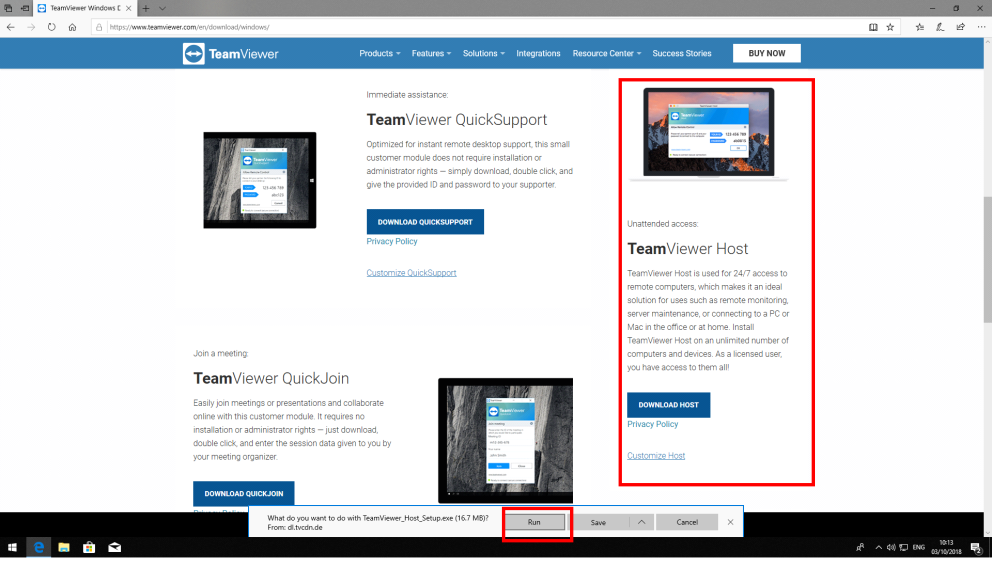
Étape 3 - Install Teamviewer Host
- Go to Internet Explorer and search "www.teamviewer.com/en/download/windows/".
- Scroll down to TeamViewer Host and click on 'Download Host',
- when prompted press 'Run' to start download.
- Make sure download is of the most recent version.
Étape 4 - Set the Date and Time
Change time and date. For this, go to the bottom right date of the PC and right click the time and date. Go to ‘Adjust time and date’ and select internet time. Press ok.
Set the Time Zone to Dublin, Edinburgh, London....

Étape 5 - Set the Region
Go to Control Panel then ‘Region and Language’ and select ’English (United Kingdom)’.
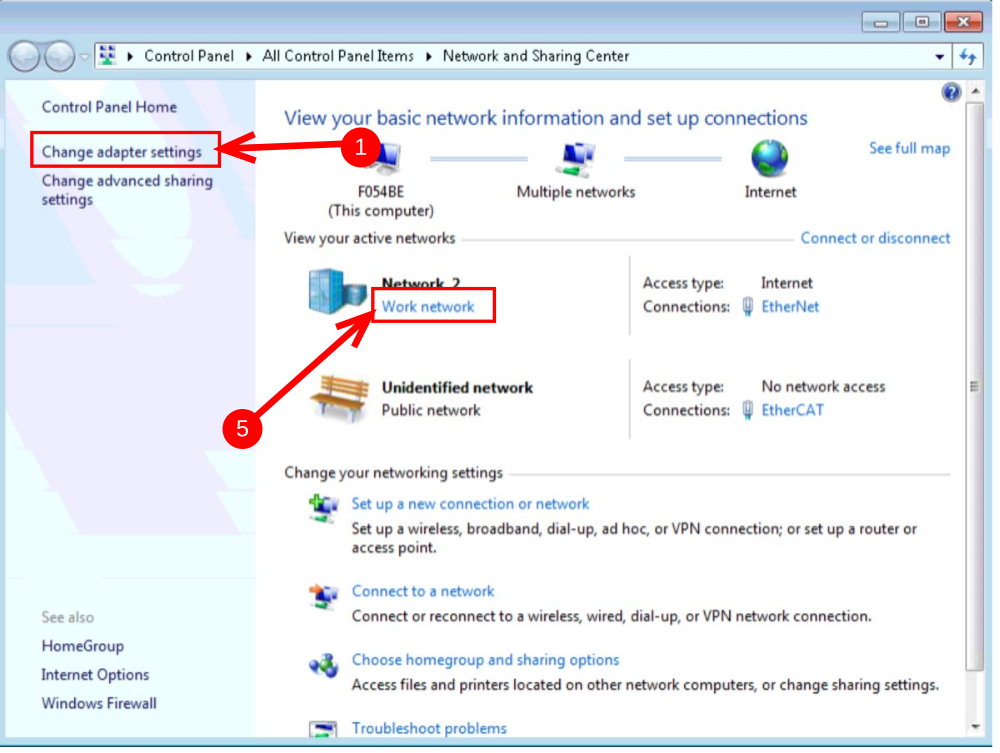
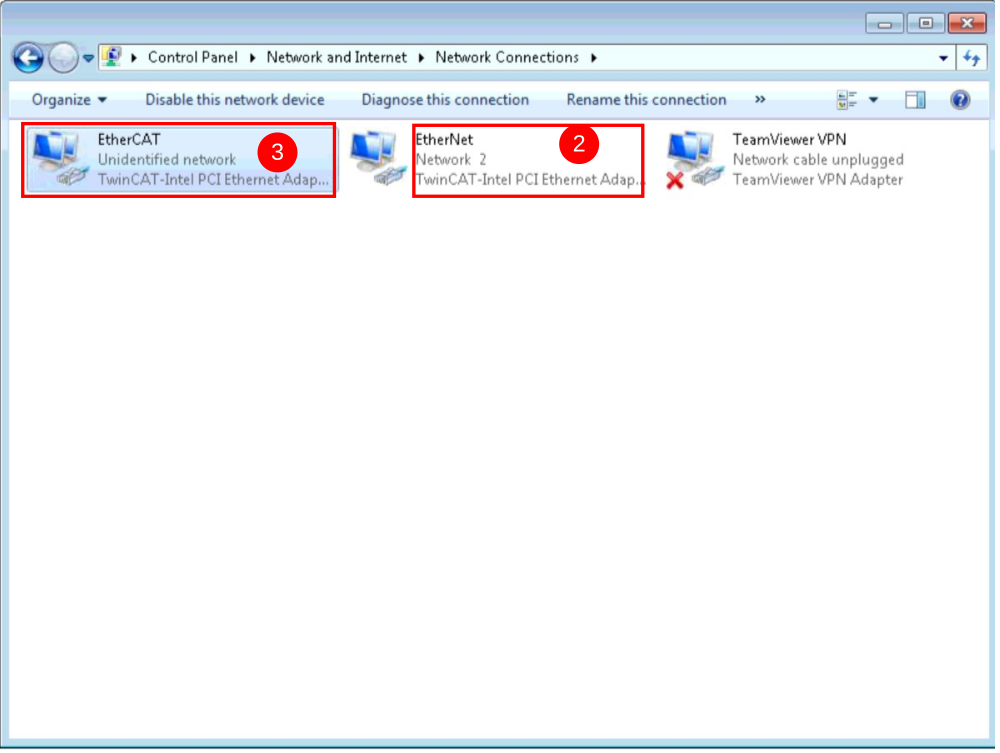
Étape 6 - Change Network Adaptor Names
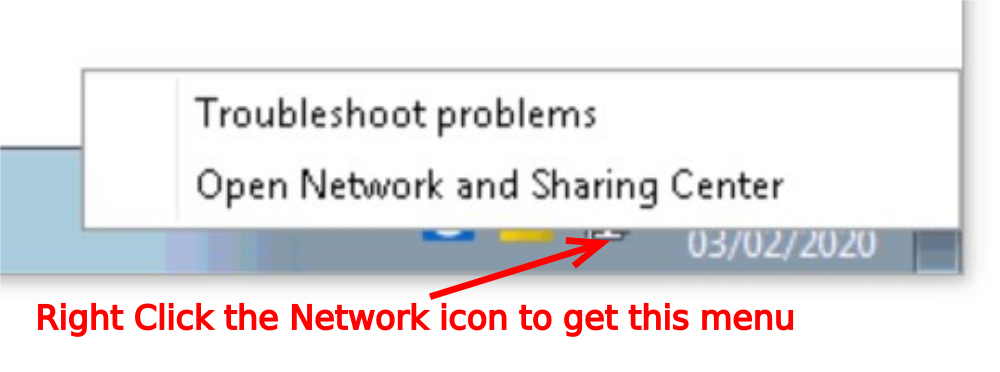
- Go to ‘Network and Sharing Centre’ then ‘Change Adaptor Settings’.
- Rename the Local area connection that is connected to STUGALTD to ‘Ethernet’
- Rename the other local area connection 2 to ‘EtherCAT’.
- This relates back two the two network ports on the Beckhoff machine.
- Change the Ethernet Network to "Work Network" from "Public Network"
Étape 7 - Add to the Company Teamviewer Account
- On a separate computer sign into your TeamViewer account. If this is the first time your account has been used on this device a conformation e-mail will be sent to your company e-mail address.
- Once logged on, go to the 'Computers & Contacts' tab on the left side.
- Then 'add remote device' from the top right corner of the window.
- From here you can input the TeamViewerID and Password
- Alias will be the company's name followed by the BuildNo and position i.e. Sidey Z065 FrontEnd.
- Group is the machine type this PC will be installed on
Étape 8 - Change Password
When the Beckhoff machine starts, internet explorer will load. The web page will contain a 'password wizard' use this wizard to change the password from "1" to the standard password (not published)
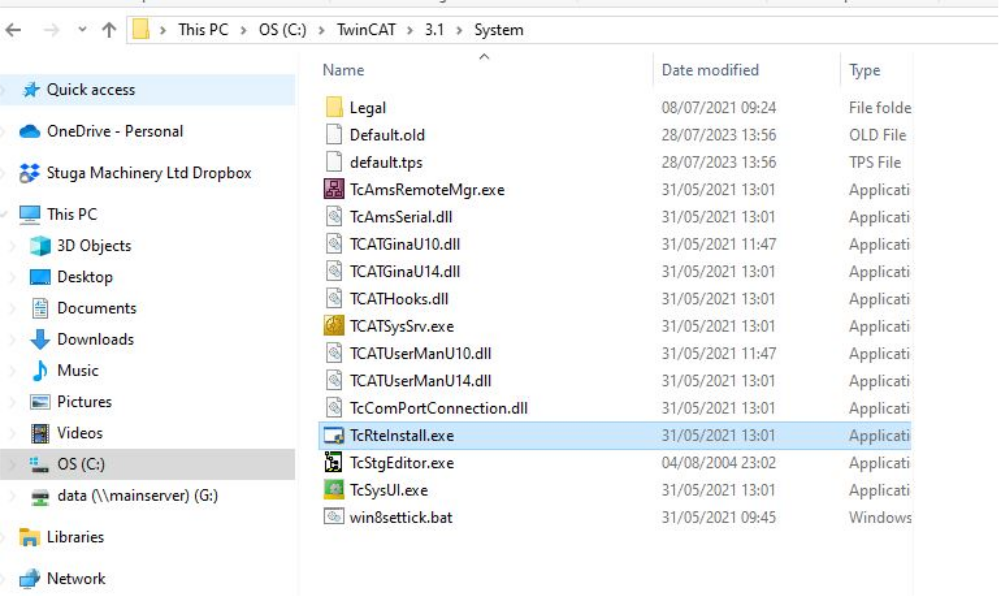
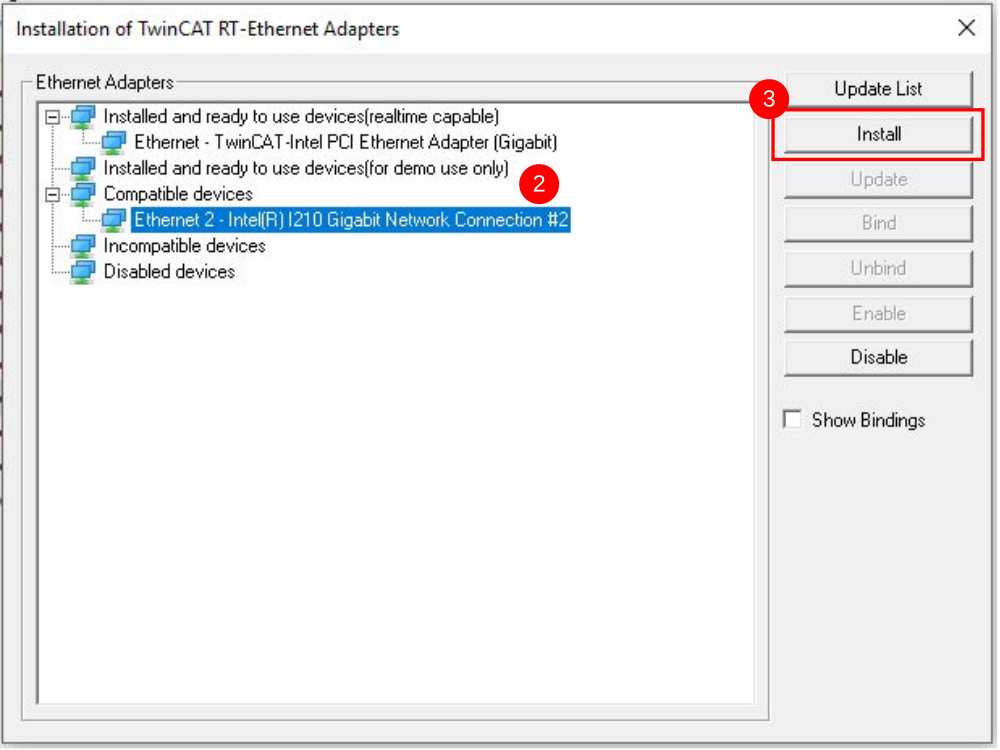
Étape 9 - Run TcRteInstall for EtherCat
On a C6015 type PLC ethercat devices are not found when scanning in the project.
Run TcRteInstall for the ethercat protocol to work and be able to scan connected devices.
1.In folder C:\TwinCAT\3.1\System - run file TcRteInstall.exe
2.Choose the Port adapter which is connected to the EtherCat loop
3.Press Install
Published
 Français
 English
 Deutsch
 Español
 Italiano
 Português