How to edit the product data on the Stuga website Spares Database

Difficulté
Facile
Durée
5 minute(s)
Sommaire
- 1 Introduction
- 2 Étape 1 - Login with user name and password
- 3 Étape 2 - Select Products/All products from outer left menu
- 4 Étape 3 - Enter the product number you wish to edit in the search box
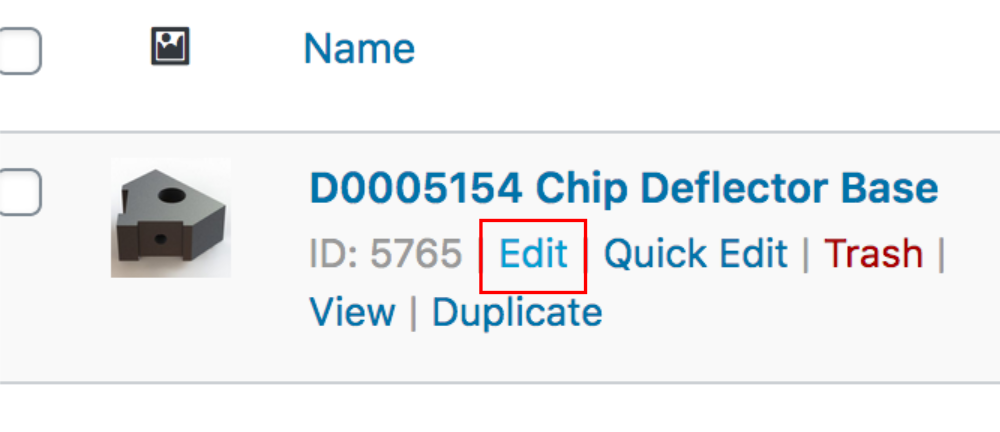
- 5 Étape 4 - Click edit from the on-hover menu
- 6 Étape 5 - Edit the product short description
- 7 Étape 6 - Enter any long notes or detailed descriptions in the upper text field
- 8 Étape 7 - Edit Categories
- 9 Étape 8 - Edit Tags
- 10 Étape 9 - Add Photos
- 11 Étape 10 - Ensure the Permalink Reflects the Part Number
- 12 Étape 11 - When finished, click the UPDATE button upper right
- 13 Commentaires
Introduction
The Stuga website has a parts database, much like a shop front for helping identify Stuga Machine parts.
Keeping the data updated and logging nuggets of useful information is invaluable in helping identify parts on machinesÉtape 1 - Login with user name and password
Authentication code will be sent to email provided

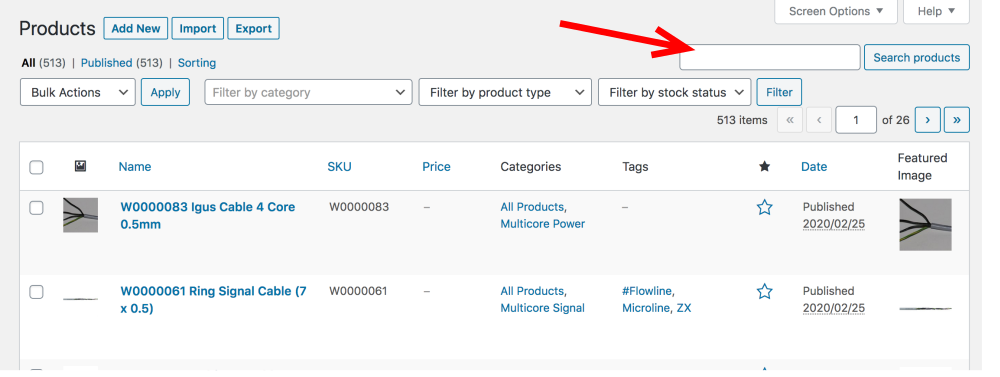
Étape 3 - Enter the product number you wish to edit in the search box
Search box is upper right
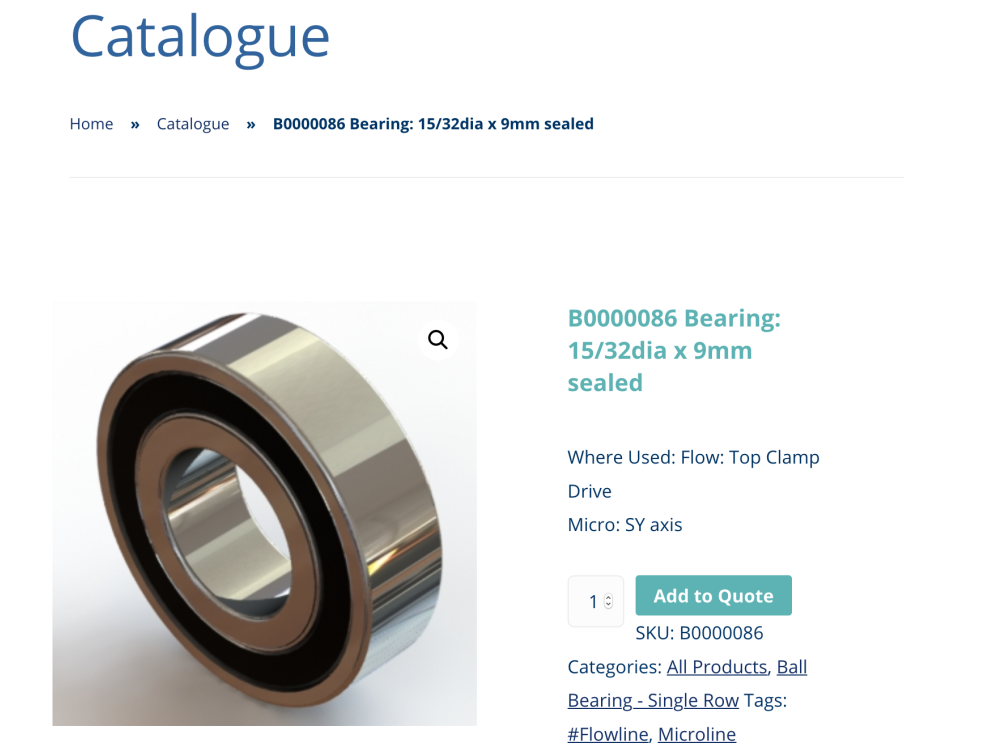
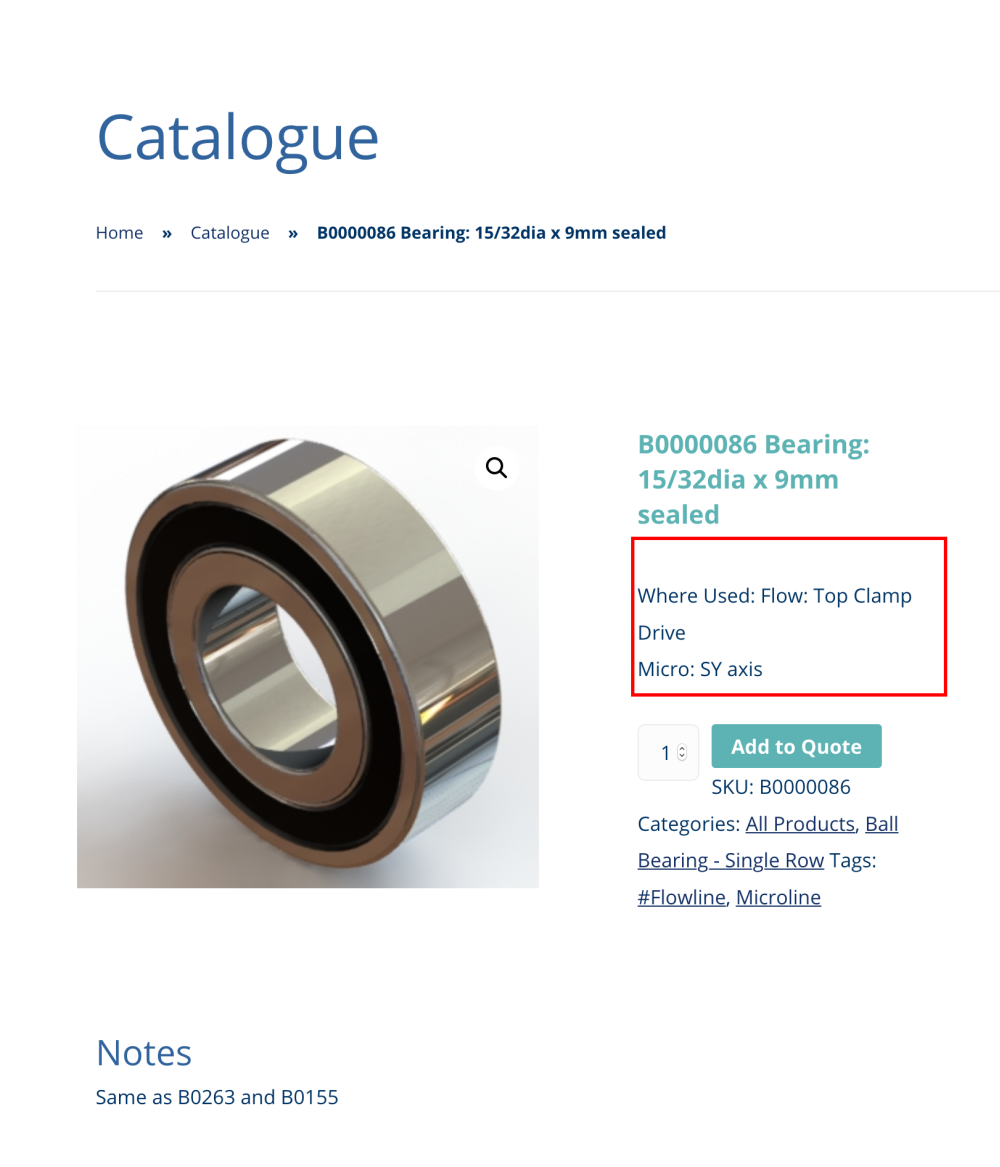
Étape 5 - Edit the product short description
This appears next to the image on the web page
This area is used to note where the part is used in operator / engineer friendly speak
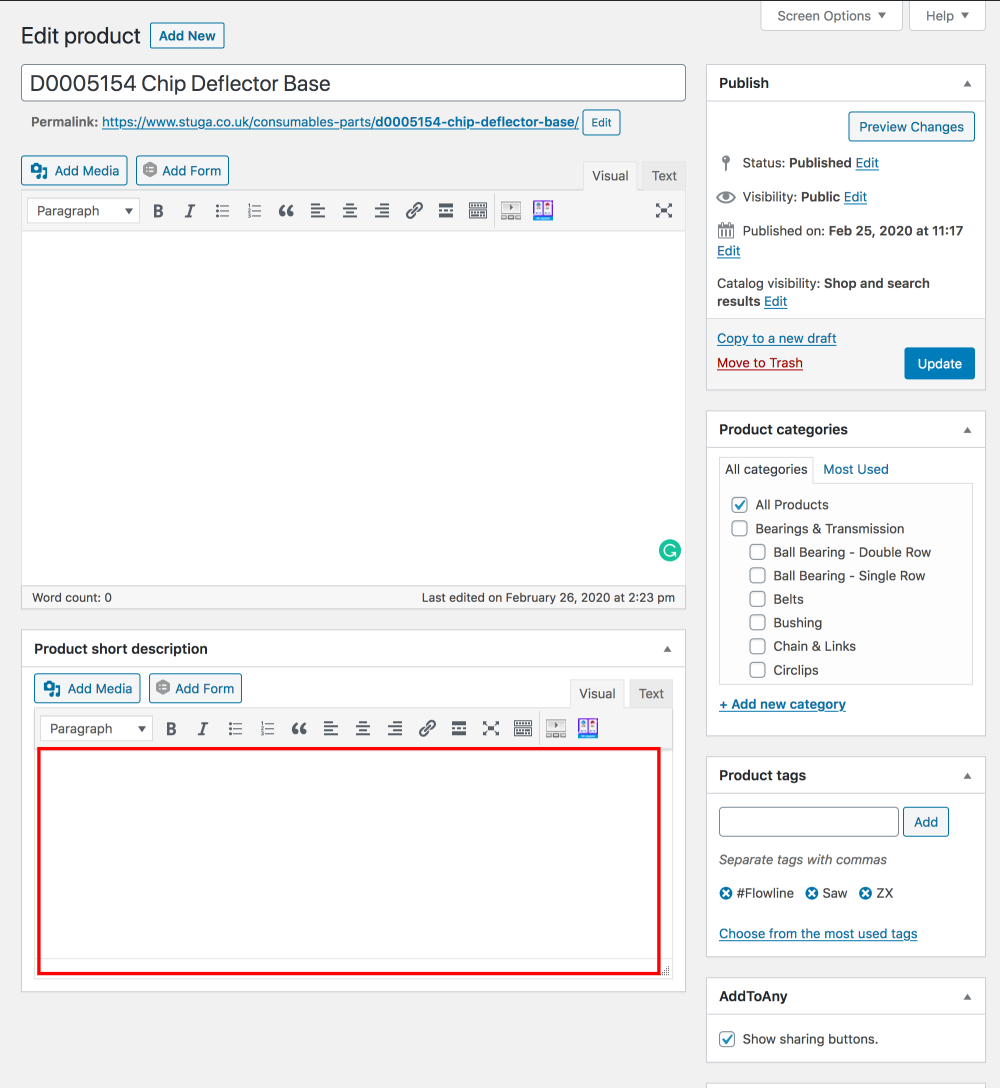
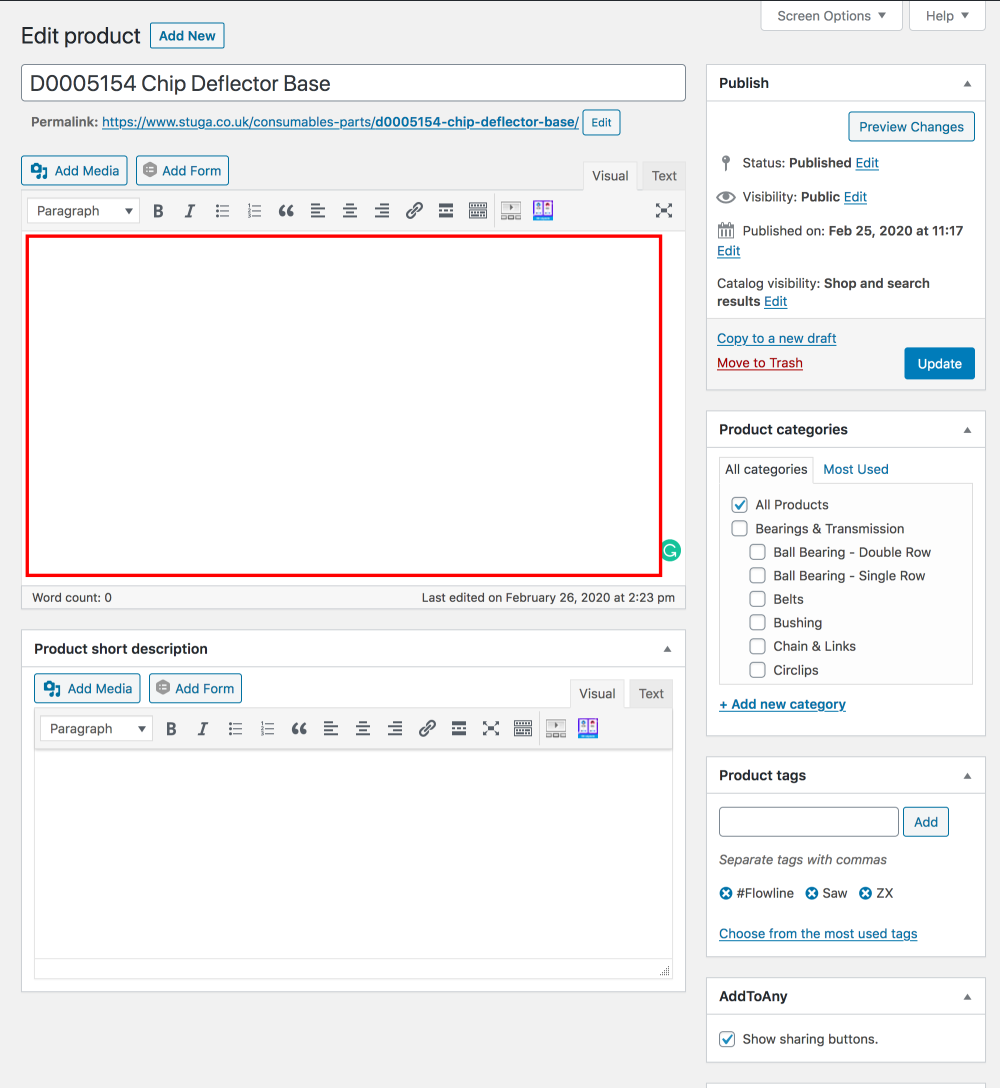
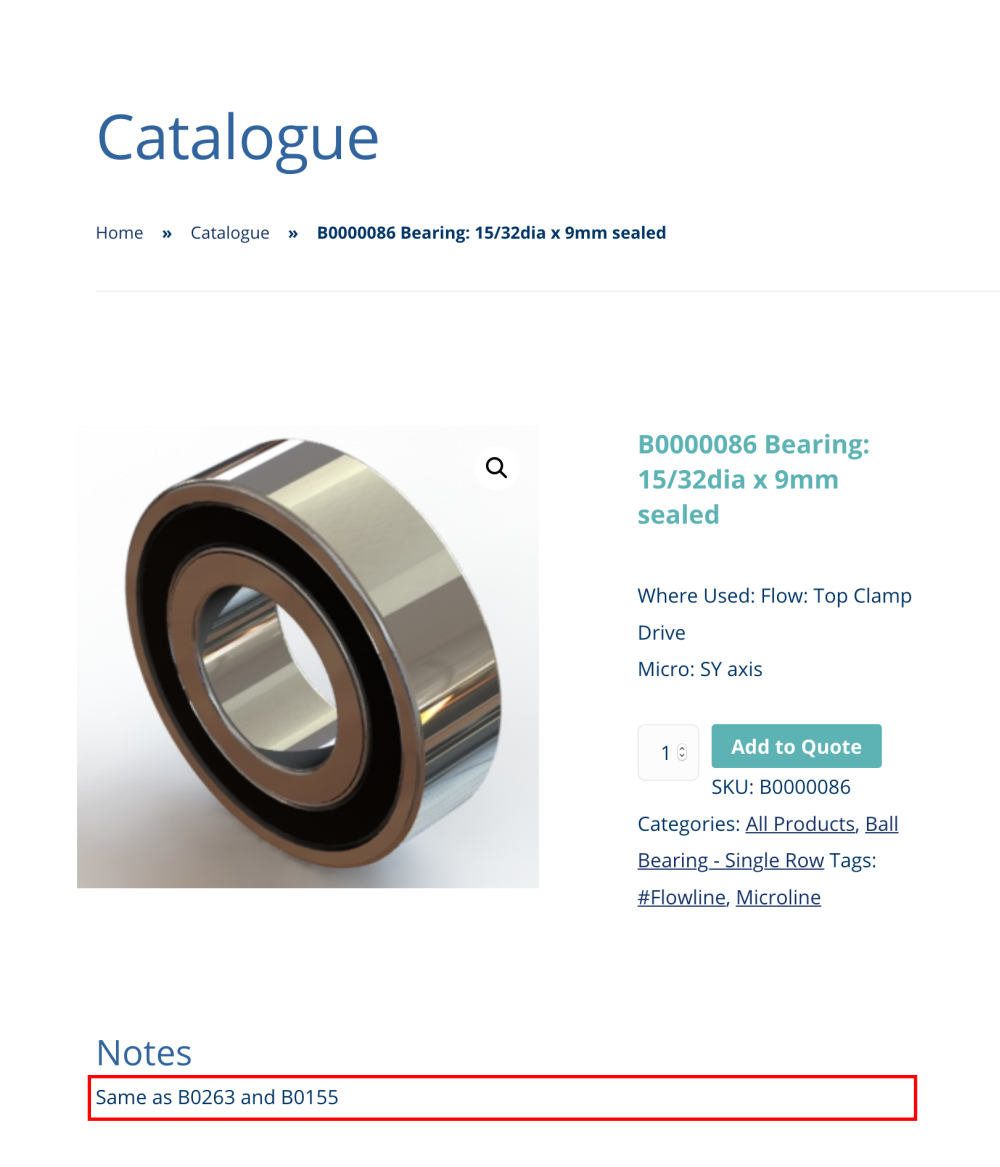
Étape 6 - Enter any long notes or detailed descriptions in the upper text field
This text appears in the Notes section of the web page
This area is used for any additional notes. The sort of notes that live in various engineer's brains....
- Compatibility issues
- Design changes
- Fitting instructions or issues
- Dangers or pitfalls
- Alternatives or suggestions
- Obsolescence issues
Étape 7 - Edit Categories
The category structure should be comprehensive enough for all the parts. It is an extension of the simple categories in the Sage Database, and should match those in use in the PDF Parts catalogue we have been using

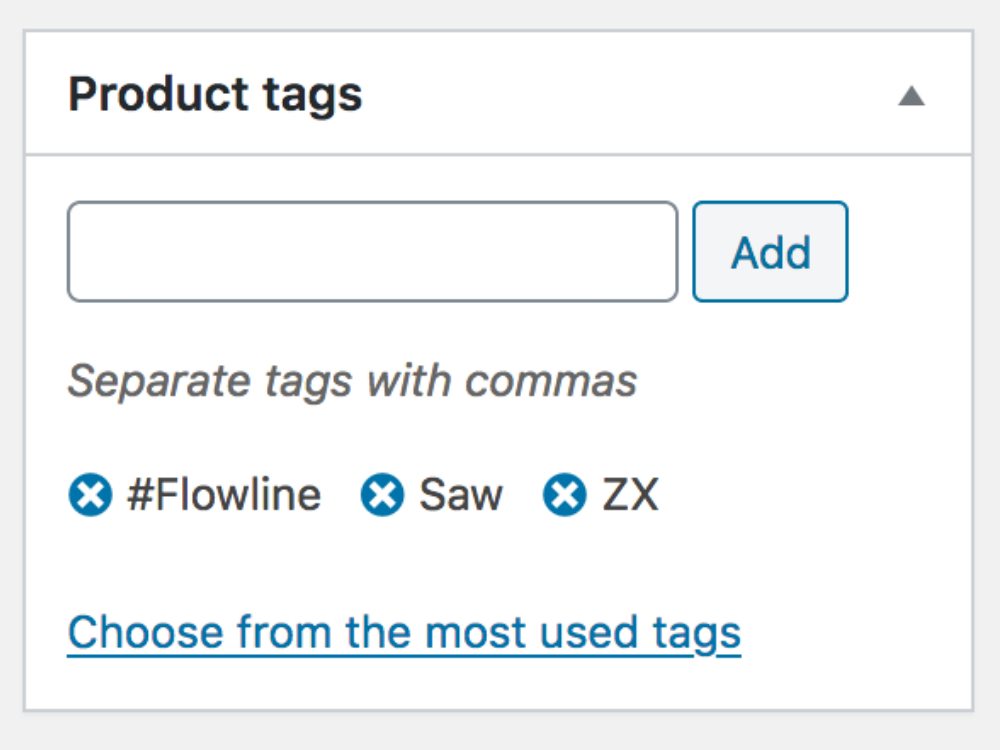
Étape 8 - Edit Tags
Product Tags are a new feature and allow grouping / classification of parts based on something different to the category.
This will be used to
- Group the parts based on Machine type
- Group the parts based on a reference in a Monday board - for example all parts to inspect on RAG Report - Flowline Infeed conveyor
- Group the parts to help identify during a Service visit - for example all the parts that may need replacing on a ZX spindle
See the Monday board for progress on this
Étape 9 - Add Photos
The main photo is set in the Product Image photo area
The Product galley allows you to add multiple images that will appear when you drill into the part. this could be useful for part identification plates, or an overall physical area on the machine

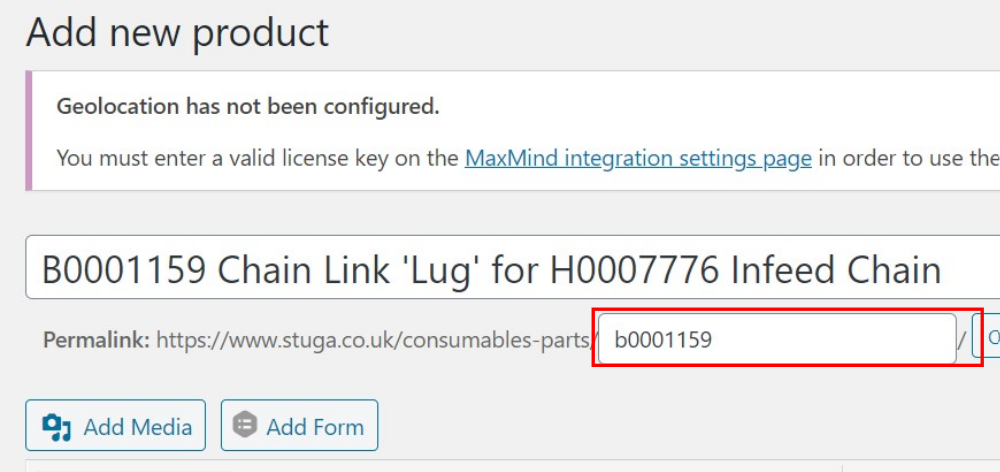
Étape 10 - Ensure the Permalink Reflects the Part Number
The permanent web link defaults to the part title, which is the part number and the description added together.
Editing this permalink means other processes can automatically link to this part webpage using the part number.
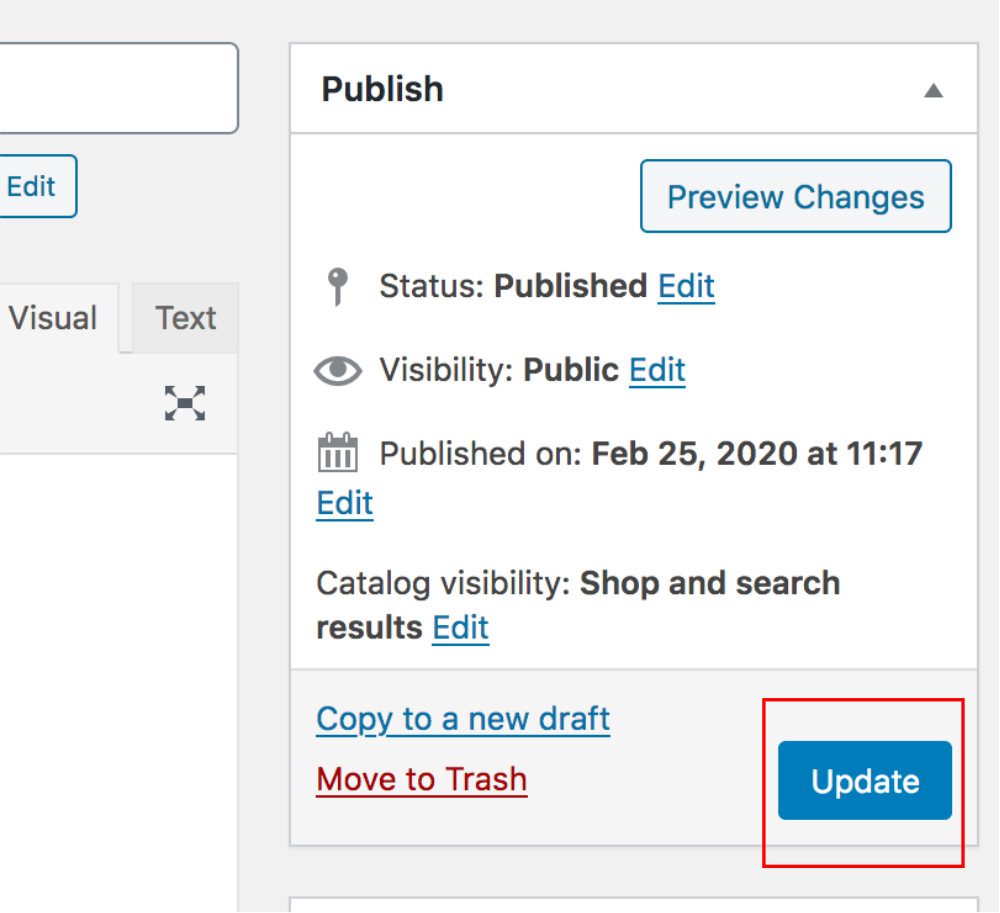
Étape 11 - When finished, click the UPDATE button upper right
Draft
 Français
 English
 Deutsch
 Español
 Italiano
 Português