Assembly details for clacker assembly

Difficulté
Facile
Durée
5 minute(s)
Introduction
Tools Required
10mm spanner
5mm punch
Ball pein hammer
Parts Required
D0008339 Gap Closer Arm x 1
D0008340 Gap Closer Base x 1
D0008496 Clacker Pins x 1
M0000101 Compression Spring 11 D 15 D 25 Long x1
F0000185 M6 x 16 Hex set S/S x 1
Étape 1 - M000101 Compression spring
M0000101 is not required for bench assembly , and will not be shown within the work instruction .
Ensure this part is issued with each assembled clacker

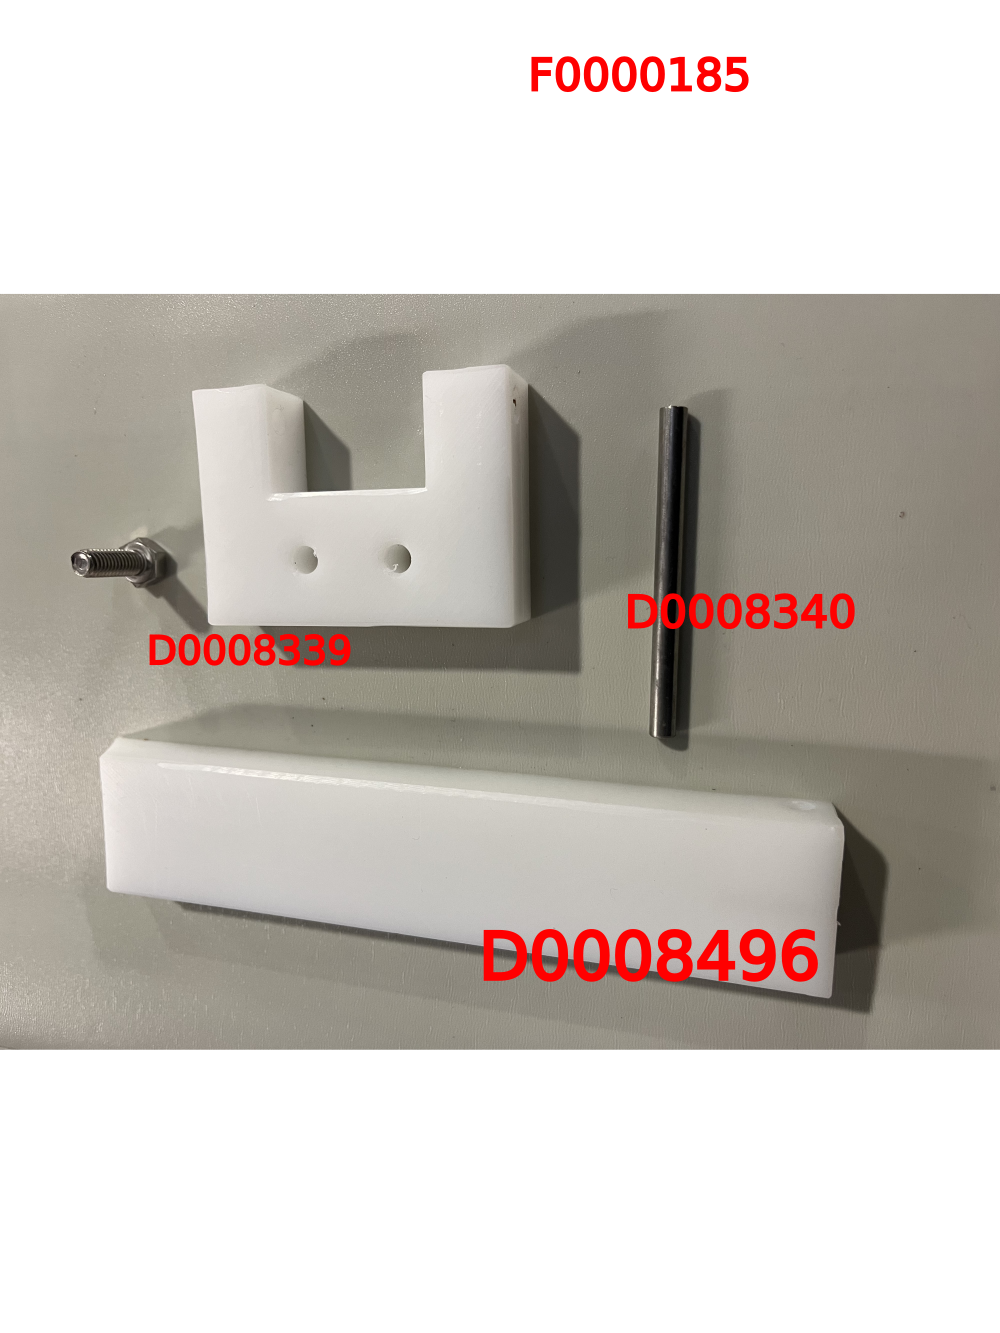
Étape 2 - Components
D0008339 Gap Closer Arm x 1
D0008340 Gap Closer Base x 1
D0008496 Clacker Pins x 1
F0000185 M6 x 16 Hex set S/S x 1
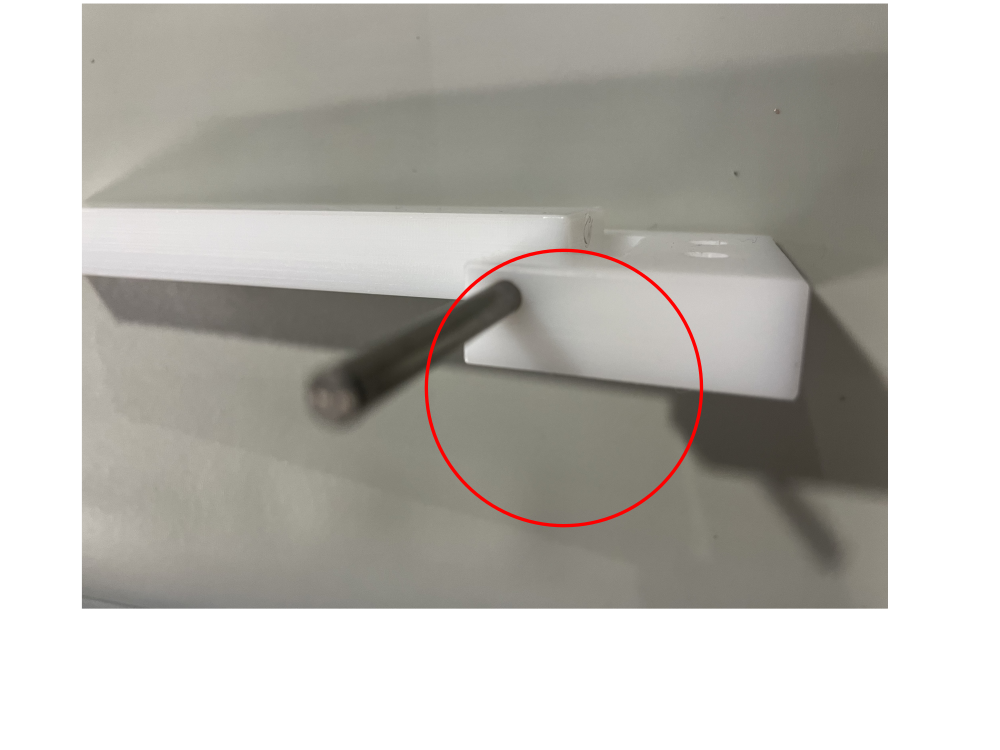
Étape 3 - Fit D0008496 Clacker Pins
Use ball pein hammer to locate D0008496 Clacker Pins into D0008340 Gap Closer Base as shown
Ensure pin does not go past indicated face

Étape 4 - Position D0008339 Gap Closer Arm
Position D0008339 Gap Closer Arm as shown

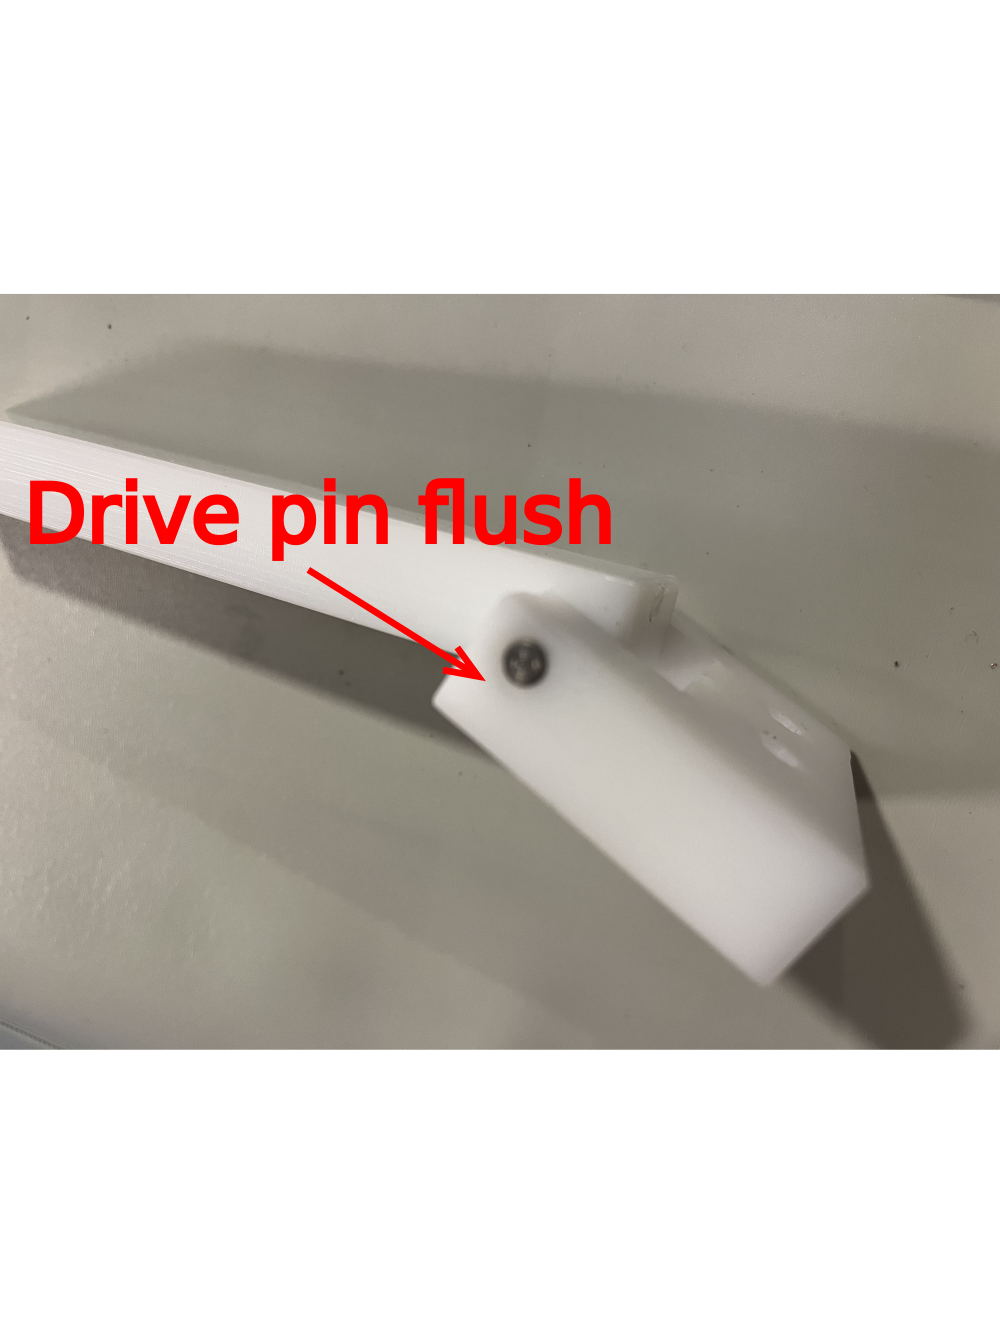
Étape 5 - Drive in pin
Drive pin through parts until flush with face
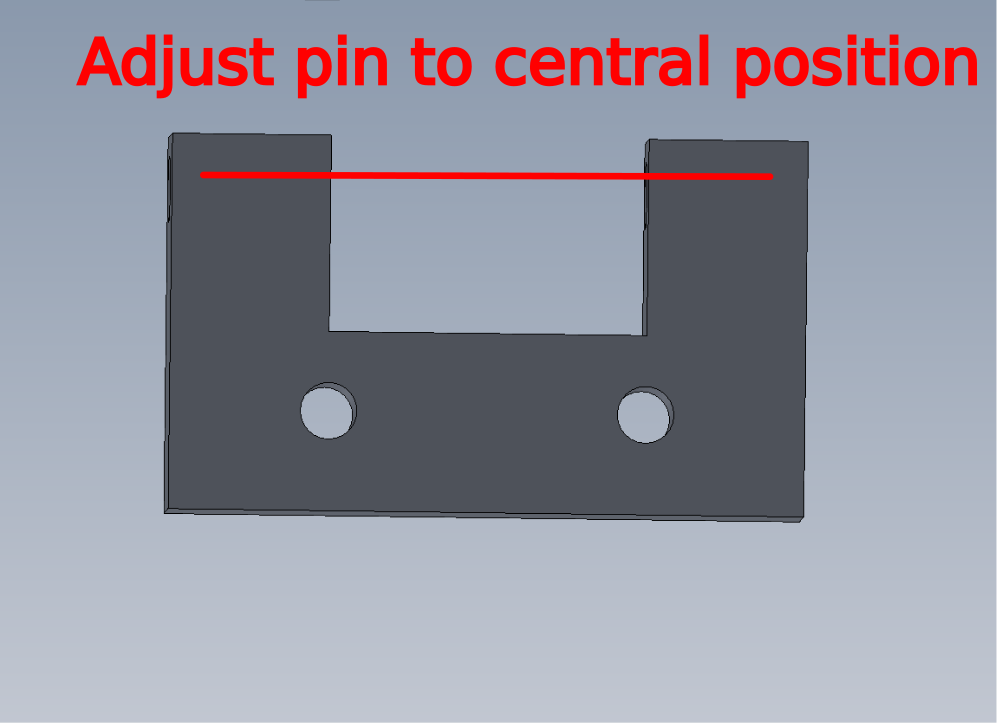
Étape 6 - Centralise pin
Use a 5mm punch and ball pein hammer to centralise pin between the 2 outer faces of D0008340 Gap Closer Base

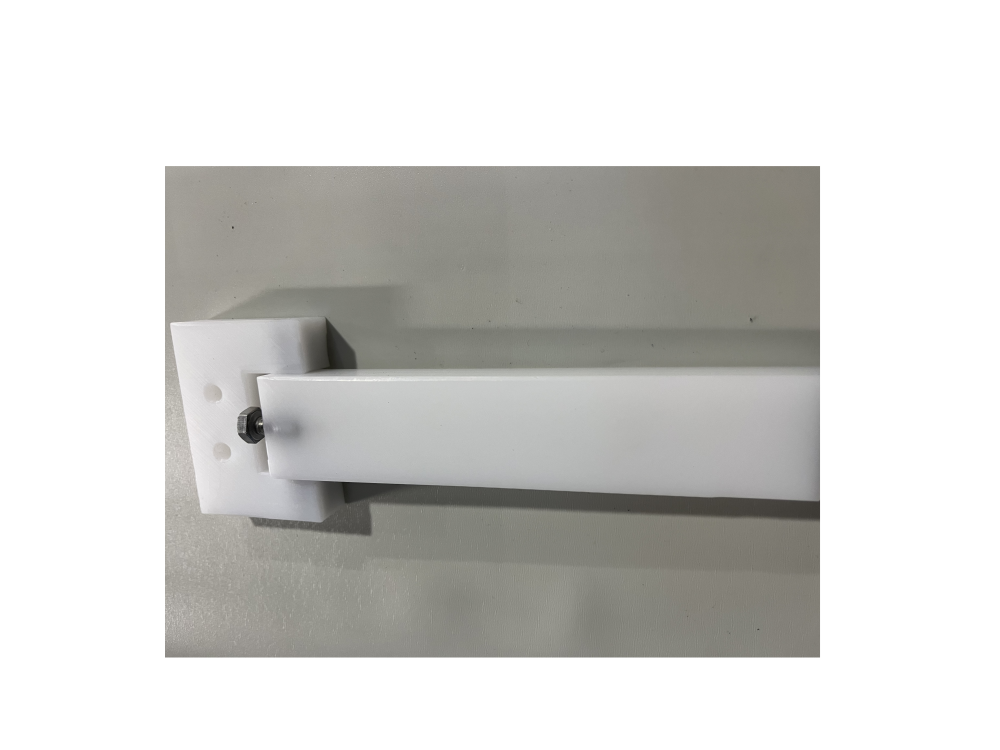
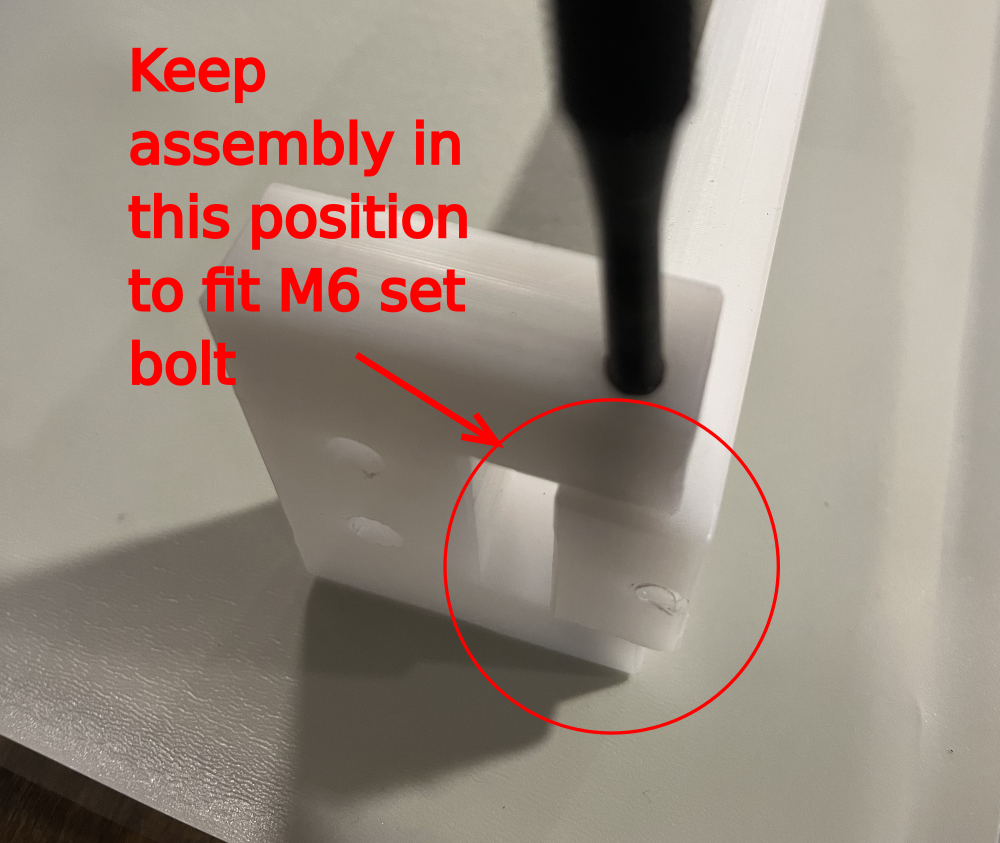
Étape 7 - Fit stop
Position assembly as shown
Fit M6 set bolt by hand
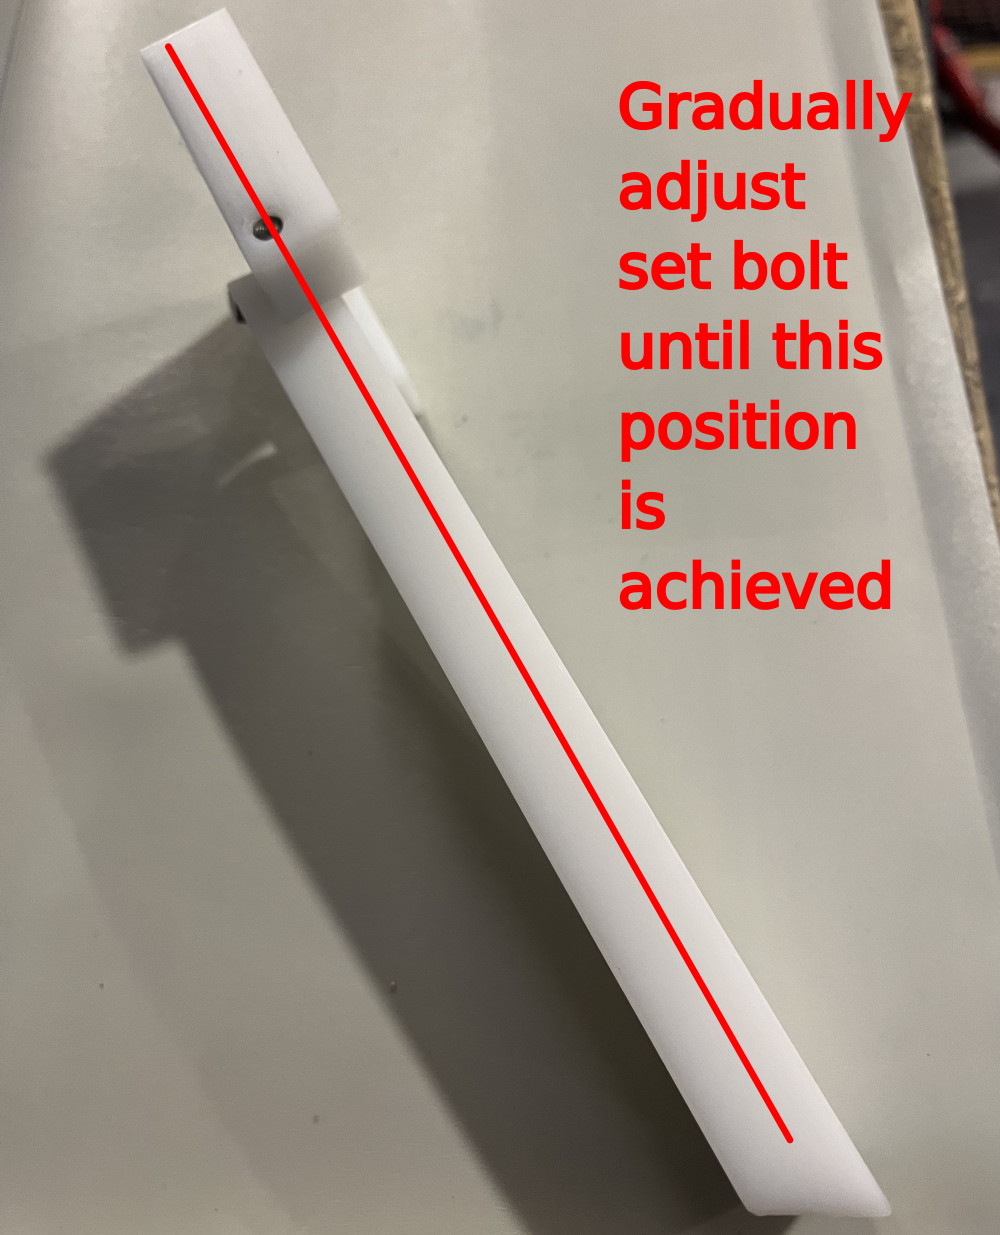
Slowly adjust set bolt by winding into the assembly until the shown position is achieved by the base and arm when Head of set bolt contacts the clacker base
DO NOT SET ANY FURTHER THAN THIS POSITION
Étape 8 - Finish
Check list
Pin centralised
Set bolt adjusted
Clacker arm and base pivots on pin by hand


Draft
 Français
 English
 Deutsch
 Español
 Italiano
 Português