Changes to Saje Label Applicator

Aims
- Fasten the temporary items on to the application frame securely
- Increase the diameter of the exhaust pipe to 10mm if possible
- Reroute the pipework to put the 3/2 switching valve closer to the 6 way valve manifold bank and tidy
- Route the venturi exhaust to work as a blower where the label will be applied
Current Setup
The original setup has been temporarily modified to improve the flow rate of the exhaust by using a Festo rather than SMC vacuum generator. however, this has left the setup poorly finished and in need of proper fixing. The standard valve for switching the vacuum supply has been "amplified" with the use of a 3/2 valve twith a larger flow rate / aperture size
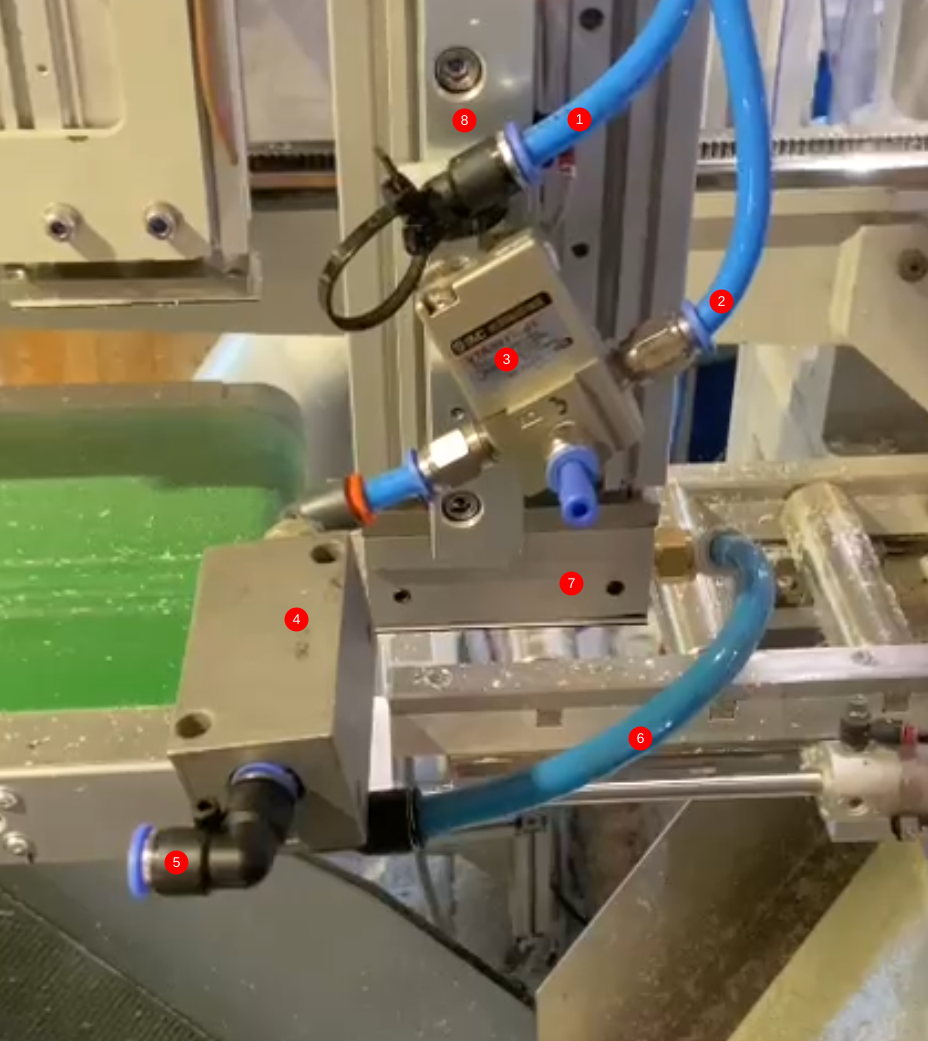
- Feed from signalling valve output
- Mains Air supply
- 3/2 Valve
- Festo Vacuum Generator (venturi device)
- Venturi exhaust
- Vacuum pipe
- Applicator Head
- Applicator Arm
Changes
- Move the 3/2 valve closer to the valve bank. This will remove the need for two pipes to the applicator head. The feed from the valve bank to the 3/2 valve can be 6mm as there is very little flow needed to operate the 3/2 valve
- Fix the Festo Vacuum Generator to the applicator arm (NB not the applicator head). The pipe from the Festo Vac Generator needs to be 10mm diameter and as short as possible, but it need to allow the applicator Head to move up and down - preferably using the pivot of an air fitting
- Add a p
Potential Parts Needed
- Elbow and Straight ait fittings 1/4BSP, 1/8 BSP, 6mm, 8mm, 10mm
- 6mm, 8mm, 10mm pipe
- Reducers 10-8mm, and reverse
Draft
 Français
 English
 Deutsch
 Español
 Italiano
 Português