How to import a picking list created in Sage to a Monday board

Difficulté
Moyen
Durée
30 minute(s)
Sommaire
- 1 Introduction
- 2 Étape 1 - Allocate the parts for "Pick Run"
- 3 Étape 2 - Print off the Bin Labels
- 4 Étape 3 - Print off the Bin Sheets
- 5 Étape 4 - Print the First Pick Labels
- 6 Étape 5 - Open "Sage Hook" Database
- 7 Étape 6 - Select the Job Cards and Export
- 8 Étape 7 - Wait for Message box
- 9 Étape 8 - Import the Board on Monday
- 10 Étape 9 - Set up First Row and Column
- 11 Étape 10 - Customise Columns
- 12 Étape 11 - Ensure a Picking List Board is Created
- 13 Étape 12 - Move the data from the import board to the Picking List
- 14 Étape 13 - Data Move Errors
- 15 Étape 14 - Delete the empty imported data board
- 16 Commentaires
Introduction
This procedure demonstrates how to use the "Sage Hooks" MS Access database to grab the data created in Sage and exort to a spreadsheet. The spreadsheet is then imported into a new Monday board, then copied across to the correct Picking List for the machine build.
Étape 1 - Allocate the parts for "Pick Run"
A pick run is a chunk or set of Job Cards that will be picked in a controlled amount. This is normally 10-20 job cards. it is managed in this way to keep the amount of time between the allocation on Sage and the physical pick as short as possible.
Étape 2 - Print off the Bin Labels

Étape 3 - Print off the Bin Sheets

Étape 4 - Print the First Pick Labels

Étape 5 - Open "Sage Hook" Database
This is located in g:\Sage\Exports
Click "OK" or "Yes" if there is a security question to enable Macros

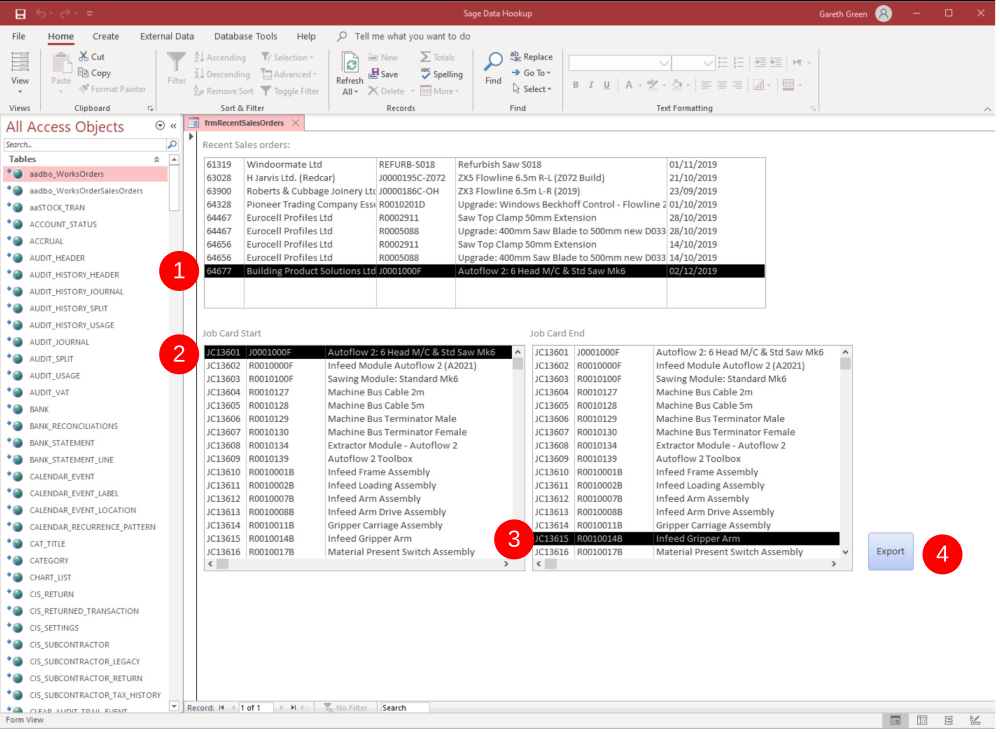
Étape 6 - Select the Job Cards and Export
- Select the Sales order relevant to the build number
- Select the Starting Job card
- Select the ending Job Card
- Click Export
- Click Yes to overwrite existing file
Étape 7 - Wait for Message box
The export may take a few minutes
Click OK

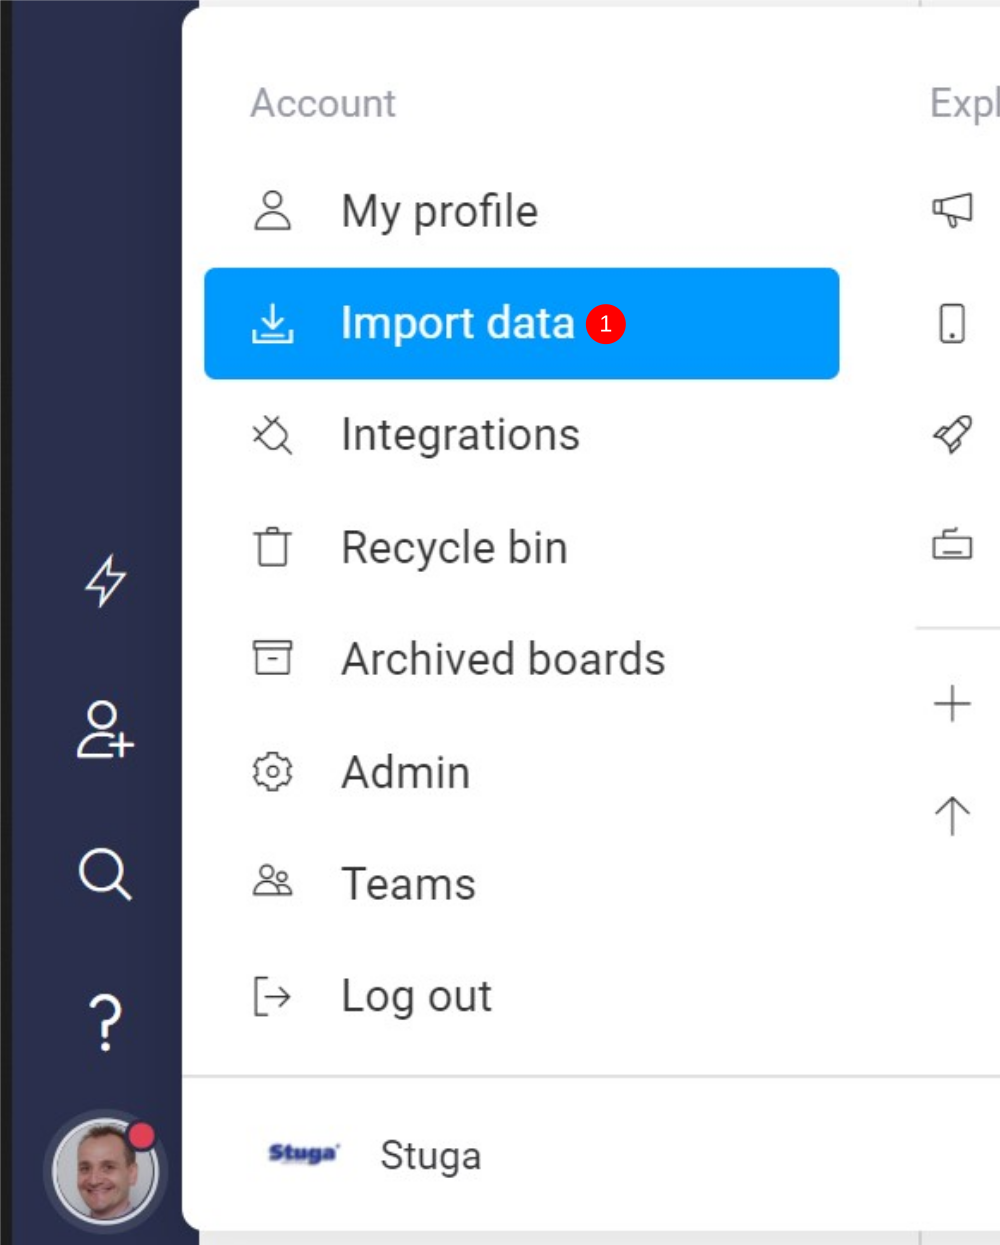
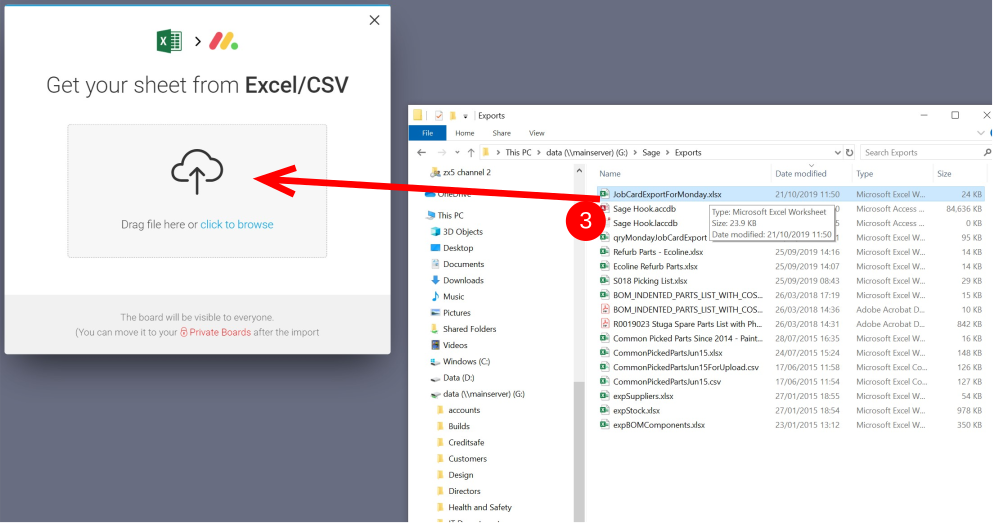
Étape 8 - Import the Board on Monday
- Click on your profile face and then select Import Data
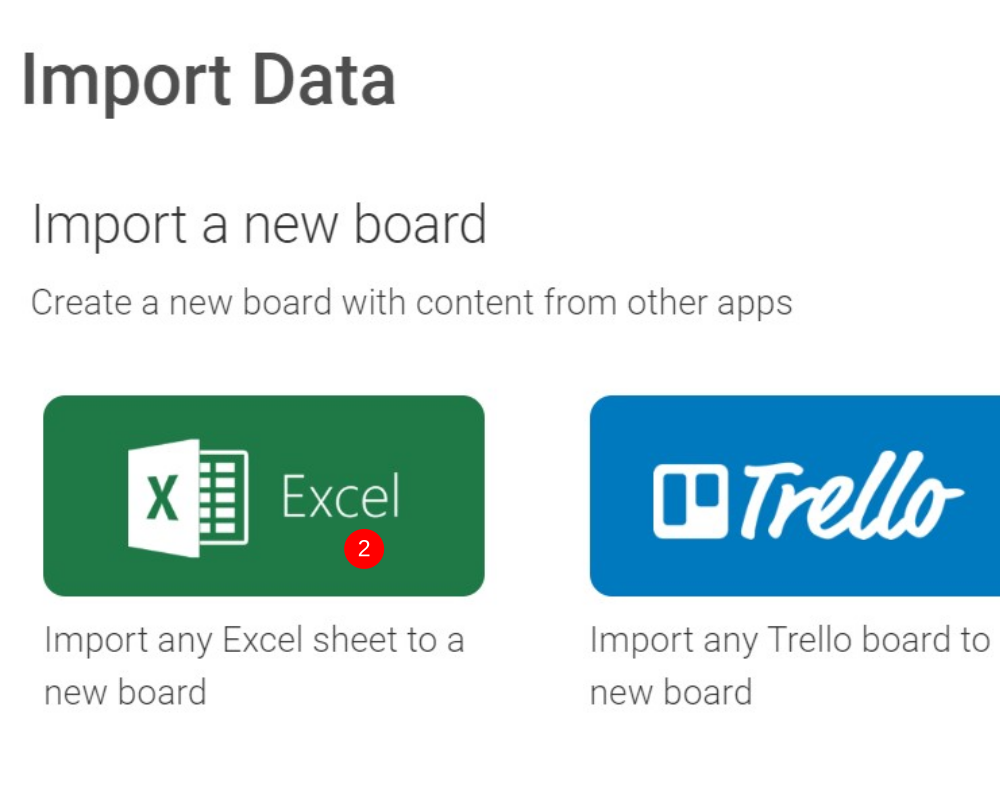
- Select Excel Document
- Drag and Drop the file G:\Sage\Exports\JobCardExportForMonday.xlsx from a file explorer window onto the import panel
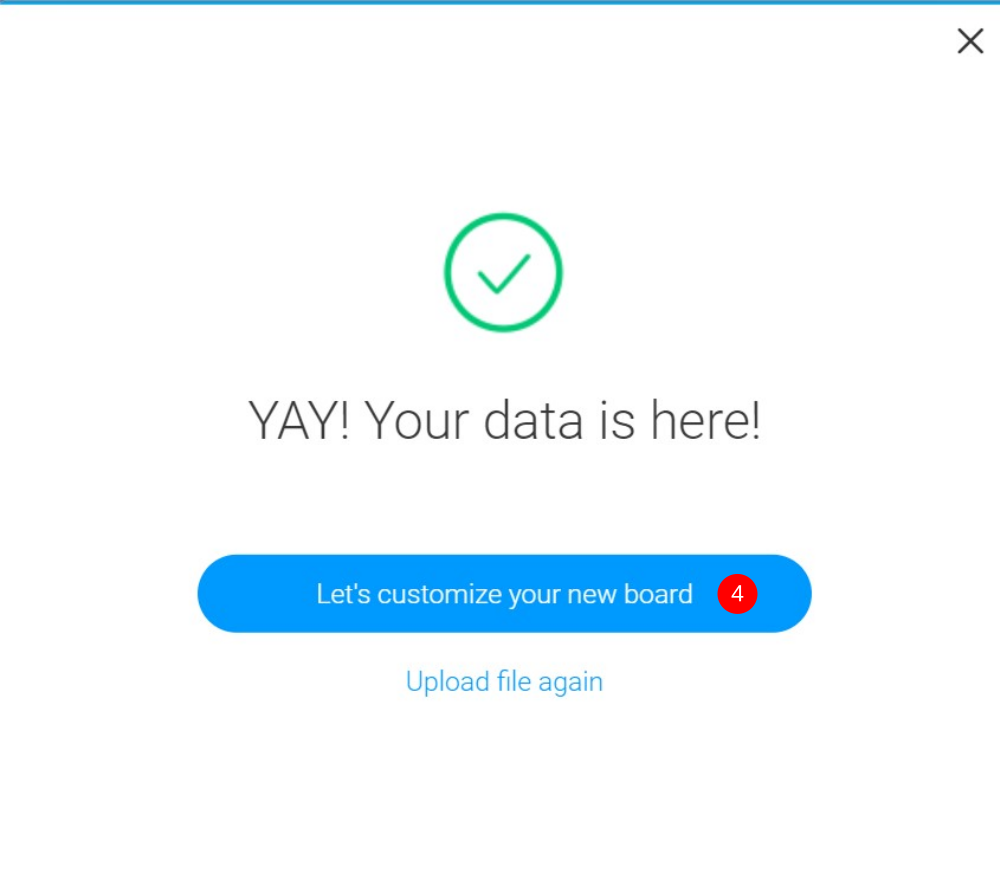
- Message when data imported successfully, click on "Let's customize your new board"
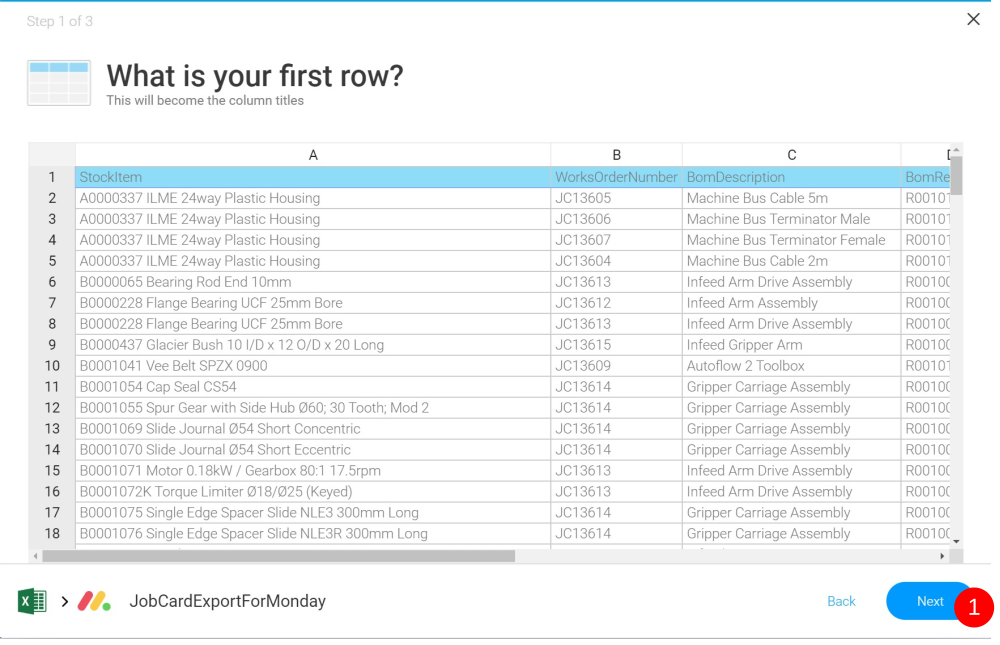
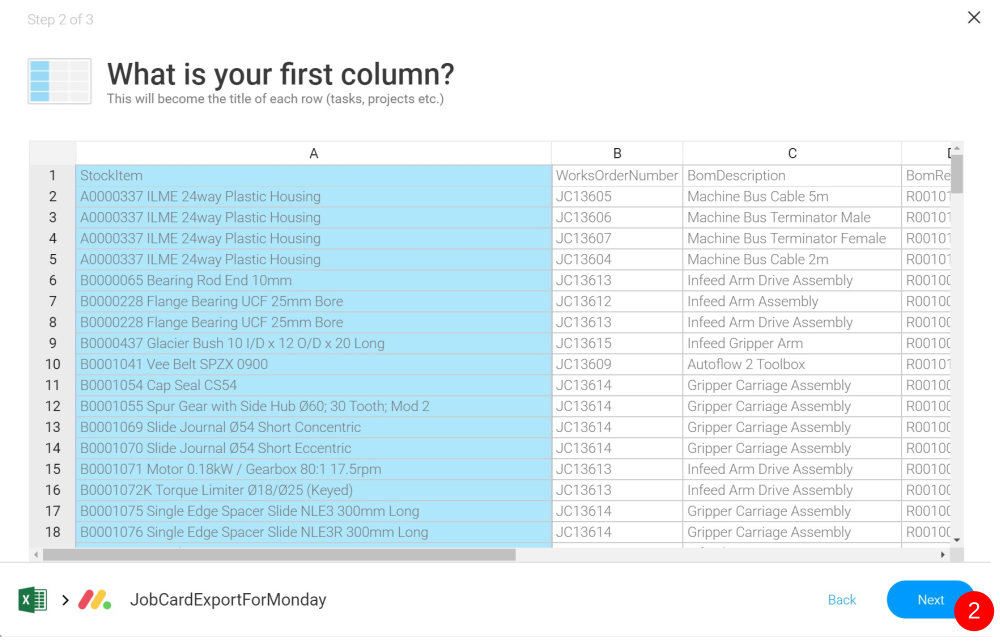
Étape 9 - Set up First Row and Column
These are always left as default
- Click "Next" for the first row
- Click "Next" for the first column
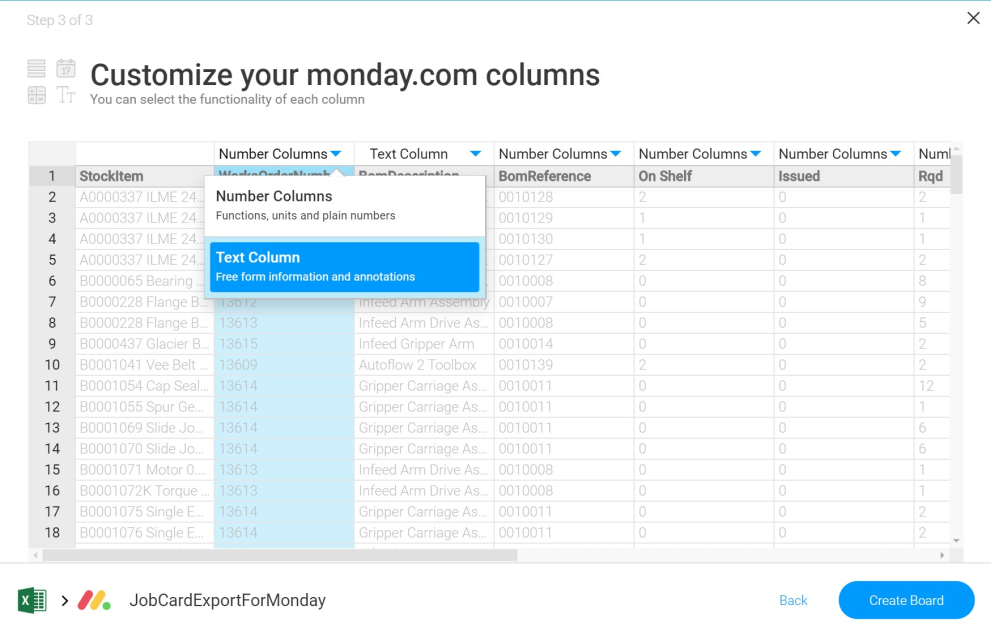
Étape 10 - Customise Columns
- Ensure that the following column heading types are changed to a "Text Column". Sometimes Monday gets this right, but in most cases you will need to change it
- "WorksOrderNumber"
- "BomDescription"
- "BomReference"
- "Supplier"
- "Supplier_Part_Number"
- "Location"
- "OrderNo"
- "Production Stage"
- "Finish"
Then click "Create Board"
Étape 11 - Ensure a Picking List Board is Created
The destination board for a build is labelled:
Bnnn Picking List
Where Bnnn is the build number for the machine. They should be stored under the 'Stores' folder.
To create a new Picking List, simply duplicate one that is already there, and duplicate the "Structure Only"., and click "Keep subscribers"
Then rename it to the correct build number.


Étape 12 - Move the data from the import board to the Picking List
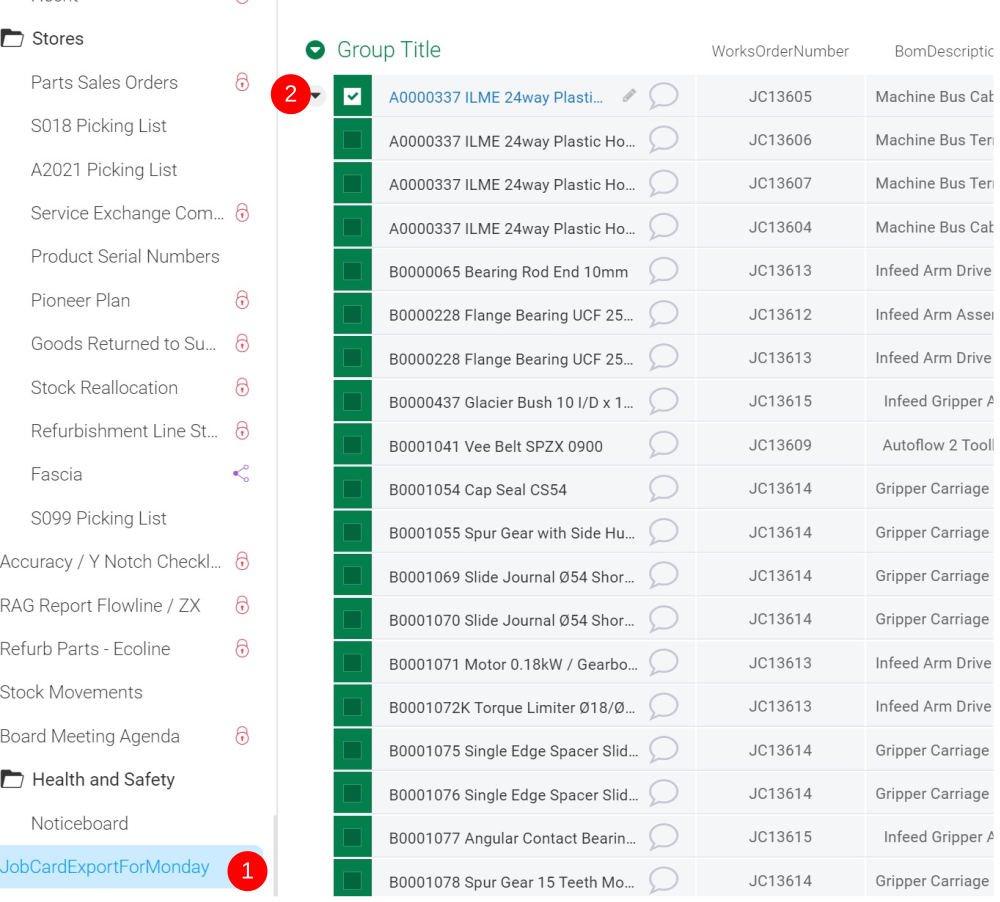
- Open the JobCardExportForMonday board
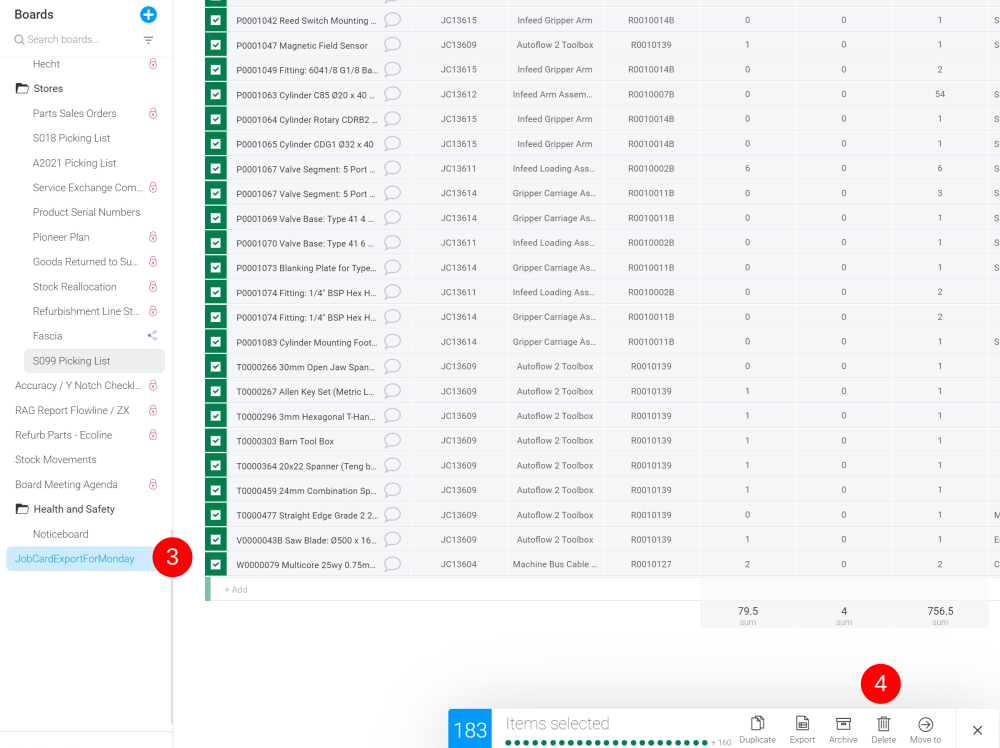
- Select as many items as you can (click the top one)
- Scroll down to the bottom, hold shift and click the lower one ) - note there is a maximum selection limit of 500. If you can't seem to select items, you have tried to select too many.
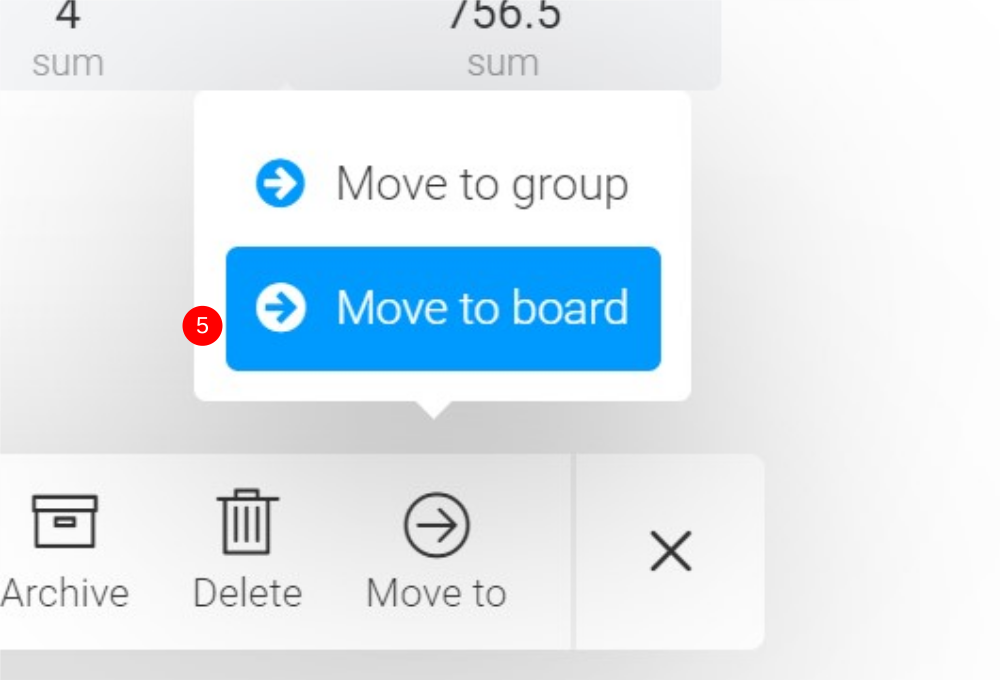
- Click Move to
- Select Move to Board
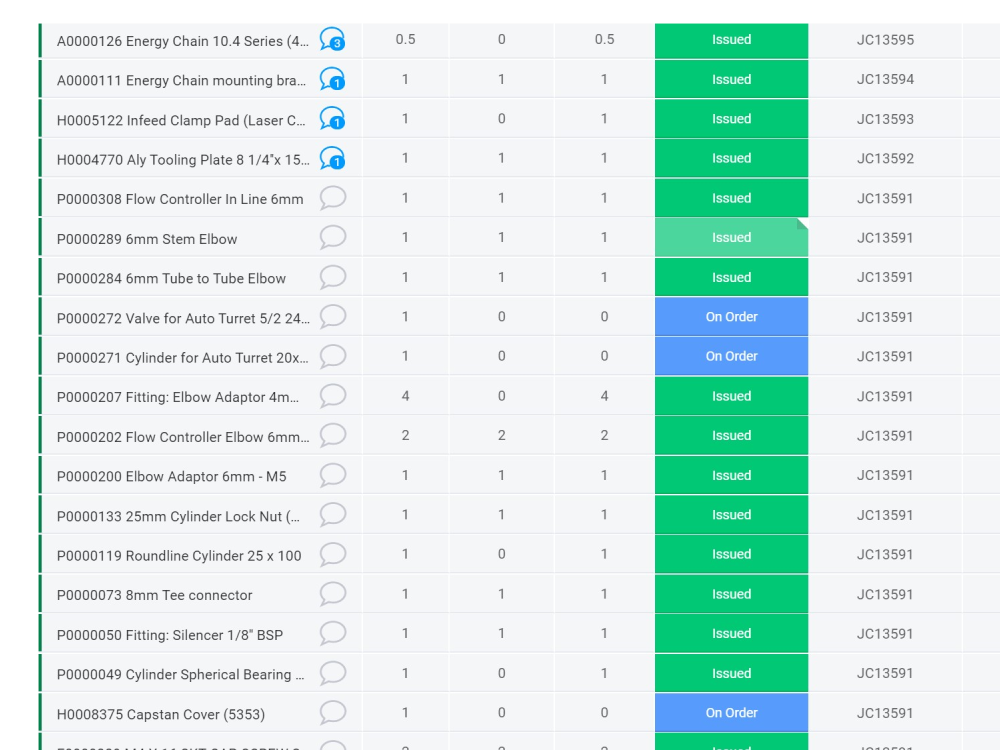
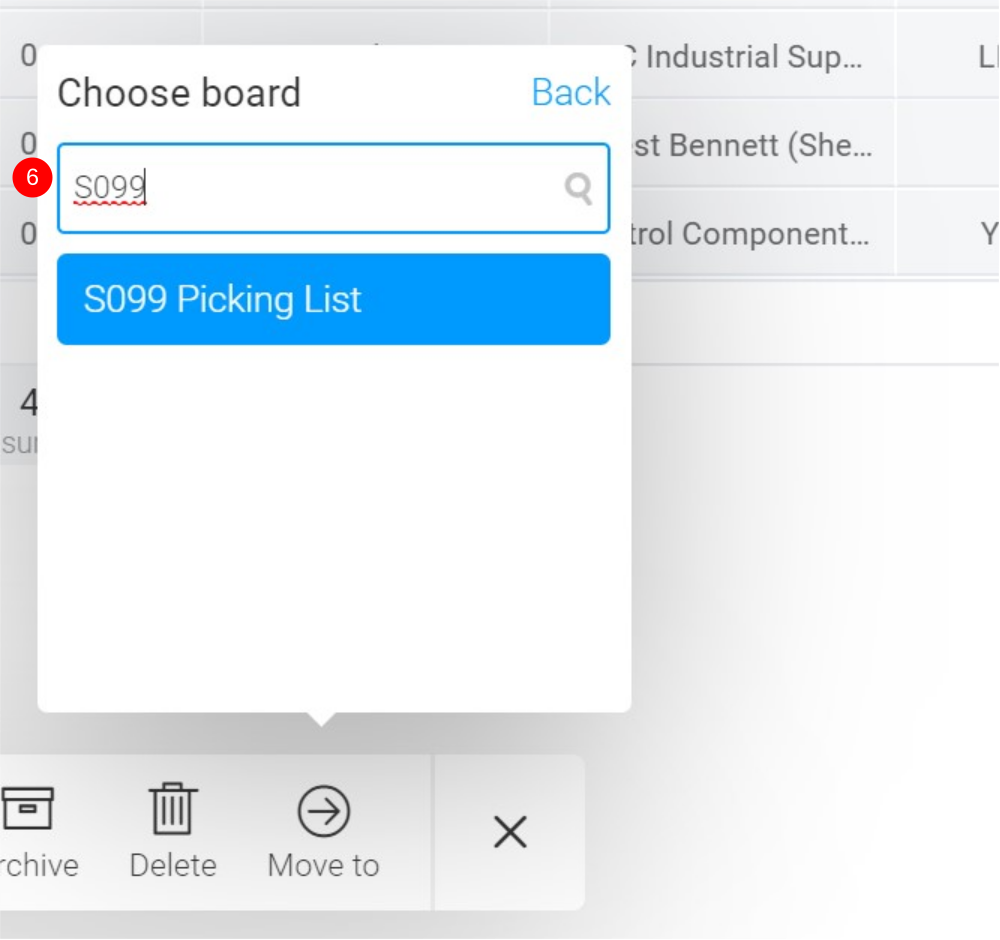
- Find the correct board by typing the Build Number and then selecting it
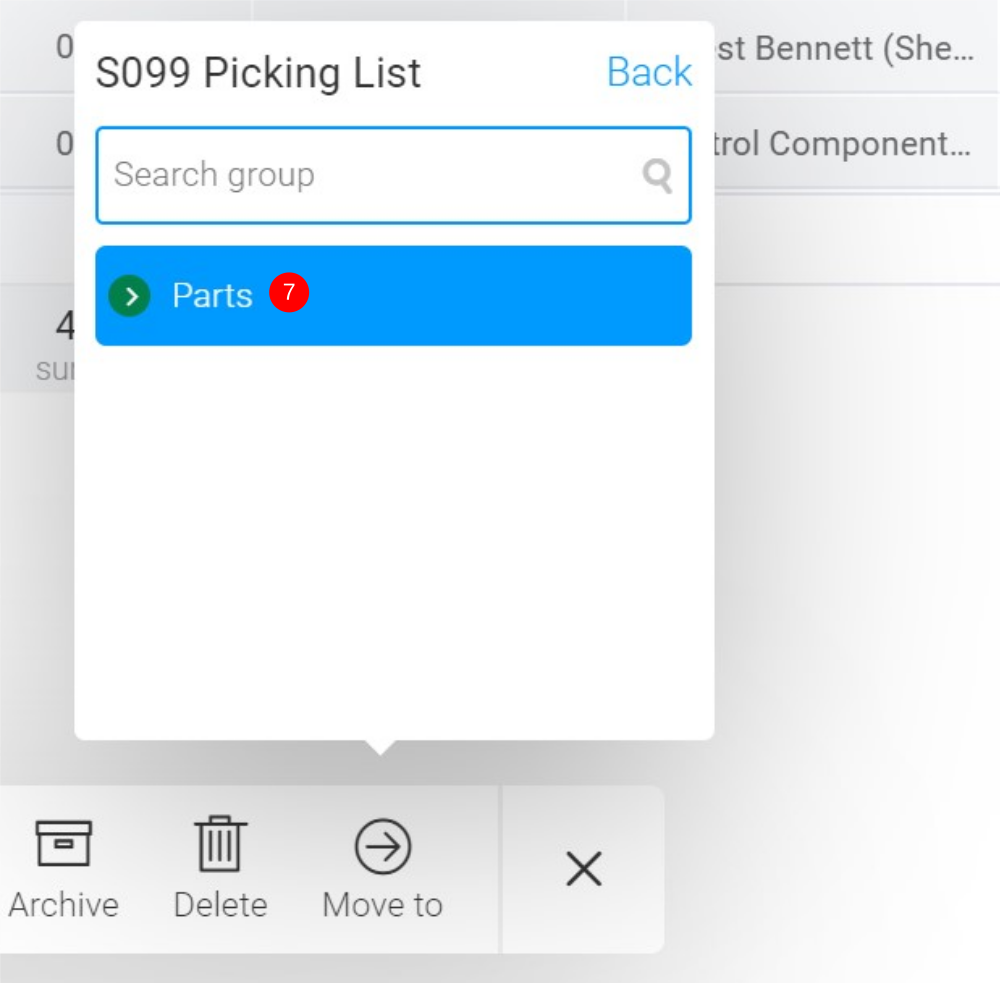
- Click on the 'Parts' group
The picking list will now be populated with the exported parts
Étape 13 - Data Move Errors
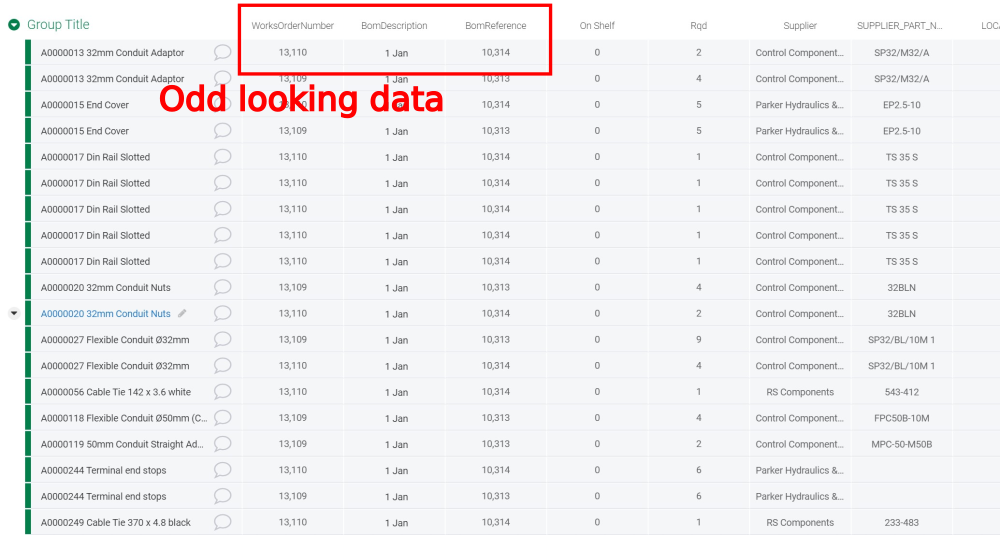
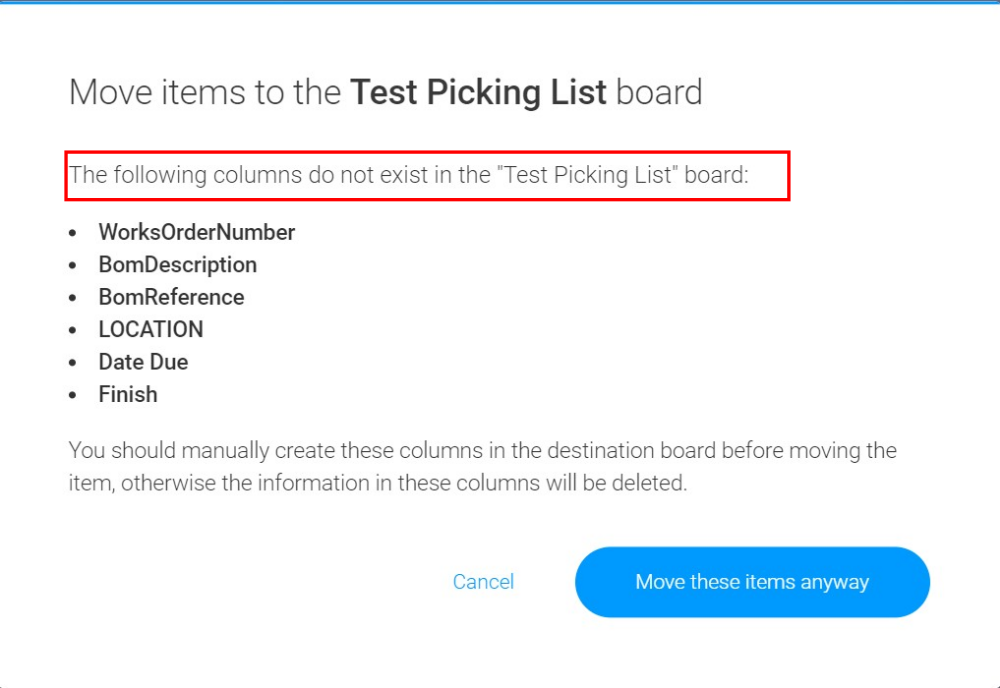
If the columns were customised correctly in Step 10, the data will move with no problems.
If not, an warning will appear telling you that "the following columns do not exist"
In this case, you will need to import the spreadsheet again from Step 8, and ensure you set all required columns to "Text"
Étape 14 - Delete the empty imported data board
Delete JobCardExportForMonday

Draft
 Français
 English
 Deutsch
 Español
 Italiano
 Português