Basic Introduction to uPVC Manufacturing process
Upvc Window Manufacturing Process
Material
Upvc extrusion : Length normally 6.0m or 6.5m
Window configuration
Externally glazed (Meaning all the glass is beaded from the outside of the house). This style is not as common within the UK as it is less secure. It can however be more aesthetically pleasing as there is no reverse butt welding required. This style can also be supplied with an end milled or “V” welded transom and mullion joint.
Extrusion types
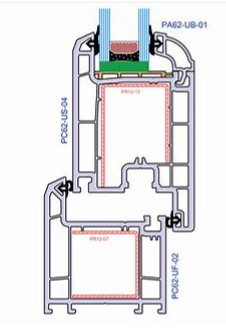
“L” shape : Outerframe profile.
“Z” shape : Sash profile
“T” shape : Transom/Mullion profile
Internally glazed (Meaning all the glass is beaded from the inside of the house). This style is the most common within the UK as it is more secure however it requires an additional process to be done on the outerframe. This process is called “Reverse butt” which consists of the outerframe being cut at 90 degrees at the point were the transom will be welded. The outerframe will then be welded together again with one piece reversed at 180 degrees to the other. The purpose of doing this process is so the sash can still be opened outwardly when assembled.
Extrusion types : “L” shape : Outerframe profile
“T” shape : Sash profile
“Z” shape : Transom/Mullion profile
Sawing and Machining
Cuts
a) 45 degree mitre cut in preparation for corner welding of sash and outerframe
b) 90 degree (straight cut) in preparation for reverse butt welding of outerframe
c) Arrowhead cut in preparation for Transom and Mullion welding into the outerframe
d) **Bevel cut (Combination of 45 & 90 degree angles) in preparation for reverse butt welding of outerframe
** (This process is normally done on a CNC Sawing & Machining Centre).
Machines : Single and Double Head Mitre Saws
Make &Model : Elumatec MGS72, DG79, DG142, Emmegi 40S, Norma-400, Classic Star 500, Stuga Autocut.
Other popular makes : Haffner, Wegoma, Kombimatec, STB, Mecal, FOM, Pertici, Avantek.
“V” Notching
This is when a “V” is cut into the inner face of the outerframe in preparation for welding the “arrowhead” joint. The arrowhead is cut using the “Z” or “T” transom profiles depending whether the window is internally glazed or externally glazed.
Machines : “V” Notch Saw : Example : Make & Model : Pertici VC721, Elumatec KS101.
Other popular makes; Haffner, Wegoma, Kombimatec, Avantek.
Machining (Routing)
The machining process uses routing tools to create holes and slots in the uPVC. These are split into 2 areas
- Drainage and Equalisation holes - allows rain water to drain correctly from the window frame
- Hardware -slots and holes for window hardware (Handles, locks, gearing) and for "Trickle Vent" ventilation.
Machines : Copy Router, Drainage (Waterslot) Router, Vent Router. : Example : Make & Model : Pertici FC106, ML142, Elumatec GF171, WSF, MLA A21, WS32. Stuga Ecoline
Other popular makes : Haffner, Wegoma, Kombimatec, Avantek
Special note : All the above processes from Main sawing - “V” Notching - Machining can be done using a CNC Sawing and Machining Centre. : Stuga Autoflow, ZX5/E, ZX5/S.
Machining Operations
Drainage
Drainage involves the incorporation of discreet channels or grooves within the window frame itself, designed to guide rainwater and condensation towards strategically placed drainage holes. These holes allow the collected moisture to exit the frame and flow outside, preventing water buildup and potential damage.
Face drainage, utilizes internal channels in the frame to guide water away from the window. These channels are often designed to complement the window's aesthetic while effectively directing water flow.
Concealed drainage, involves ingeniously designed channels that are hidden within the frame, maintaining a sleek appearance while still efficiently diverting rainwater and preventing pooling.
Both face and concealed drainage systems play a crucial role in enhancing the functionality and longevity of UPVC windows, ensuring they remain resilient and visually appealing amidst the UK's often challenging weather conditions.
Pressure Equalisation
Equalization holes in UPVC windows ensure proper drainage by maintaining pressure balance. These holes allow air to flow between internal drainage channels and the outside, preventing water buildup and helping water drain smoothly through the drainage system. This balanced pressure enhances drainage efficiency and overall window performance.
These operations can be manually created by routing machines - Make & Model : Pertici FC106, ML142, Elumatec GF171, WSF, MLA A21, WS32
or created automatically on a machining centre.
Drainage and equalisation holes are on the majority of the components on a window, as theey are required wherever rain could collect - on every horizontal member of the window frame
Lock Handles
Various locking handle mechanisms are employed to ensure both security and ease of use. Two common types are the Espagnolette (Espag) and shootbolt locking systems. The Espag locking handle is a popular choice, utilizing a metal strip with multiple locking points that engage with keeps along the window frame when the handle is turned. This mechanism provides excellent security by distributing locking points evenly across the frame. On the other hand, the shootbolt system involves cylindrical rods (shootbolts) that are extended into designated slots on the window frame, creating a strong and secure barrier against intrusion. These rods are controlled by turning the handle, ensuring simple operation and reliable protection
Lock Keeps
UPVC keeps are crucial components in UK windows and doors, providing secure points for locking mechanisms. These metal pieces align perfectly with locking points on handles or shootbolts, ensuring a tight seal when windows or doors are closed and locked. Keeps are durable, built to withstand use and weather exposure. They come in various shapes and sizes to match different locking systems and designs
Steel Reinforcement
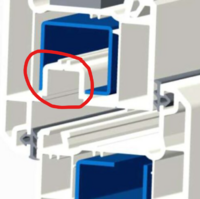
In most cases fabricated thin gauge steel bars will be used to reinforce the window to give it the strength and rigidity. The steel is cut to the required length which would normally be approximately 10mm to 20mm less than the cut length of the Upvc profile and then inserted into the reinforcement chamber which is located in the centre of the Upvc extrusion. The steel is then held in place by fixing screws. Windows can also use “regrind” reinforcement which is basically manufactured using old replacement windows or rejected extrusions which are broken down and then extruded to form a solid bar which can then be inserted and fixed inside the reinforcement chamber. The benefits of regrind reinforcement is that it can be inserted into the main profiles before cutting and then welded as normal during the welding cycle. This enhances the corner strength as well as the overall thermal efficiencies of the window. The down side is that regrind is not as strong as steel therefore it cannot be used for all applications and styles. Especially Upvc doors which require to have steel inserted due to the higher risk of expansion and contraction.
Machines : Coldsaw, Bandsaw. : Example : Make & Model : MACC 250DV, MACC Special 280M.
Welding
Main Welding
The most important part of the process in manufacturing Upvc windows is the frame welding. This process is a hot melt technique where the uPVC faces are heated to around 240 degrees and pressed together. It is important that the welding machine is kept in good condition and regularly serviced to maintain accuracy and to keep consistency across all the welded joints. This will prevent poor welds which is the most common cause of joint breakages and inaccuracies when performing the cleaning operation post welding. It is also vitally important to instil good housekeeping of the welding fixtures as bruised or damaged fixtures are also common causes of poor welds.
The most widely used welding machines amongst window fabricators, whether small, medium or large, is the In-Line Combination Welder. They can either be supplied in three, four or five head versions and can have additional functions were the heads can swivel internally to allow
for the welding of “H” joints. All UK windows styles, whether complex or not can normally be welded on this type of machine which is why they can be found in every Upvc window fabricator. The larger producers will also have one or several of these types of welders in their workplace as they still have a vital role to play even when there is more automated welding machines in place. The In-line welders are then used offline to produce the non standard window styles which take longer to produce or they are used as “build up” welding machines to produce all the welded joints like a “H” weld or a crucifix joint in preparation for finishing on the automated four, six or eight head welding machines.
Reverse Butt Welding
Reverse butt welding is needed where the frame changes from Internal to external beading. This process is performed prior to completing the welding of all other peripheral welds on the corner and transom joints. The most common machine used in the industry is a single head welder. The heater plate is flat and the back fences are normally variable angle that can be adjusted between 30 deg. to 180 deg. When welding a reverse butt joint the back fences must be set at an angle of 180 deg. The “burn off” will normally be between 5mm to 6mm and the “weld seam limitation” will range between 0.2mm to 2.0mm depending on the type of welder and also the customers preference. An important point to note is that when a reverse butt weld is performed the burn off can be up to 1.2mm less than what the welder has been originally specified to do at 90 deg. For example, if the welder has been specified during its build to weld a 90 deg. angle at a burn off of 6mm then it will only burn off 4.8mm when doing a reverse butt weld. It is therefore important to specify the exact burn off required at 180 deg. when ordering a machine.
Refer to the different terminology used within the manufacturing processes at the end)
Crucifix (Cruciform) Welding
Crucifix welding or cruciform welding is when you weld three or in some cases four pieces of profile together to create a cross. This can be seen in some complex window styles like a four or six pane window. The crucifix joint can be performed on a dedicated single head Crucifix welder which has an “X” shaped heater plate which allows for four separate lengths of profile with “arrowhead” cuts to be welded simultaneously. The other method of producing a crucifix joint is to cut a “V” notch into one side of a profile then weld a mating arrowhead into this to form a “T” joint. The opposite “V” notch would then be cut out in preparation for the second arrowhead to be welded. This process takes longer and involves having a “V” Notch saw and an In-line or single head welding machine which has a “V” shaped heater plate. These heater plates are the most common used in manufacturing windows and are found on every multi head In-line welding machine. The process of forming a Crucifix joint is exactly the same as a reverse butt joint were you have to manufacture it prior to completing the welding of all other peripheral joints.
Corner Cleaning
The corner cleaning process is performed post welding and its sole function is to clean all the excess weld or (sprue) around the complete welded joint. The transom and crucifix joints can also be cleaned using a combination corner/transom cleaner. The main points of any corner cleaner is what is the maximum height it can clamp and what is the minimum internal dimension it can clamp. This is important as profiles evolve they are becoming taller and also the internal clamping needs to be correct to suit the customers minimum “transom drop”.
The most common corner/transom cleaners in the UK market are manufactured by URBAN and to a lesser extend, ROTOX. Both of which are manufactured in Germany. The most common single head corner cleaner amongst the small, medium and large fabricators is the Urban SV530 and to a lesser extent the Rotox EPA379. It is common for the larger fabricators who have two or four head automatic corner cleaners to also have one or several single head corner cleaners which they would use offline as “build up” machines for cleaning complex window styles.
Beading
The Beading of a window is the final process before assembly. The most common angle of cut at each corner joint is 45 degree as this is the quickest and easiest to produce. The level of quality and consistency can however be difficult to maintain as the cut of the angle and the measurement of the cut length must be accurate otherwise you will see gaps in the joint. With new technology in beading machinery the margin of error is drastically reduced due to advances in bead holding fixtures and electronic measuring wands which give far greater accuracy. The other method of beading is to “overscribe”. This is a longer process to manufacture as it involves using a bead saw or chop saw which will be used to cut two beads at 90 degrees and a bead end milling machine to mill out the end of the two remaining beads to the shape of the external face of the bead. This method is normally used with fabricators who do not have a good quality beadsaw or they just prefer this particular finish. It can also be the preferred choice if they are working with less flexible bead profile as its easier to remove from the window if sealed units need to be changed.
Terminology
| Term | Description |
|---|---|
| Sawing and Machining | |
| Transom | Refers to the horizontal profile bar that separates each part of a window. |
| Mullion | Refers to the vertical profile bar that separates each part of a window. |
| Sash | Refers to the opening section of a window. |
| Outer frame | Refers to the external frame that is fixed to the window opening within a house |
| Bar length | Length of profile before cutting |
| Optimization | Process to obtain the best yield from the profile bar or batch to minimise wastage. Normally there is an interface between the machine software and the customers processing software (e.g.Windowmaker, 1st Degree, Business Micros)
On Stuga machines, the optimisation is done by the Stuga software |
| Batch cutting | The process of cutting a number of profile bars to create a batch of windowsto allow for an easier and manageable flow of product through the factory. |
| Y Notch
Bevel cut |
This is a cutting process normally undertaken by a CNC Sawing & Machining Centre. It consists of a 90 degree straight cut followed by a 45 degree cut on the same face of the profile. A Y notch eliminates the need to produce a secondary “V” notch cut when welding a reverse but joint as the “V” notch has already been created. |
| Square Cut
Straight cut |
This is a 90 degree cut usually performed on outer frames pre. Reverse butt welding. |
| Arrowhead | This type of cut is done at each end of a transom or mullion in preparation for welding into a “V” notch joint on an outerframe or sash profile. |
| “V” Notching | The “V” cut out is normally done on the inner face of the outerframe in preparation for welding the transom bar complete with arrowhead. It can also be done on a “T” or “Z” sash profile to create a crucifix joint. |
| Offcut | This refers to the length of profile which has been left at the end of a bar. The offcuts can normally be reused to suit a window within another batch. On most CNC Sawing and Machining Centres you can load an offcut on to the machine and it will recalculate through the machine software the amount of bar lengths required to produce that batch. The minimum offcut that you can use on a Stuga for example is approx. 700mm |
| Espag Routing | This is the machining process for drilling the three holes required to accept an espagnolette handle lock. Normally the holes diameter are 10/12/10mm. |
| Vent Slots | The routing of ventilation slots on sashes and outerframe profiles. |
| Drainage (Waterslots) | The routing of drainage slots to prevent a build up of water within the chambers of the profile and to stop water entering the building. Drainage slots are
normally 5mm wide x 30mm long and are positioned on the face, bottom and concealed within the inner corners of the profile and in accordance with the profile extruders manual. Drainage slots can also be used to equalise pressure which allows the water to easily flow through the slots and prevent water build up. |
| Eurogroove | A standard slot that is placed in all profiles to accept hardware from different manufacturers |
| Welding Terminology | |
| Burn off | This is the term used to explain the amount of plastic that is melted back before it is ready to be fused together. The standard amount of burn off required as per the extruders manual is between 5mm and 6mm. This means that for each face of profile that touches the heater plate it will burn back between 2.5mm and 3.0mm |
| Weld seam limitation | This is the term used to explain the gap with which the melted plastic is pushed through the top and bottom restriction knives on the welding machine. In
most welding machines this gap will be 2.0mm as it is enough of a gap to hold the profile in place and to give the required weld strength pre cleaning. Some welding machines can get down to as low as 0.2mm weld seam limitation which gives a far neater finish however this is very profile specific as not all profiles and machines can cope with the greater clamping pressures required to squeeze melted plastic through such a small gap without slippage or collapsing. |
| Clamping pressure | This refers to the amount of downward pressure required to hold profile in place during the welding cycle without slipping. The normal maximum clamping
pressure for welding corner joints would be 6bar (100 psi) however this can be less when welding transoms with arrowhead or door midrails which are much wider and therefore more likely to collapse if the downward pressure is too high. |
| Welding time | This refers to the cycle time required during the melting process. This is normally around 30 seconds. |
| Fusion time | This refers to the cycle time required during the fusion process. This is normally around 30 seconds. |
| Heater plate temperature | This refers to the optimum temperature of the heater plate to allow for the profile to be melted back the required distance before fusion. The normal optimum temperature for welding Upvc profiles is around 240°C. |
| Corner Cleaning Terminology | |
| Main cleaning sawblade | For cleaning the external face of the outerframe and sash profile. |
| Kiss cutter | This cutter is for cleaning the external ovolo or contoured feature on a sash. It is normally fitted underneath the main cleaning sawblade. |
| Grooving knives | The grooving knives of (feature knives) refer to the knives used to clean the top and bottom faces of the welded corner and transom joints. These knives can either produce a shadow groove underneath the face of the profile or can leave a flush (flat) appearance which is the prefered finish when cleaning coloured or foiled profiles. |
| Gasket drill | Refers to the drilling units to clean the gasket channel of the “hard spot” which forms underneath the rubber gasket after welding. This needs to be removed before inserting the sealed glass unit otherwise it could break the glass. These drills are fitted on the top and the bottom of the machine. |
| Internal cleaning Knives | This refers to the special shaped knives to clean the internal sculptured (ovolo) or bevelled (chamfered) corner or transom joints. |
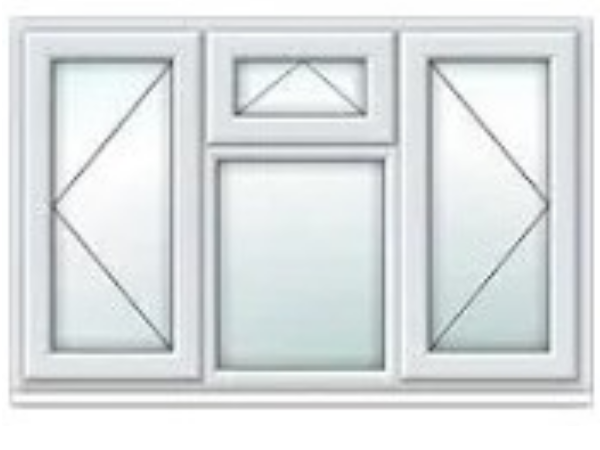
Window Types
| Casement | |||
| Tilt and Turn | |||
| Vertical Slider | |||
| Fully Reversible / Pivot | |||
| Caravan |
Door Types
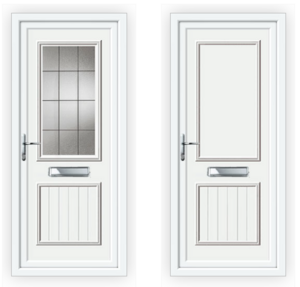
| Type | Picture | Features | Notes |
|---|---|---|---|
| Standard |
|
||
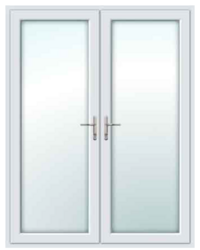
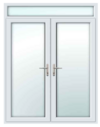
| French Door |
|
||
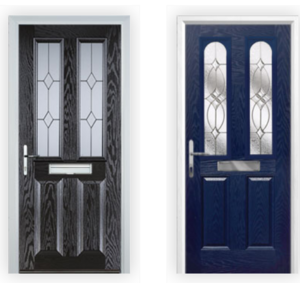
| Composite Door |
|
||
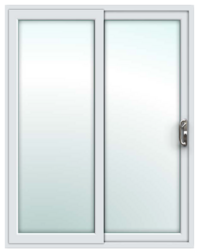
| Patio Slider |
|
||
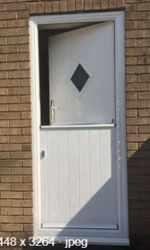
| Stable Door | |||
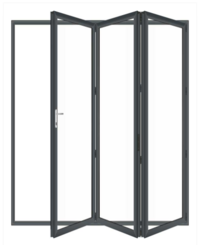
| BiFold Door |
|
||
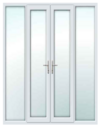
| Top and Side Lights |
|
Draft

 Français
 English
 Deutsch
 Español
 Italiano
 Português