A guide to Allocations and Issuing from booking goods in.

Difficulté
Moyen
Durée
1-3 heure(s)
Sommaire
- 1 Introduction
- 2 Étape 1 - Generated allocations list
- 3 Étape 2 - Click ok when Allocations are filled out correctly
- 4 Étape 3 - Generate P.O allocations list.
- 5 Étape 4 - Information on the P.O allocation report
- 6 Étape 5 - Put allocated parts into correct Bins
- 7 Étape 6 - Stock Items
- 8 Étape 7 - Issuing Parts to Bins
- 9 Étape 8 - Mondays Picking list
- 10 Commentaires
Introduction
This involves splitting down received orders into the JC/Pick bins the parts have been allocated to by Sage.
If there are parts to be allocated, after filling in the 'this delivery' column and pressing save, if there are parts to be allocated a list will appear.
Étape 1 - Generated allocations list
Populate the allocate column for each part in accordance to the pick bins that are available.
The general rule is to prioritize allocation to the range of Bins of the Build numnber which is next to in line to be Built according to the production schedule.
If there is no bin physically available for the Job car number shown it must be zero'd in the allocation quantity column and put into stock normally.
Étape 2 - Click ok when Allocations are filled out correctly
Étape 3 - Generate P.O allocations list.
The P.O allocation report generates a printed list of the parts that have been allocated from the booking in process.
To run the report, on Sage manufacturing go to:
Traceability --> Reports --> Stuga P.O allocation
Once loaded input the Purchase order number the parts were booked in under and generate the report.
Étape 4 - Information on the P.O allocation report
The report shows the quantity of the part that has been received on the left next to the part code, and below shows the JC number then the amount to go into that JC to the right.
Étape 5 - Put allocated parts into correct Bins
Split down the order to put the allocated parts into the correct Bins using the Allocation Report.
Once a part has physically been put into the correct bin tick the Box to the right of marked 'Bin/Shelf' this indicates the part has been put into the JC pick bin. If the part is too big to go inside the bin Mark on the Pick sheet the location it has been put it. (e.g bottom shelf, pallet 1 etc) This information must then also be inputted on the Mondays picking list 'Destination' column.
Any remaining Quantity of each part, which is not allocated to any JC, is to be put into stock.
Étape 6 - Stock Items
Any Parts that do not appear on the allocations list are to be put into Stock.
Étape 7 - Issuing Parts to Bins
Once the order has been split down and all the parts have ben placed where required (into a pick bin or on the shelf) the allocated parts need to be issued to the relevant JC on Sage Manufacturing.
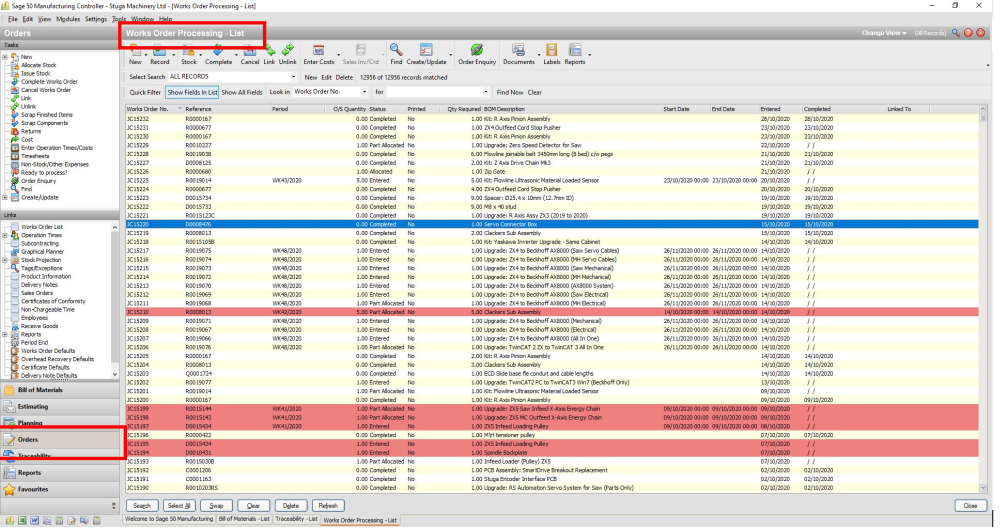
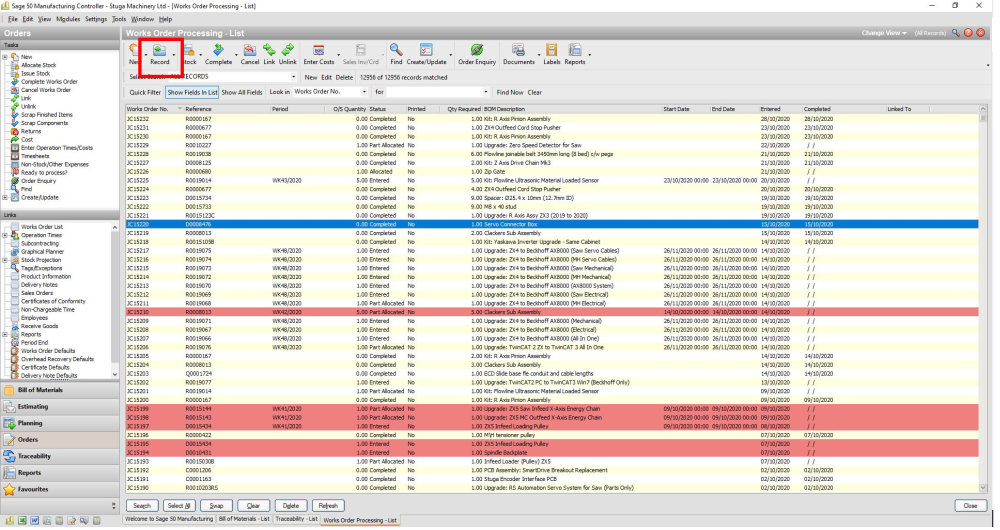
On Sage click on 'Orders' to open the works order processing list.
Using the P.O allocation report go through each Job Card number on this list and issue each part to the Job card it has been allocated to.
Issue by highlighting the Job Card required, clicking at the top of the page on 'Stock' then selecting 'Issue Stock'
The next step is to populate the 'issue now' column to the quantities required to issue of each part.
Once this is correctly populated, click ok at the bottom of the screen.
Étape 8 - Mondays Picking list
If there is a Picking list for the build on Mondays which related to the parts you have just issued, this Board needs to be filled out to match the Sage Data aswell.
If there isn't ignore this step as the Sage data will be transferred correctly when required.
Draft
 Français
 English
 Deutsch
 Español
 Italiano
 Português