| [version en cours de rédaction] | [version en cours de rédaction] |
| Ligne 35 : | Ligne 35 : | ||
{{Tuto Step | {{Tuto Step | ||
|Step_Title=<translate>Machine Arrival</translate> | |Step_Title=<translate>Machine Arrival</translate> | ||
| − | |Step_Content=<translate>'''Thursday'''</translate> | + | |Step_Content=<translate>'''Thursday PM''' |
| + | |||
| + | Unload machining centre and store in Glass shed | ||
| + | |||
| + | Unload infeed and cover with Tarpaulin | ||
| + | |||
| + | Unload electrical cabinet and store inside | ||
| + | |||
| + | <br /></translate> | ||
}} | }} | ||
{{Tuto Step | {{Tuto Step | ||
|Step_Title=<translate>Remove the Soenen Machine</translate> | |Step_Title=<translate>Remove the Soenen Machine</translate> | ||
| − | |Step_Content=<translate>'''Friday''' | + | |Step_Content=<translate>'''Friday''' |
| + | |||
| + | remove the Soenen machine, leaving the large outfeed conveyor tables | ||
The Brackets on the outfeed tables will be used for the Stuga conveyors</translate> | The Brackets on the outfeed tables will be used for the Stuga conveyors</translate> | ||
| Ligne 53 : | Ligne 63 : | ||
Using these datum points, mark the position of the remainder of the floor pads | Using these datum points, mark the position of the remainder of the floor pads | ||
| − | {{Pin|...}}<br /></translate> | + | {{Pin|...Note this may be a large quick set pad}}<br /></translate> |
|Step_Picture_00=Saje_uPVC_Unloading_Process_Saje_Floor_Datum_2.jpg | |Step_Picture_00=Saje_uPVC_Unloading_Process_Saje_Floor_Datum_2.jpg | ||
|Step_Picture_01=Saje_uPVC_Unloading_Process_Sturtz_Infeed_Triangulation_4.jpg | |Step_Picture_01=Saje_uPVC_Unloading_Process_Sturtz_Infeed_Triangulation_4.jpg | ||
| Ligne 67 : | Ligne 77 : | ||
|Step_Picture_01=Saje_uPVC_Unloading_Process_Sturtz_Infeed_Triangulation_2.jpg | |Step_Picture_01=Saje_uPVC_Unloading_Process_Sturtz_Infeed_Triangulation_2.jpg | ||
|Step_Picture_02=Saje_uPVC_Unloading_Process_Sturtz_Infeed_Triangulation_3.jpg | |Step_Picture_02=Saje_uPVC_Unloading_Process_Sturtz_Infeed_Triangulation_3.jpg | ||
| − | |||
| − | |||
| − | |||
| − | |||
| − | |||
}} | }} | ||
{{Tuto Step | {{Tuto Step | ||
|Step_Title=<translate>Prepare the Machine Pads / Piles</translate> | |Step_Title=<translate>Prepare the Machine Pads / Piles</translate> | ||
| − | |Step_Content=<translate>'''Friday''':{{Idea|...Using shuttering in the pad holes will enable the height of the pad to be increased to correct the "run off" of the floor.}} | + | |Step_Content=<translate>'''Friday''':{{Idea|...Using shuttering in the pad holes will enable the height of the pad to be increased to correct the "run off" of the floor.}}{{Info|...this instruction can be ignored if a large pad is set}} |
*Pad size 300mm x 300mm (or similar) | *Pad size 300mm x 300mm (or similar) | ||
| Ligne 85 : | Ligne 90 : | ||
}} | }} | ||
{{Tuto Step | {{Tuto Step | ||
| − | |Step_Title=<translate>Prepare | + | |Step_Title=<translate>Prepare transport axle</translate> |
| − | |Step_Content=<translate> | + | |Step_Content=<translate>Stuga will supply a wheeled all-terrain axle |
| + | |||
| + | this axle is designed to form a "wheelbarrow" using the forklift as the driver / opposite end. This will enable the heavy machine units to be carefully wheeled over the rough terrain | ||
| − | + | {{Warning|...Take care to attach the axle to the load correctly and securely}}<br /></translate> | |
| − | |||
}} | }} | ||
{{Tuto Step | {{Tuto Step | ||
Version actuelle datée du 22 février 2023 à 14:44
Process for unloading and locating Autoflow Mk4 machine in Saje upvc


Difficulté
Difficile
Durée
4 jour(s)
Sommaire
- 1 Introduction
- 2 Pièces et outils
- 3 Tutoriels prérequis
- 4 Étape 1 - Lorry Loading Schedule
- 5 Étape 2 - Machine Arrival
- 6 Étape 3 - Remove the Soenen Machine
- 7 Étape 4 - Prepare the floor
- 8 Étape 5 - Triangulation for Infeed Pads
- 9 Étape 6 - Prepare the Machine Pads / Piles
- 10 Étape 7 - Prepare transport axle
- 11 Étape 8 - Clear the inside area
- 12 Étape 9 - Clear Outside Unloading Area
- 13 Étape 10 - Imporvements to step into building
- 14 Étape 11 - Lorry to reverse along RHS of building
- 15 Étape 12 - Machining Centre
- 16 Étape 13 - Machining Centre Guard
- 17 Étape 14 - Infeed Table
- 18 Étape 15 - Conveyor Table1
- 19 Étape 16 - Conveyor Table2
- 20 Étape 17 - Conveyor Control Cabinets
- 21 Commentaires
Introduction
Access for machinery is limited at the Saje factory.
The machine will be delivered in the following modules, that should be unloaded from the lorry in this order
- Electrical Cabinet
- Machining centre base module (1.8 x 2.2m)
- Infeed module (2.4 x 9.0m)
- Pièces et outils
- Tutoriels prérequis

Utiliser des chaussures de protection
Porter des vêtements de protection
Utiliser un casque protecteur
Étape 1 - Lorry Loading Schedule
The Infeed table in particular needs to be loaded in such a way so it can be unloaded in the correct direction
Étape 2 - Machine Arrival
Thursday PM
Unload machining centre and store in Glass shed
Unload infeed and cover with Tarpaulin
Unload electrical cabinet and store inside
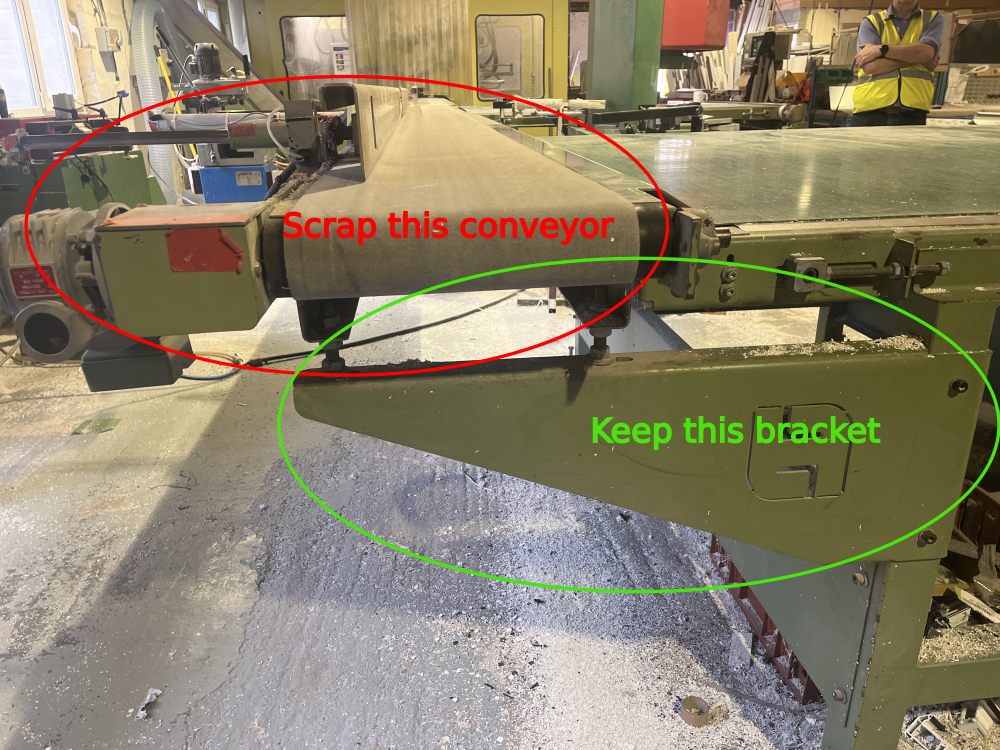
Étape 3 - Remove the Soenen Machine
Friday
remove the Soenen machine, leaving the large outfeed conveyor tables
The Brackets on the outfeed tables will be used for the Stuga conveyors
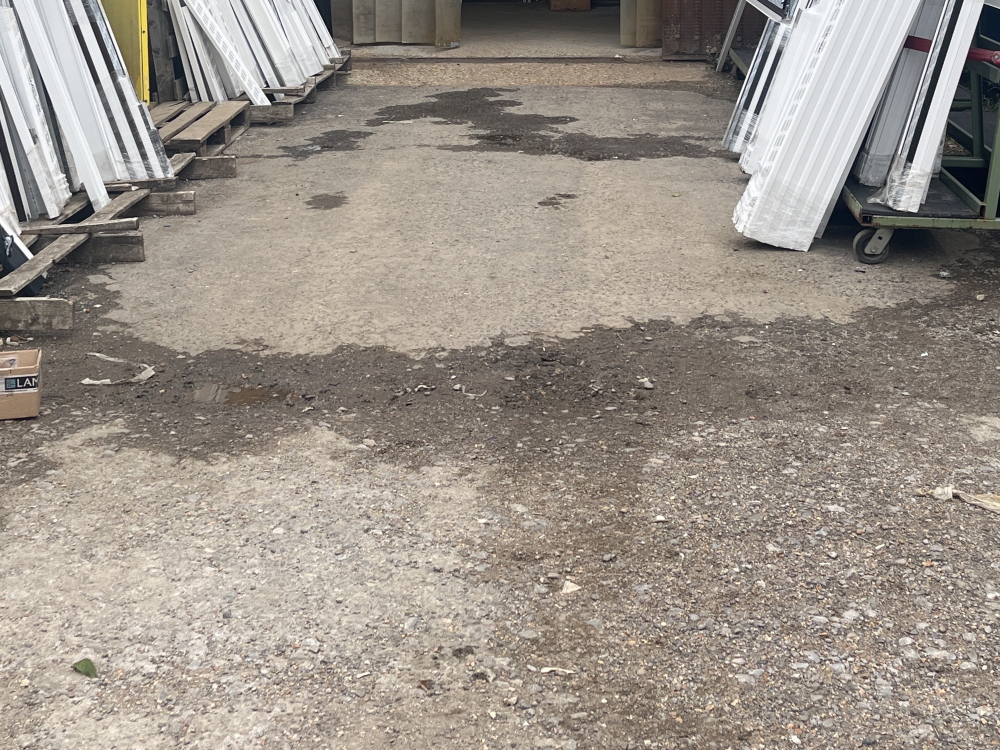
Étape 4 - Prepare the floor
The datum points for loading have already been marked on the floor.
Using these datum points, mark the position of the remainder of the floor pads


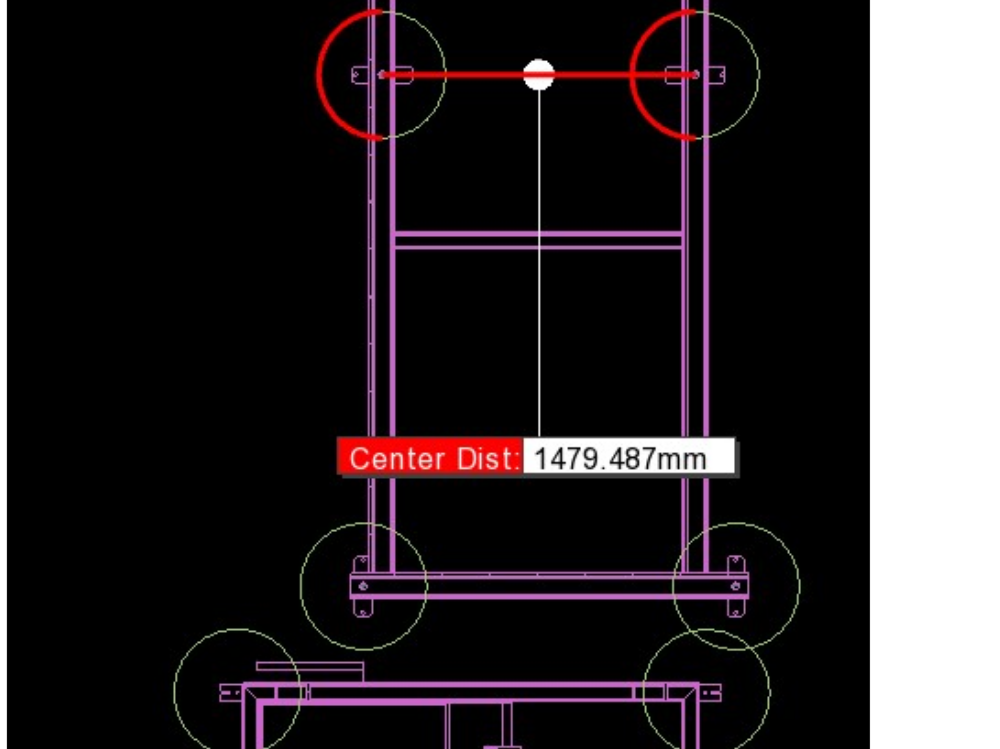

Étape 5 - Triangulation for Infeed Pads
Pictures show triangulation distances.


Étape 6 - Prepare the Machine Pads / Piles
Friday:- Pad size 300mm x 300mm (or similar)
- Pad Depth 300-500mm
- Use shuttering or large diameter soil pipe
- Find the highest point, string a level agcross to the other pads
- Fill shuttering with quick set cement to +/- 15mm of level
Étape 7 - Prepare transport axle
Stuga will supply a wheeled all-terrain axle
this axle is designed to form a "wheelbarrow" using the forklift as the driver / opposite end. This will enable the heavy machine units to be carefully wheeled over the rough terrain
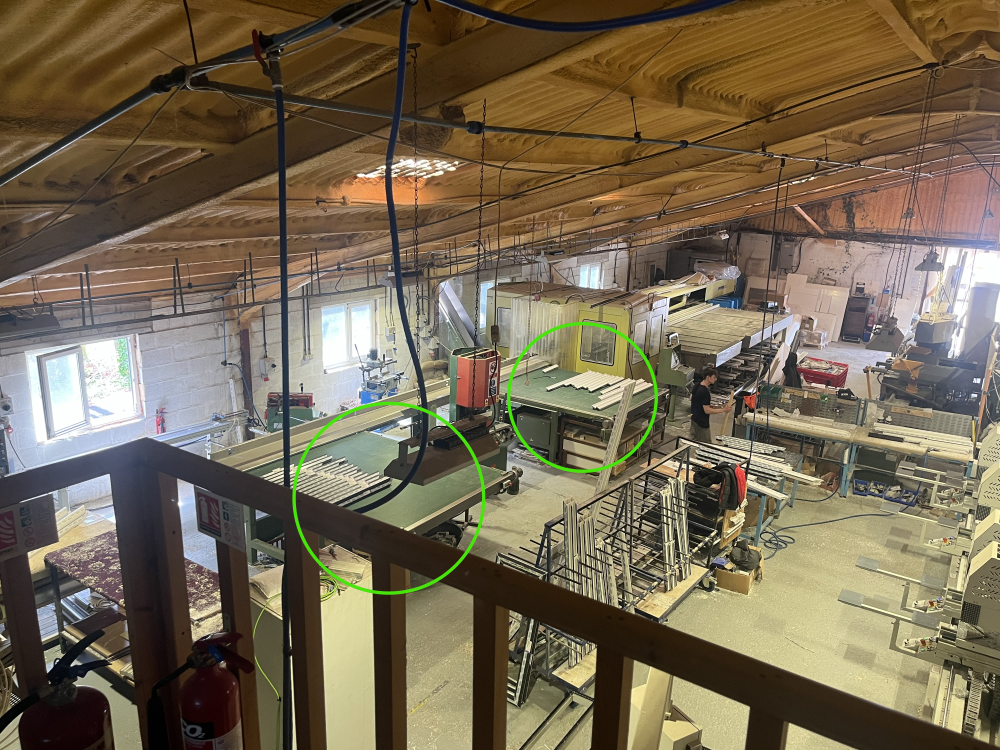
Étape 8 - Clear the inside area
Including the chop saw table
Leaving a clear route for the 2.4m x 7.5m table to roll in

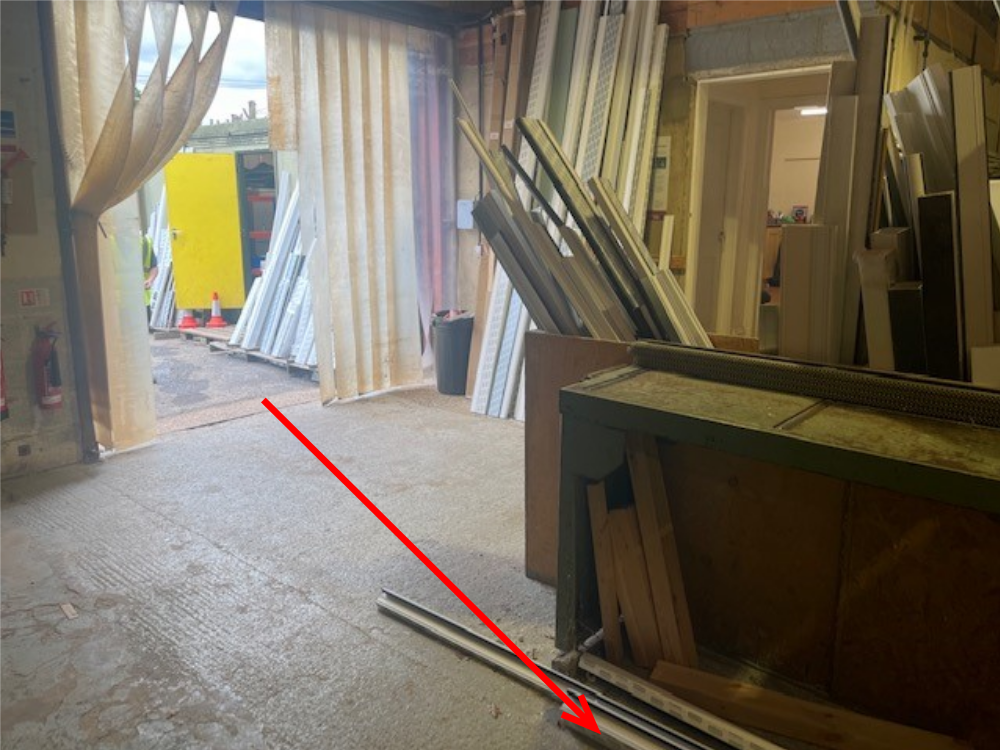
Étape 9 - Clear Outside Unloading Area
The full width of this route will need to be cleared

Étape 10 - Imporvements to step into building
If possible, improve the access pathway.
Potentially find a ramp system for the step into the unit

Étape 11 - Lorry to reverse along RHS of building
Monday:
Lorry to reverse along right side of building (when viewed from front)
This allow easy unloading access for forklift to unload to ground, and align components with door


Étape 12 - Machining Centre
The machining centre should be unloaded first
Étape 13 - Machining Centre Guard
The guard is a clam shell design that encases the machine in 2 parts from front and rear
Étape 14 - Infeed Table
- Infeed should lifted to align with rear door
- Bogey on lead end
- Forlift moves to rear end
- Forklift to shunt infeed able into factory
- 2 Off pallet trucks to manouvre into position
Étape 15 - Conveyor Table1
Conveyor table should attach to existing Soenen Brackets
Position of conveyor 1 adjusted to machining centre, leaving gap of 25mm
Height adjust on Soenen Brackets
Étape 16 - Conveyor Table2
Conveyor table should attach to existing Soenen Brackets
Additional leg for long conveyor to support
Position of conveyor 2 adjusted to Conveyor 1, leaving gap of 10mm
Height adjust on Soenen Brackets
Étape 17 - Conveyor Control Cabinets
Remove old Conveyor control back plate
Premade Backplates fit inside
Rewire as indicated in drawings

Draft
 Français
 English
 Deutsch
 Español
 Italiano
 Português