| [version en cours de rédaction] | [version en cours de rédaction] |
(Page créée avec « {{Tuto Details |Main_Picture=R0015357_Fit_Guards_Screenshot_2023-09-01_082521.png |Main_Picture_annotation={"version":"2.4.6","objects":[{"type":"image","version":"2.4.6",... ») |
|||
| Ligne 96 : | Ligne 96 : | ||
{{Tuto Step | {{Tuto Step | ||
|Step_Title=<translate>Cut guard panels</translate> | |Step_Title=<translate>Cut guard panels</translate> | ||
| − | |Step_Content=<translate>D0016333 Bruehl Fence panel | + | |Step_Content=<translate>D0016333 Bruehl Fence panel 1730 x 800 x 2 |
D0016334 Bruehl Fence panel 650 x 800 x 2 | D0016334 Bruehl Fence panel 650 x 800 x 2 | ||
| Ligne 128 : | Ligne 128 : | ||
{{Notes}} | {{Notes}} | ||
{{PageLang | {{PageLang | ||
| + | |Language=en | ||
|SourceLanguage=none | |SourceLanguage=none | ||
|IsTranslation=0 | |IsTranslation=0 | ||
| − | |||
}} | }} | ||
{{Tuto Status | {{Tuto Status | ||
|Complete=Draft | |Complete=Draft | ||
}} | }} | ||
Version du 10 octobre 2023 à 10:00
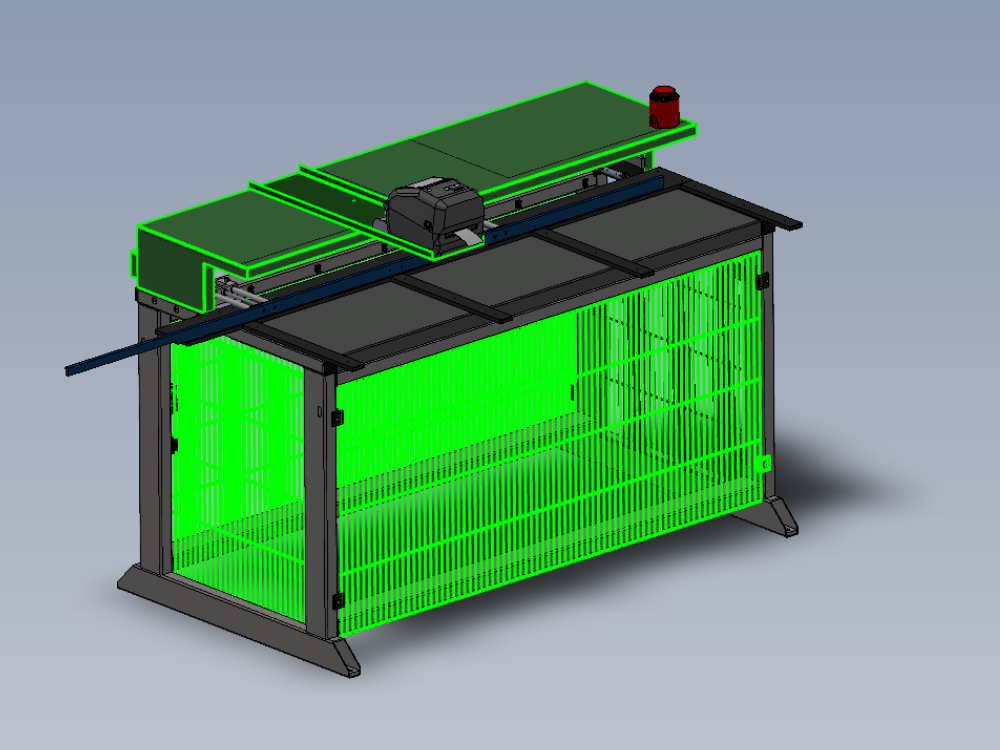
Instructions to mount cut guard

Difficulté
Moyen
Durée
3 heure(s)
Introduction
Tools Required
Standard hex key set
Standard HSS drill set
Standard tap set
Cutting disc
Parts Required
C0001275 Printer: ZD421 Direct Thermal (Not Incl. C0001276 P&P)
C0001276 Peel & Present for ZD421 Printer
D0016333 Bruehl Fence panel 1700 x 800 x 2
D0016334 Bruehl Fence panel 650 x 800 x 2
H0005178 Safety Table Extension x 1
M0000033 Frame End Cap 50 x 50 x 1
M0001207 Bruehl Fence Clip x 14
P0000069 Tube to tube fitting 6mm x 1
R0015290 Saw Outfeed Bench Assemble Top guard x 1
Étape 1 - Unless otherwise stated
Use loctite 243 on all fasteners
Use Loctite 572 on all threaded pneumatic connections
Pen mark all bolts to show finalised

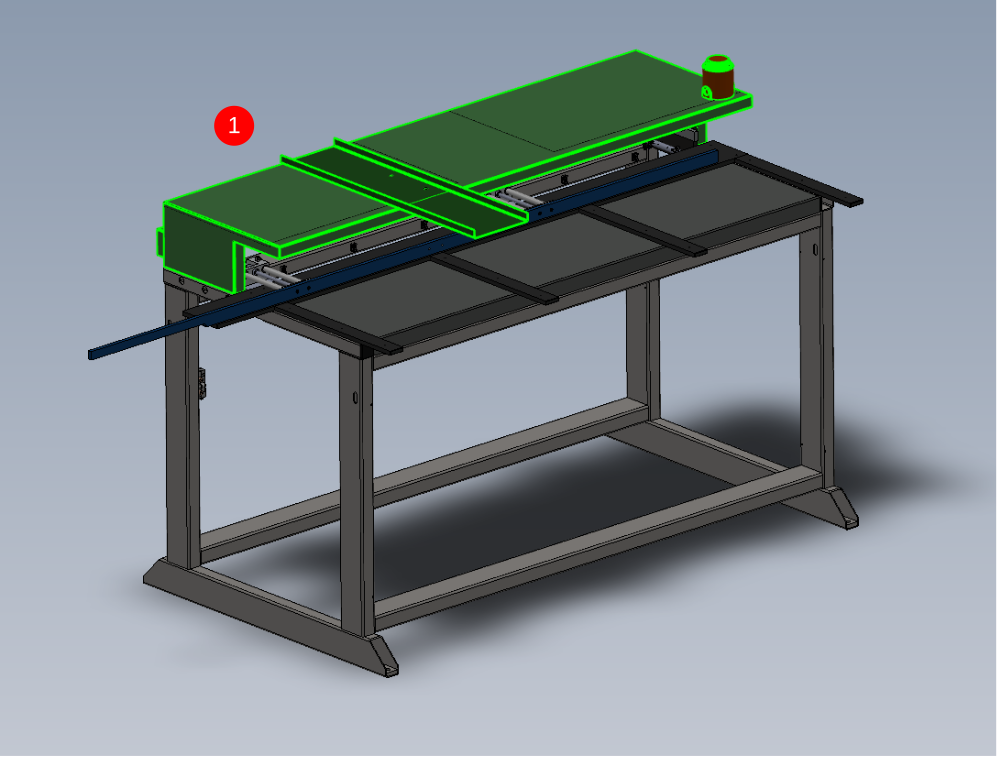
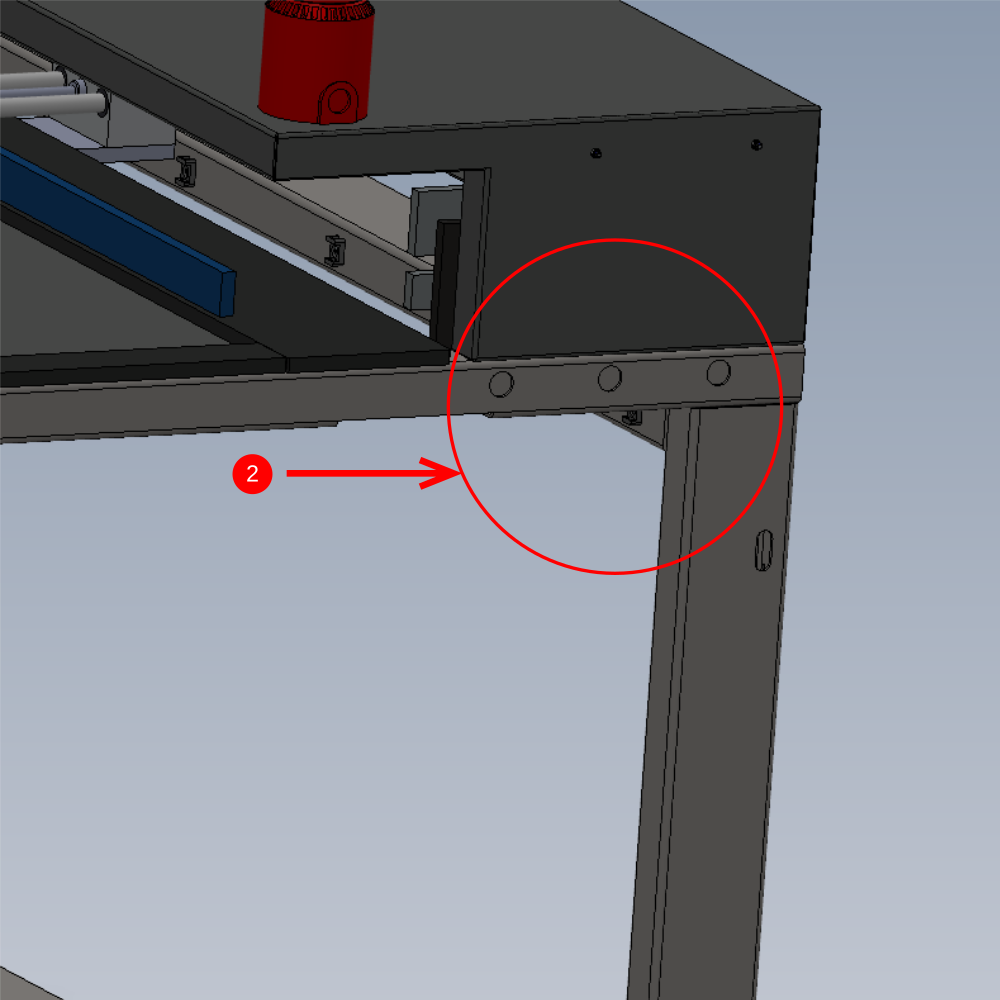
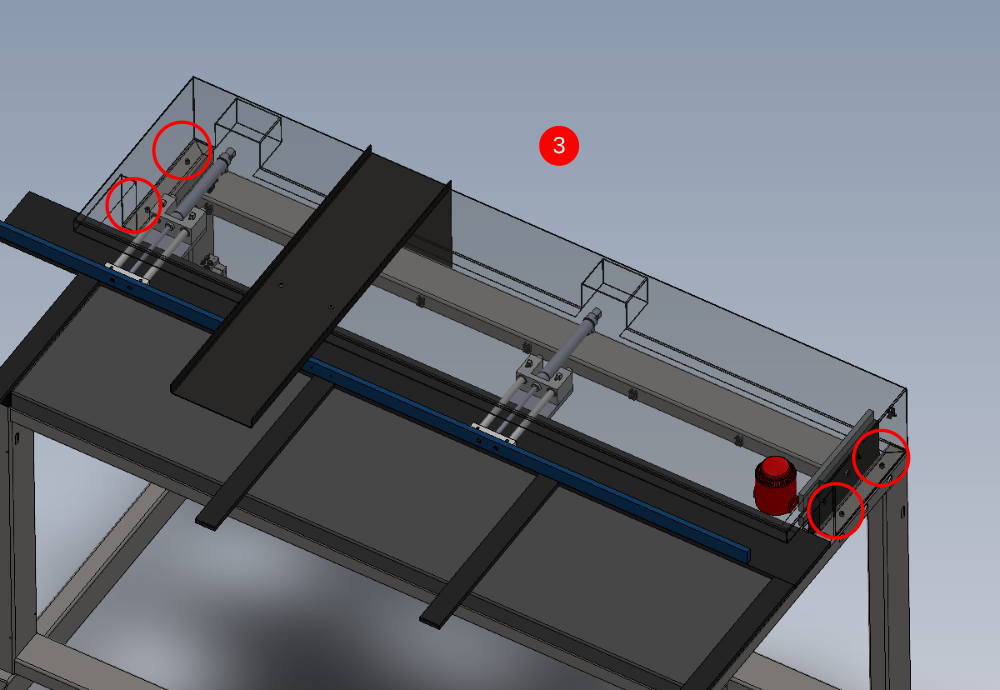
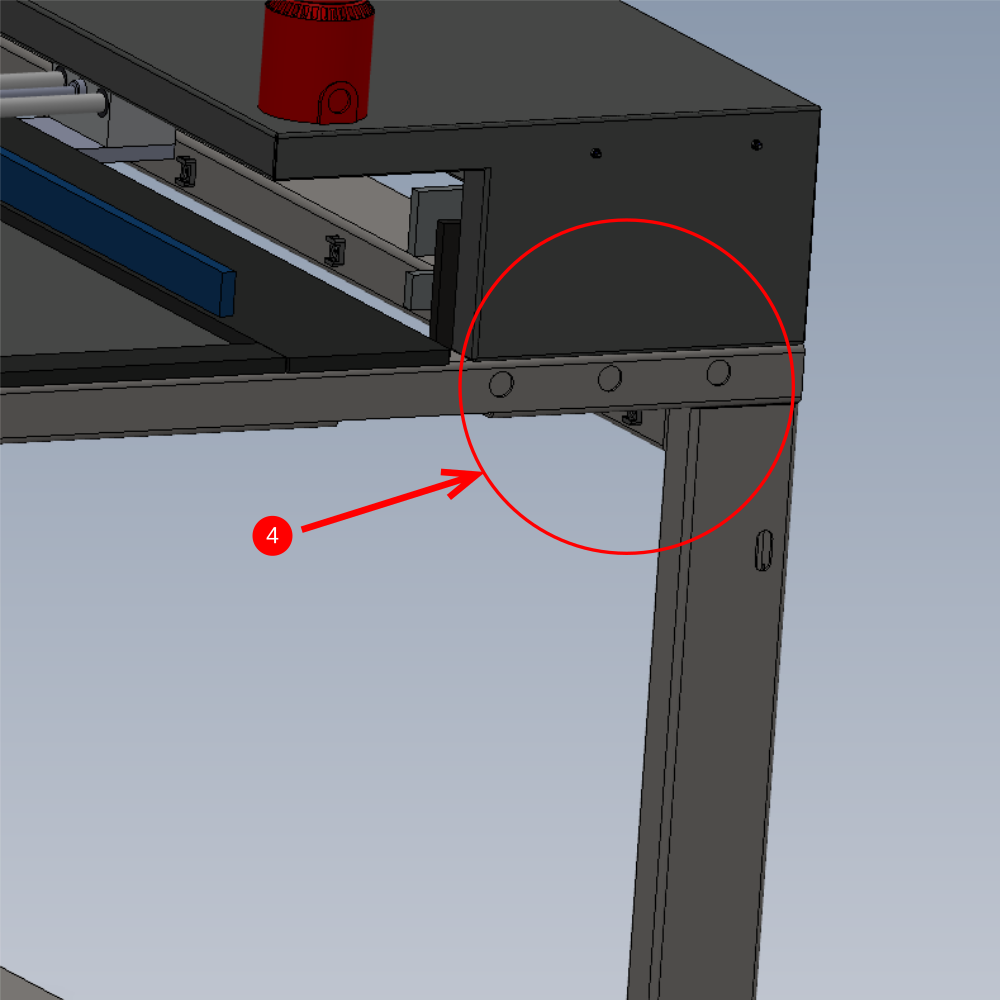
Étape 2 - Fit top Hood
1 Position top hood assembly as shown
2 Slacken safety gate fixing 3 off M8 to allow access for cut guard mounting points
3 Use 4 off M6 x 20 Socket caps with M6 heavy motor washers and fit to indicated positions . Align as best as possible edges of cut guard to frame, then apply final tension to fasteners to complete
4 Finalise 3 off M8 socket caps that hold safety gate to frame
5 Run W00010002 cable into tie bases fitted to cut guard and route to Siren
(pictures please)
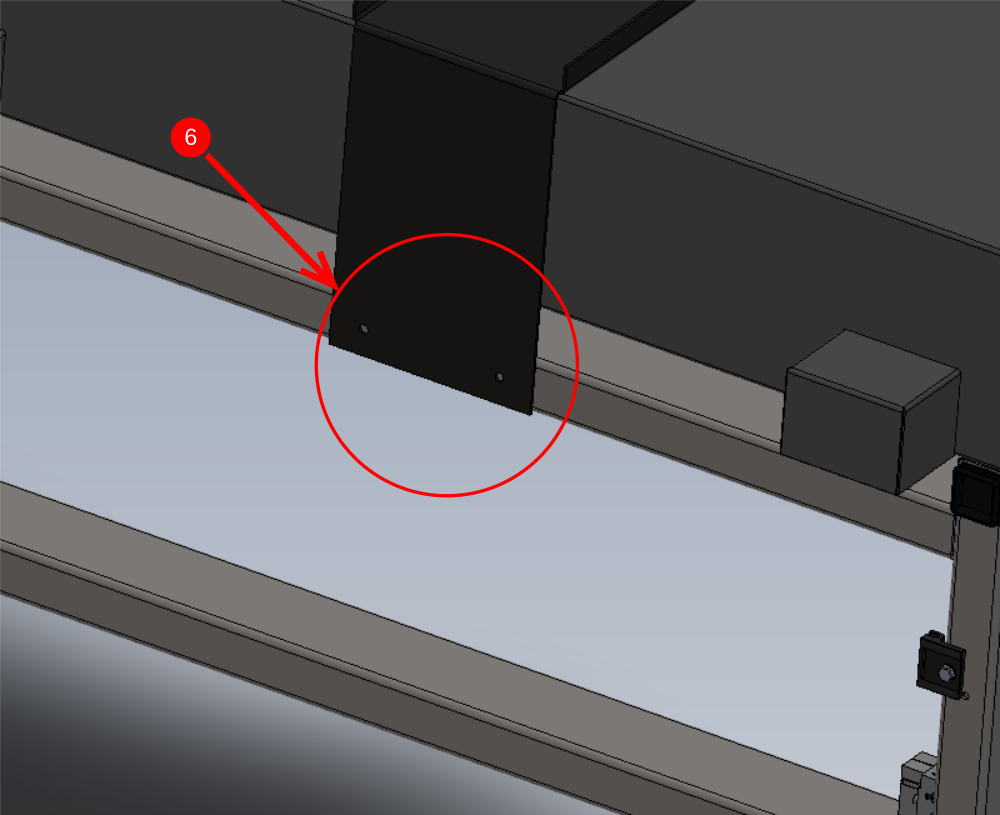
6 Add final fixings to printer shelf . Drill and tap to M8 and add 2 off M8 socket caps with A form washers
Étape 3 - Fit Printer
Fit printer to shelf as indicated
Ensure box is left on frame and auto peel is left with box

Étape 4 - Cut guard panels
D0016333 Bruehl Fence panel 1730 x 800 x 2
D0016334 Bruehl Fence panel 650 x 800 x 2
These panels will require cutting from sheet , ensure correct orientation of fence slats is obtained when marking out and cutting
See image for orientation

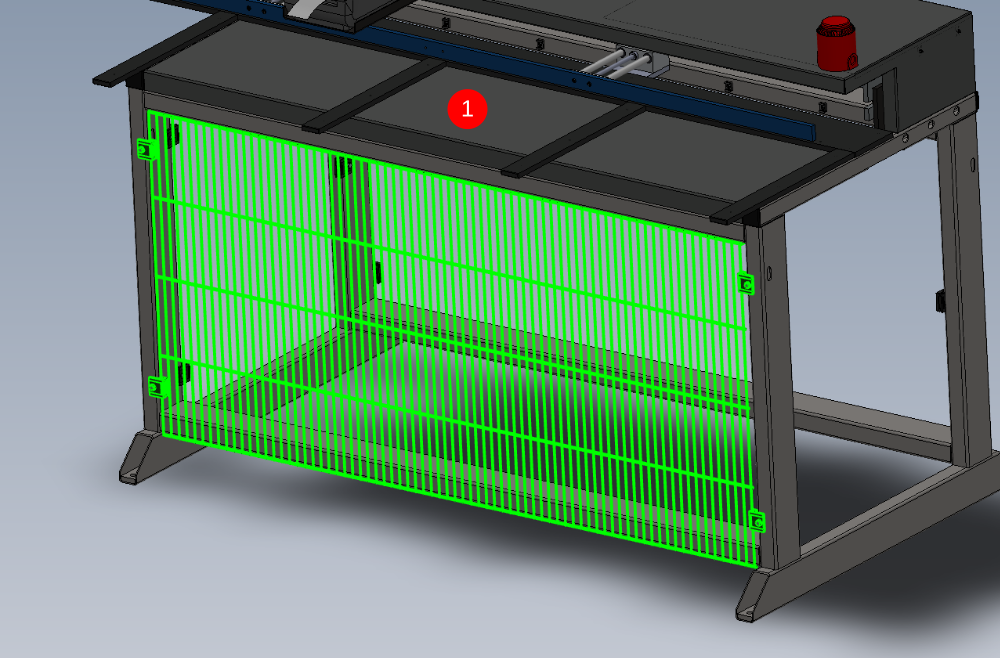
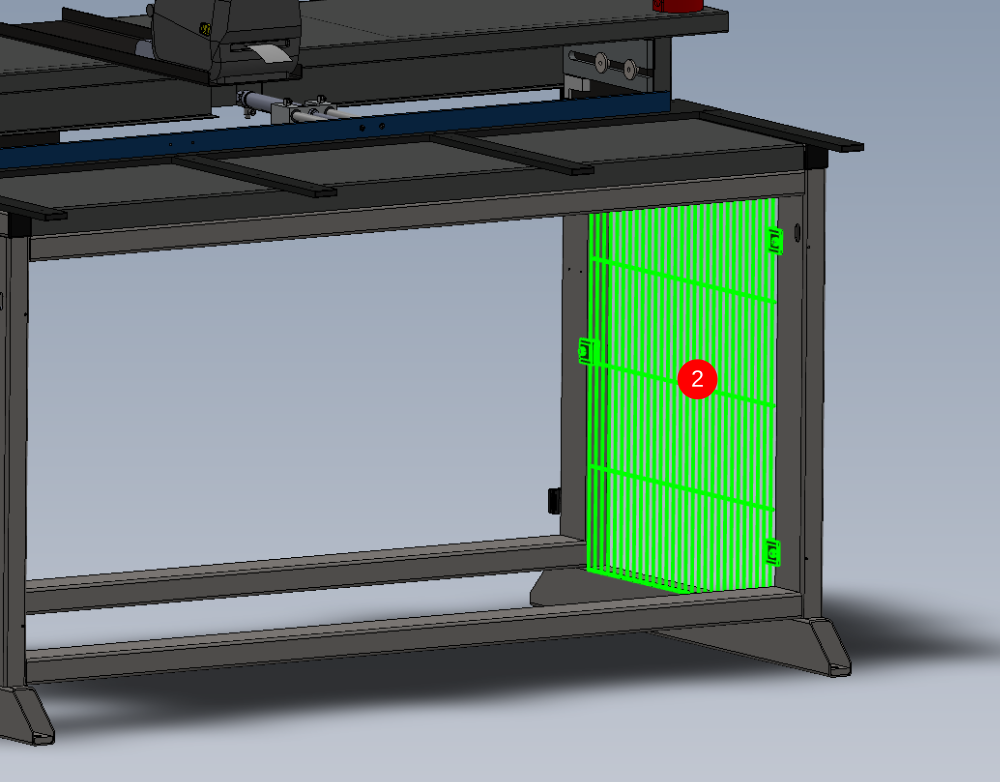
Étape 5 - Attach guards to frame
1 Drill and fix front guard orientated as shown (hole sizes and bolt type required)
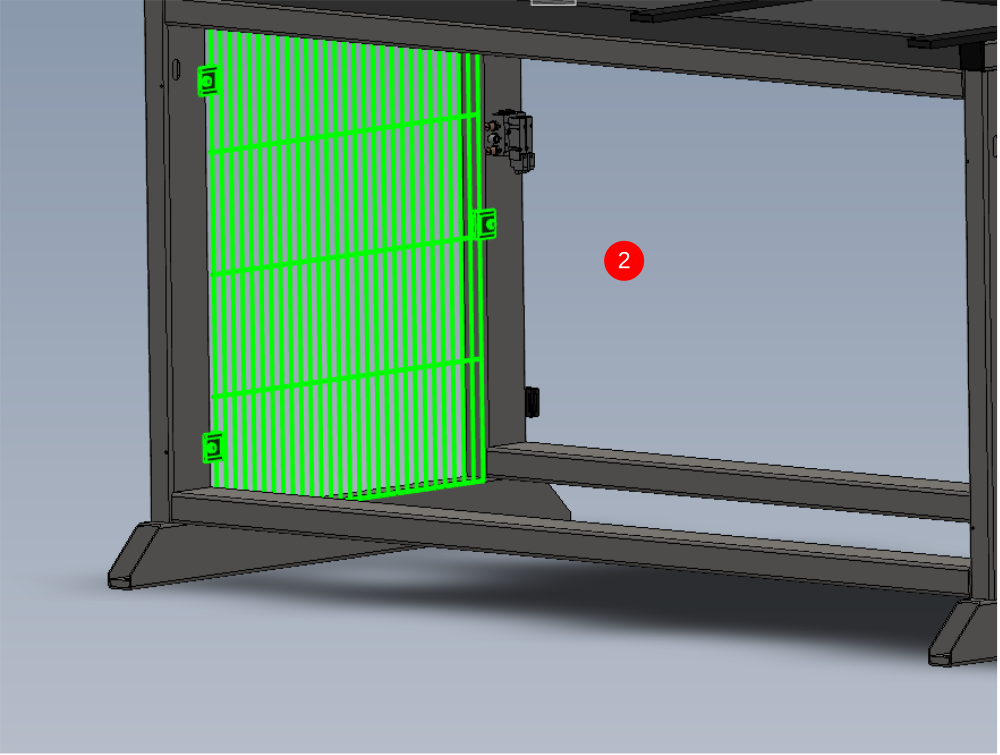
2 Drill and fix both side guards as shown (hole sizes and bolt type required)
3 Drill and fix read guard orientated as shown (hole sizes and bolt type required)

Draft
 Français
 English
 Deutsch
 Español
 Italiano
 Português