| [version en cours de rédaction] | [version en cours de rédaction] |
(Page créée avec « {{Tuto Details |Description=<translate>Guide to programming the RS Automation Servo dirves via a USB port and the RSWare software using a UDB file</translate> |Categories=... ») |
|||
| Ligne 1 : | Ligne 1 : | ||
{{Tuto Details | {{Tuto Details | ||
| + | |Main_Picture=Programming_RS_Automation_Servo_Drive_Parameters_CSD7.jpg | ||
| + | |Main_Picture_annotation={"version":"2.4.6","objects":[{"type":"image","version":"2.4.6","originX":"left","originY":"top","left":47,"top":50,"width":263,"height":192,"fill":"rgb(0,0,0)","stroke":null,"strokeWidth":0,"strokeDashArray":null,"strokeLineCap":"butt","strokeDashOffset":0,"strokeLineJoin":"miter","strokeMiterLimit":4,"scaleX":1.93,"scaleY":1.93,"angle":0,"flipX":false,"flipY":false,"opacity":1,"shadow":null,"visible":true,"clipTo":null,"backgroundColor":"","fillRule":"nonzero","paintFirst":"fill","globalCompositeOperation":"source-over","transformMatrix":null,"skewX":0,"skewY":0,"crossOrigin":"","cropX":0,"cropY":0,"src":"https://stuga.dokit.app/images/e/ed/Programming_RS_Automation_Servo_Drive_Parameters_CSD7.jpg","filters":[]}],"height":449.89662301860784,"width":600} | ||
|Description=<translate>Guide to programming the RS Automation Servo dirves via a USB port and the RSWare software using a UDB file</translate> | |Description=<translate>Guide to programming the RS Automation Servo dirves via a USB port and the RSWare software using a UDB file</translate> | ||
|Categories=Software | |Categories=Software | ||
| Ligne 17 : | Ligne 19 : | ||
{{EPI}} | {{EPI}} | ||
{{Tuto Step | {{Tuto Step | ||
| − | |Step_Title=<translate></translate> | + | |Step_Title=<translate>Run RSWare Software</translate> |
|Step_Content=<translate></translate> | |Step_Content=<translate></translate> | ||
| + | }} | ||
| + | {{Tuto Step | ||
| + | |Step_Title=<translate>Connect USB Cable</translate> | ||
| + | |Step_Content=<translate></translate> | ||
| + | |Step_Picture_00=Programming_RS_Automation_Servo_Drive_Parameters_Annotation_2019-09-19_140859.jpg | ||
| + | |Step_Picture_00_annotation={"version":"2.4.6","objects":[{"type":"image","version":"2.4.6","originX":"left","originY":"top","left":0,"top":0,"width":1997,"height":1391,"fill":"rgb(0,0,0)","stroke":null,"strokeWidth":0,"strokeDashArray":null,"strokeLineCap":"butt","strokeDashOffset":0,"strokeLineJoin":"miter","strokeMiterLimit":4,"scaleX":0.3,"scaleY":0.3,"angle":0,"flipX":false,"flipY":false,"opacity":1,"shadow":null,"visible":true,"clipTo":null,"backgroundColor":"","fillRule":"nonzero","paintFirst":"fill","globalCompositeOperation":"source-over","transformMatrix":null,"skewX":0,"skewY":0,"crossOrigin":"","cropX":0,"cropY":0,"src":"https://stuga.dokit.app/images/2/2c/Programming_RS_Automation_Servo_Drive_Parameters_Annotation_2019-09-19_140859.jpg","filters":[]},{"type":"wfarrow2line","version":"2.4.6","originX":"center","originY":"center","left":219.5,"top":126,"width":339,"height":152,"fill":"rgba(255,0,0,0)","stroke":"#FF0000","strokeWidth":4,"strokeDashArray":null,"strokeLineCap":"round","strokeDashOffset":0,"strokeLineJoin":"miter","strokeMiterLimit":4,"scaleX":1,"scaleY":1,"angle":0,"flipX":false,"flipY":false,"opacity":1,"shadow":null,"visible":true,"clipTo":null,"backgroundColor":"","fillRule":"nonzero","paintFirst":"fill","globalCompositeOperation":"source-over","transformMatrix":null,"skewX":0,"skewY":0,"x1":-169.5,"x2":169.5,"y1":-76,"y2":76,"x2a":154.5235719838177,"y2a":60.51753883014366,"x2b":147.97744097458775,"y2b":75.11713364678148},{"type":"wfarrow2circle","version":"2.4.6","originX":"center","originY":"center","left":50,"top":50,"width":16,"height":16,"fill":"#aaa","stroke":"#666","strokeWidth":0,"strokeDashArray":null,"strokeLineCap":"butt","strokeDashOffset":0,"strokeLineJoin":"miter","strokeMiterLimit":4,"scaleX":1,"scaleY":1,"angle":0,"flipX":false,"flipY":false,"opacity":0.5,"shadow":null,"visible":true,"clipTo":null,"backgroundColor":"","fillRule":"nonzero","paintFirst":"fill","globalCompositeOperation":"source-over","transformMatrix":null,"skewX":0,"skewY":0,"radius":8,"startAngle":0,"endAngle":6.283185307179586},{"type":"wfarrow2circle","version":"2.4.6","originX":"center","originY":"center","left":389,"top":202,"width":16,"height":16,"fill":"#aaa","stroke":"#666","strokeWidth":0,"strokeDashArray":null,"strokeLineCap":"butt","strokeDashOffset":0,"strokeLineJoin":"miter","strokeMiterLimit":4,"scaleX":1,"scaleY":1,"angle":0,"flipX":false,"flipY":false,"opacity":0.5,"shadow":null,"visible":true,"clipTo":null,"backgroundColor":"","fillRule":"nonzero","paintFirst":"fill","globalCompositeOperation":"source-over","transformMatrix":null,"skewX":0,"skewY":0,"radius":8,"startAngle":0,"endAngle":6.283185307179586}],"height":418,"width":600} | ||
| + | }} | ||
| + | {{Tuto Step | ||
| + | |Step_Title=<translate>Connect RS Ware to Drive</translate> | ||
| + | |Step_Content=<translate>Select Tools->Serial Port | ||
| + | |||
| + | Select the Latest Serial Port in the list | ||
| + | |||
| + | Click OK</translate> | ||
| + | |Step_Picture_00=Programming_RS_Automation_Servo_Drive_Parameters_Annotation_2019-09-19_140945.jpg | ||
| + | |Step_Picture_01=Programming_RS_Automation_Servo_Drive_Parameters_Annotation_2019-09-19_141013.jpg | ||
| + | }} | ||
| + | {{Tuto Step | ||
| + | |Step_Title=<translate>Open the UDB file for the axis</translate> | ||
| + | |Step_Content=<translate>{| class="wikitable" | ||
| + | |+UDB file storage locations in G:\Builds\Latest Software Versions\ | ||
| + | !Machine | ||
| + | !Location | ||
| + | |- | ||
| + | |Ecoline | ||
| + | |\Ecoline.RSAutomation | ||
| + | |- | ||
| + | |Flowline | ||
| + | |\Flowline.RSAutomation | ||
| + | |- | ||
| + | |Standalone Saw | ||
| + | |\Saw.RSAutomation | ||
| + | |} | ||
| + | {{Info|...These files are usually copied over to the root directory of the machine during commissioning}}</translate> | ||
| + | |Step_Picture_00=Programming_RS_Automation_Servo_Drive_Parameters_Annotation_2019-09-19_141047.jpg | ||
| + | |Step_Picture_01=Programming_RS_Automation_Servo_Drive_Parameters_Annotation_2019-09-19_141111.jpg | ||
| + | }} | ||
| + | {{Tuto Step | ||
| + | |Step_Title=<translate>Scan for the drive</translate> | ||
| + | |Step_Content=<translate>This tells RSware to look for a drive on the serial port you have specified | ||
| + | |||
| + | <br /></translate> | ||
| + | |Step_Picture_00=Programming_RS_Automation_Servo_Drive_Parameters_Annotation_2019-09-19_141135.jpg | ||
| + | }} | ||
| + | {{Tuto Step | ||
| + | |Step_Title=<translate>Drag and Drop</translate> | ||
| + | |Step_Content=<translate>Drag and Drop the loaded drive onto the On-Line Drive. | ||
| + | |||
| + | Click OK to replace the contents | ||
| + | |||
| + | Allow the download to finish | ||
| + | |||
| + | Click OK to reset the drive</translate> | ||
| + | |Step_Picture_00=Programming_RS_Automation_Servo_Drive_Parameters_Annotation_2019-09-19_141205.jpg | ||
| + | |Step_Picture_01=Programming_RS_Automation_Servo_Drive_Parameters_Annotation_2019-09-19_141226.jpg | ||
| + | |Step_Picture_02=Programming_RS_Automation_Servo_Drive_Parameters_Annotation_2019-09-19_141249.jpg | ||
| + | |Step_Picture_03=Programming_RS_Automation_Servo_Drive_Parameters_Annotation_2019-09-19_141308.jpg | ||
}} | }} | ||
{{Notes}} | {{Notes}} | ||
{{PageLang | {{PageLang | ||
| + | |Language=en | ||
|SourceLanguage=none | |SourceLanguage=none | ||
|IsTranslation=0 | |IsTranslation=0 | ||
| − | |||
}} | }} | ||
{{Tuto Status | {{Tuto Status | ||
|Complete=Draft | |Complete=Draft | ||
}} | }} | ||
Version actuelle datée du 19 septembre 2019 à 15:14
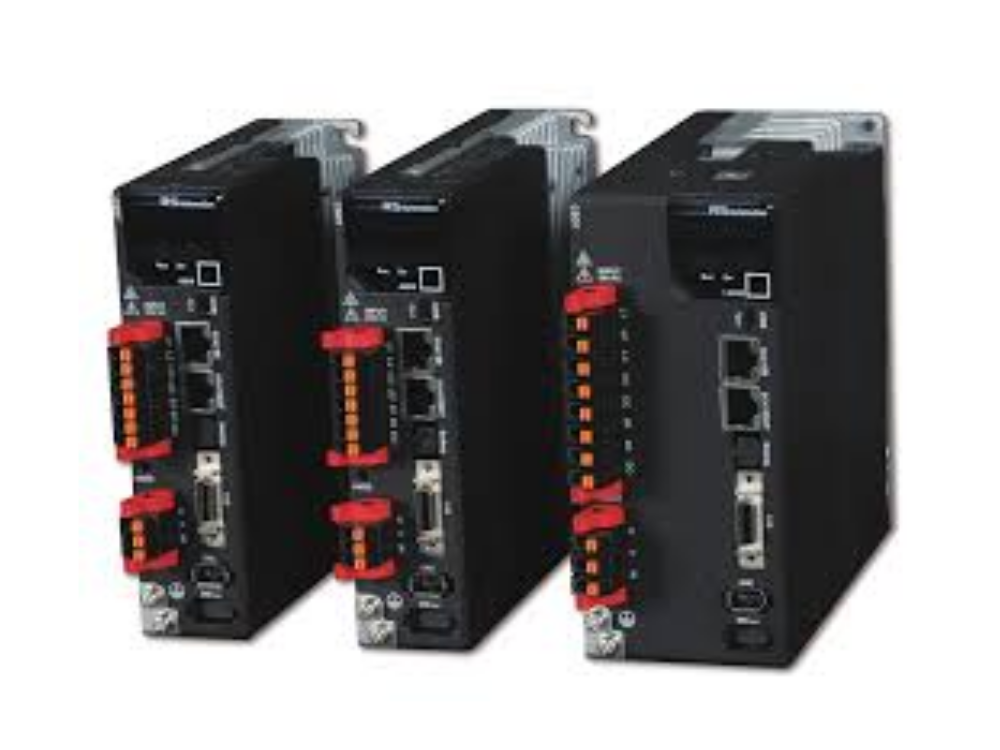
Guide to programming the RS Automation Servo dirves via a USB port and the RSWare software using a UDB file

Difficulté
Moyen
Durée
5 minute(s)
Introduction
The RS Automation drives are used on refurb Stuga machines to drive axes. They are set up electronically for each axis using a software tool called RSWare and programmed with a USB cable
Vimeo
Étape 1 - Run RSWare Software
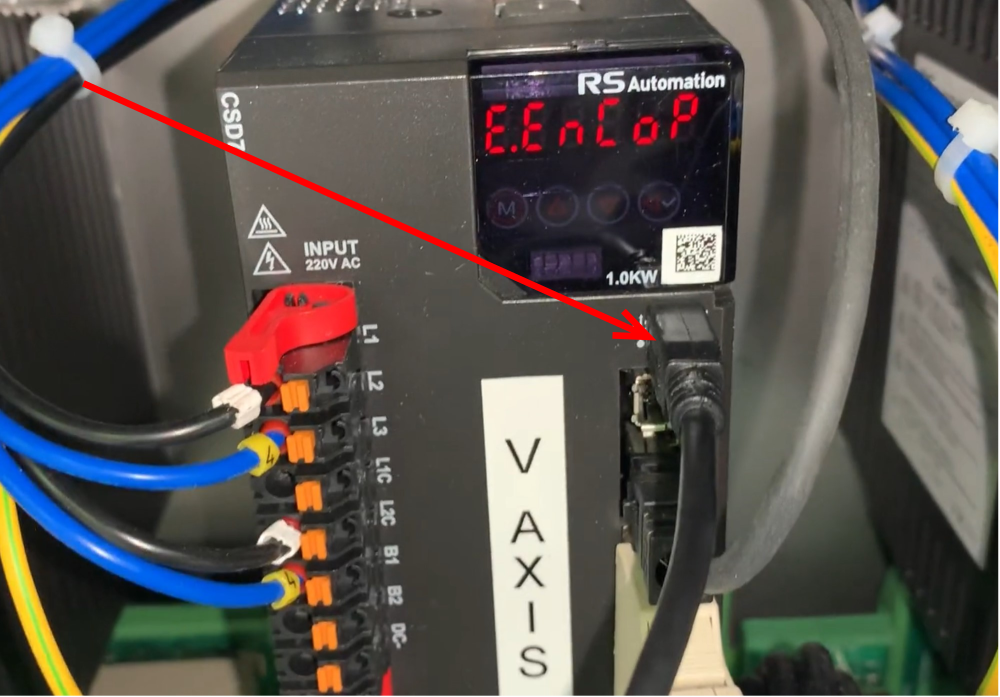
Étape 2 - Connect USB Cable
Étape 3 - Connect RS Ware to Drive
Select Tools->Serial Port
Select the Latest Serial Port in the list
Click OK


Étape 4 - Open the UDB file for the axis
| Machine | Location |
|---|---|
| Ecoline | \Ecoline.RSAutomation |
| Flowline | \Flowline.RSAutomation |
| Standalone Saw | \Saw.RSAutomation |


Étape 5 - Scan for the drive
This tells RSware to look for a drive on the serial port you have specified

Étape 6 - Drag and Drop
Drag and Drop the loaded drive onto the On-Line Drive.
Click OK to replace the contents
Allow the download to finish
Click OK to reset the drive


Draft
 Français
 English
 Deutsch
 Español
 Italiano
 Português