| [version en cours de rédaction] | [version en cours de rédaction] |
| Ligne 2 : | Ligne 2 : | ||
|Description=<translate>Programming the Eaton DE Drive</translate> | |Description=<translate>Programming the Eaton DE Drive</translate> | ||
|Categories=Maintenance, Software | |Categories=Maintenance, Software | ||
| − | |Difficulty= | + | |Difficulty=Easy |
|Duration=10 | |Duration=10 | ||
|Duration-type=minute(s) | |Duration-type=minute(s) | ||
Version du 30 octobre 2019 à 21:42
Programming the Eaton DE Drive

Difficulté
Facile
Durée
10 minute(s)
Étape 1 - Plug programming lead and run DrivesConnect Software
Programming lead is kept at Stuga
Software can be downloaded at
http://www.drive-support-studio.com/OTS/Eaton/downloads/deploy/drivesConnect.htm
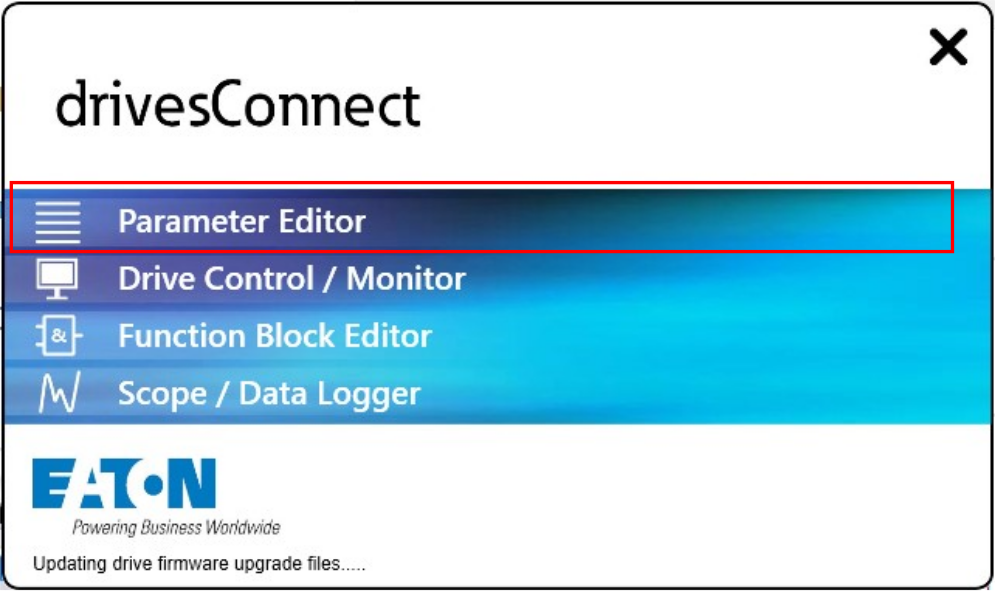
Select Parameter Edit from the menu
Étape 2 - Scan Network for Drive
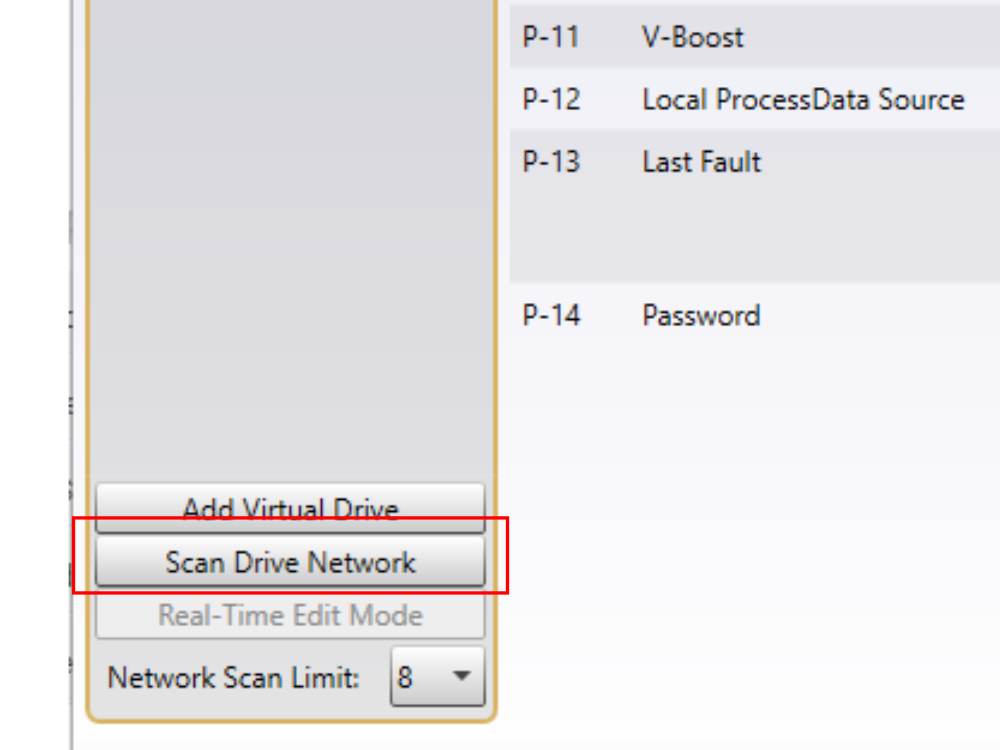
Click on Scan Drive Network to find the drive you are plugged in to
You may need to change the COM port to get this to work

Étape 3 - Set Parameters
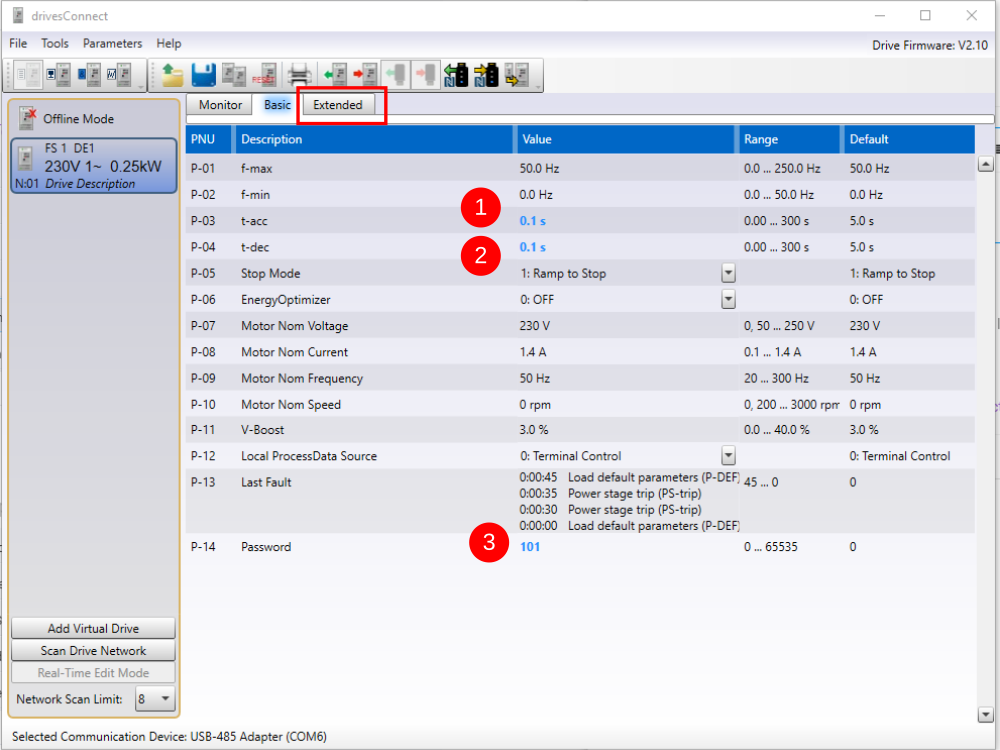
- Set Accel to 0.1s
- Set Decel to 0.1s
- Unlock Extended Parameters - Set P14 to 101. This creates the "Extended" tab on the top
Étape 4 - Set Config Mode
Click on the Extended tab
Set the P15 Config Mode to 2, which means [Fwd][Rev][Freqbit1][FreqBit2]

Étape 5 - Set Frequency References
Set these references P-20 to P-23 to 50Hz so it will not matter what input 3 or 4 is set to - it will always be 50Hz

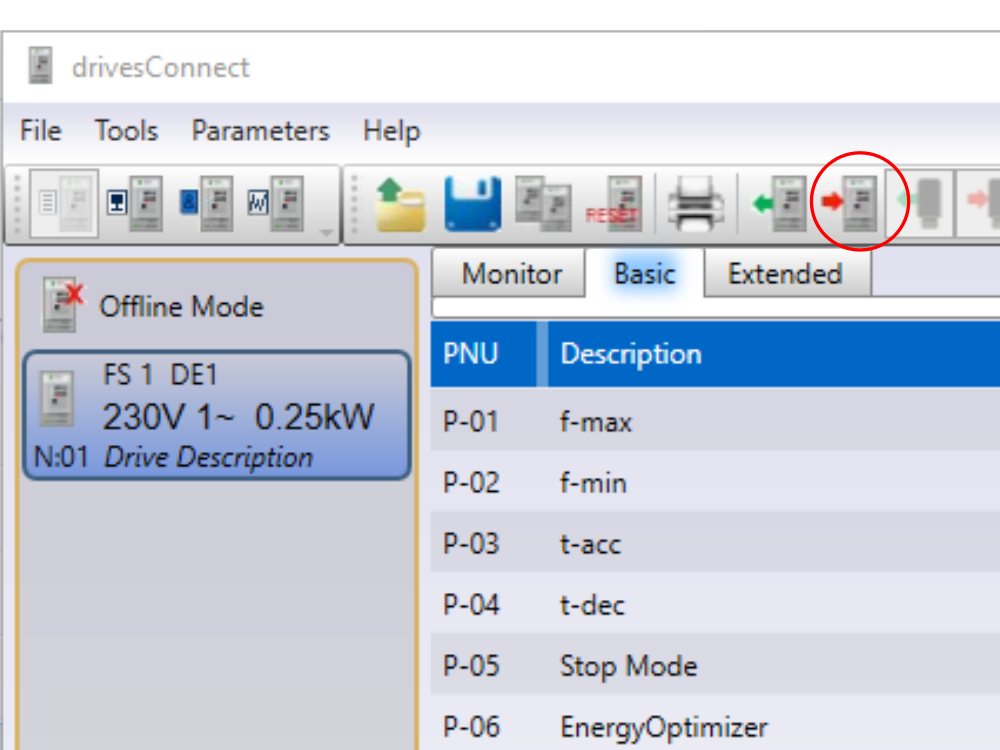
Étape 6 - Transfer Current Data Set to Drive
Press the button in the top toolbar with a picture of the drive and a red arrow
Draft
 Français
 English
 Deutsch
 Español
 Italiano
 Português