| [version en cours de rédaction] | [version en cours de rédaction] |
| Ligne 23 : | Ligne 23 : | ||
|Step_Title=<translate>Scan Network for Drive</translate> | |Step_Title=<translate>Scan Network for Drive</translate> | ||
|Step_Content=<translate>Click on Scan Drive Network to find the drive you are plugged in to</translate> | |Step_Content=<translate>Click on Scan Drive Network to find the drive you are plugged in to</translate> | ||
| − | |||
}} | }} | ||
{{Tuto Step | {{Tuto Step | ||
Version du 28 octobre 2019 à 18:41
Programming the Eaton DE Drive

Difficulté
Moyen
Durée
10 minute(s)
Étape 1 - Plug programming lead and run DrivesConnect Software
Programming lead is kept at Stuga
Software can be downloaded at
http://www.drive-support-studio.com/OTS/Eaton/downloads/deploy/drivesConnect.htm
Étape 2 - Scan Network for Drive
Click on Scan Drive Network to find the drive you are plugged in to
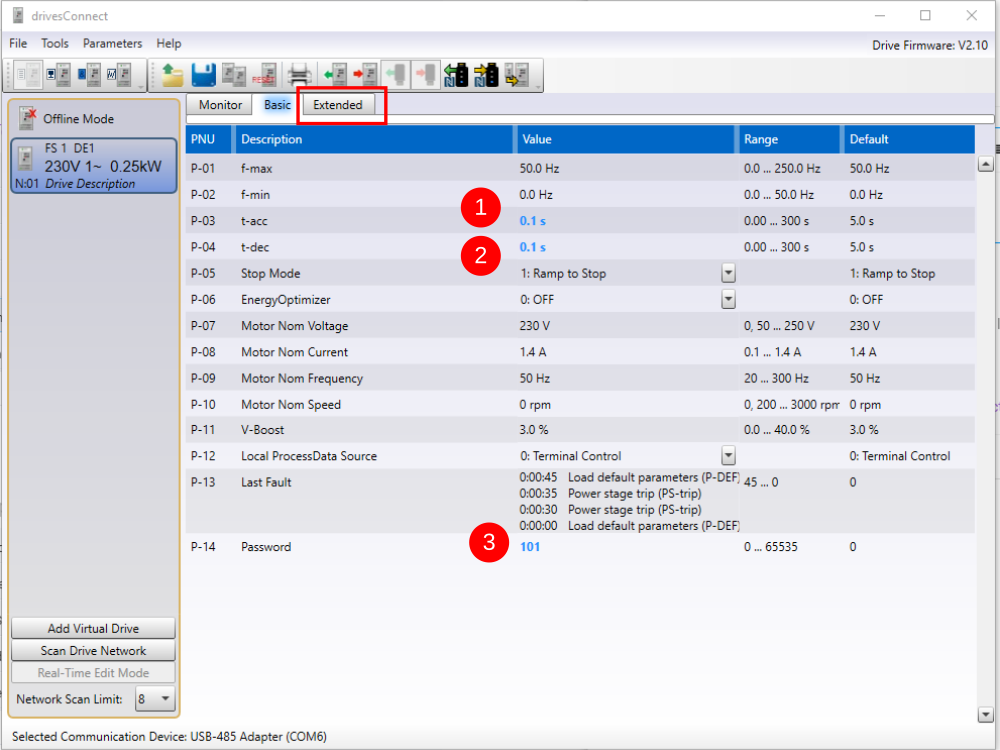
Étape 3 - Set Parameters
- Set Accel to 0.1s
- Set Decel to 0.1s
- Unlock Extended Parameters - Set P14 to 101. This creates the "Extended" tab on the top
Étape 4 - Set Config Mode
Click on the Extended tab
Set the P15 Config Mode to 2, which means [Fwd][Rev][Freqbit1][FreqBit2]

Étape 5 - Set Frequency References
Set these references P-20 to P-23 to 50Hz so it will not matter what input 3 or 4 is set to - it will always be 50Hz

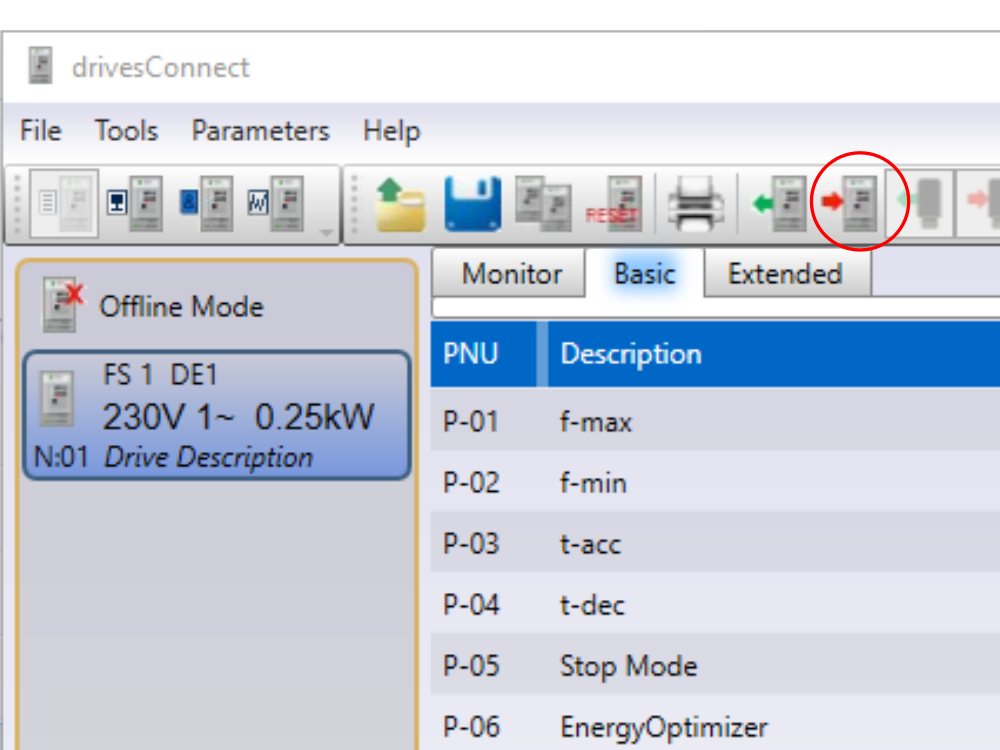
Étape 6 - Transfer Current Data Set to Drive
Press the button in the top toolbar with a picture of the drive and a red arrow
Draft
 Français
 English
 Deutsch
 Español
 Italiano
 Português