| [version en cours de rédaction] | [version en cours de rédaction] |
| Ligne 8 : | Ligne 8 : | ||
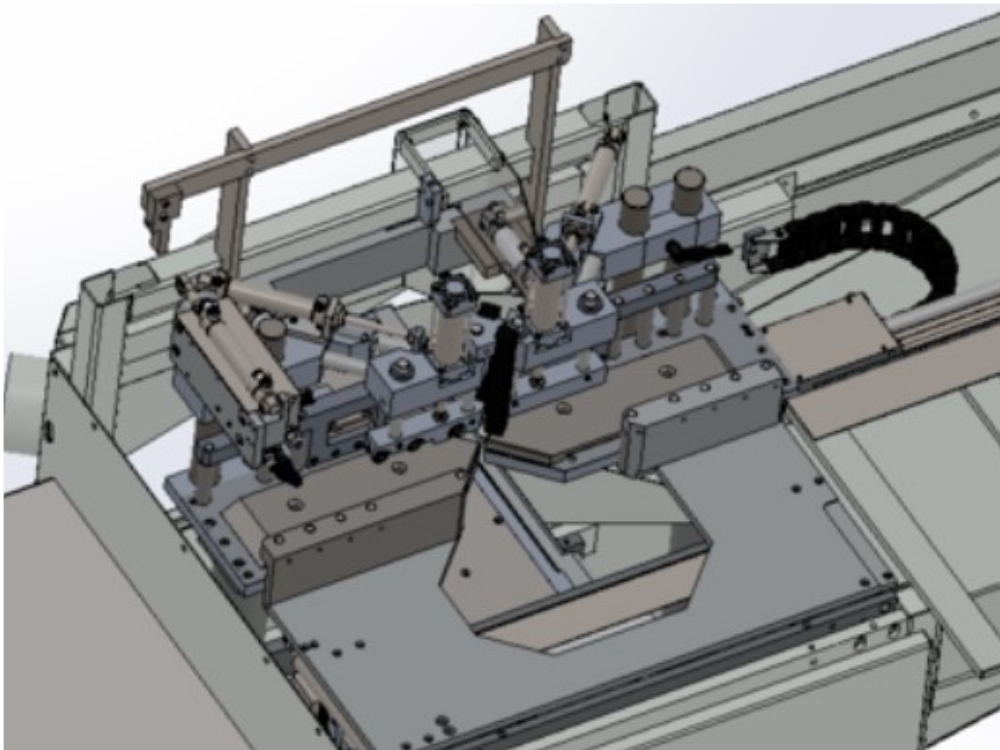
<translate>=Tooling Design= | <translate>=Tooling Design= | ||
Several Cill profile supports have already been designed. | Several Cill profile supports have already been designed. | ||
| − | {{Warning|...All cill support blocks are handed depending on feed of machine}}<br /> | + | {{Warning|...All cill support blocks are handed depending on feed of machine}}<br />See [https://stugaltd.monday.com/boards/5233024954 Parts: Stuga Tooling] for the full range and [[Parts Identification - Cill Support Blocks]] for a guide on selection |
{| class="wikitable" | {| class="wikitable" | ||
|+ | |+ | ||
Version actuelle datée du 27 septembre 2023 à 16:50
Special guidance for setting up Ancil Saws

Sommaire
- 1 Tooling Design
- 2 Side Clamp Positioner
- 3 Saw Stroke End Position and 500mm Upgrade
- 4 Saw Stroke Mid Cut Input
- 5 Colour Coding Support Blocks and Pusher End
- 6 BladetoFence Setup
- 7 Cill Chute Fill Plate
- 8 Parameter Setup - winMulti / Beckhoff Control
- 9 Parameter Setup - winStugaSawVB / Nextmove Control
Tooling Design
Several Cill profile supports have already been designed.
See Parts: Stuga Tooling for the full range and Parts Identification - Cill Support Blocks for a guide on selection
| Build Number | Profile | Profile BMP | Cill Block |
|---|---|---|---|
| S012 | Rehau 246330 150mm
Rehau 503940 225mm |
   |
D0001897-16
D0001898-16
|
Side Clamp Positioner
- Side Clamp Positioner "home" position is cylinder extended. Activating the output casues the side clamp to widen to the full size
- Ensure Side clamp Positioner stroke length is 100mm to give full range of travel
- Check range of motion to ensure the side clamp output can grip each profile type using the side clamp output only
Saw Stroke End Position and 500mm Upgrade
Cill saws need a 500mm blade upgrade
Check the widest profile cut at 45 degrees to ensure there is enough travel to complete the cut. to get a further 10mm stroke from the saw cut, the mount for the saw stroke cylinder rod end can be modified.

This has the downside of forcing the start point of the blade up -the blade pokes out 10mm above the slit strips, but this is not a big problem as long as the blade is not above the cut tables
Saw Stroke Mid Cut Input
Ancil saws benefit from the mid switch input on the saw stroke, because the stoke speed is inevitably slowed down on the widest profile, which also needs the full stroke range. Adding the mid point switch means narrower and lower profiles do not need the full, slow range of the cut and the cycle time is reduced considerably.
See instructions on how to set this feature up
Part numbers P0000327 and P0000609 are part of the R0010241 Ancil upgrade BOM
Colour Coding Support Blocks and Pusher End
See instructions for how to set this feature up in a standard way
BladetoFence Setup
Bladetofence on an ancil saw should be around 70mm.
Cill Chute Fill Plate
Part number D0005628(-OH) is used to fill in the radius of the chute which helps offcuts of wide cills down the chute

Part is included in the R0010241(-OH) Ancil upgrade BOM
Parameter Setup - winMulti / Beckhoff Control
isAncilSaw=1
allWasteAtStart=1
OverOptimising issues. This seemed to particularly affect cill saws - see Overoptimising Issues
Parameter Setup - winStugaSawVB / Nextmove Control
The winSaw control was the original version, so the ancil parameters are slightly different and were improved upon when merged into the existing code in the winMulti version
Parameter 225Cill turns on the use of the Z support output to become "Side Clamp positioner
225Cill=1
Parameter clampLiftPos sets the position where the Infeed Top clamp needs to lift up, because the saw pusher no longer passes underneath the clamp (the pusher is higher up on ancil saws). This is only activated if the profile parameters for the tooling colour coding are set to a colour.
clampLiftPos=230
Draft
 Français
 English
 Deutsch
 Español
 Italiano
 Português