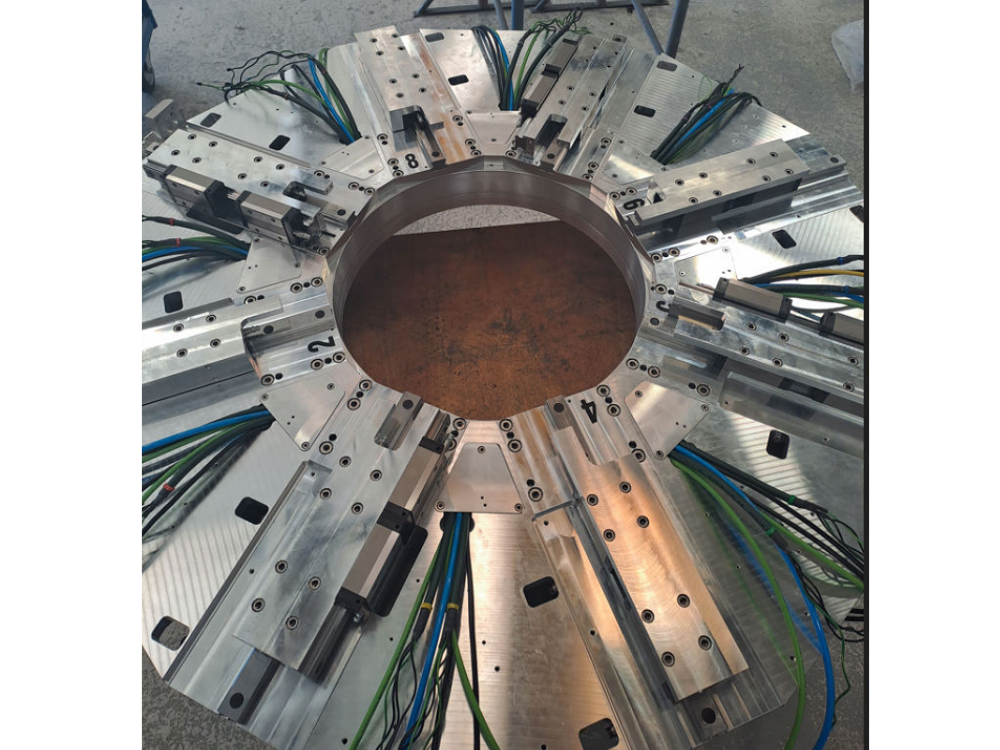
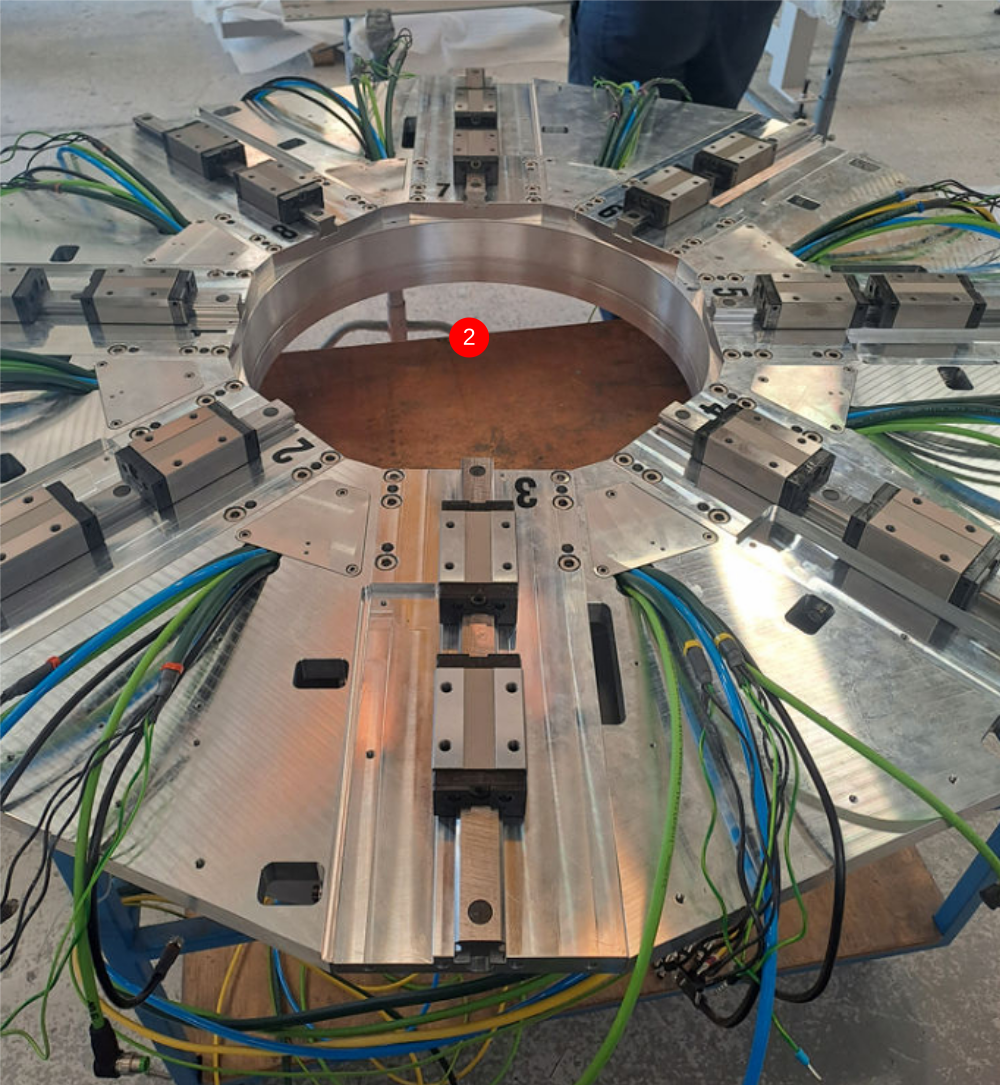
Build instructions for stage one assembly of spindle heads

Difficulté
Moyen
Durée
3 heure(s)
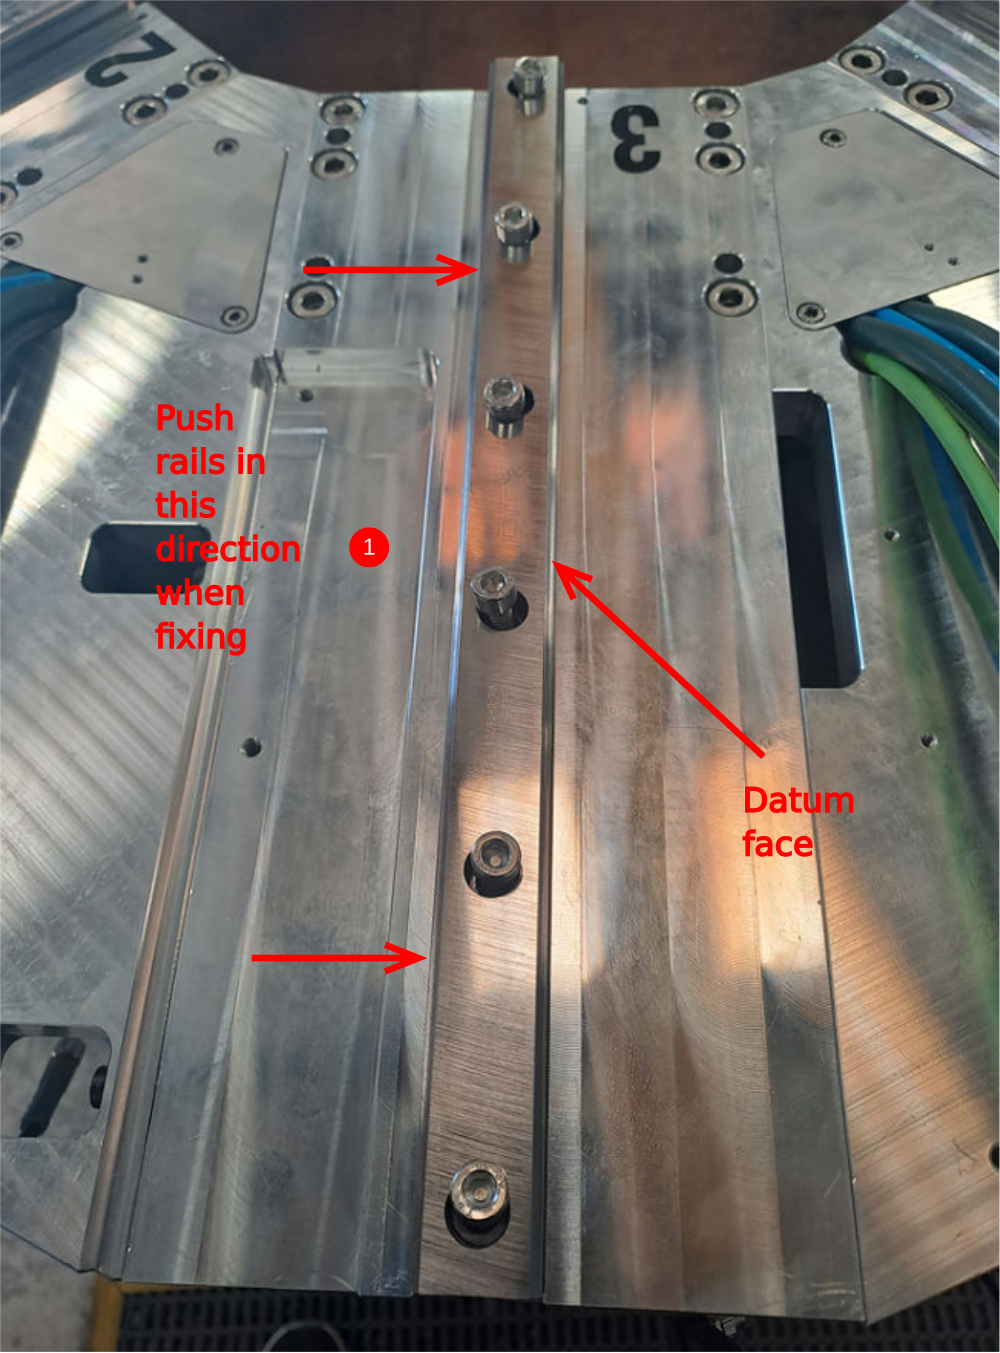
Étape 1 - Fit Linear rails
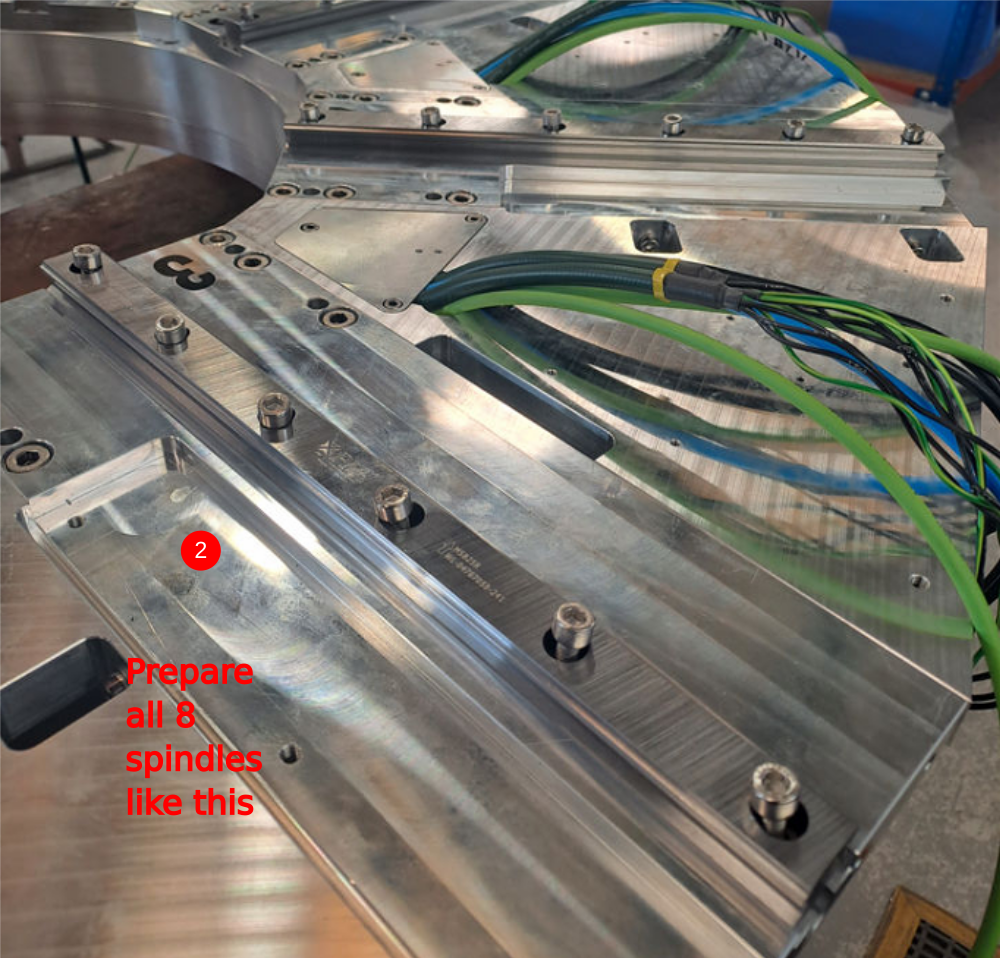
Linear rail B0000045 needs fitting to each spindle base
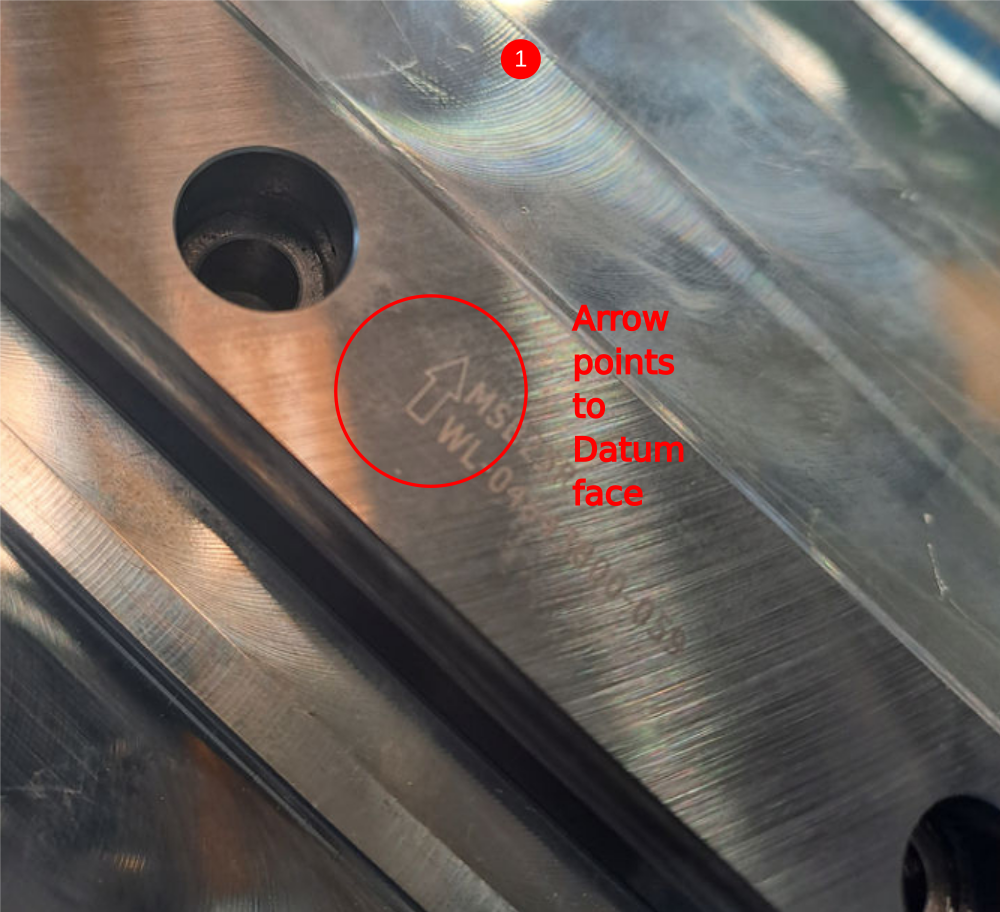
1 Orientation of Datum face is as shown
Ensure all linear rails and machined grooves in spindle plates are free from debris. Use compressed air.
2 Insert linear rail into each spindle base and drop in m6 x 20 socket caps with adhesive applied into all rail counterbores, do not screw in
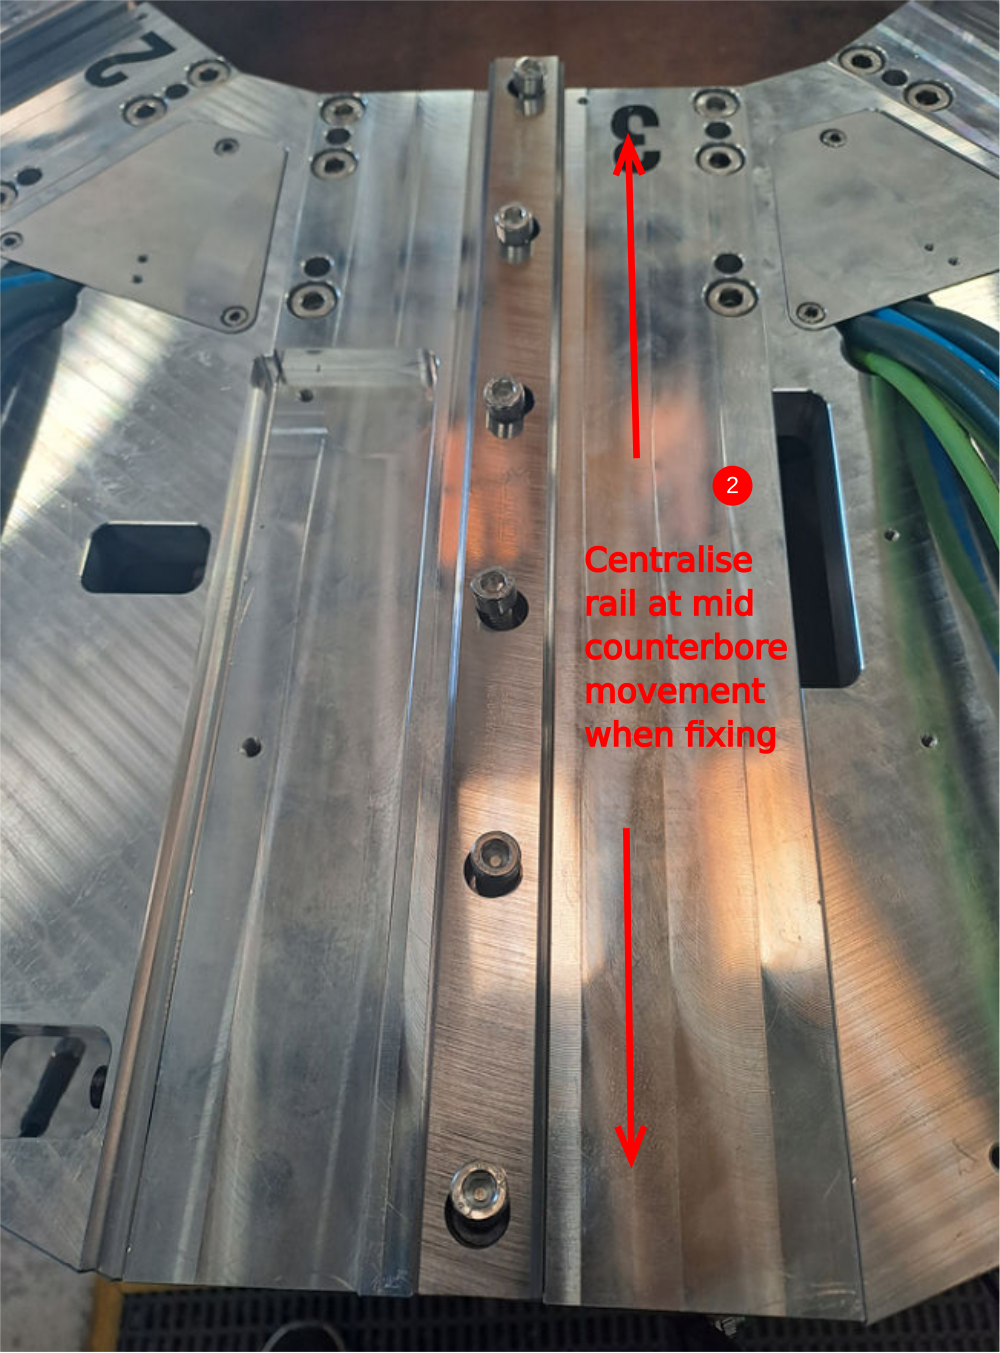
Étape 2 - Position and finalise rails
When finalising rails , the following should be observed
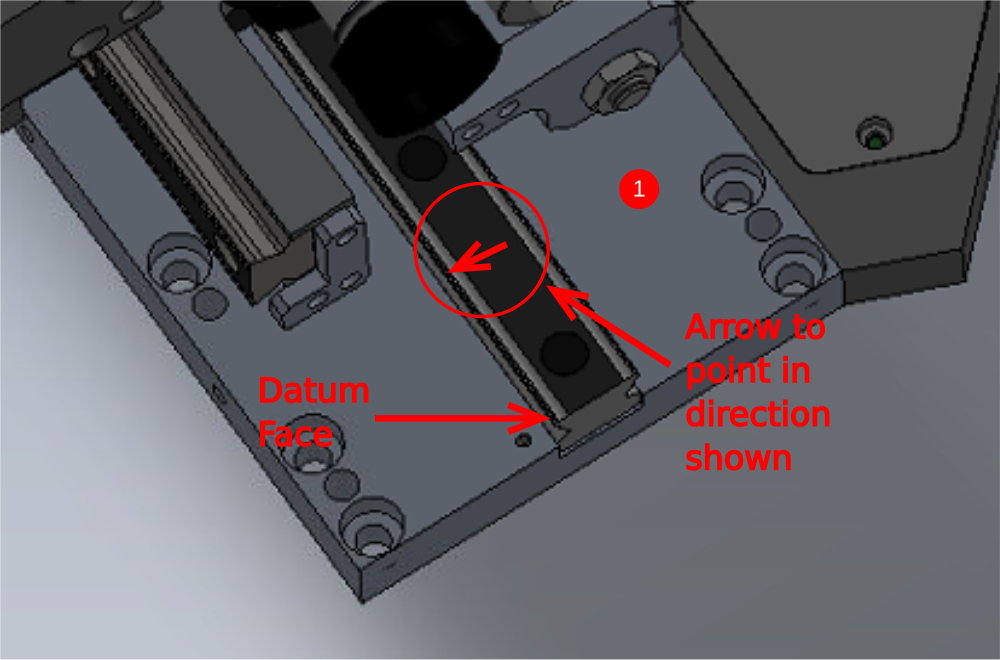
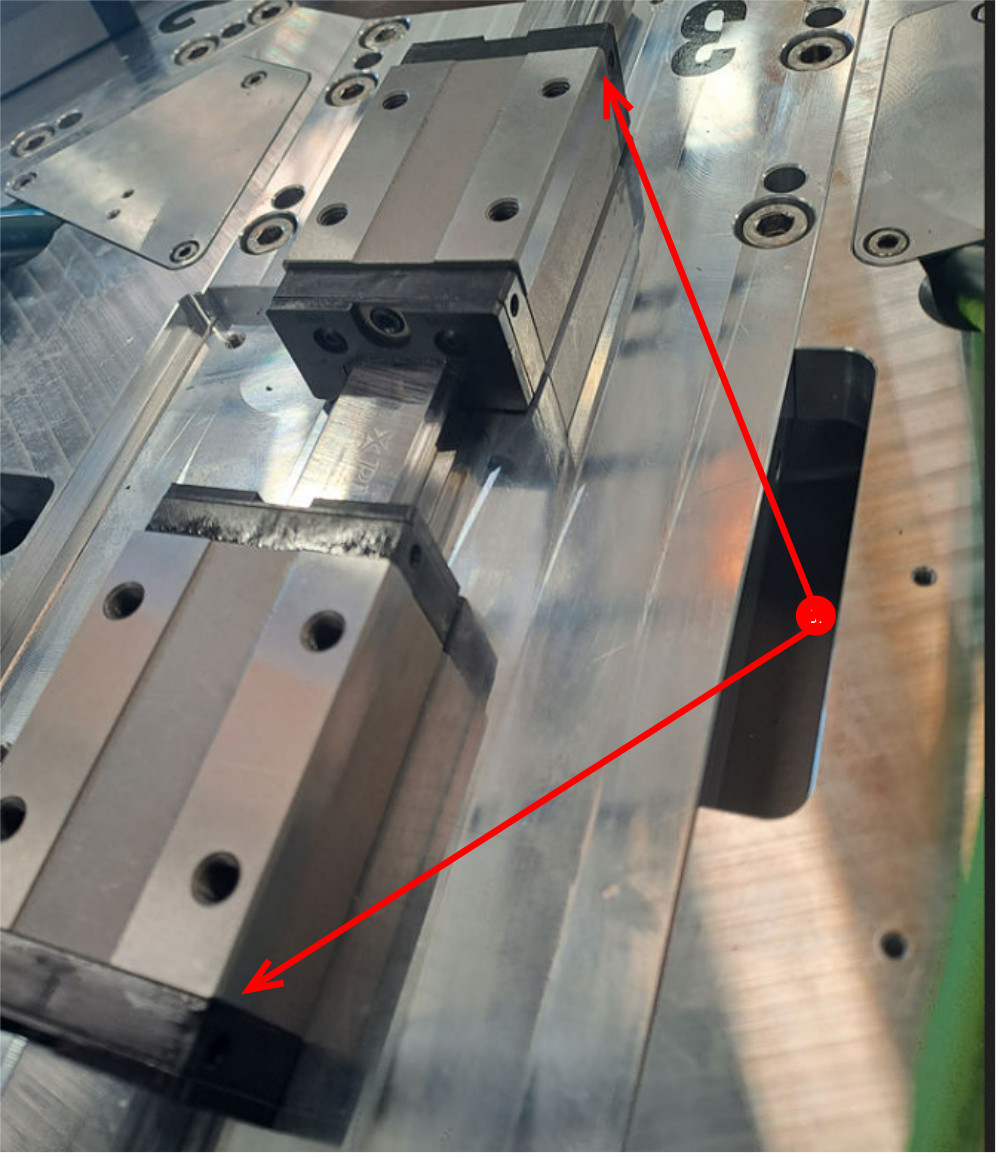
1 Rails should be pushed against this face when fixing, to ensure consistent positioning between spindles
2 Rails should be centralised in this direction , due to the clearance in the counterbores
3 Use a drill driver @ 15 torque and 5mm hex bit to drive in m6 cap heads on all spindles
4 Use hex key to apply final tension to m6 bolts on all spindles
Étape 3 - Fit Blanking caps B0000173
Fit blanking caps to all rails fitted . It is vital rail caps are fitted flush to allow bearing seals to work correctly.
Use a nylon block as a dolly to ensure caps are driven in flush but no damage is possible to linear rail.


Étape 4 - Prepare bearing blocks
Bearing blocks B0000046 must be prepared for installation . They must be de greased to ensure loctite 243 activates correctly
1 Lay out all 24 bearing blocks as shown and use Fe10 solvent and spray entire top face of lined up bearings, ensuring solvent floods into top facing m6 holes.
2 use compressed air to remove solvent from bearing blocks and tapped holes. 3 Wipe remaining solvent from bearing with clean rag

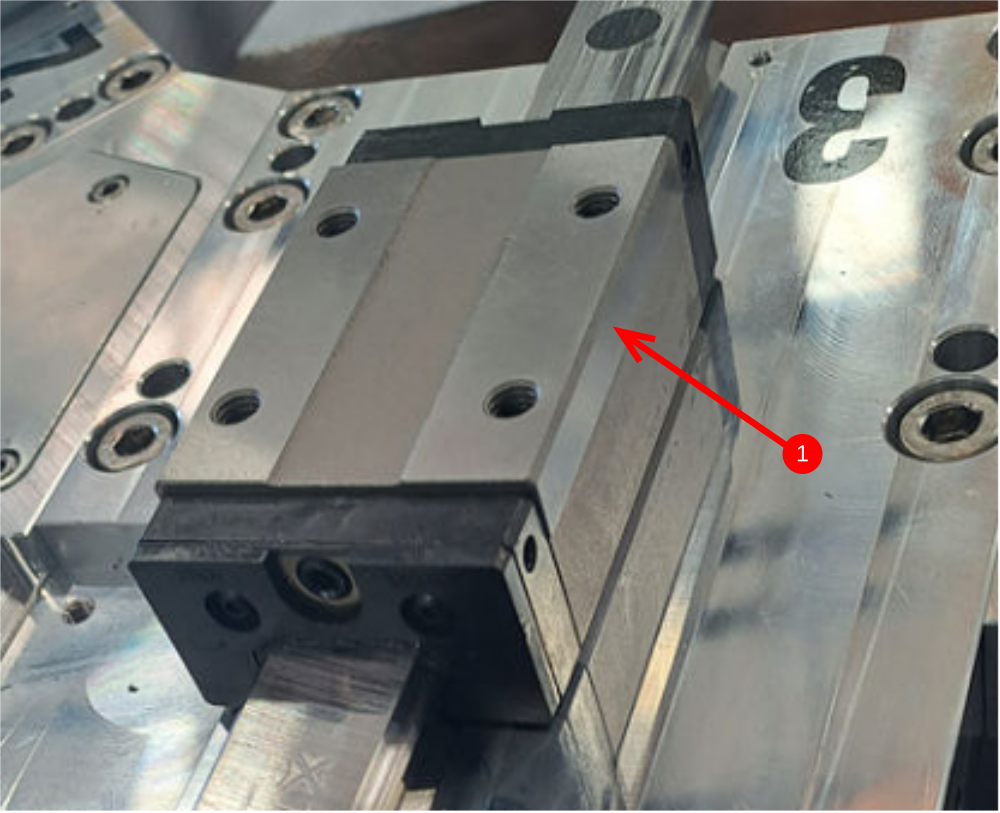
Étape 5 - Position bearing blocks onto rails
1 Datum faces of bearings must be observed and installed correctly
Bearing will only have one side that has a machined datum face. It is vital this is orientated correctly when adding bearings to the linear rails
2 Fit 16 bearing to rails as shown
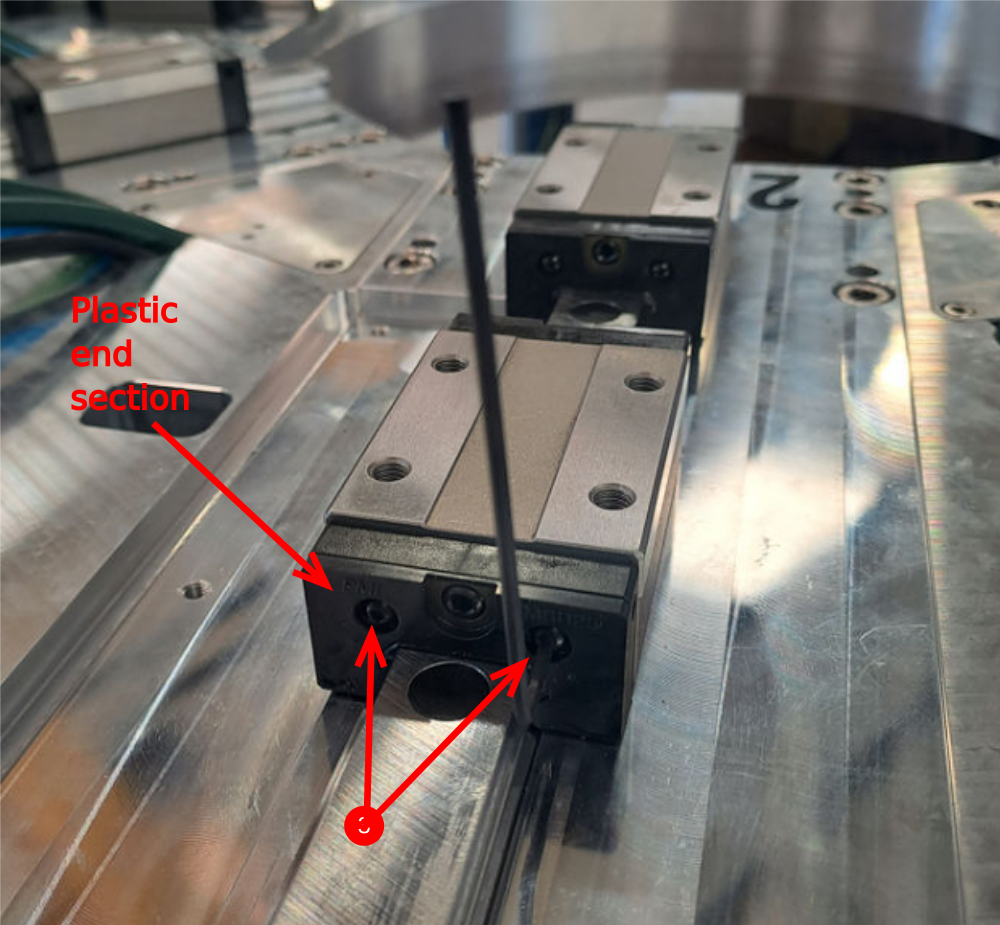
3 Adjust bearing seals to suit rail. release tension on indicated 2 bolts until end plastic section can move
4 Move bearing up and down on rail
5 Re tension 2 bolts
6 Repeat on other end of bearing
This should be done to all bearings fitted
Étape 6 - Fit greasing points

Draft
 Français
 English
 Deutsch
 Español
 Italiano
 Português