Changing the directory structure to allow a PC used for PLC code editing to sync with the source code version control system


Difficulté
Moyen
Durée
30 minute(s)
Sommaire
- 1 Introduction
- 2 Étape 1 - Install Sourcetree on the PC
- 3 Étape 2 - Backup the Old Project
- 4 Étape 3 - Rename tcMulti and PLC_Reset
- 5 Étape 4 - Clone the tcMulti repository
- 6 Étape 5 - Pull the latest tcMulti Projects
- 7 Étape 6 - Change the PLC Projects to versionControl
- 8 Étape 7 - Check the IO Links still Exist
- 9 Étape 8 - Activate Configuration
- 10 Étape 9 - Delete the Old PLC Projects
- 11 Commentaires
Introduction
Click here for the latest procedure
For many years, the source code for the PLCs has resided on the G:\drive and then a copy on each and every one of the PCs used to edit the code, so at least one on each machine. This is a recipe for disaster because maintaining all the copies and version numbers is incredibly difficult and adds a lot of time overhead to fixes and changes. This has worked because there has been only one developer, but this is set to change in future as more programmers will be trained and tracking versions becomes more difficult
From 2020, the PLC code version control has been improved by using an industry standard source control system called "Git" along with "BitBucket" to store the PLC code in the cloud. The program "SourceTree" is used to commit, push and pull the changes
Click here for an introduction to version control using Git
Étape 2 - Backup the Old Project
See this tutorial for backing up (archiving) a TwinCAT3 project
Étape 3 - Rename tcMulti and PLC_Reset
Remove the version numbers at the end
Étape 4 - Clone the tcMulti repository
Clone the online repository to a new local directory c:\TwinCAT\stuga\versionControl
Check success by navigating to the folder - there should be 2 folders
PLC_Reset
tc3Multi
Étape 5 - Pull the latest tcMulti Projects
This will get the latest file versions from the cloud of tcMulti and PLC_Reset and copy into PLC_Reset and tc3Multi folders
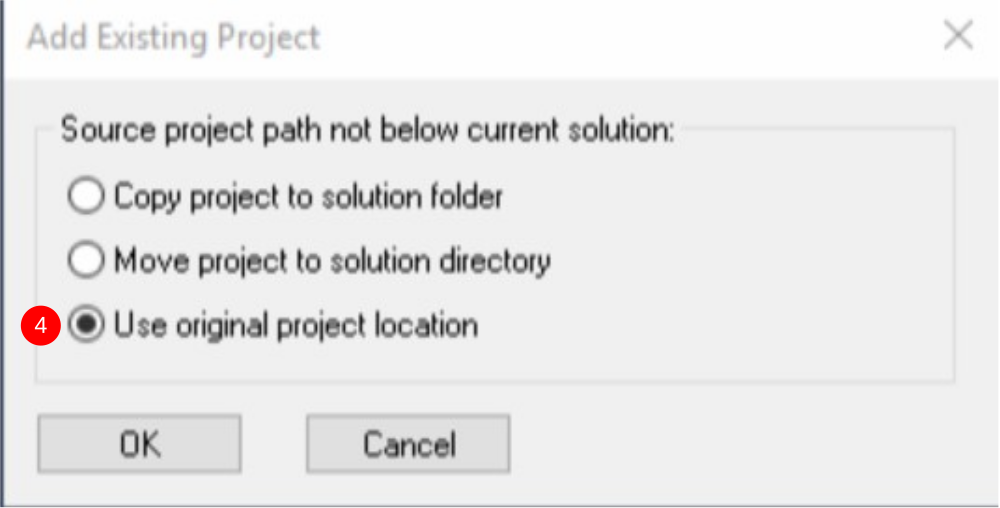
Étape 6 - Change the PLC Projects to versionControl
- Open the machine's standard Visual Studio project file
- Right click on tc3Multi_and select Change Project
- Navigate to the versionControl folder\tc3Multi
- Select Use Original Project Location
- Repeat for PLC_Reset

Étape 7 - Check the IO Links still Exist
Étape 8 - Activate Configuration
Étape 9 - Delete the Old PLC Projects
In the Project folder for the machine, delete tc3Multi and PLC_Reset folder
Draft
 Français
 English
 Deutsch
 Español
 Italiano
 Português