This will describe the setup of a replacement Zebra printer after a fault with one on site.

Difficulté
Moyen
Durée
10 minute(s)
Sommaire
- 1 Introduction
- 2 Étape 1 - Boot up printer
- 3 Étape 2 - Place in label reel
- 4 Étape 3 - Printout 'IP Address' label
- 5 Étape 4 - Open browser and type in IP Address
- 6 Étape 5 - Open the homepage
- 7 Étape 6 - Check parameters
- 8 Étape 7 - Calibration
- 9 Étape 8 - TeamViewer
- 10 Étape 9 - Network Settings and IP Protocol
- 11 Étape 10 - Re-print parameters
- 12 Étape 11 - Notes
- 13 Commentaires
Introduction
Étape 1 - Boot up printer
Open box, unwrap printer, plug in power and plug Ethernet connected to network to the printer. As the printer boots up there will be a red light displayed on the front. After around 30 seconds this will turn green as the printer completes boot up.
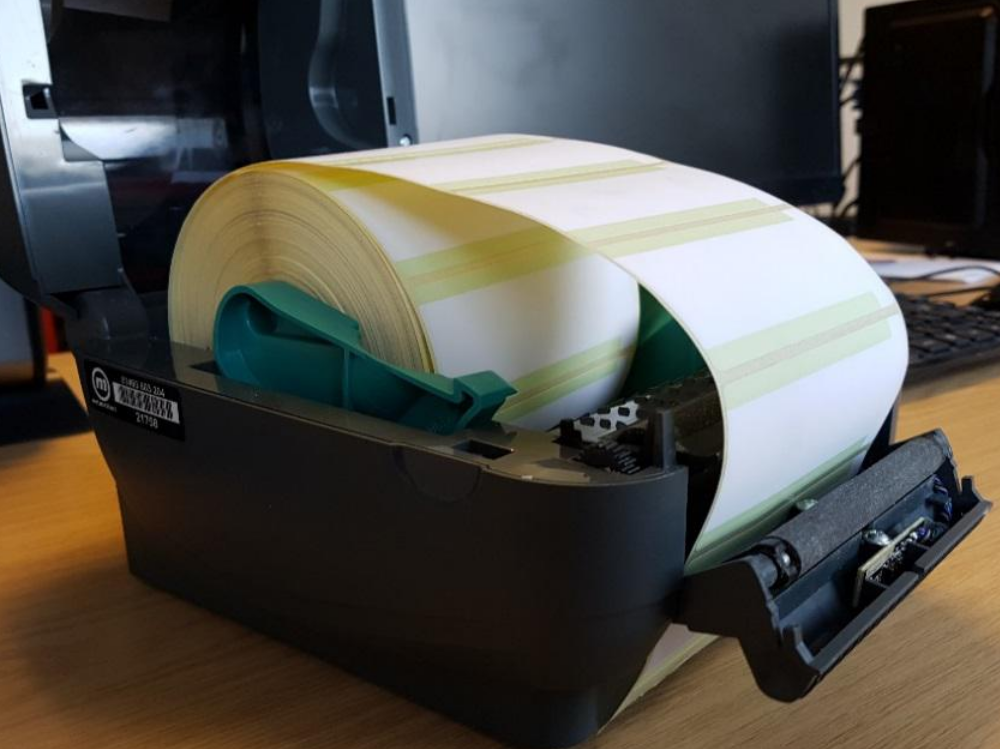
Étape 2 - Place in label reel
Using the latches on the sides, open the printer and place in a label reel as shown in photo. Now ok to close the printer and front roller.

Étape 3 - Printout 'IP Address' label
Hold down the button until the green light flashes once, then release. This should printout 8 labels with various parameters on them, look for the label with ‘IP Address’ as shown in figure 2.

Étape 4 - Open browser and type in IP Address
Open any browser (Microsoft Edge, Chrome, Firefox) and type the IP address on the label into the search bar. IP addresses such as “192.168.016.079” should be typed as”192.168.16.79”
Étape 5 - Open the homepage
This will now open the Zebra Printers home page. From here we can alter all settings required to set up a replacement printer. Click on ‘View and Modify Printer Settings’. When prompted for a password type: 1234. This will be the same password whenever prompted again. You will now be on the ‘View and Modify Printer Settings’ page.


Étape 6 - Check parameters
Now go to “General Setup”. From here you need to check parameters and change them if needs be.
Darkness: 30
Print Mode: Peel off
Speed: 3IPS
Then save changes.

Étape 7 - Calibration
Then go to “Calibration”.
Power up: Calibration
Head close: Feed
Save.

Étape 8 - TeamViewer
Using TeamViewer go onto the costumer’s machine’s computer where the printer is to be replaced. There are several ways of archiving this, the most reliable of which is finding the “params.saw” txt file. This will be in the C:\ drive. Open this and find “PrinterIPAddress”. This will be the most recent IP address for the printer on their current network. This ensures the printer only needs to be connected to the company’s network to operate. (If on an older system see notes)
Étape 9 - Network Settings and IP Protocol
Go back onto the “Change and Modify Settings” menu on the printer interface. From here go to “Network Settings” and then to “TCP/IP Settings”.
IP Address: (the IP address found in step 9)
IP Protocol: PERMINANT.
Submit changes and save in all menus.

Étape 10 - Re-print parameters
It is now recommended to re-print the parameters (like step 3) and stick the IP section of stickers on the bottom of the printer. Printer is now setup.
Note: when saved you will not be able to alter again as the printer will have the company’s IP address. If alteration to parameters a Factory reset would be required. To do this hold down the green button and wait for the light to flash 4 times, then release. The printer will now be reset. Wait till green. Repeat this technical bulletin.
For more information see the zebra GK420d online user guide: https://www.zebra.com/content/dam/zebra/manuals/printers/desktop/legacy/gk420d/gk420d-ug-en.pdf
Étape 11 - Notes
Neuron Old Systems. This applies if the machine has not been upgraded to a more recent system. Printer IP address will be found in an XML file, (Master > ZPL > files) under printer IP address.
Draft
 Français
 English
 Deutsch
 Español
 Italiano
 Português