CX5120 Beckhoff PC Setup
Étape 1 - Connect
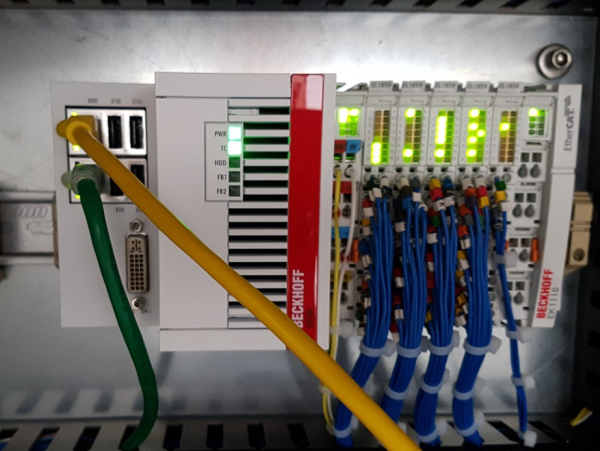
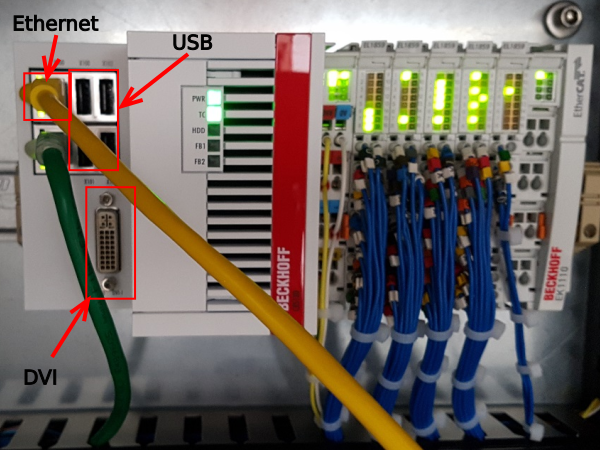
Plug in the Ethernet, DVI, Keyboard and Mouse to the Beckhoff PLC. This can be done on a machine (as shown) or before installation (without etherCAT or slices).
Étape 2 - Install Teamviewer Host
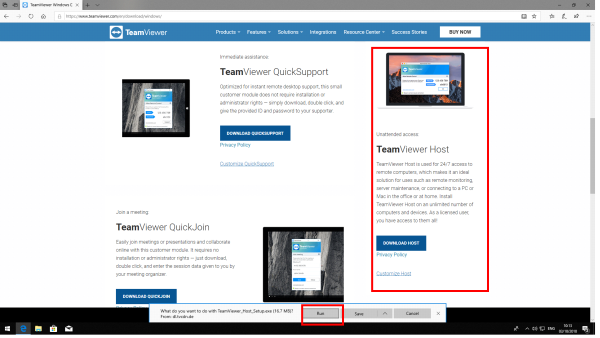
Go to Internet Explorer and search "www.teamviewer.com/en/download/windows/". Scroll down to TeamViewer Host and click on 'Download Host', when prompted press 'Run' to start download. Make sure download is of the most recent version.
Étape 3 - Naming
Change name to the machine name that the PC is for (i.e. F010B)
Étape 4 - Set the Date and Time
Change time and date. For this, go to the bottom right date of the PC and right click the time and date. Go to ‘Adjust time and date’ and select internet time. Press ok.
Étape 5 - Set the Region
Go to Control Panel then ‘Region and Language’ and select ’English (United Kingdom)’.
Étape 6 - Change Network Adaptor Names
Go to ‘Network and Sharing Centre’ then ‘Change Adaptor Settings’. Rename the area connection 1 to ‘EtherCAT’ and local area connection 2 to ‘Ethernet’. This relates back two the two network ports on the Beckhoff machine.
Étape 7 - Change Password
When the Beckhoff machine starts, internet explorer will load. The web page will contain a 'password wizard' use this wizard to change the password from "1" to "Stuga001".
Draft


 Français
 English
 Deutsch
 Español
 Italiano
 Português