| [version en cours de rédaction] | [version en cours de rédaction] |
(Page créée avec « {{Tuto Details |Description=<translate>How to correctly set the gripper nose mechanics</translate> |Categories=Maintenance |Difficulty=Medium |Duration=20 |Duration-type=m... ») |
|||
| Ligne 1 : | Ligne 1 : | ||
{{Tuto Details | {{Tuto Details | ||
| + | |Main_Picture=Setting_Gripper_Nose_Annotation_2019-11-13_140338.jpg | ||
| + | |Main_Picture_annotation={"version":"2.4.6","objects":[{"type":"image","version":"2.4.6","originX":"left","originY":"top","left":-15,"top":56,"width":1239,"height":608,"fill":"rgb(0,0,0)","stroke":null,"strokeWidth":0,"strokeDashArray":null,"strokeLineCap":"butt","strokeDashOffset":0,"strokeLineJoin":"miter","strokeMiterLimit":4,"scaleX":0.5,"scaleY":0.5,"angle":0,"flipX":false,"flipY":false,"opacity":1,"shadow":null,"visible":true,"clipTo":null,"backgroundColor":"","fillRule":"nonzero","paintFirst":"fill","globalCompositeOperation":"source-over","transformMatrix":null,"skewX":0,"skewY":0,"crossOrigin":"","cropX":0,"cropY":0,"src":"https://stuga.dokit.app/images/8/8b/Setting_Gripper_Nose_Annotation_2019-11-13_140338.jpg","filters":[]}],"height":449.62279966471084,"width":600} | ||
|Description=<translate>How to correctly set the gripper nose mechanics</translate> | |Description=<translate>How to correctly set the gripper nose mechanics</translate> | ||
|Categories=Maintenance | |Categories=Maintenance | ||
| Ligne 25 : | Ligne 27 : | ||
{{Notes}} | {{Notes}} | ||
{{PageLang | {{PageLang | ||
| + | |Language=en | ||
|SourceLanguage=none | |SourceLanguage=none | ||
|IsTranslation=0 | |IsTranslation=0 | ||
| − | |||
}} | }} | ||
{{Tuto Status | {{Tuto Status | ||
|Complete=Draft | |Complete=Draft | ||
}} | }} | ||
Version du 13 novembre 2019 à 16:04
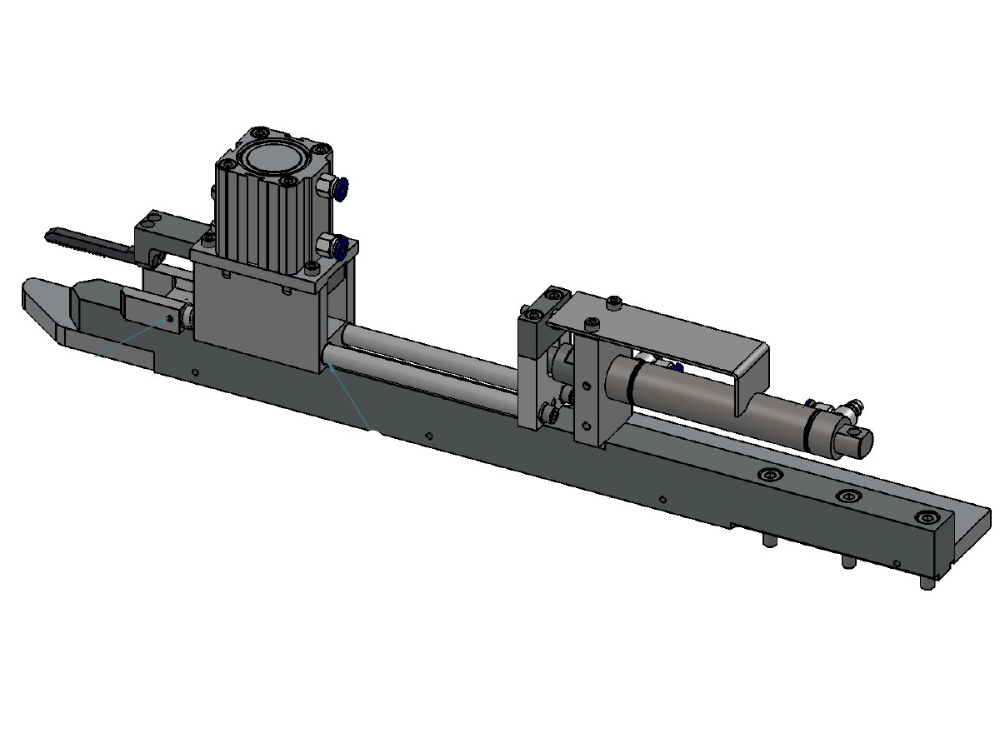
How to correctly set the gripper nose mechanics

Difficulté
Moyen
Durée
20 minute(s)
Introduction
It is very important to ensure the gripper nose and heel is correctly set up. This assembly is subject to a lot of wear and tear and maintenance is very important. Incorrect setting or play in this assembly is a major cause of accuracy issues
Étape 1 - Temporary Instructions
when it is in this position - Fully bottomed make sure the Grip on comes down but doesn't catch the Grip nose.
Notice the Dead stop bolt at bottom is hard up then set grip switch bolt so that the dead stop bolt gap is no more than 1mm when grip switch goes off.


Étape 2 -
Draft
 Français
 English
 Deutsch
 Español
 Italiano
 Português