| [version en cours de rédaction] | [version en cours de rédaction] |
| Ligne 4 : | Ligne 4 : | ||
|Description=<translate>Instructions to bench assemble infeed support arms</translate> | |Description=<translate>Instructions to bench assemble infeed support arms</translate> | ||
|Categories=Production | |Categories=Production | ||
| − | |Difficulty= | + | |Difficulty=Medium |
|Duration=5 | |Duration=5 | ||
|Duration-type=hour(s) | |Duration-type=hour(s) | ||
| Ligne 28 : | Ligne 28 : | ||
D0015553 Transfer Support arm R/H (right to left machine ) OR D0015552 Transfer Support Arm L/H ( Left to Right machine) | D0015553 Transfer Support arm R/H (right to left machine ) OR D0015552 Transfer Support Arm L/H ( Left to Right machine) | ||
| − | D0015554 x 18</translate> | + | D0015554 x 18 |
| + | |||
| + | M8 x 20 button hex fastener x 18 | ||
| + | |||
| + | M5 x 25 socket cap x 180 | ||
| + | |||
| + | M5 A form washer x 180</translate> | ||
}} | }} | ||
{{Materials}} | {{Materials}} | ||
| Ligne 57 : | Ligne 63 : | ||
|Step_Content=<translate>1 Mount 4 off setting jigs to arm on the indicated points | |Step_Content=<translate>1 Mount 4 off setting jigs to arm on the indicated points | ||
| − | 2 align spacers over all m5 holes</translate> | + | 2 align 20 off spacers over all m5 holes</translate> |
|Step_Picture_00=R0015095_Bench_Assemble_Infeed_Support_Arms_Screenshot_2023-07-17_141246.png | |Step_Picture_00=R0015095_Bench_Assemble_Infeed_Support_Arms_Screenshot_2023-07-17_141246.png | ||
|Step_Picture_01=R0015095_Bench_Assemble_Infeed_Support_Arms_Screenshot_2023-07-17_141252.png | |Step_Picture_01=R0015095_Bench_Assemble_Infeed_Support_Arms_Screenshot_2023-07-17_141252.png | ||
Version du 7 novembre 2023 à 11:45
Instructions to bench assemble infeed support arms

Difficulté
Moyen
Durée
5 heure(s)
Introduction
Tools Required
Standard hex key set
Standard tap sete
Setting jigs
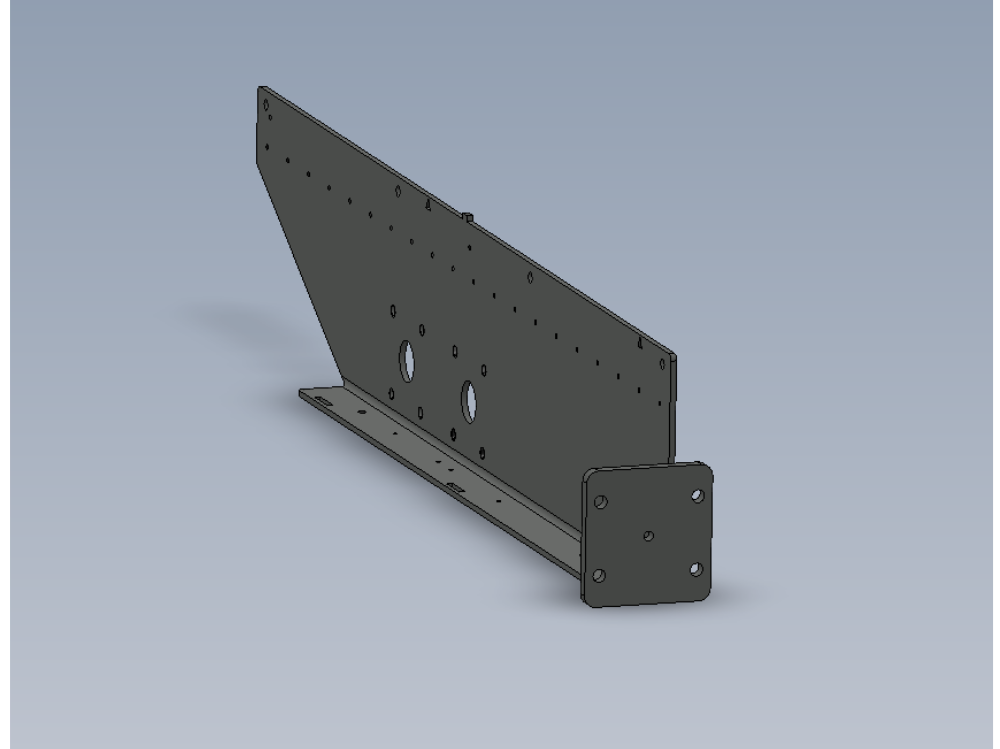
Parts required
B0001170 Spacer 180 off
B0001155 open rail 18 off
D0015553 Transfer Support arm R/H (right to left machine ) OR D0015552 Transfer Support Arm L/H ( Left to Right machine)
D0015554 x 18
M8 x 20 button hex fastener x 18
M5 x 25 socket cap x 180
M5 A form washer x 180Étape 1 - Unless otherwise stated
Use Loctite 243 on all fasteners
Use Loctite 572 on all threaded pneumatic connections
Pen mark all bolts to show finalised

Étape 2 - Hand of parts issued determines handing.
Steps shown below will show location and position of parts and procedure for fitting , not orientation

Étape 3 - Clean all threads


Étape 4 - Align spacers and fit setting jigs
1 Mount 4 off setting jigs to arm on the indicated points
2 align 20 off spacers over all m5 holes


Étape 5 - Fix Rail to arm
1 Use M5 x 25 socket cap and A form washer with loctite 243 to fix rail to arm
2 Ensure rail touching setting jig as indicated and two rails are pushed completely together


Étape 6 - Fit support arm spacers to arms
2 off per arm
Fix using M8 x 20 button head socket

Draft
 Français
 English
 Deutsch
 Español
 Italiano
 Português