| [version en cours de rédaction] | [version en cours de rédaction] |
| Ligne 1 : | Ligne 1 : | ||
{{Tuto Details | {{Tuto Details | ||
| + | |Main_Picture=ZX5_Datum_and_Grip_Pin_Setup_Main.jpg | ||
| + | |Main_Picture_annotation={"version":"2.4.6","objects":[{"type":"image","version":"2.4.6","originX":"left","originY":"top","left":-2,"top":-114,"width":3000,"height":4000,"fill":"rgb(0,0,0)","stroke":null,"strokeWidth":0,"strokeDashArray":null,"strokeLineCap":"butt","strokeDashOffset":0,"strokeLineJoin":"miter","strokeMiterLimit":4,"scaleX":0.2,"scaleY":0.2,"angle":0,"flipX":false,"flipY":false,"opacity":1,"shadow":null,"visible":true,"clipTo":null,"backgroundColor":"","fillRule":"nonzero","paintFirst":"fill","globalCompositeOperation":"source-over","transformMatrix":null,"skewX":0,"skewY":0,"crossOrigin":"","cropX":0,"cropY":0,"src":"https://stuga.dokit.app/images/4/4d/ZX5_Datum_and_Grip_Pin_Setup_Main.jpg","filters":[]}],"height":449.54954954954957,"width":600} | ||
|Description=<translate>This will guide you through the machanical setup of the grip pins, along with datum and loadPos calibration.</translate> | |Description=<translate>This will guide you through the machanical setup of the grip pins, along with datum and loadPos calibration.</translate> | ||
|Difficulty=Easy | |Difficulty=Easy | ||
| Ligne 10 : | Ligne 12 : | ||
For it to work accurately and reliably the system first needs to be set up mechanically on both the X and SX axis. And crucially, if the datum is changed the loading position also has to be changed, and vice versa. This is extremely important for the operator, and any on-site maintenance staff to be aware of as changing either one without compensating the other can lead to accuracy issues and miss grips.</translate> | For it to work accurately and reliably the system first needs to be set up mechanically on both the X and SX axis. And crucially, if the datum is changed the loading position also has to be changed, and vice versa. This is extremely important for the operator, and any on-site maintenance staff to be aware of as changing either one without compensating the other can lead to accuracy issues and miss grips.</translate> | ||
}} | }} | ||
| − | {{Materials | + | {{Materials}} |
| − | |||
| − | }} | ||
{{EPI}} | {{EPI}} | ||
{{Tuto Step | {{Tuto Step | ||
Version du 26 février 2022 à 14:55
This will guide you through the machanical setup of the grip pins, along with datum and loadPos calibration.
Introduction
The ZX5 has a different and much improved grip system where we use the 10mm cutter to put holes in the end of the profile. The profile is then gripped by the grip pins to give a more accurate and reliable grip. Along with better machining accuracy, this also allows the X axis to be run at higher speeds and virtually eliminates gripper slip.
For it to work accurately and reliably the system first needs to be set up mechanically on both the X and SX axis. And crucially, if the datum is changed the loading position also has to be changed, and vice versa. This is extremely important for the operator, and any on-site maintenance staff to be aware of as changing either one without compensating the other can lead to accuracy issues and miss grips.Étape 1 - Check loadPos
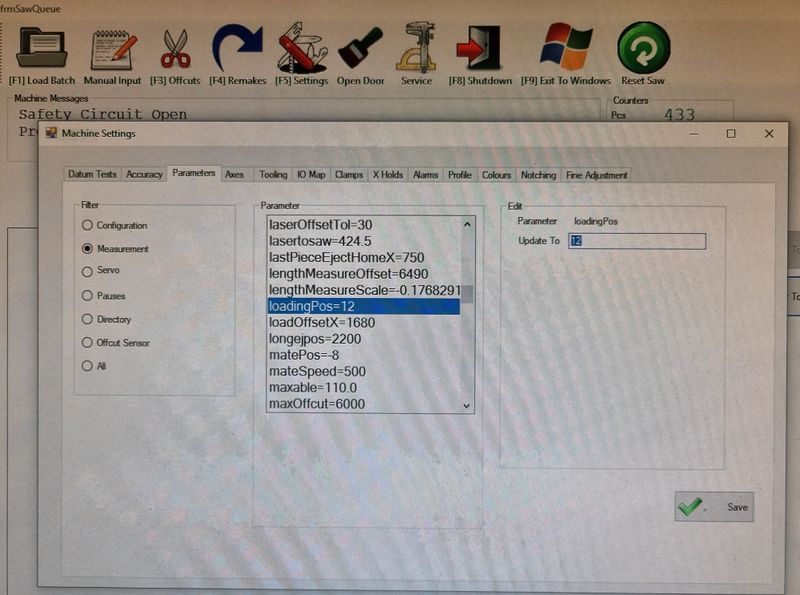
In SETTINGS > PARAMETERS > MEASUREMENT > loadingPos=11
If set at a different figure, update to 11 and SAVE
Étape 2 - Carry Out Datum Test
First we need a piece of standard outer frame around 1.5 – 2mtrs in length. The end of the profile that will be gripped MUST be square both horizontally and vertically. There is a jig sent out with all ZX5’s which is used for this purpose, but they can go missing or be thrown out as operators will not be aware of their use.
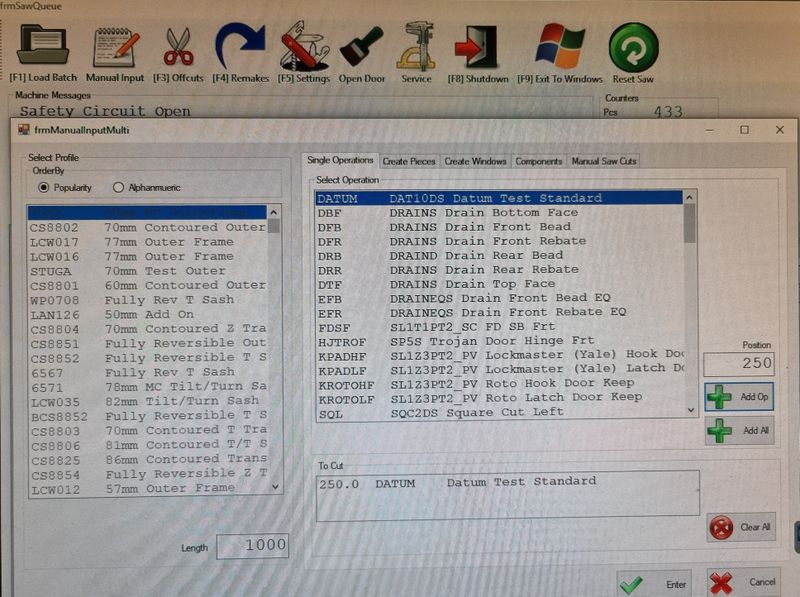
To create our test piece, we need to go into MANUAL INPUT, select a standard outer frame , select DATUM TEST and position at 250, ADD OP, then ENTER.
Run the test and allow the gripper to pull the profile onto the outfeed table and stop the machine.
Étape 3 - Check Grip Gap
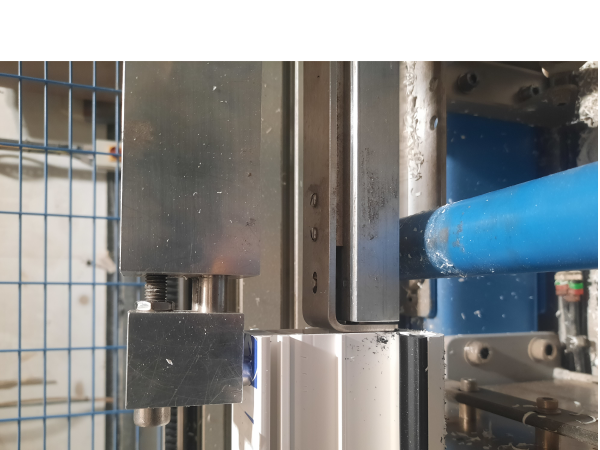
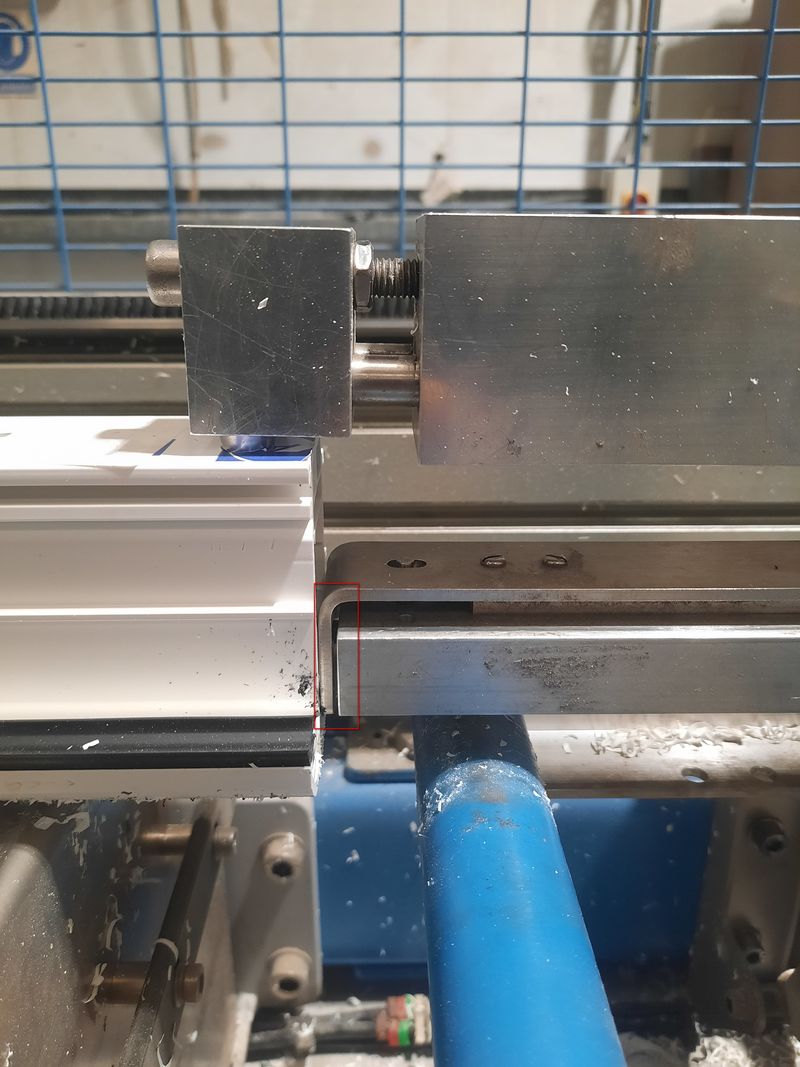
With a 13mm spanner, 6mm alan key, and a set of feeler gauges enter the machine and physically move the gripper so that the grip teeth, and end of profile are over one of the outfeed table arms. Check the gap between the strike plate and sensor block. It does not matter what this measurement is, as long as it is between 1 and 1.5mm. If required, slacken off the locking nut and adjust gap to suit, fully tighten the nut and recheck the gap. Now remove the profile and move over to the saw pusher side (SX Axis). Again, move the pusher so that the teeth are over an infeed table arm. Drop the grip pins into the profile and check the grip gap, if it is different from the X axis then it needs to be adjusted to match.
Étape 4 - Set Datum and LoadingPos
Once mechanical setup has been carried out we need to check the datum and carry out any adjustment. Using another fresh piece of profile carry out another datum test at 250mm. Once complete remove the profile and measure from the bottom side of the profile to the edge of the hole (it is important to use a good quality tape measure that has no slop or play in the tang, or a good 1mtr steel rule). This measurement should be 245mm (250mm minus half the diameter of the 10mm tool)
If this measurement is correct then no adjustment is required and you can carry on to a POS test to check the back to back accuracy of the saw side for handle hole positions etc.
If the measurement is wrong, we need to carry out the test again with datum at 270mm and then 290mm, it is important that the machine is reinitialised between each test. This is to ensure the result is repeatable and not being caused by a mechanical fault, i.e. worn pinion gear.
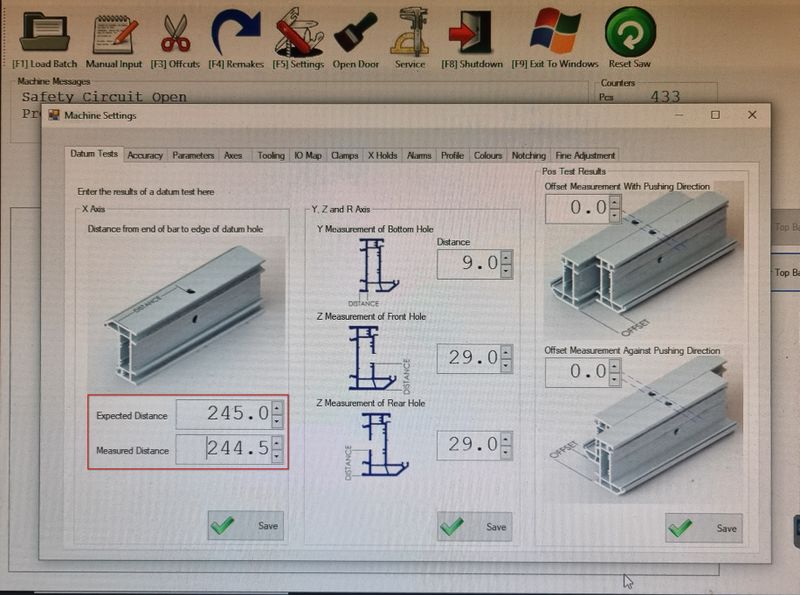
If the result is repeatable and is always out by the same amount, i.e. 0.5mm, go to SETTINGS > DATUM TEST. Enter the results of the test in the boxes highlighted.
If the MEASURED DISTANCE is LOWER than the EXPECTED DISTANCE, then the datum will be moved further AWAY from the gripper. If it is HIGHER then the datum will be moved CLOSER to the gripper. By changing the DATUM position, the machining centre will move ALL operations along the X axis by the corresponding amount, i.e. 0.5mm. This includes the holes for the grip pins as it is just another operation, therefore if the datum hole is moved away from the gripper, then the grip pin holes will also be moved away from the gripper and vice versa. This can result in accuracy issues, missgrips, and gripper slip. Therefore, the LOADING POS will also need changed by the same amount, but in the OPPOSITE direction.
Étape 5 - Example
MEASURED DISTANCE in RED is LOWER than the EXPECTED DISTANCE in YELLOW by 0.5mm. The datum will be shifted away from the gripper by 0.5mm (increased distance from gripper) and also shifting the grip pin holes by the same amount, we need to decrease the LOADING POS by 0.5mm to correct for this.
Draft

 Français
 English
 Deutsch
 Español
 Italiano
 Português