| [version en cours de rédaction] | [version en cours de rédaction] |
| Ligne 92 : | Ligne 92 : | ||
Fit camera to top guard using 3 off M4 x 12 socket caps , and back off with M4 dome nuts and M4 A form washers | Fit camera to top guard using 3 off M4 x 12 socket caps , and back off with M4 dome nuts and M4 A form washers | ||
| − | Ensure camera is fitted the correct orientation. Camera will have a 'UP' marked on body. This must be at the top</translate> | + | Ensure camera is fitted the correct orientation. Camera will have a 'UP' marked on body. This must be at the top |
| + | |||
| + | |||
| + | Camera must be fitted to top corner of front guard closest to Module F saw unit</translate> | ||
|Step_Picture_00=R0015321_Bench_Assemble_Guards_and_Doors_Screenshot_2023-11-02_081657.png | |Step_Picture_00=R0015321_Bench_Assemble_Guards_and_Doors_Screenshot_2023-11-02_081657.png | ||
}} | }} | ||
Version du 7 décembre 2023 à 11:07
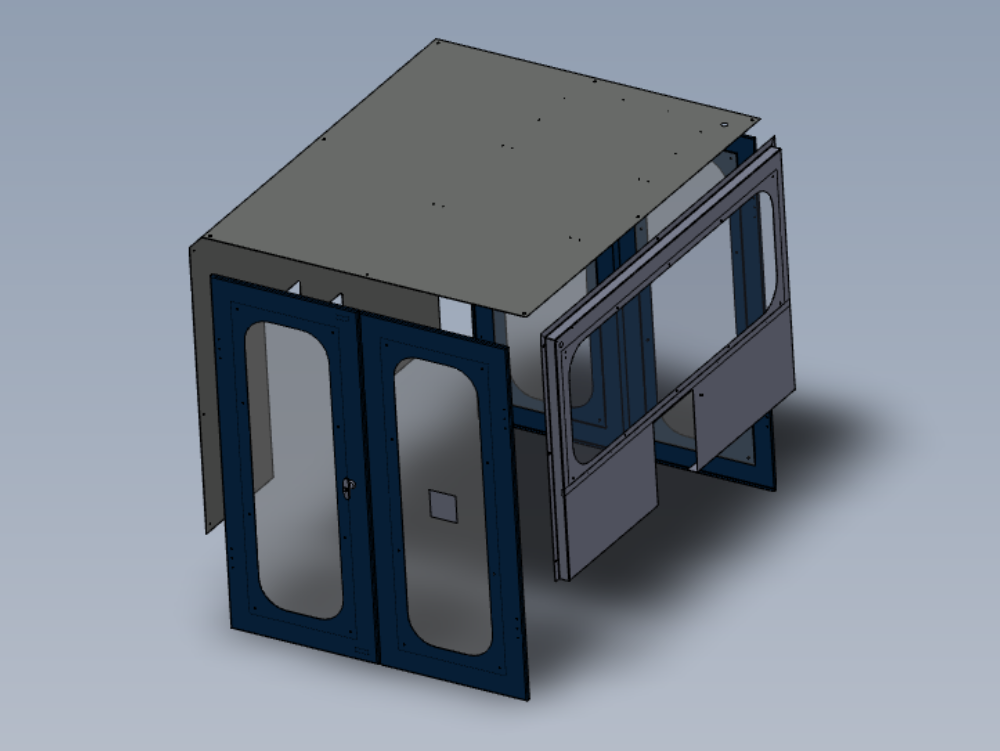
Bench assembly details for guards and doors

Difficulté
Moyen
Durée
5 heure(s)
Sommaire
- 1 Introduction
- 2 Étape 1 - Unless otherwise stated
- 3 Étape 2 - Roof Panel fit light
- 4 Étape 3 - Roof panel fit beacon
- 5 Étape 4 - Roof panel fit Stuga sticker
- 6 Étape 5 - Front Panel Upper Fit screen
- 7 Étape 6 - Front Panel Upper fit camera
- 8 Étape 7 - Front Panel upper Fit Sticker
- 9 Étape 8 - Rear Upper Panel Fit Camera
- 10 Étape 9 - Rear upper Panel Fit sticker
- 11 Étape 10 - Door Assembly Fit screens
- 12 Étape 11 - Door assembly Fit Handles
- 13 Étape 12 - Door Assembly Fit locking pins
- 14 Étape 13 - Door Assembly Fit stickers
- 15 Commentaires
Introduction
Tools Required
Standard hex key set
Standard spanner set
Dymo label printer
Parts Required
C0001152 Camera: HikVision DS-2CD2343G0-I-2.8mm x 3
C0001239 Micro SD Card 32Gb Class 10 x 3
D0007643B Perspex Glazing - Door x 4
D0007644B Machining Centre Door 1 x 2
D0007645B Machining Centre Door 2 x 2
D0007654B Perspex Glazing - Front Guard MkB x 1
H0015747 8mm diameter rod x 1 ( in process of changing to D0015747 x 4 )
M0000036 Sign - Ear Protection x 1
M0000201 T Handle Cabinet Lock x 2
Étape 1 - Unless otherwise stated
Use locktite 243 on all fasteners
Use loctite 572 on all threaded pneumatic connection
Pen mark all fasteners to show finalised

Étape 2 - Roof Panel fit light
Fit Pre assembled lights to roof panel
Ensure nyloc nuts are used to back of fixings on light assemblies
Fit cable tie bases
Attach Cables from lights to tie bases

Étape 3 - Roof panel fit beacon
Fit Beacon assembly to roof
Étape 4 - Roof panel fit Stuga sticker
Fit Large clear stuga sticker to top face of roof
fit central and facing infeed
Étape 5 - Front Panel Upper Fit screen
Fit screen to front panel

Étape 6 - Front Panel Upper fit camera
Fit C0001239 Micro SD Card 32Gb Class 10 x 1 to camera before mounting
Fit camera to top guard using 3 off M4 x 12 socket caps , and back off with M4 dome nuts and M4 A form washers
Ensure camera is fitted the correct orientation. Camera will have a 'UP' marked on body. This must be at the top
Camera must be fitted to top corner of front guard closest to Module F saw unit
Étape 7 - Front Panel upper Fit Sticker
Fit small clear Stuga sticker to front panel
Étape 8 - Rear Upper Panel Fit Camera
Fit C0001239 Micro SD Card 32Gb Class 10 x 1 to camera before mounting
Fit camera to rear panel using 3 off M4 x 12 socket caps , and back off with M4 dome nuts and M4 A form washers
Ensure camera is fitted the correct orientation. Camera will have a 'UP' marked on body. This must be at the top

Étape 9 - Rear upper Panel Fit sticker
Fit large Clear Stuga sticker
Étape 10 - Door Assembly Fit screens
Fit screens to doors

Étape 11 - Door assembly Fit Handles
Fit door handles to doors
Étape 12 - Door Assembly Fit locking pins
Fit locking pins to doors
Étape 13 - Door Assembly Fit stickers
Draft
 Français
 English
 Deutsch
 Español
 Italiano
 Português