Modèles/fichiers mis à jour (pages non relues en gras) : Autoflow Hepco Slewing Ring - Journal Adjustment, Fichier:Autoflow Hepco Slewing Ring - Journal Adjustment Capture4.JPG
| [version en relecture] | [en attente de relecture] |
(Page créée avec « {{Tuto Details |Main_Picture=Autoflow_Hepco_Slewing_Ring_-_Journal_Adjustment_Capture4.JPG |Main_Picture_annotation={"version":"2.4.6","objects":[{"type":"image","version"... ») |
|||
| Ligne 7 : | Ligne 7 : | ||
|Duration=0.5 | |Duration=0.5 | ||
|Duration-type=day(s) | |Duration-type=day(s) | ||
| + | |Tags=Confluence | ||
}} | }} | ||
{{Introduction | {{Introduction | ||
| − | |Introduction=<translate></translate> | + | |Introduction=<translate>17/11/2025 Moved To Confluence |
| + | |||
| + | [https://stuga-ltd.atlassian.net/wiki/external/YjQxZjBjYzg1N2QzNGYxN2E3ZjUyOTQ2M2I5NDhiYTg Click Here]</translate> | ||
}} | }} | ||
{{Materials}} | {{Materials}} | ||
| Ligne 34 : | Ligne 37 : | ||
{{Notes}} | {{Notes}} | ||
{{PageLang | {{PageLang | ||
| + | |Language=en | ||
|SourceLanguage=none | |SourceLanguage=none | ||
|IsTranslation=0 | |IsTranslation=0 | ||
| − | |||
}} | }} | ||
{{Tuto Status | {{Tuto Status | ||
|Complete=Draft | |Complete=Draft | ||
}} | }} | ||
Version du 17 novembre 2025 à 14:32
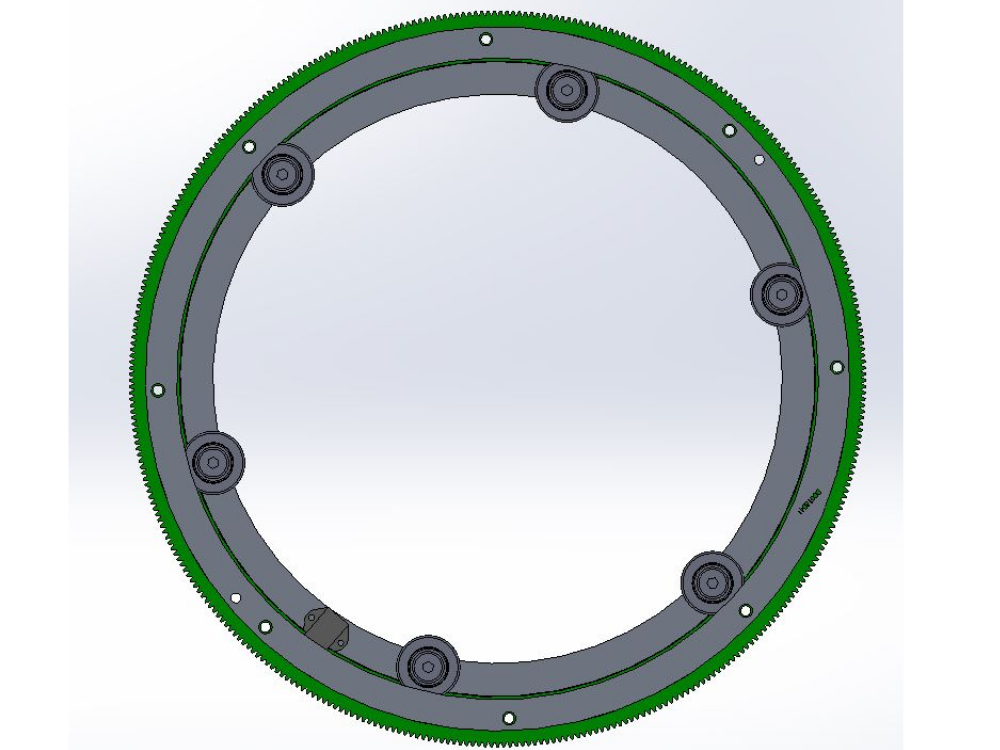
A2024 and A2025 both have Hepco slewing rings in their Machining Rings. This document describes how to access the journals for adjustment

Difficulté
Moyen
Durée
0.5 jour(s)
Introduction
17/11/2025 Moved To Confluence
Click HereÉtape 1 - Identify the blank spindles
Identify the blank spindles - these are the ones with no machining stations on them.


Étape 2 - Remove blank plates
Remove the blank plates to leave the ring as shown.

Étape 3 - Remove blank plates
Remove the blank plates to leave the ring as shown. This gives access to the hole (circled red) which will rotate around over the top of each journal bolt head.
Note that there are two of these access holes on the "doughnut ring", and they are at 180deg to each other, both under the blank spindle plates.
Draft
 Français
 English
 Deutsch
 Español
 Italiano
 Português