|
|
| Ligne 9 : |
Ligne 9 : |
| | }} | | }} |
| | {{Introduction | | {{Introduction |
| − | |Introduction=<translate>The ZX5 has two bar measuring systems – the side laser and the sensor array. | + | |Introduction=<translate>19/08 Moved to confluence |
| | | | |
| − | | + | click [https://stuga-ltd.atlassian.net/wiki/external/MzkwNGI2NDYzNzMwNDdhMjhhZDQxYWI1MDNkNjg5ODY here]</translate> |
| − | The side laser scans the bar as it moves into the final loading location, which gives the software a “heads-up” for the length of the bar. If the length is different to expected, the software will then use the sensor array to measure the bar length.
| |
| − | | |
| − | | |
| − | There are 2 measurement methods because the side laser is not 100% reliable, especially on shorter lengths below 3000mm. However, it does mean the system does not have to grip and measure / reoptimize each bar length, so improves the cycle time.
| |
| − | | |
| − | | |
| − | The sequence is as follows
| |
| − | | |
| − | | |
| − | 1. During the conveyor loading, measure the length using the side laser
| |
| − | | |
| − | 2. Once loaded to backfence, check the backfence sensor array.
| |
| − | | |
| − | 3. If the sensor array rough measurement does not match the laser –
| |
| − | | |
| − | a. If the laser measured length < infeedLaserRemeasure, continue and measure with rear sensors
| |
| − | | |
| − | b. If the laser measured length < infeedLaserRemeasure, flag an error that laser has not measured correctly.
| |
| − | | |
| − | c. If it does match, use the laser value to reoptimize the bar if it is different than expected
| |
| − | | |
| − | 4. Load and Grip bar, if necessary, measure accurately with rear sensor array</translate>
| |
| | }} | | }} |
| | {{Materials}} | | {{Materials}} |
| | {{EPI}} | | {{EPI}} |
| | {{Tuto Step | | {{Tuto Step |
| − | |Step_Title=<translate>Side Laser</translate> | + | |Step_Title=<translate></translate> |
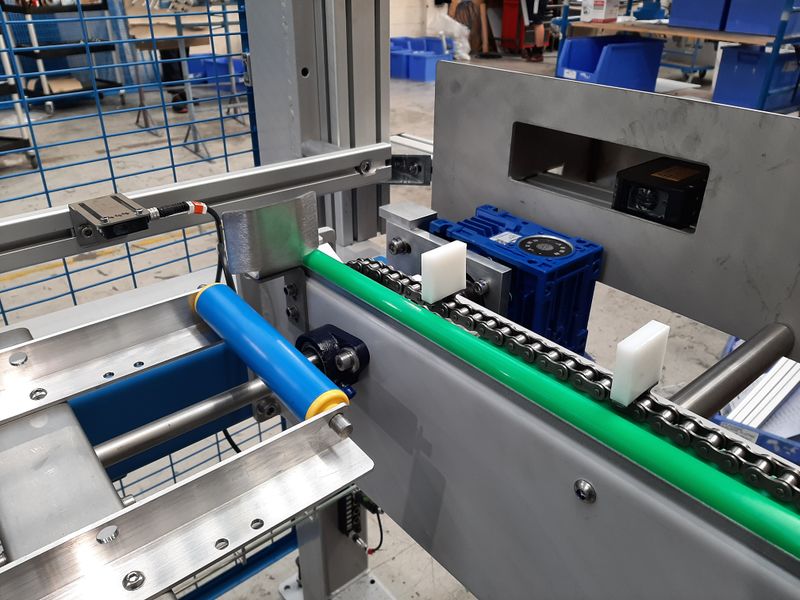
| − | |Step_Content=<translate>The laser should be aligned to ensure the beam is level up / down and parallel to the backfence. The path should follow the Yellow edge of the lift rollers on the infeed table. | + | |Step_Content=<translate></translate> |
| − | | |
| − | | |
| − | Length feedback from the measurement system is visible all the time on the service form.
| |
| − | | |
| − | <br />
| |
| − | | |
| − | # Measure and mark the infeed table at fixed positions from the loading fence at MH end – (3m, 4m, 5m, 6m)
| |
| − | # Use a short offcut of profile with a label on the end to act a a fixed reflector at the marked positions – check against the feedback on the screen.
| |
| − | # Adjust the lengthMeasureOffset parameter to get the screen measurements to match reality (+/-10mm)</translate>
| |
| − | }}
| |
| − | {{Tuto Step
| |
| − | |Step_Title=<translate>Measure Array</translate>
| |
| − | |Step_Content=<translate>Firstly, adjust the sensor dark / light and range correctly - see online video https://vimeo.com/294109652/c84d27e9f4
| |
| − | | |
| − | | |
| − | '''Note to experienced engineers''': the version 6 software makes this a lot easier to set up than older software versions
| |
| − | | |
| − | <br />
| |
| − | | |
| − | # Using a tape rule from the MH end loading fence, note where the first sensor dot hits the tape
| |
| − | # Repeat for all 8 sensors
| |
| − | # Add these to the offcut sensor positions
| |
| − | # Run 3 different sizes of offcut through machine, noting the actual length, and the length measured by the machine. All the lengths should have a similar error
| |
| − | # Adjust the infeedToZeroX to get the machine measuring correctly (+5mm/-0mm). This parameter represents the distance from the loading fence to the zero datum</translate>
| |
| | }} | | }} |
| | {{Notes}} | | {{Notes}} |

 Français
 English
 Deutsch
 Español
 Italiano
 Português