| [version en cours de rédaction] | [version en cours de rédaction] |
(Page créée avec « {{Tuto Details |Description=<translate>Setting up a windows 11 Dell PC created with C0000422-KIT with Dionisys preconfigured setup</translate> |Categories=Administration,... ») |
|||
| (2 révisions intermédiaires par le même utilisateur non affichées) | |||
| Ligne 1 : | Ligne 1 : | ||
{{Tuto Details | {{Tuto Details | ||
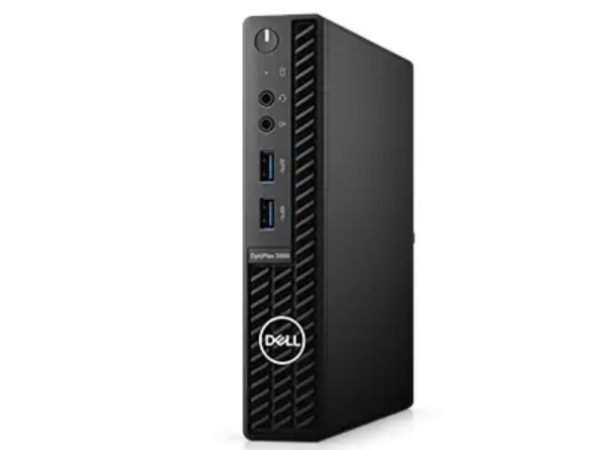
| + | |Main_Picture=Dell_Optiplex_3080.jpg | ||
| + | |Main_Picture_annotation={"version":"2.4.6","objects":[{"type":"image","version":"2.4.6","originX":"left","originY":"top","left":151,"top":0,"width":328,"height":456,"fill":"rgb(0,0,0)","stroke":null,"strokeWidth":0,"strokeDashArray":null,"strokeLineCap":"butt","strokeDashOffset":0,"strokeLineJoin":"miter","strokeMiterLimit":4,"scaleX":0.99,"scaleY":0.99,"angle":0,"flipX":false,"flipY":false,"opacity":1,"shadow":null,"visible":true,"clipTo":null,"backgroundColor":"","fillRule":"nonzero","paintFirst":"fill","globalCompositeOperation":"source-over","transformMatrix":null,"skewX":0,"skewY":0,"crossOrigin":"","cropX":0,"cropY":0,"src":"https://stuga.dokit.app/images/b/b2/Dell_Optiplex_3080.jpg","filters":[]}],"height":450.09861932938855,"width":600} | ||
|Description=<translate>Setting up a windows 11 Dell PC created with C0000422-KIT with Dionisys preconfigured setup</translate> | |Description=<translate>Setting up a windows 11 Dell PC created with C0000422-KIT with Dionisys preconfigured setup</translate> | ||
|Categories=Administration, Maintenance, Software | |Categories=Administration, Maintenance, Software | ||
| Ligne 7 : | Ligne 9 : | ||
}} | }} | ||
{{Introduction | {{Introduction | ||
| − | |Introduction=<translate></translate> | + | |Introduction=<translate>{{Idea|...This Dokit is for setting up the software on a C0000422-KIT that has already been built. For building the kit see https://stuga.dokit.app/wiki/Setting_Up_C0000422-KIT_-_Full_Hardware_2023}}</translate> |
}} | }} | ||
{{Materials}} | {{Materials}} | ||
| Ligne 65 : | Ligne 67 : | ||
<br /></translate> | <br /></translate> | ||
| + | }} | ||
| + | {{Tuto Step | ||
| + | |Step_Title=<translate>Update IT Asset Log</translate> | ||
| + | |Step_Content=<translate>[https://stugaltd.monday.com/boards/4694129138 IT Stock Asset Tracking]</translate> | ||
}} | }} | ||
{{Tuto Step | {{Tuto Step | ||
| Ligne 76 : | Ligne 82 : | ||
{{Notes}} | {{Notes}} | ||
{{PageLang | {{PageLang | ||
| + | |Language=en | ||
|SourceLanguage=none | |SourceLanguage=none | ||
|IsTranslation=0 | |IsTranslation=0 | ||
| − | |||
}} | }} | ||
{{Tuto Status | {{Tuto Status | ||
|Complete=Draft | |Complete=Draft | ||
}} | }} | ||
Version actuelle datée du 9 novembre 2023 à 16:46
Setting up a windows 11 Dell PC created with C0000422-KIT with Dionisys preconfigured setup
Difficulté
Moyen
Durée
10 minute(s)
Sommaire
- 1 Introduction
- 2 Étape 1 - Unbox the PC and plug in
- 3 Étape 2 - Double click Setup Icon
- 4 Étape 3 - Enter the PC details
- 5 Étape 4 - Connect to the PC on teamviewer
- 6 Étape 5 - Install a backup of the original PC
- 7 Étape 6 - Contact Software Team
- 8 Étape 7 - Ensure the correct shares are setup
- 9 Étape 8 - Activate Teamviewer Backup
- 10 Étape 9 - Add the latest details to the Control Systems Log
- 11 Étape 10 - Update IT Asset Log
- 12 Étape 11 - Test run control program on desktop
- 13 Étape 12 - Rebox the PC
- 14 Commentaires
Introduction
Étape 1 - Unbox the PC and plug in
- Connect Keyboard and mouse
- Connect network
- Connect monitor
Étape 2 - Double click Setup Icon
Étape 3 - Enter the PC details
- Customer Name
- PC name (use standard naming protocols)
Étape 4 - Connect to the PC on teamviewer
Étape 5 - Install a backup of the original PC
The backup can be retrieved in several ways, depending on the state of the PC you are replacing and how up to date the backup is
- Teamviewer in to the original PC and copy the backup over
- Restore from Teamviewer bacup - see Restoring a Teamviewer Backup
- Restore from a Stuga backup
Étape 6 - Contact Software Team
The software team will need to assess the software update route which will depend on the original setup, software version and
Étape 8 - Activate Teamviewer Backup
Étape 9 - Add the latest details to the Control Systems Log
Open Control Systems Log
- Update Operating Systems
- Update Software Versions
- Update Asset Number
Étape 10 - Update IT Asset Log
Étape 11 - Test run control program on desktop
Étape 12 - Rebox the PC
Draft

 Français
 English
 Deutsch
 Español
 Italiano
 Português