| [version en cours de rédaction] | [version en cours de rédaction] |
| Ligne 1 : | Ligne 1 : | ||
{{Tuto Details | {{Tuto Details | ||
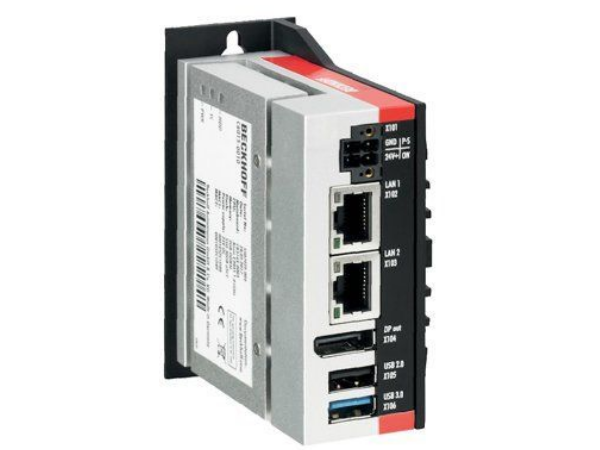
| + | |Main_Picture=Beckhoff_C6015.jpg | ||
| + | |Main_Picture_annotation={"version":"2.4.6","objects":[{"type":"image","version":"2.4.6","originX":"left","originY":"top","left":26,"top":-32,"width":445,"height":445,"fill":"rgb(0,0,0)","stroke":null,"strokeWidth":0,"strokeDashArray":null,"strokeLineCap":"butt","strokeDashOffset":0,"strokeLineJoin":"miter","strokeMiterLimit":4,"scaleX":1.19,"scaleY":1.19,"angle":0,"flipX":false,"flipY":false,"opacity":1,"shadow":null,"visible":true,"clipTo":null,"backgroundColor":"","fillRule":"nonzero","paintFirst":"fill","globalCompositeOperation":"source-over","transformMatrix":null,"skewX":0,"skewY":0,"crossOrigin":"","cropX":0,"cropY":0,"src":"https://stuga.dokit.app/images/0/00/Beckhoff_C6015.jpg","filters":[]}],"height":449.76816074188565,"width":600} | ||
|Description=<translate>How to replace a beckhoff PC and install the original project</translate> | |Description=<translate>How to replace a beckhoff PC and install the original project</translate> | ||
|Categories=Software | |Categories=Software | ||
Version actuelle datée du 2 octobre 2023 à 10:12
How to replace a beckhoff PC and install the original project
Sommaire
- 1 Introduction
- 2 Étape 1 - Replace the PC hardware
- 3 Étape 2 - Set up the customer related network settings
- 4 Étape 3 - Open the PLC Project
- 5 Étape 4 - Backup (Archive) the current project
- 6 Étape 5 - Set the route to the new PLC
- 7 Étape 6 - Change the Device
- 8 Étape 7 - Activate the configuration
- 9 Étape 8 - Log in both Tc3Multi and PLC_Reset Projects
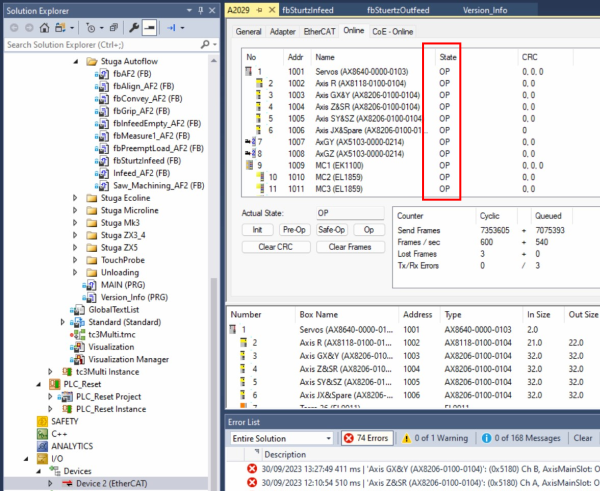
- 10 Étape 9 - Check the EtherCAT network
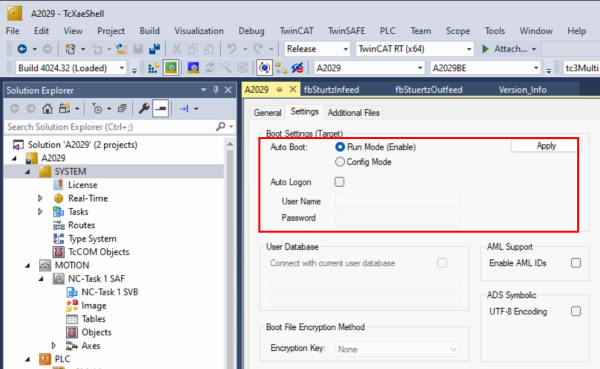
- 11 Étape 10 - Set Boot Settings to Run Mode
- 12 Étape 11 - Ensure the params.saw Net ids updated
- 13 Étape 12 - Set the route for the front end to the back end PLC
- 14 Étape 13 - Full shutdown and restart to check
- 15 Commentaires
Introduction
Étape 1 - Replace the PC hardware
Take care to ensure all cables are replaced in the same relative positions
Power on
Teamviewer in to the new beckhoff PLC ("BE")
Set
- IP Address
- Subnet Mask
- Default Gateway
These addresses should be stored in the DDRIVE of the front end PC in IP.mul
Étape 3 - Open the PLC Project
This is done using the TwinCAT Visual Studio interface. The location of the Visual Studio project will depend on the setup and age of the machine. Generally this is one of 3 places, to find out, use teamviewer database to list the computers associated with the machine
- If the PC has a "VM" virtual machine installed (2023 onwards), a project will be set up on this desktop - use Teamviewer to connect
- If the PC has a "C" camera machine (only selected customers and older TwinCAT2 machines)
- On the main front end PC (operator desktop)
Étape 4 - Backup (Archive) the current project
Étape 5 - Set the route to the new PLC
Étape 6 - Change the Device
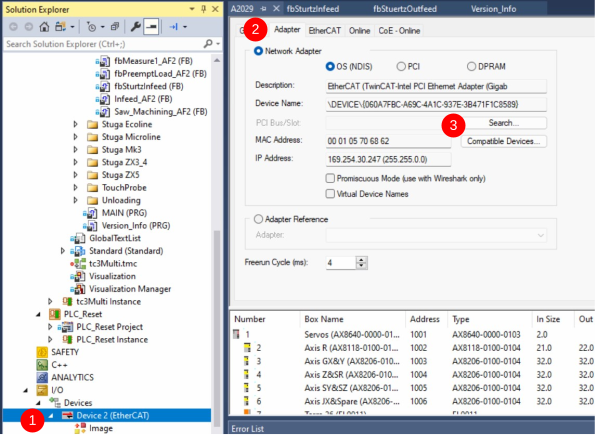
This step programs the project with the Mac address of the ethernet port for the system to use as the connection to the TwinCAT system. There are two ports on the front of the Beckhoff unit, Ethernet (Yellow cable) plugs in one, EtherCAT(green cable) in the other.
- Double click devices
- Adapter tab
- Click Search
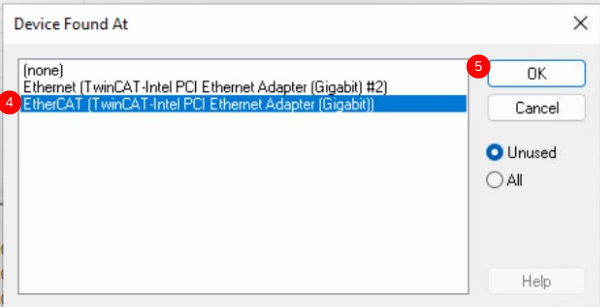
- Select the "EtherCAT" Port (This may not be named correctly, one port is used for EtherCAT, the other for Ethernet)
- Click ok
Étape 7 - Activate the configuration
Étape 8 - Log in both Tc3Multi and PLC_Reset Projects
Étape 10 - Set Boot Settings to Run Mode
Click Apply
Username is Administrator and password is the standard Stuga one
Étape 11 - Ensure the params.saw Net ids updated
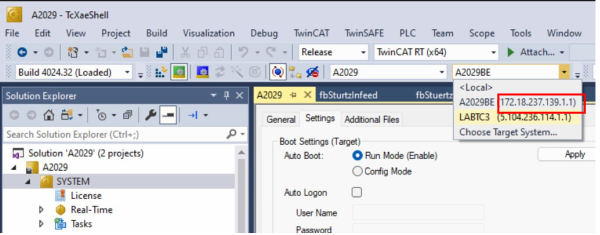
This step tells the front end the AMS net Id of the backend. The AMS net Id should be different for every Beckhoff PLC created
Two parameters need to be set
amsNetId=[xxx.xxx.xxx.xxx].1.1
twinCATAddress=[xxx.xxx.xxx.xxx].1.1
Étape 12 - Set the route for the front end to the back end PLC
Étape 13 - Full shutdown and restart to check
Shut down all the pcs, saving projects, etc and perform a full power cycle
Draft
 Français
 English
 Deutsch
 Español
 Italiano
 Português