Assembly details for duplex extractor unit

Difficulté
Moyen
Durée
2 heure(s)
Sommaire
- 1 Introduction
- 2 Étape 1 - Unless otherwise stated
- 3 Étape 2 - Attach mounting plates
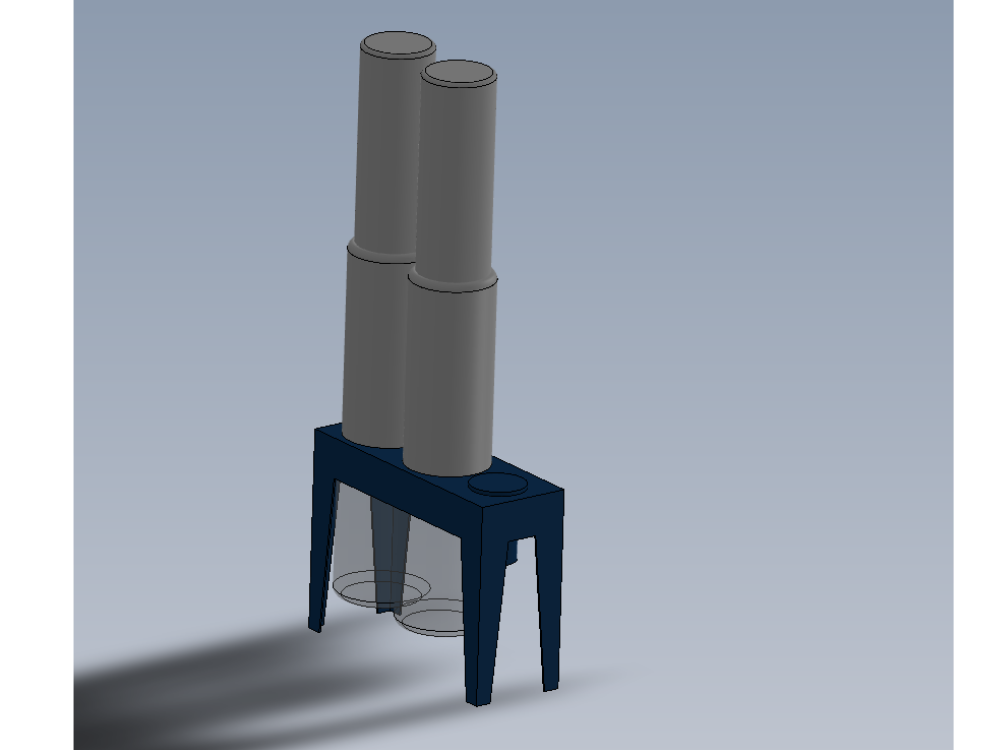
- 4 Étape 3 - Lift Extractor body
- 5 Étape 4 - Attach legs
- 6 Étape 5 - Set leg positions
- 7 Étape 6 - Cloth bag inspection
- 8 Étape 7 - Fit extraction cloth bags
- 9 Étape 8 - fit waste bags
- 10 Étape 9 - Remove manufacturer logos
- 11 Étape 10 - Fit ear defence sticker
- 12 Étape 11 - Fix Power connection
- 13 Commentaires
Introduction
Tools Required
Standard Spanner set
Lifting platform
standard screwdriver set
Parts Required
M0000151 Extractor Poly Bags 700G 31.5'' Layflat 50'' Long x 2
M0000274 Extraction Unit Duplex 2off 8' Bags (No Starter) 1850mm x 1
M0000036 ear defence sticker x 1
Étape 1 - Unless otherwise stated
Use Loctite 243 on all fasteners
Use Loctite 572 on all threaded pneumatic connection
Pen mark all fasteners to show finalised

Étape 2 - Attach mounting plates
Loose fit 4 off mounting plates to legs with supplied fixings in kit


Étape 3 - Lift Extractor body
Use Red lift trolley to raise extractor body to an appropriate height for fitment of legs

Étape 4 - Attach legs
Loose fit 4 off legs to extractor unit when being supported by lifting platform
Use supplied fixings within kit.
Note some fasteners will fit to a rivnut, some will be backed off with nuts. Take note when removing fixings to enable correct refitting when mounting legs to unit


Étape 5 - Set leg positions
Sit assembled extractor on floor and add final tension to all legs and mounting plates to ensure unit sits flat on floor
Étape 6 - Cloth bag inspection
The cloth bags need inspecting before fitting to extractor unit. There has been instances of bags varying in length, and this needs to be checked before fitting
Lay both cloth bags out and check that they are the same length as each other ( -+25mm)
Report any discrepancies through NCR system


Étape 7 - Fit extraction cloth bags
Fit 2 off cloth extraction bags using metal bands supplied with kit


Étape 8 - fit waste bags
fit 2 off clear waste bags using ratchet straps supplied with kit
Photos please

Étape 9 - Remove manufacturer logos
Remove all logos from supplier on extraction unit
Photos Please

Étape 10 - Fit ear defence sticker
Fit ear defender sticker to extractor unit
Photos please
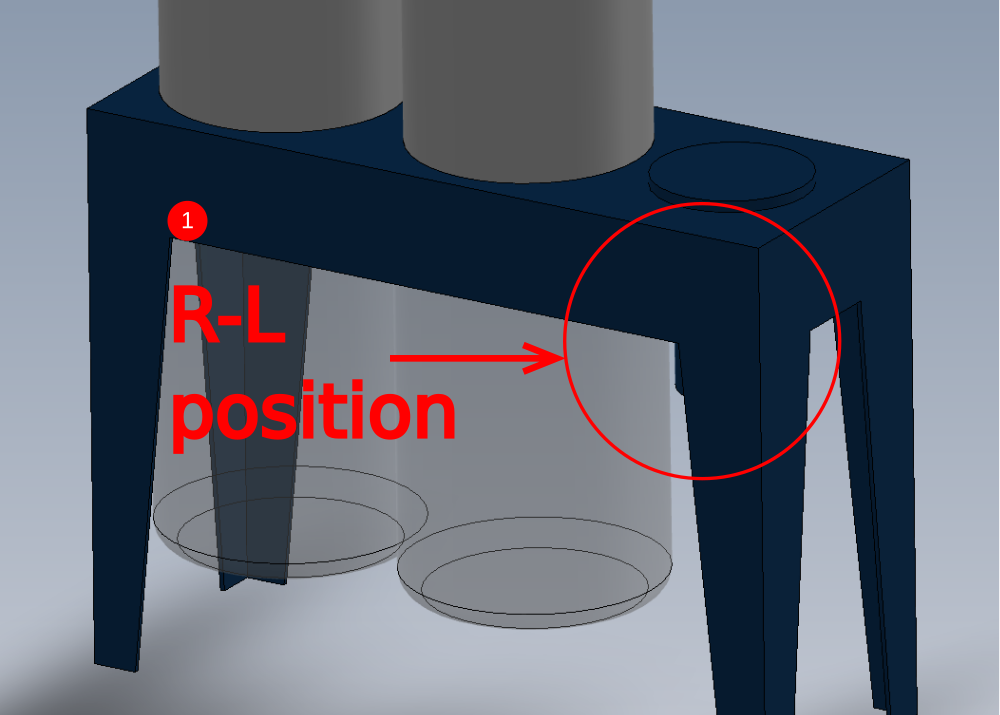
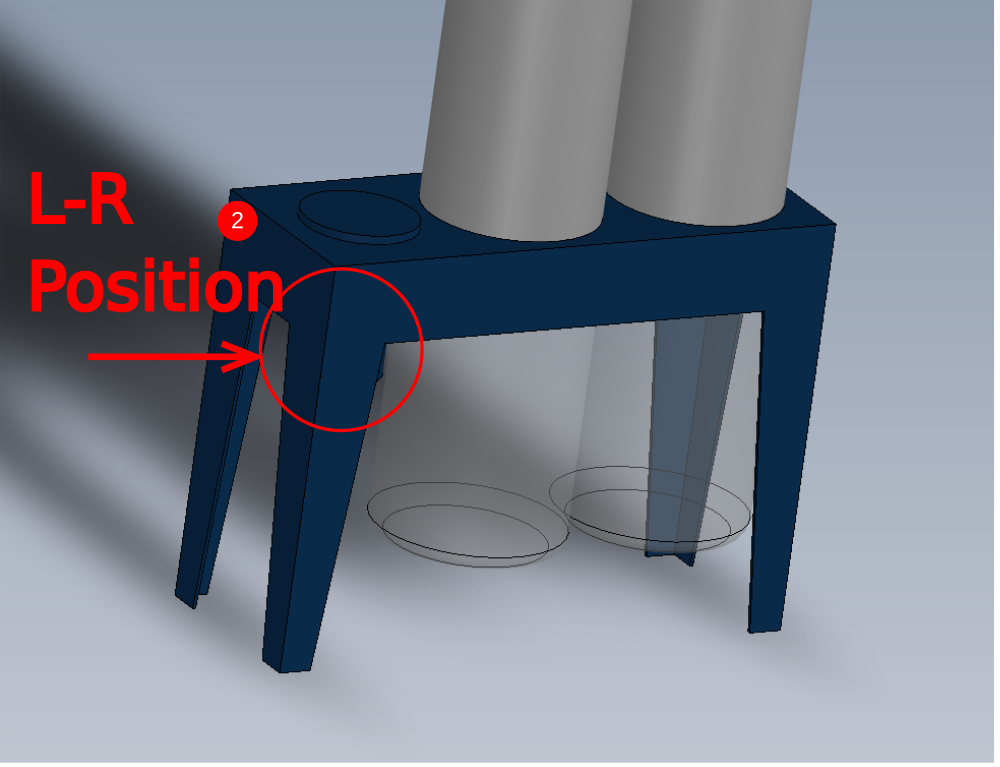
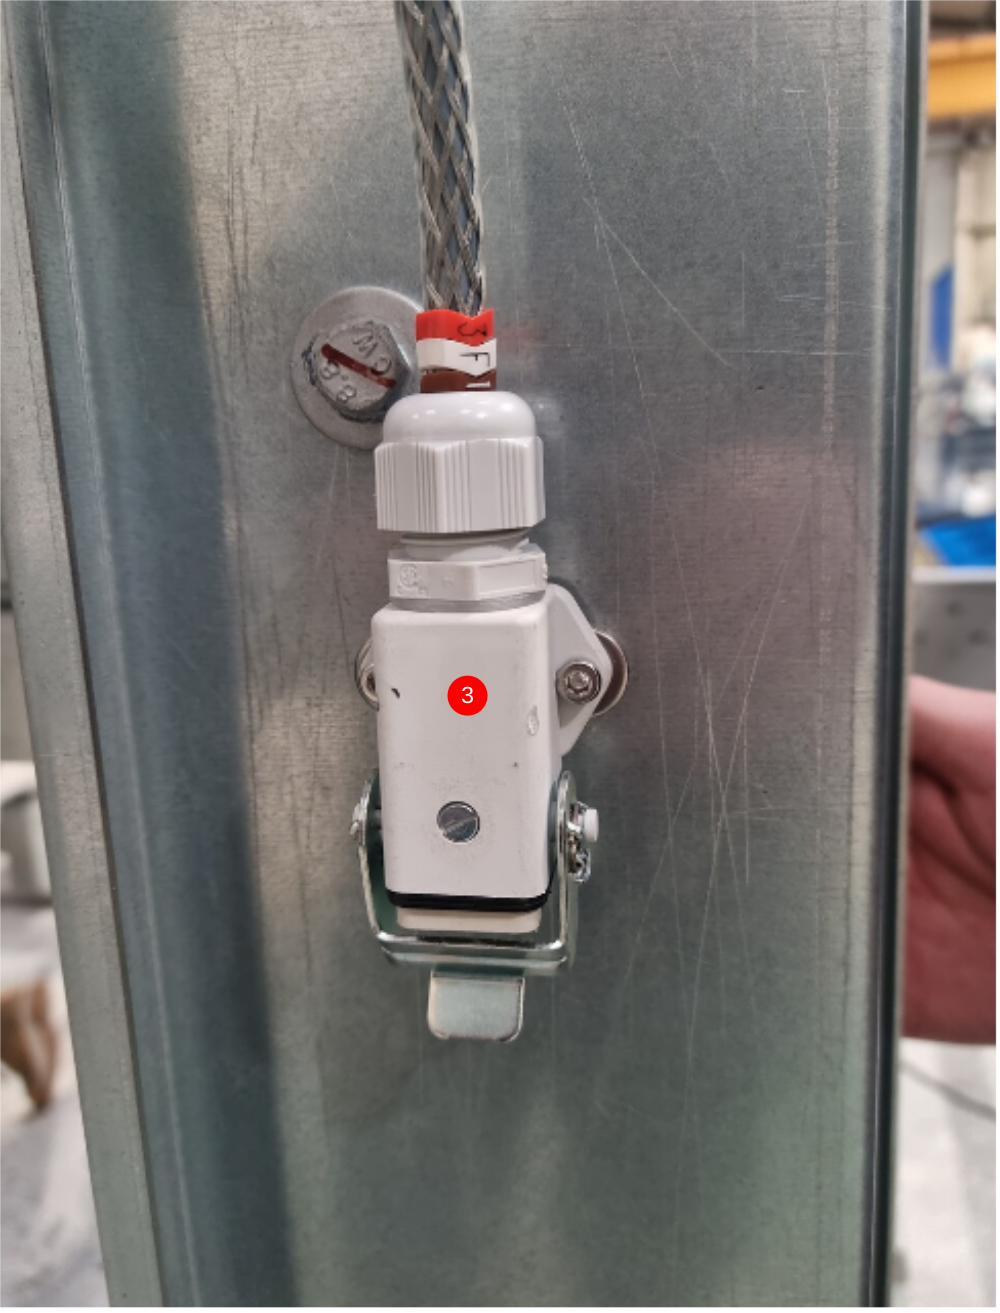
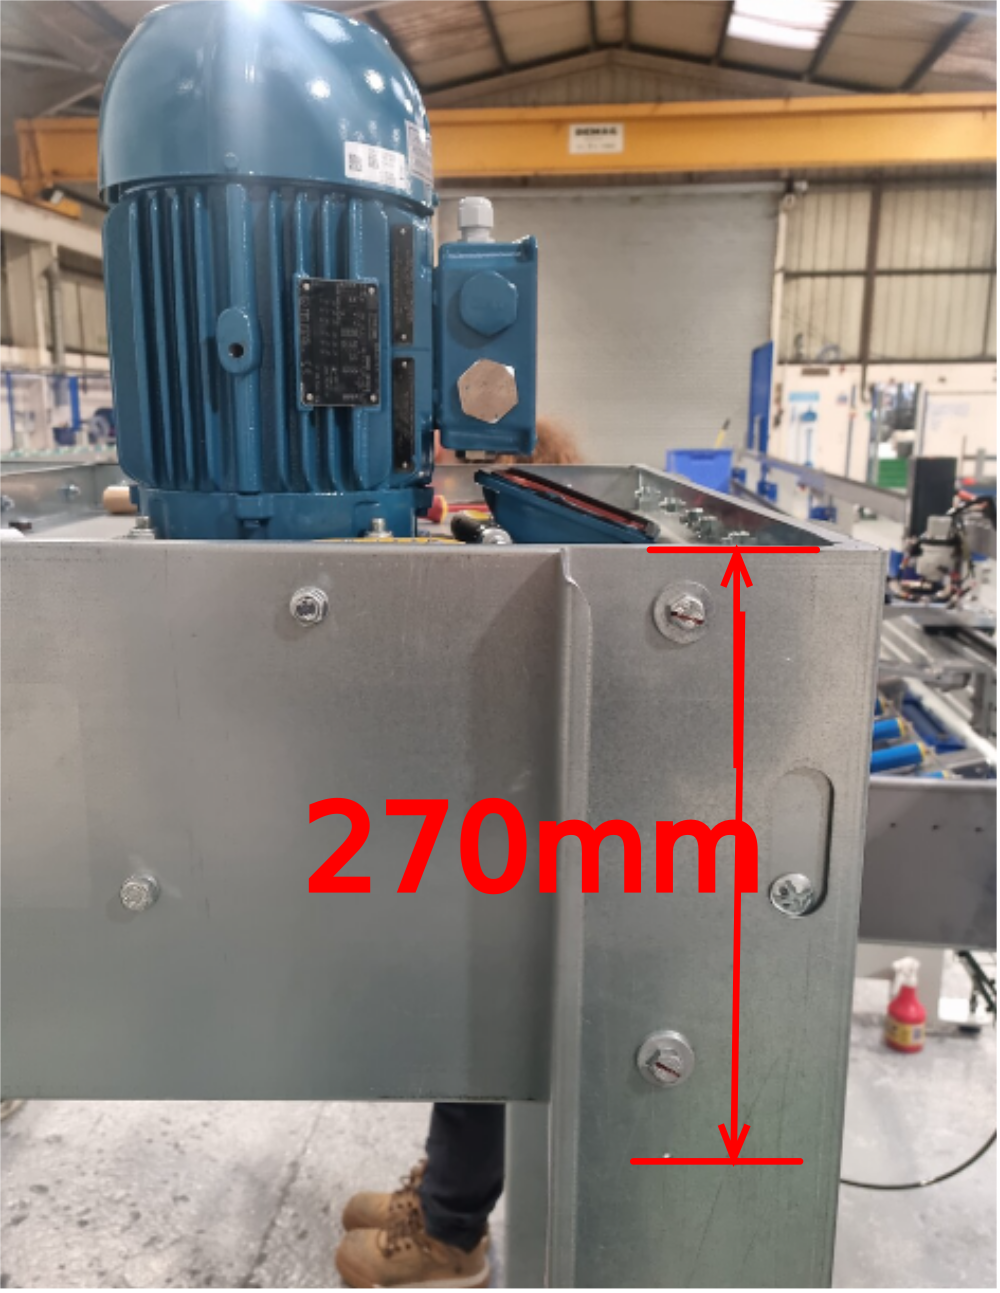
Étape 11 - Fix Power connection
1 Position for R-L machine
2 Position for L-R machine
3 Position and drill pre assembled plug ( from electrical, ID as 3F1) M4
4 Connector is positioned 270mm from top of extraction unit and central on leg
Draft
 Français
 English
 Deutsch
 Español
 Italiano
 Português