| [version en cours de rédaction] | [version en cours de rédaction] |
| Ligne 72 : | Ligne 72 : | ||
{{Tuto Step | {{Tuto Step | ||
|Step_Title=<translate>Fit extraction cloth bags</translate> | |Step_Title=<translate>Fit extraction cloth bags</translate> | ||
| − | |Step_Content=<translate>Fit 2 off cloth extraction bags using metal bands supplied with kit | + | |Step_Content=<translate>Fit 2 off cloth extraction bags using metal bands supplied with kit</translate> |
| − | |||
| − | |||
| − | |||
|Step_Picture_00=R0015347_Bench_Assemble_Duplex_extraction_unit_Screenshot_2023-10-31_093343.png | |Step_Picture_00=R0015347_Bench_Assemble_Duplex_extraction_unit_Screenshot_2023-10-31_093343.png | ||
| − | |Step_Picture_01=R0015347_Bench_Assemble_Duplex_extraction_unit_Screenshot_2023-11-16_115426.png | + | |Step_Picture_01=R0015347_Bench_Assemble_Duplex_extraction_unit_Screenshot_2023-12-11_080602.png |
| + | |Step_Picture_02=R0015347_Bench_Assemble_Duplex_extraction_unit_Screenshot_2023-11-16_115426.png | ||
}} | }} | ||
{{Tuto Step | {{Tuto Step | ||
Version du 11 décembre 2023 à 10:11
Assembly details for duplex extractor unit

Difficulté
Moyen
Durée
2 heure(s)
Sommaire
- 1 Introduction
- 2 Étape 1 - Unless otherwise stated
- 3 Étape 2 - Attach mounting plates
- 4 Étape 3 - Lift Extractor body
- 5 Étape 4 - Attach legs
- 6 Étape 5 - Set leg positions
- 7 Étape 6 - Fit extraction cloth bags
- 8 Étape 7 - fit waste bags
- 9 Étape 8 - Remove manufacturer logos
- 10 Étape 9 - Fit ear defence sticker
- 11 Étape 10 - Fix Power connection
- 12 Commentaires
Introduction
Tools Required
Standard Spanner set
Lifting platform
standard screwdriver set
Parts Required
M0000151 Extractor Poly Bags 700G 31.5'' Layflat 50'' Long x 2
M0000274 Extraction Unit Duplex 2off 8' Bags (No Starter) 1850mm x 1
M0000036 ear defence sticker x 1
Étape 1 - Unless otherwise stated
Use Loctite 243 on all fasteners
Use Loctite 572 on all threaded pneumatic connection
Pen mark all fasteners to show finalised

Étape 2 - Attach mounting plates
Loose fit 4 off mounting plates to legs with supplied fixings in kit


Étape 3 - Lift Extractor body
Use Red lift trolley to raise extractor body to an appropriate height for fitment of legs

Étape 4 - Attach legs
Loose fit 4 off legs to extractor unit when being supported by lifting platform
Use supplied fixings within kit.
Note some fasteners will fit to a rivnut, some will be backed off with nuts. Take note when removing fixings to enable correct refitting when mounting legs to unit


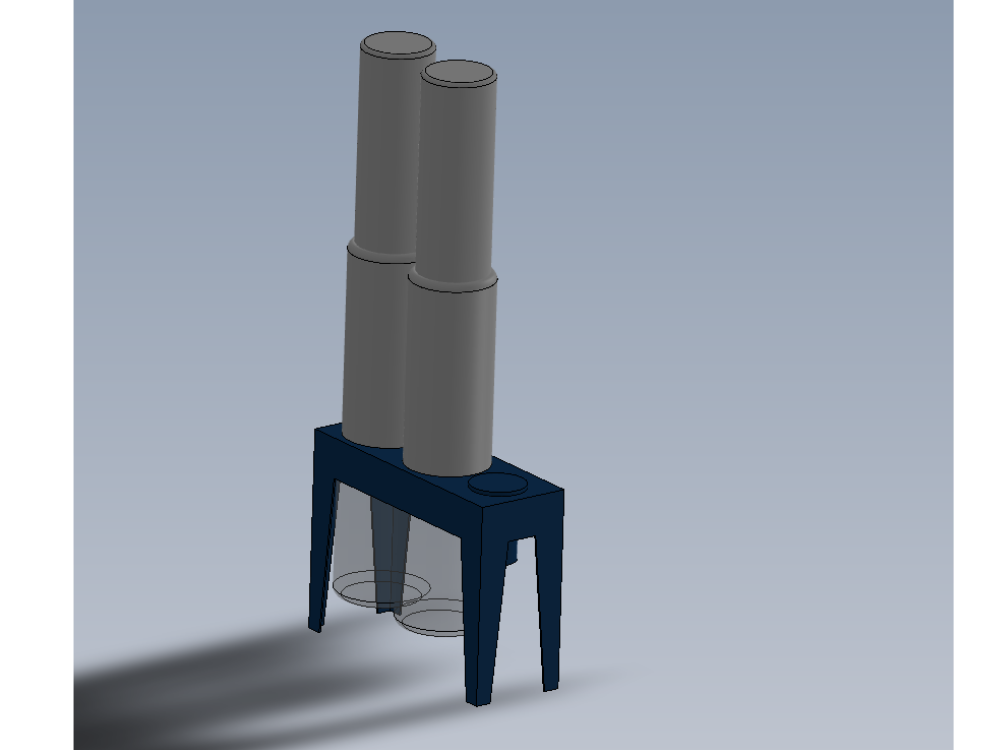
Étape 5 - Set leg positions
Sit assembled extractor on floor and add final tension to all legs and mounting plates to ensure unit sits flat on floor
Étape 6 - Fit extraction cloth bags
Fit 2 off cloth extraction bags using metal bands supplied with kit


Étape 7 - fit waste bags
fit 2 off clear waste bags using ratchet straps supplied with kit
Photos please

Étape 8 - Remove manufacturer logos
Remove all logos from supplier on extraction unit
Photos Please

Étape 9 - Fit ear defence sticker
Fit ear defender sticker to extractor unit
Photos please
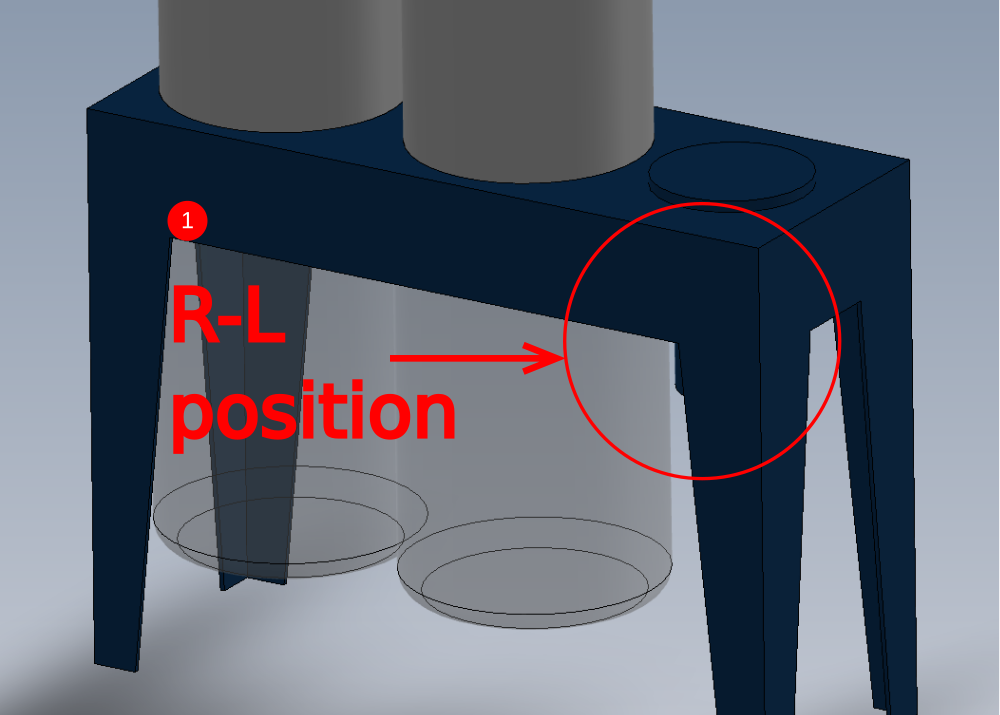
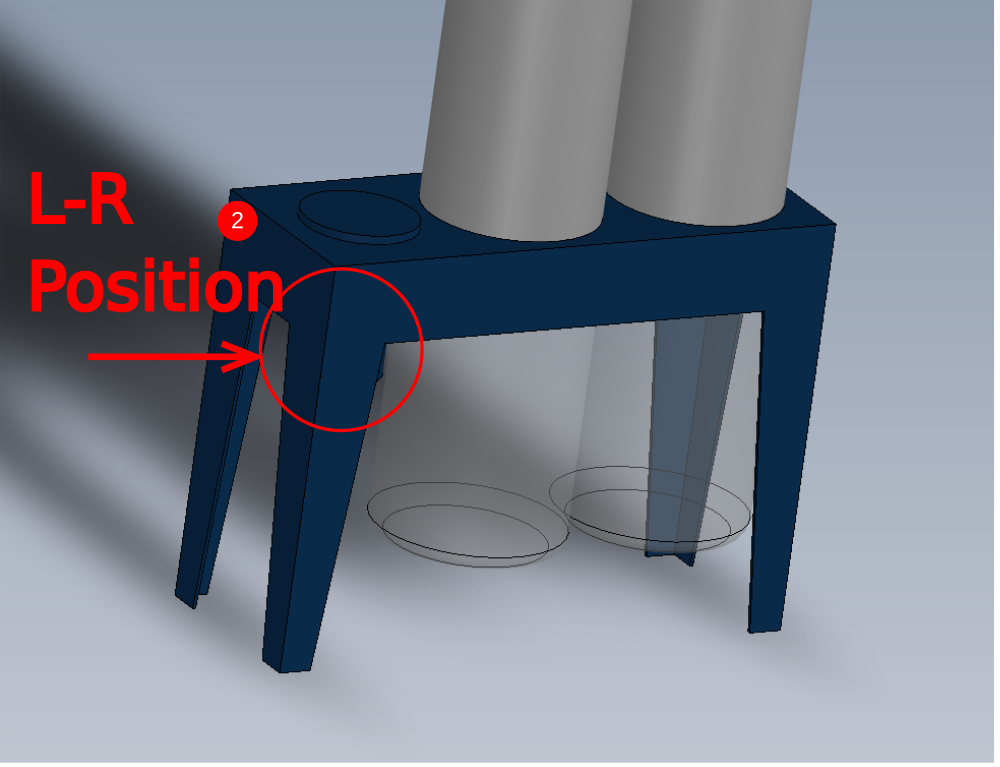
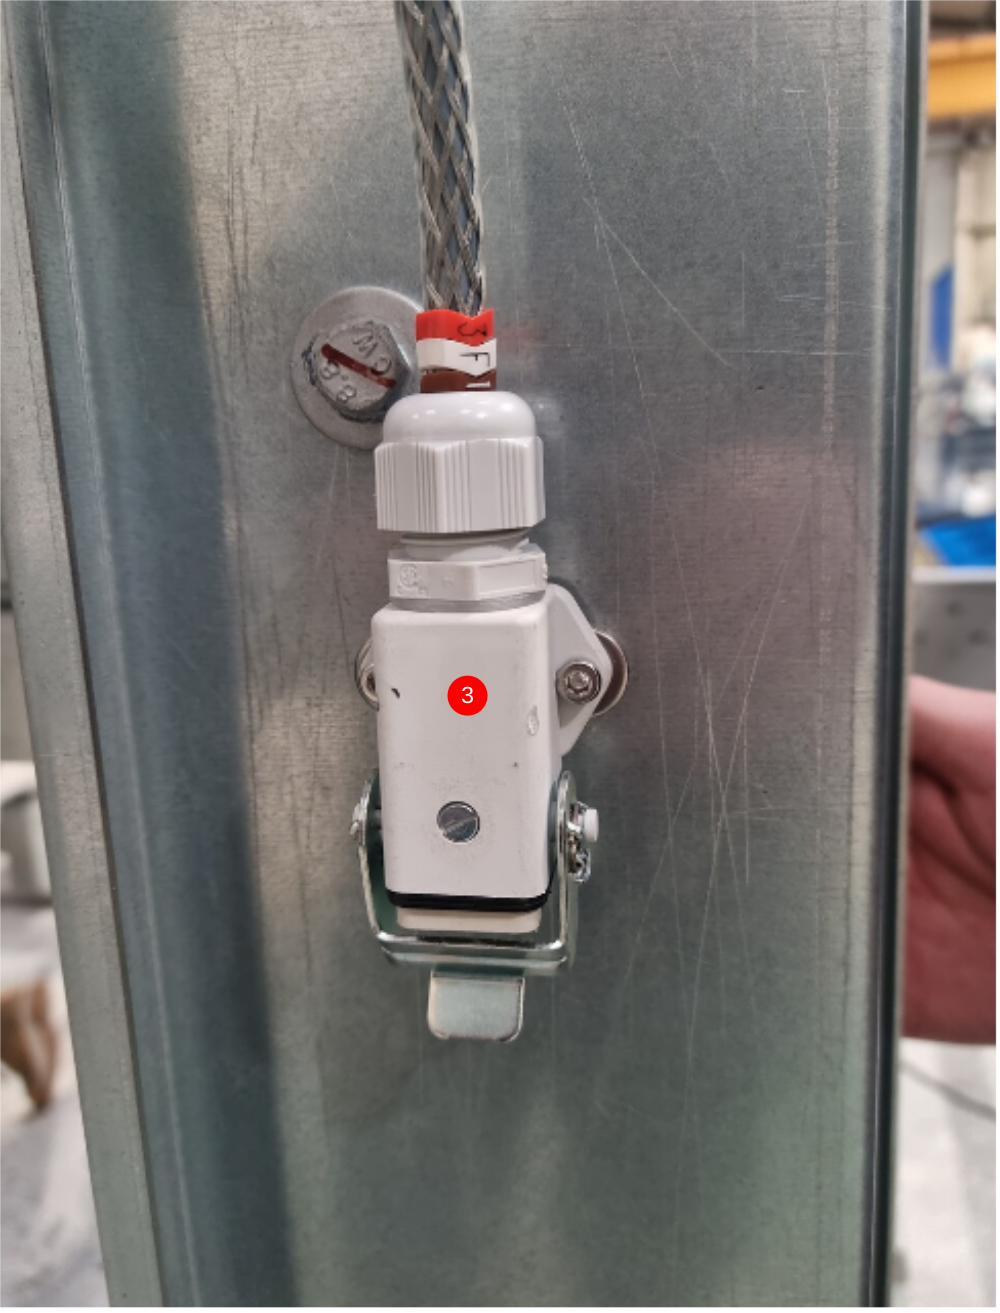
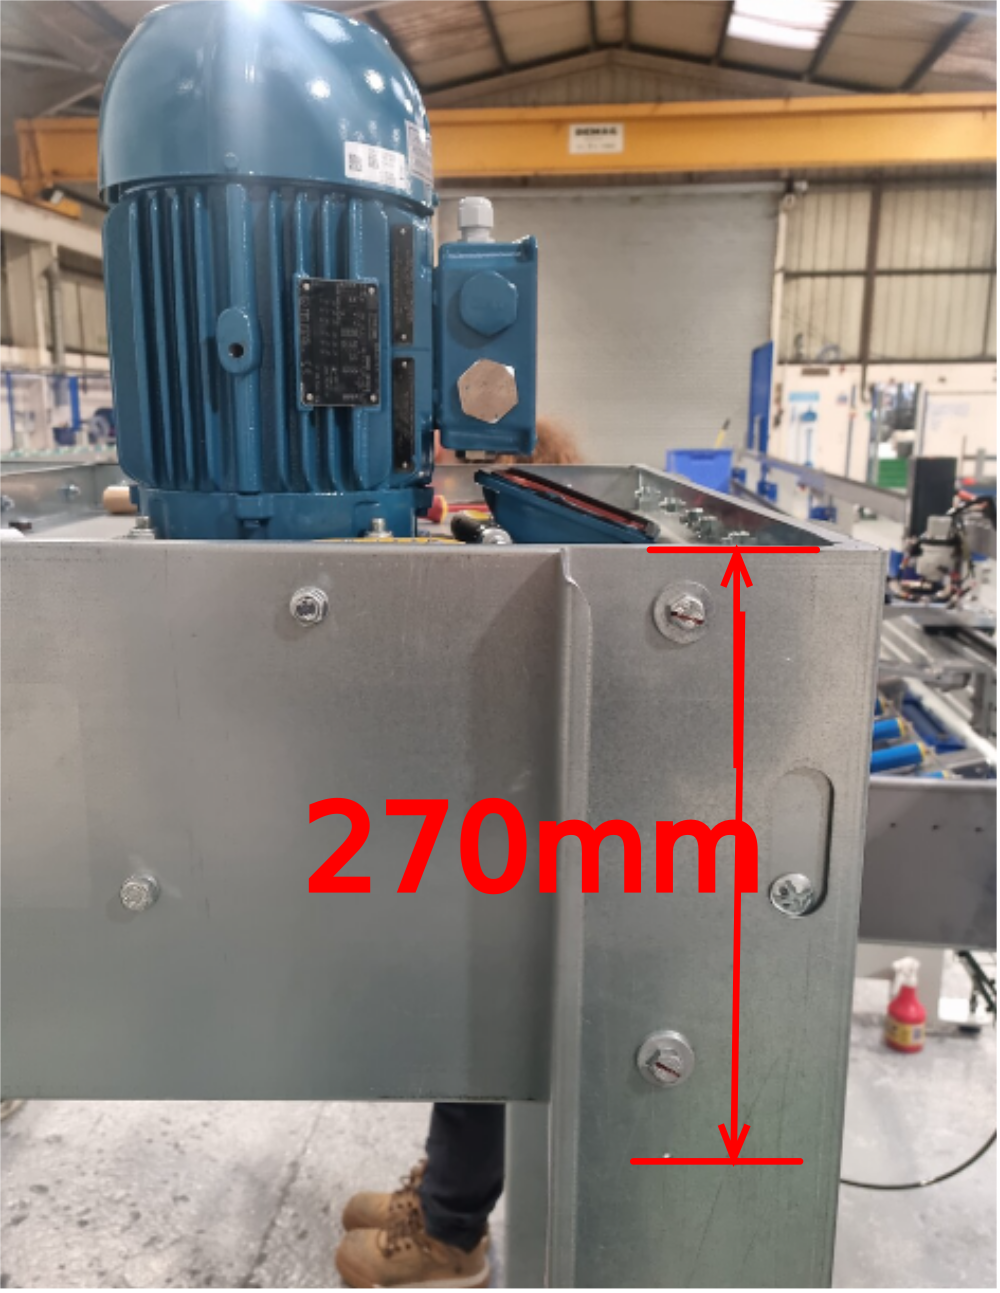
Étape 10 - Fix Power connection
1 Position for R-L machine
2 Position for L-R machine
3 Position and drill pre assembled plug ( from electrical, ID as 3F1) M4
4 Connector is positioned 270mm from top of extraction unit and central on leg
Draft
 Français
 English
 Deutsch
 Español
 Italiano
 Português