Details for mounting cylinder rails to transfer beams

Difficulté
Moyen
Durée
6 heure(s)
Sommaire
- 1 Introduction
- 2 Étape 1 - Unless otherwise stated
- 3 Étape 2 - Position pre built cylinder rails
- 4 Étape 3 - Adjust delrin wheels front
- 5 Étape 4 - Adjust Delrin wheels Rear
- 6 Étape 5 - Check all fasteners
- 7 Étape 6 - Check movement
- 8 Étape 7 - Cylinder heights checked
- 9 Étape 8 - Align Cylinders to Hepco
- 10 Étape 9 - Set rack meshing
- 11 Étape 10 - Add Hard stops
- 12 Étape 11 - Quality sign off
- 13 Commentaires
Introduction
Tools Required
Standard spanner set
Standard hex key set
Parts Required
R0015288 Bench Assemble Transfer slid units and cylinder rails
Étape 1 - Unless otherwise stated
Use Loctite 243 on all fasteners
Use Loctite 572 on all threaded pneumatic connection
Pen mark all fasteners to show finalised

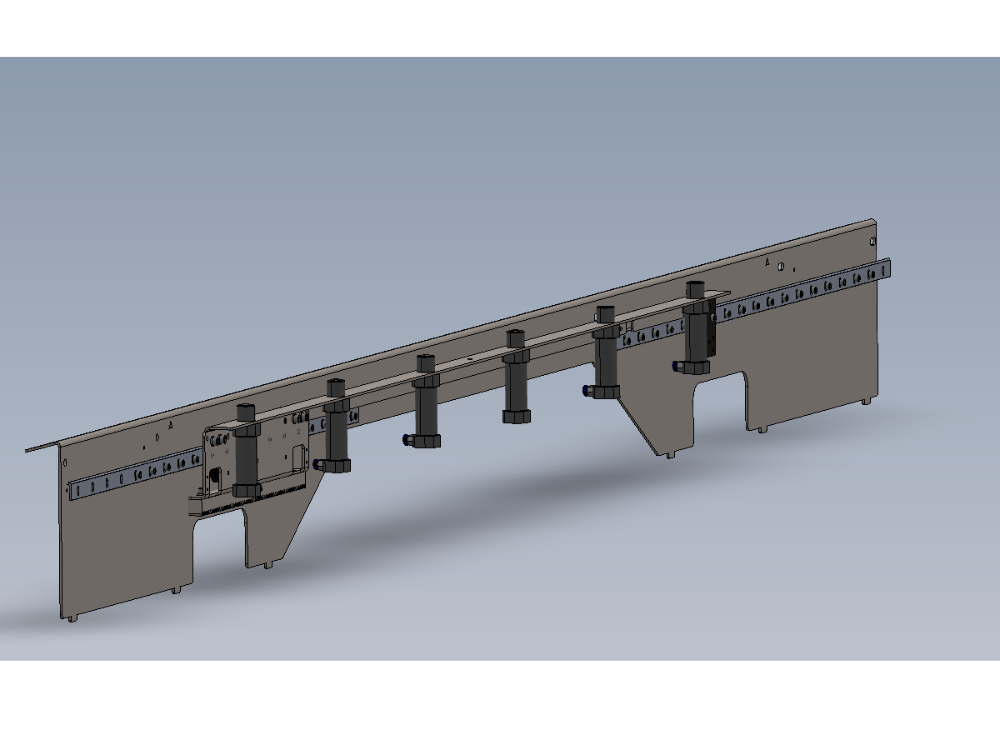
Étape 2 - Position pre built cylinder rails
Position Cylinder rail onto transfer beam as shown

Étape 3 - Adjust delrin wheels front
Adjust delrin wheels on section shown
Ensure to use Setting Delrin Transfer Table Wheel Tension To set delrin wheels correctly

Étape 4 - Adjust Delrin wheels Rear
Adjust delrin wheels on section shown
Ensure to use Setting Delrin Transfer Table Wheel Tension To set delrin wheels correctly

Étape 5 - Check all fasteners
Check all fasteners are correctly tensioned
Ensure all delrin wheels are correctly set and all fasteners on delrin wheels are tensioned to final tension

Étape 6 - Check movement
Ensure cylinder rail is free moving along transfer beam
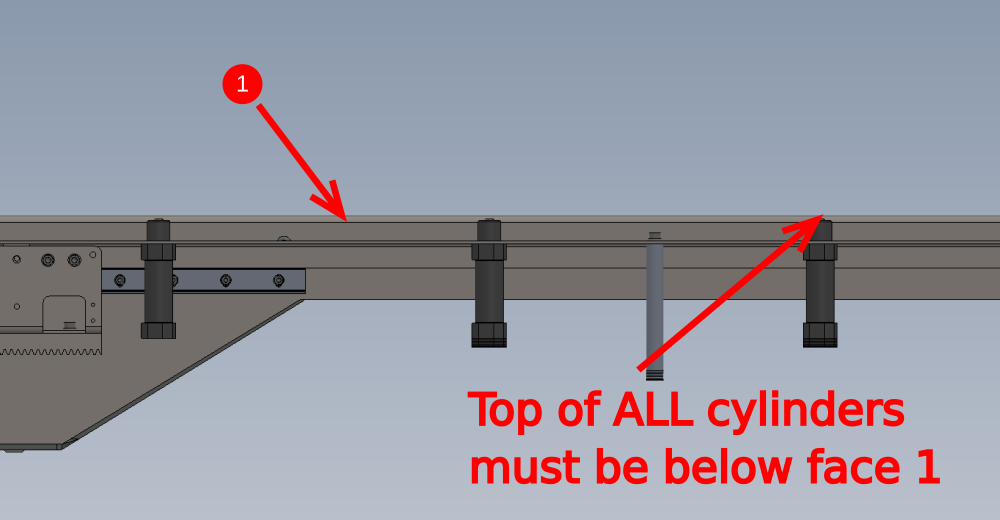
Étape 7 - Cylinder heights checked
All cylinders should be checked for correct height position in regards to top face of transfer arms
All cylinders should be below the top face of the transfer arm
Check with 2 meter straight edge over tops of transfer arms


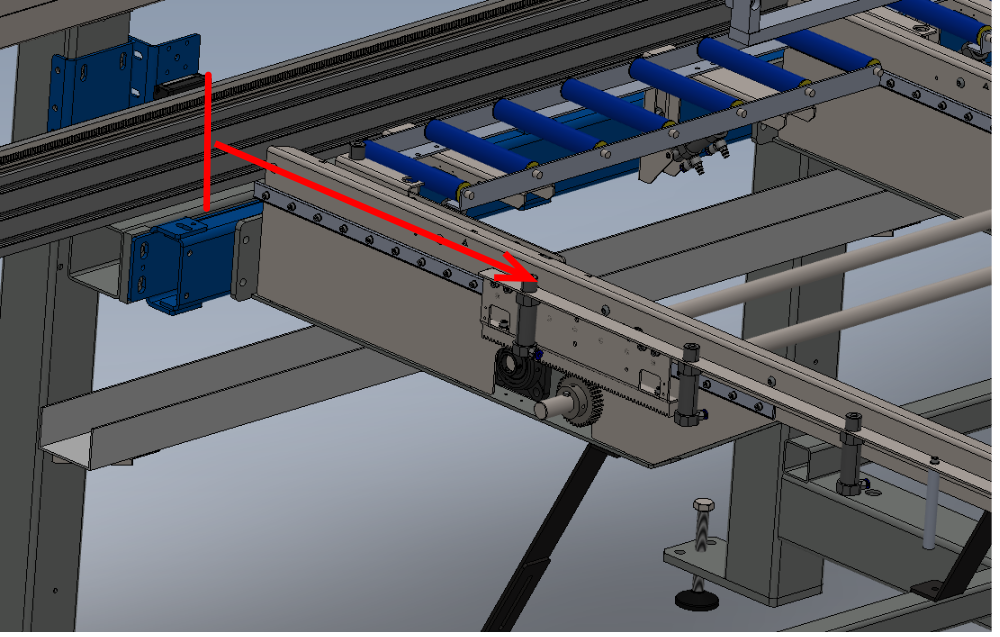
Étape 8 - Align Cylinders to Hepco
Set cylinder rails to hepco rail
Set all cylinder rails to same measurement to hepco beam
Use slots in rack mounting and drive gear position to adjust

Étape 9 - Set rack meshing
Mesh requires setting between slider unit and drive pinion
1 It is vital that the correct drive meshing is achieved.
2 Once set, there should be 1mm movement in the direction shown, which will indicate the correct tooth meshing has been obtained.
3 This need to be checked at all points of travel as shown


Étape 10 - Add Hard stops
Fit hard stop assemblies once alignment is set
Étape 11 - Quality sign off
Sign off Required for all alignment settings

Draft
 Français
 English
 Deutsch
 Español
 Italiano
 Português