Instructions to fit loader chains to arms

Difficulté
Moyen
Durée
2 heure(s)
Introduction
Tools Required
Standard hex key set
Standard spanner set
150mm rule
Long nose pliers
Loctite 290
Straight ended 4mm hex key and extension bar
Parts Required
Étape 1 - Unless otherwise stated
Use loctite 243 on all fasteners
Use Loctite 572 on all threaded pneumatic connections
Pen mark all bolts to show finalised

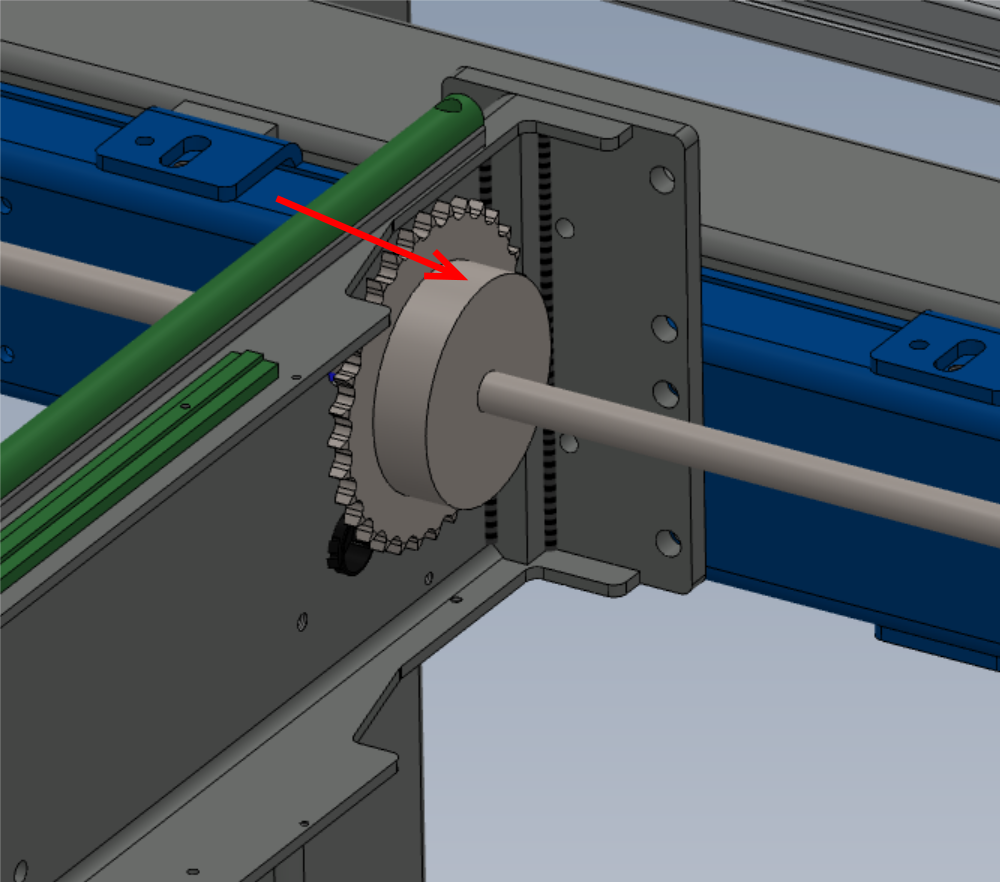
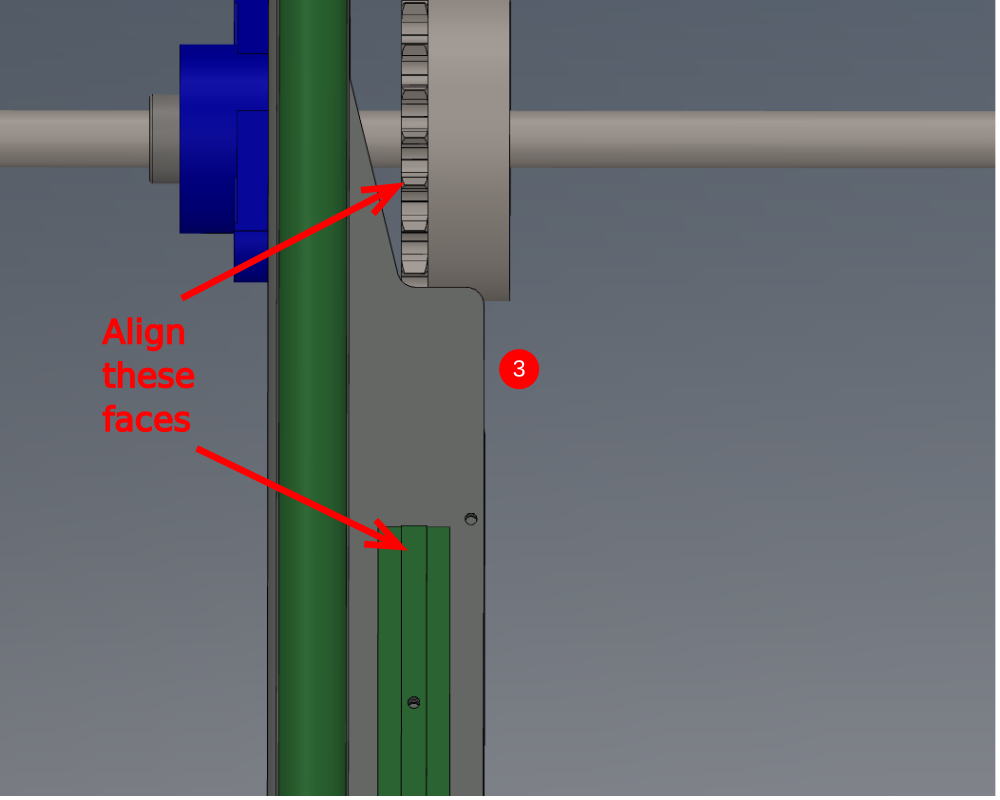
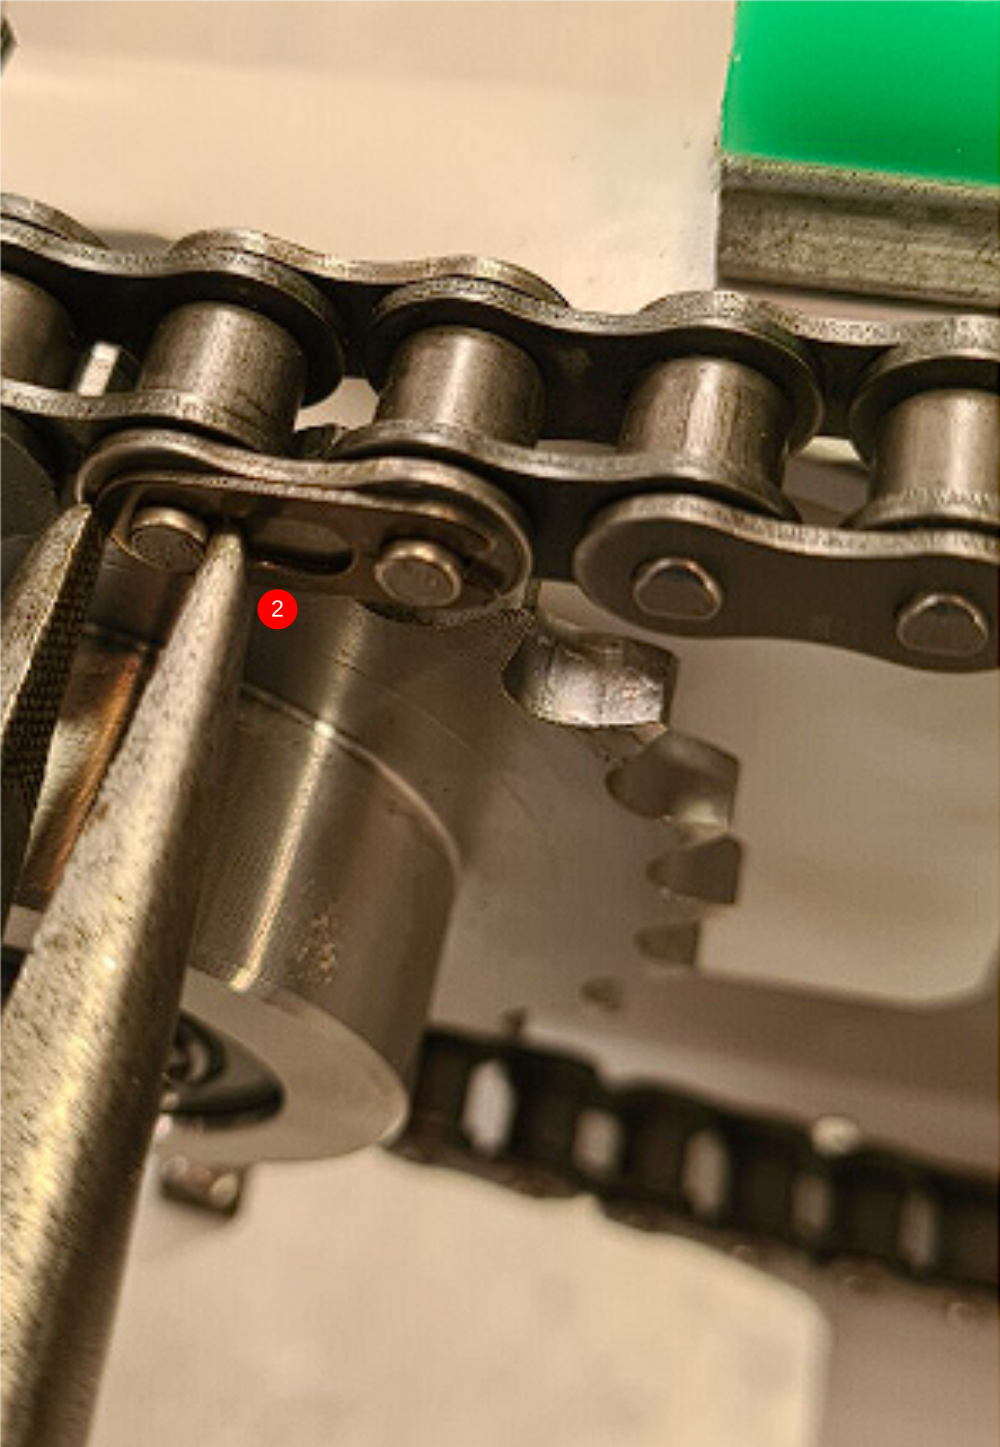
Étape 2 - 1st stage fix of drive sprockets
Add M8 x 20 kcp grubscrew to each chain drive sprocket. Do not add adhesive at this point
Align sprocket with faces shown and tighten grubscrew ensuring the
****flat on the driveshaft ***
is aligned with the fixing grubscrew .
Repeat for all 8 remaining sprockets
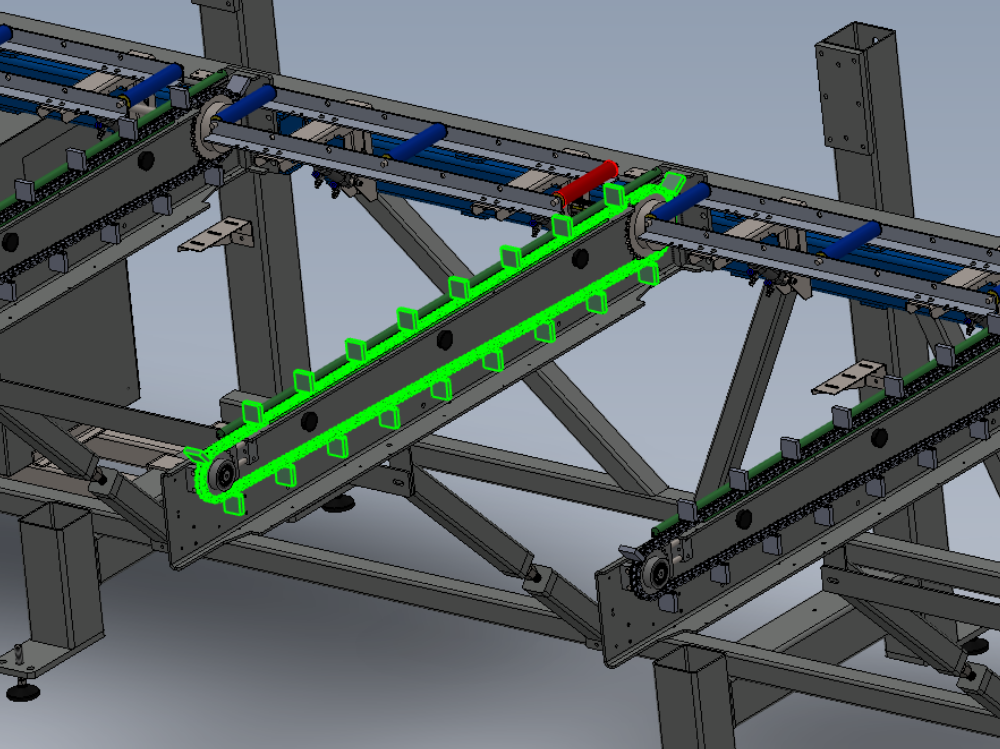
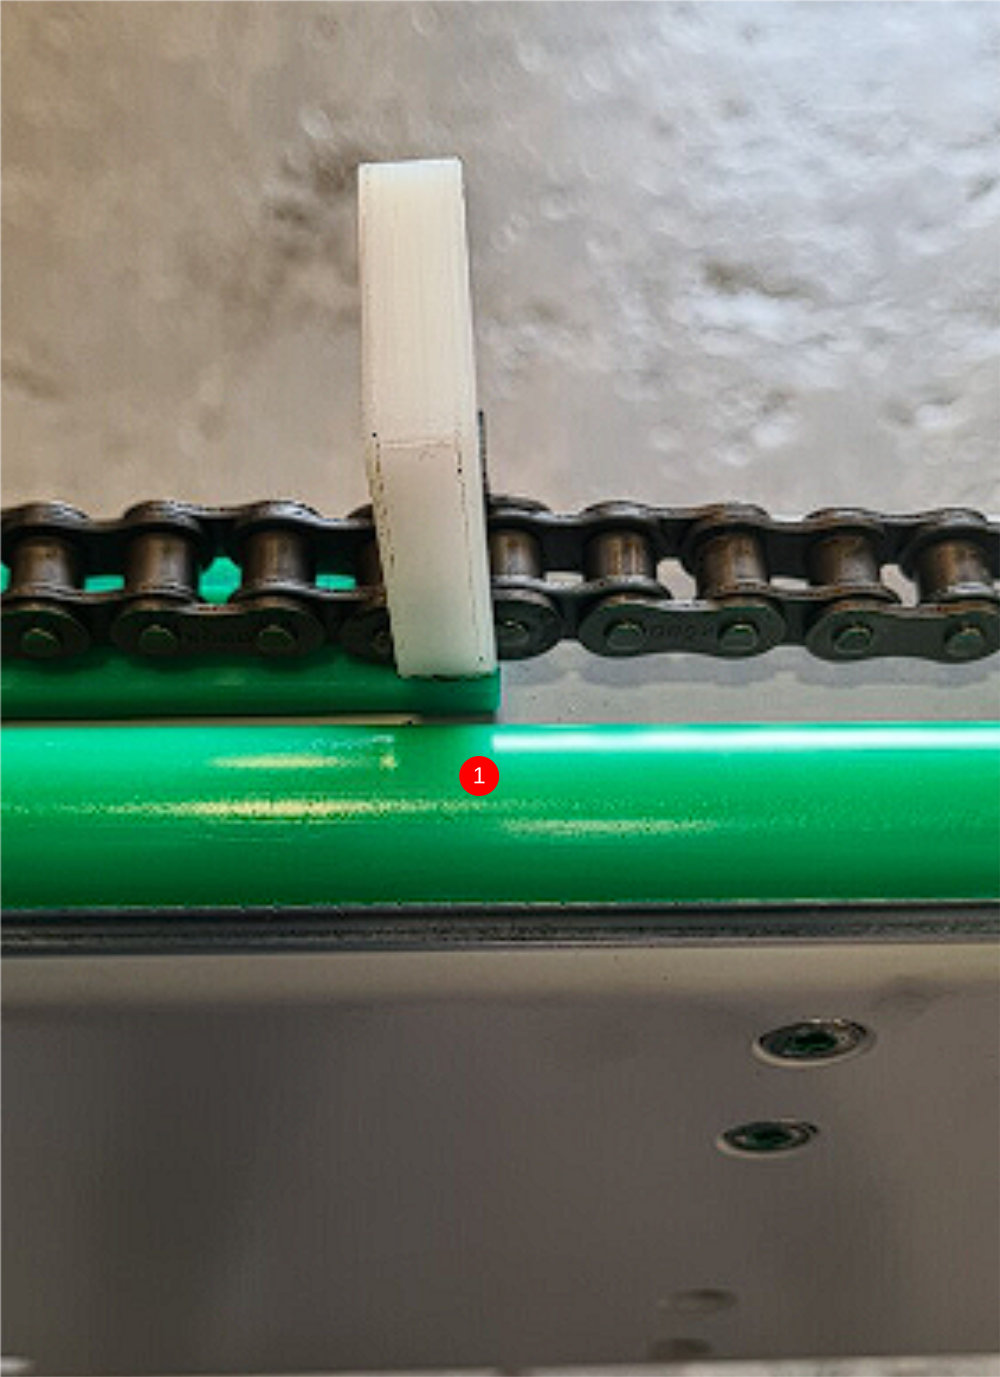
Étape 3 - Fit chains
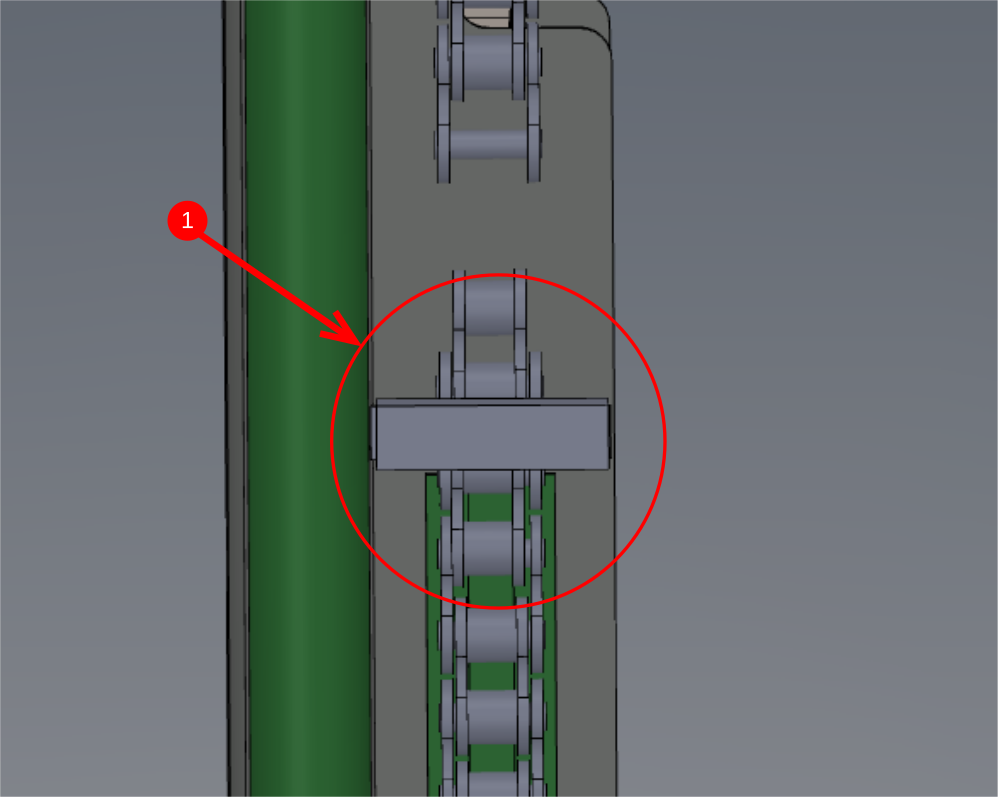
Remove chain joining link from chain assembly and fit chain in position
It is vital all chains are fitted in the same position, to do this
1 When fitting chain use datum point to align chain paddle
2 Attach chain link joiner
Repeat for all 8 remaining chains
If chains are tight to connect adjust M8 set bolt to reduce tension on chains

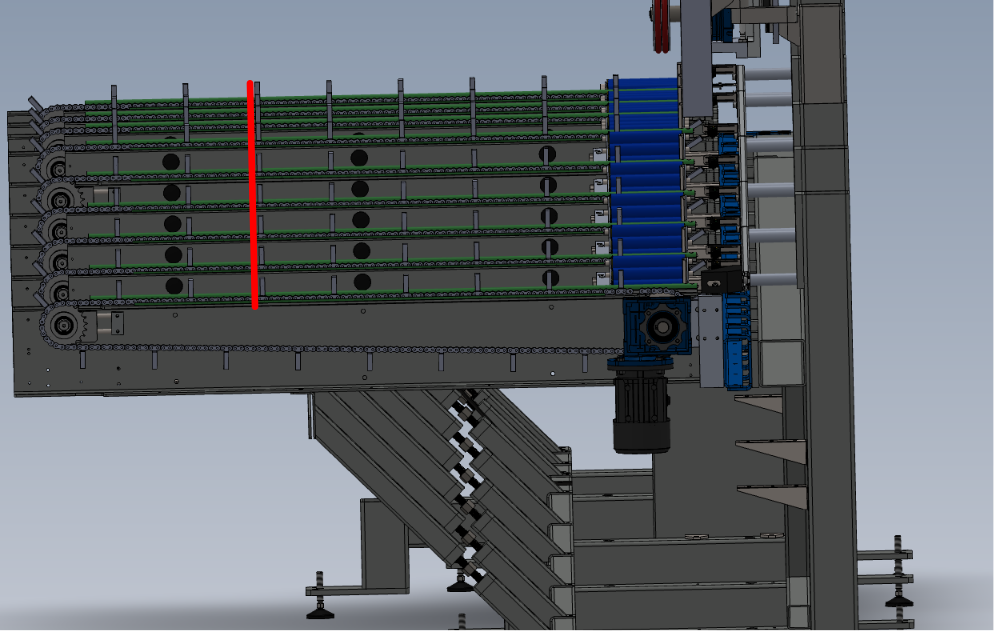
Étape 4 - Quality check
Once all chains are fitted a visual check should be performed to confirm alignment . When looking over the length of the table, all chain flights should be inline
Étape 5 - Finalise Sprocket fasteners
It is vital to tension the securing grubscrew for the drive sprockets correctly
Use a straight ended 4mm hex key and extension bar to apply as much tension as possible to the m8 grubscrew
Then add 2 drops of self wicking thread locker to complete the tension process

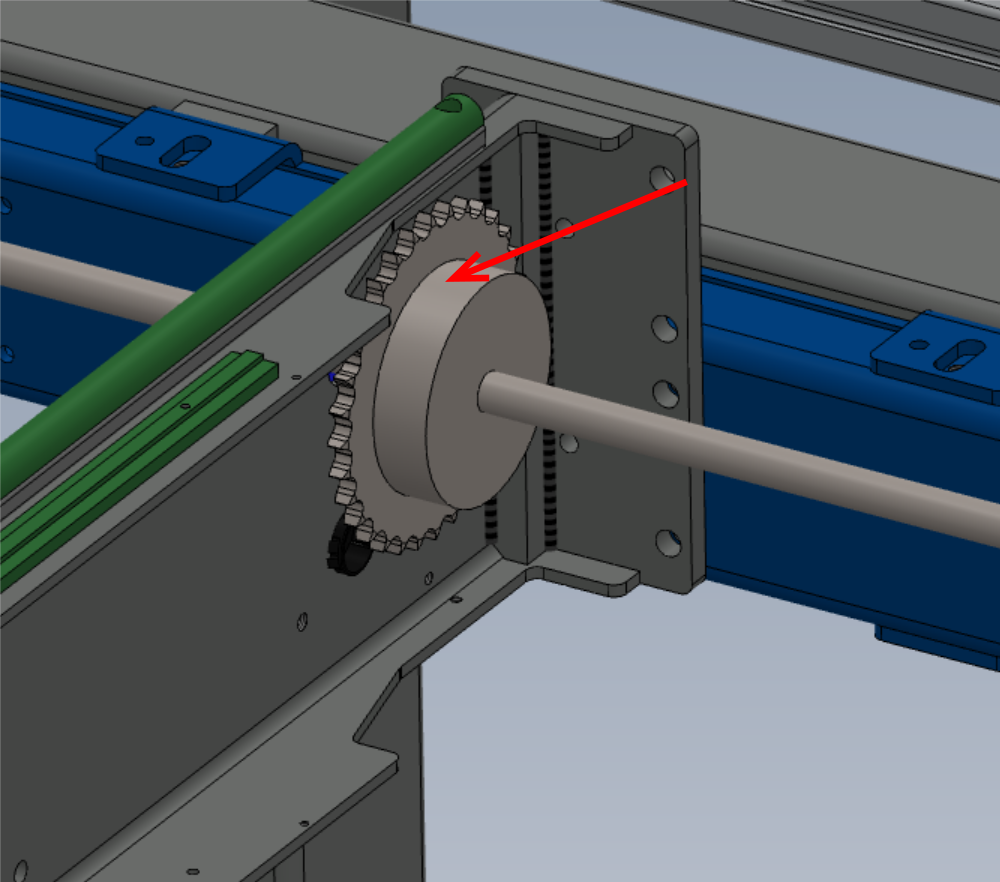
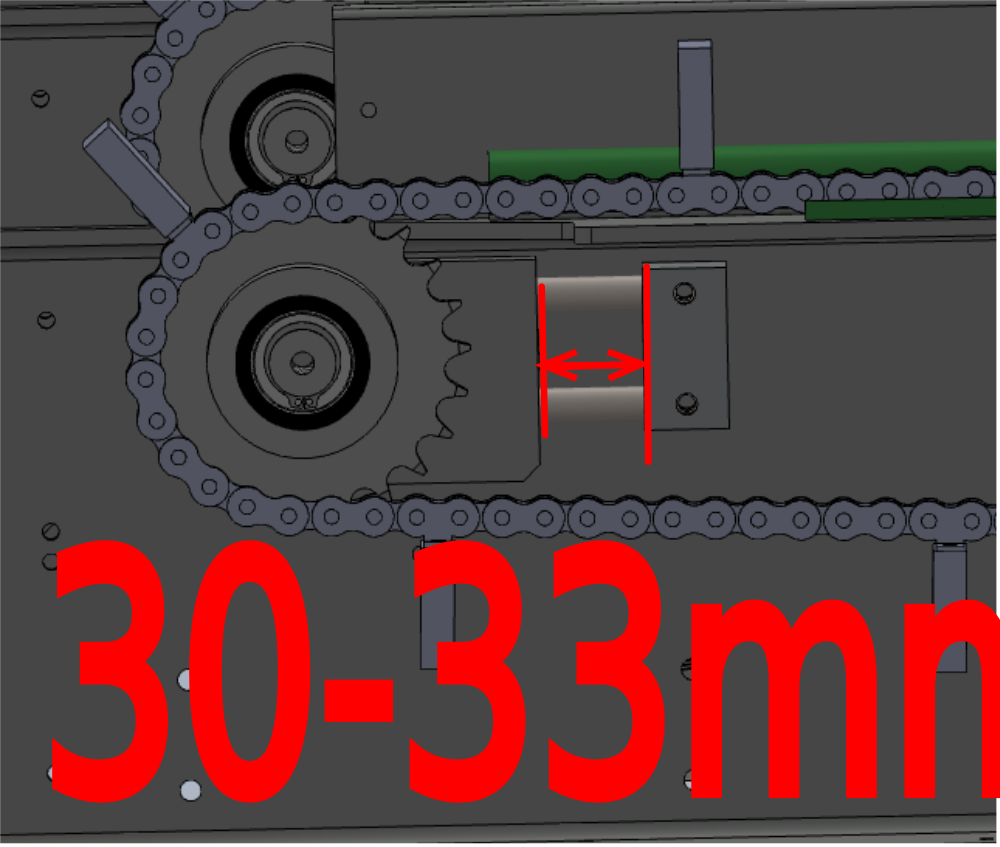
Étape 6 - Tension chains
Using the M8 adjusting set bolt, set shown gap to the range shown. (30-33mm approx)
This will give a starting position for chain adjustment
Once set , gauge feel of the chains to note any difference in tension between all chains
Check clearance between bottom flights on chains and bottom of arm
Adjust individual chains to match correctly tensioned chains, and ensure all chain flights are clear from bottom arm face
Once set, lock off M8 locking nut


Draft
 Français
 English
 Deutsch
 Español
 Italiano
 Português