| [version en cours de rédaction] | [version en cours de rédaction] |
| Ligne 5 : | Ligne 5 : | ||
|Categories=Production | |Categories=Production | ||
|Difficulty=Medium | |Difficulty=Medium | ||
| − | |Duration= | + | |Duration=2.5 |
|Duration-type=hour(s) | |Duration-type=hour(s) | ||
}} | }} | ||
Version actuelle datée du 3 avril 2024 à 12:00
Drilling and assembly details for swarf chutes

Difficulté
Moyen
Durée
2.5 heure(s)
Sommaire
- 1 Introduction
- 2 Étape 1 - Unless otherwise stated
- 3 Étape 2 - ECR raised
- 4 Étape 3 - Assemble chutes
- 5 Étape 4 - Position swarf corners
- 6 Étape 5 - Position assembled chute
- 7 Étape 6 - Adjust chutes and corners
- 8 Étape 7 - Drill off to suit
- 9 Étape 8 - Mark lower chute position
- 10 Étape 9 - Remove all chutes
- 11 Étape 10 - Assemble chutes
- 12 Étape 11 - Label bulkheads both sides of panel
- 13 Commentaires
Introduction
Tools Required
Standard hex key set
Standard HSS drill set
Standard tap set
Standard spanner set
Parts Required
D7908 Swarf chute front section ( OH-D0002973)
D7905 Swarf Chute Front Section Small (OH D0008702)
H0007907 Swarf dispersal lip x 1
H0007909 Swarf corner left x 1
H0007910 Swarf corner right x 1
H0007946 Front swarf chute infill x 1
P0000047 Bulkhead Elbow 6mm x 2
P0000152 Bulkhead Elbow 8mm x 2
P0000161 Plug-in Reducer 6mm Tube 8mm Fitting x 2
P0000489 Air Nozzle Flat(Air Knife) x 2
P0000540 Straight Adaptor Ø8mm x 1/4'' BSP Female x 2Étape 1 - Unless otherwise stated
Use Loctite 243 on all fasteners
Use Loctite 572 on all threaded pneumatic connection
Pen mark all fasteners to show finalised

Étape 2 - ECR raised
Ecr raised to cover current reworks to panel
Until processed rework at production


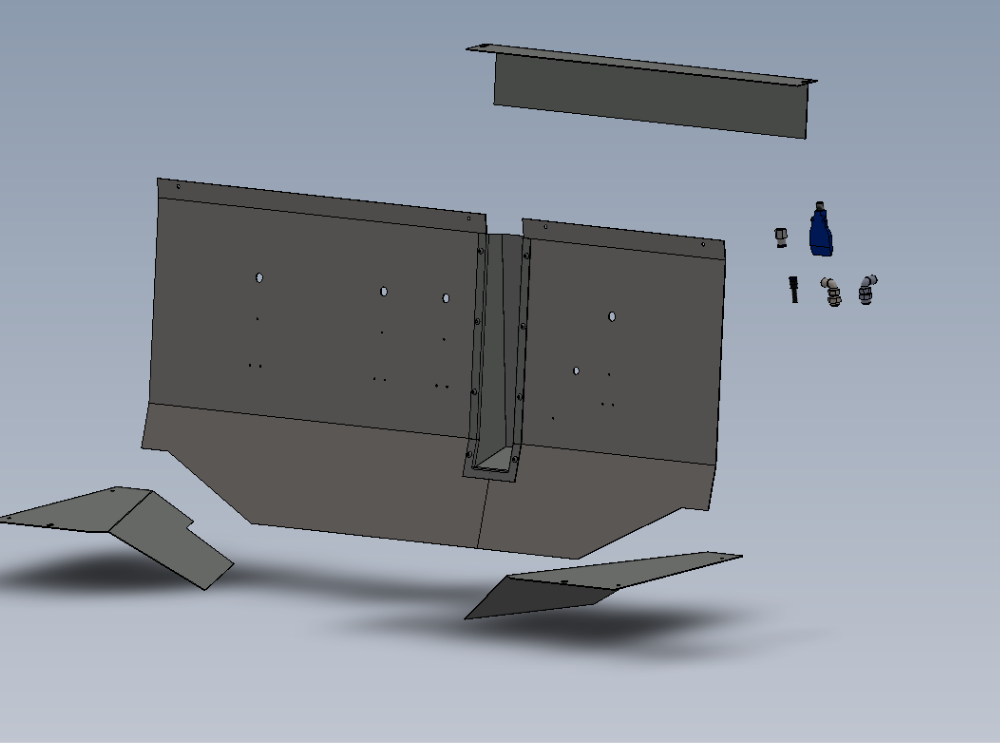
Étape 3 - Assemble chutes
Assemble chute panels as shown

Étape 4 - Position swarf corners
Position swarf corners onto main frame


Étape 5 - Position assembled chute
Position assembled chute into frame

Étape 6 - Adjust chutes and corners
Adjust panels to best fit


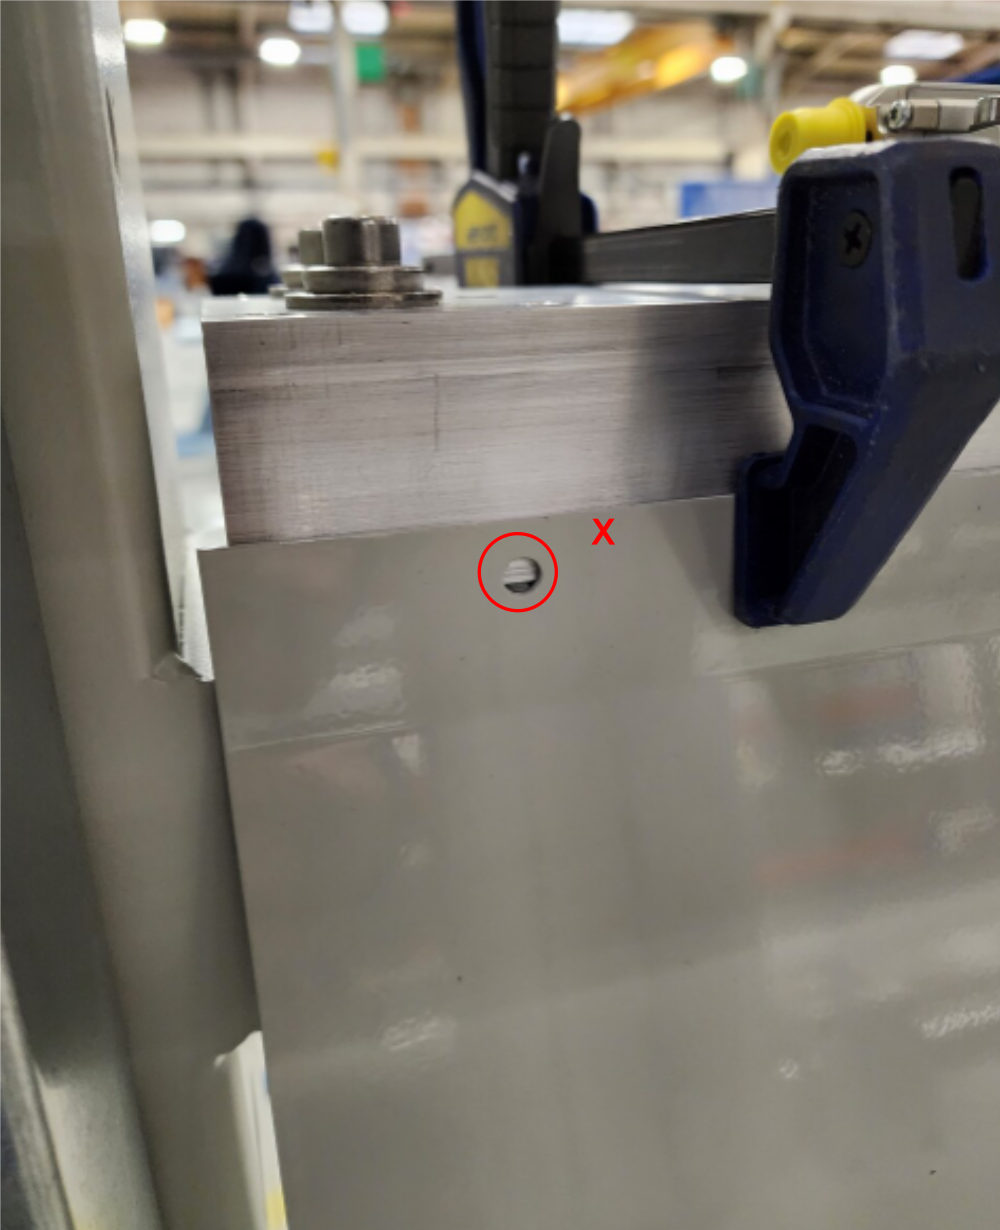
Étape 7 - Drill off to suit
Drill to suit all fixing holes @ M5
8 off in total
If upper holes are not able to be used due to position, an additional fixing hole may be required to fix
Étape 8 - Mark lower chute position
With chutes still fitted, align and mark lower lip cute
Align with bottom of lifting channel and central between fitted chutes


Étape 9 - Remove all chutes
Remove all chutes and drill marked fixing points for lower lip chute
Drill 2 off M5
Final fit lower lip using 2 off M5 x 12 socket caps and
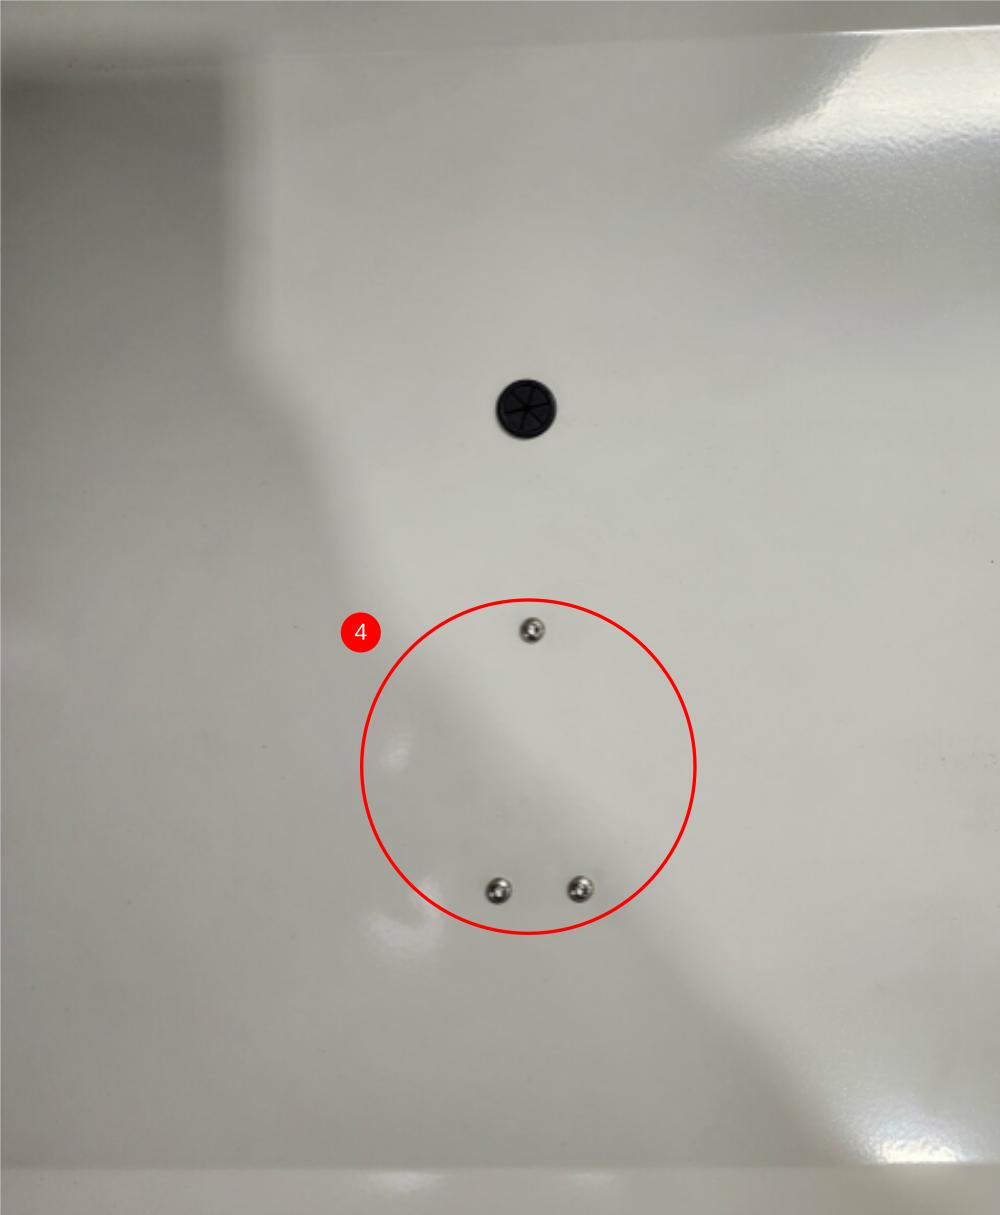
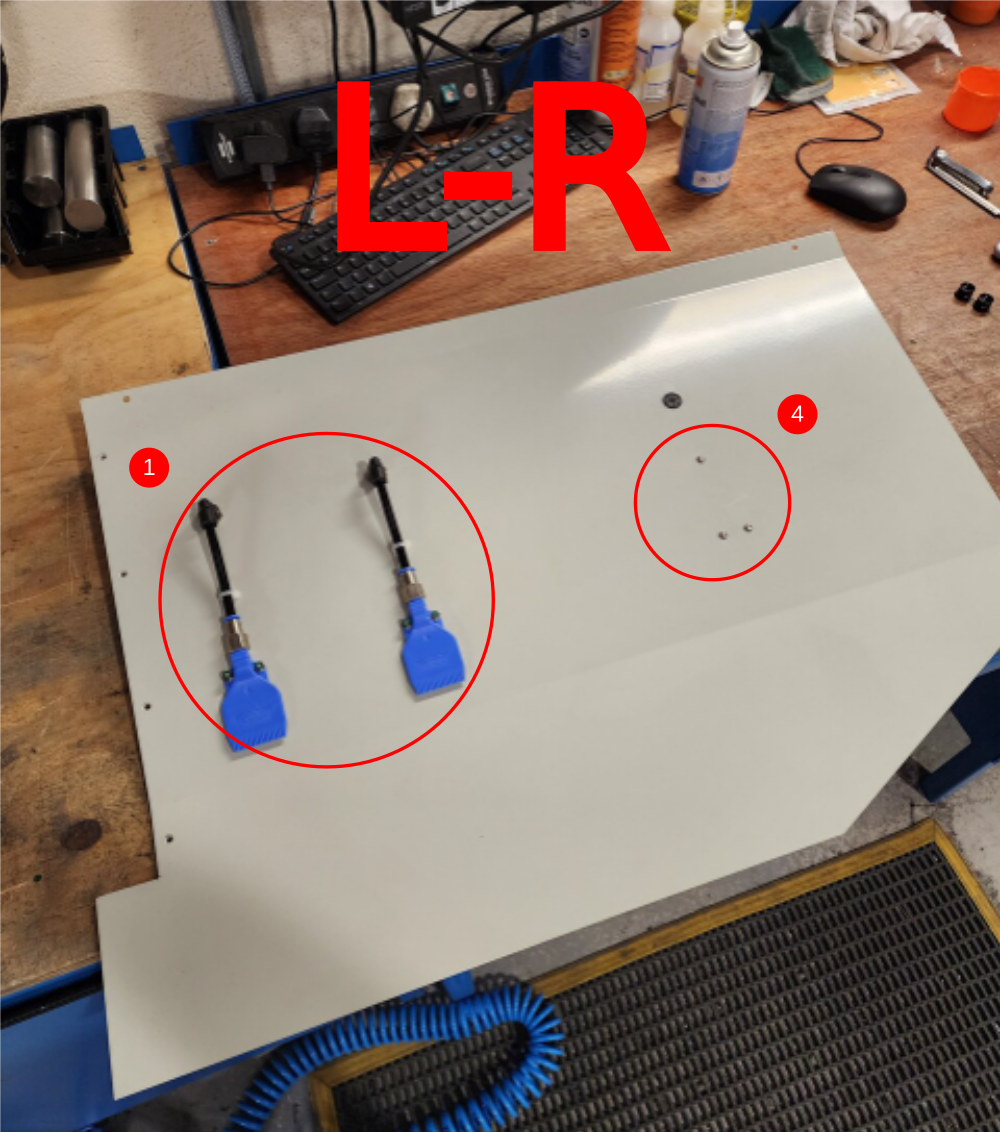
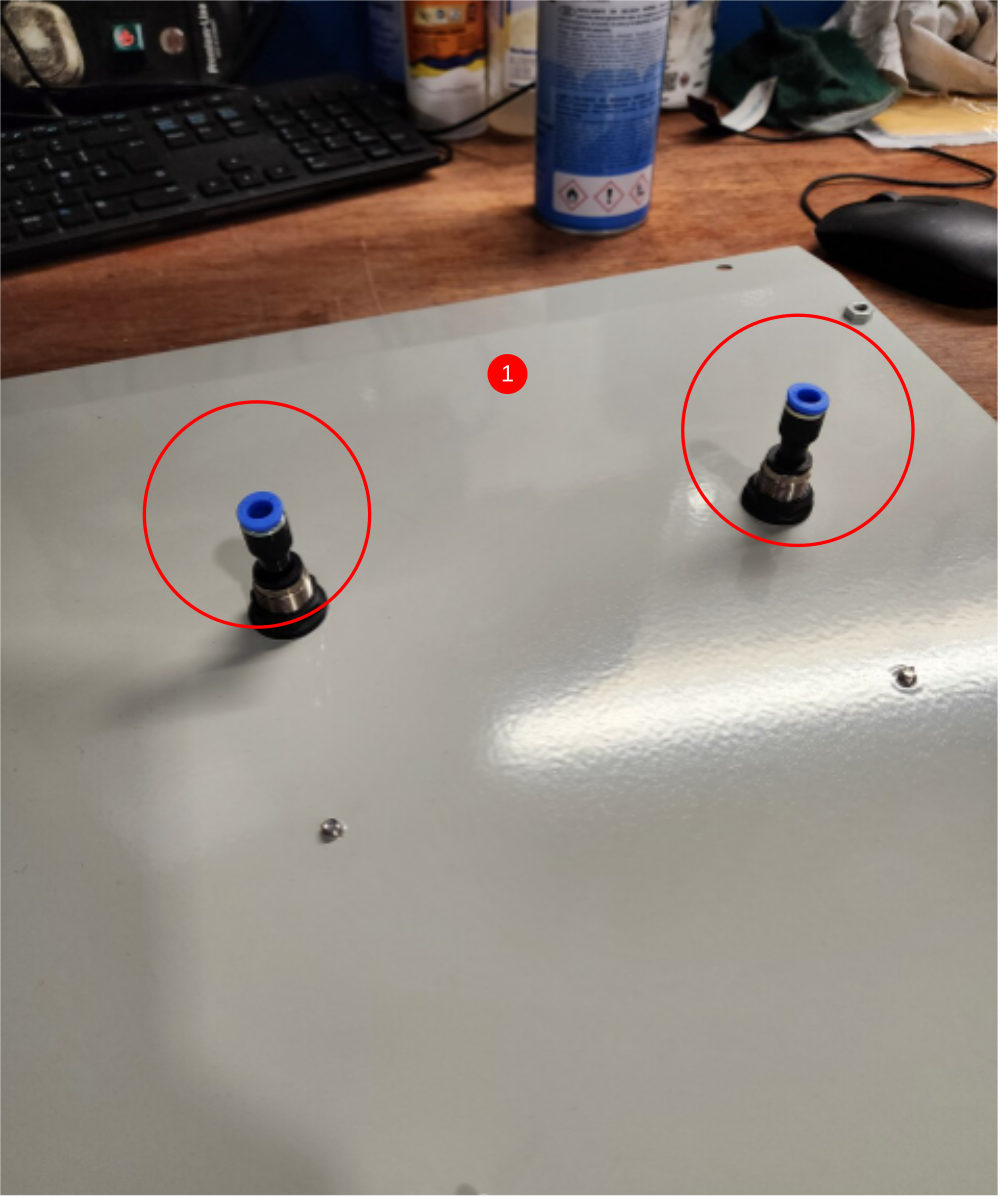
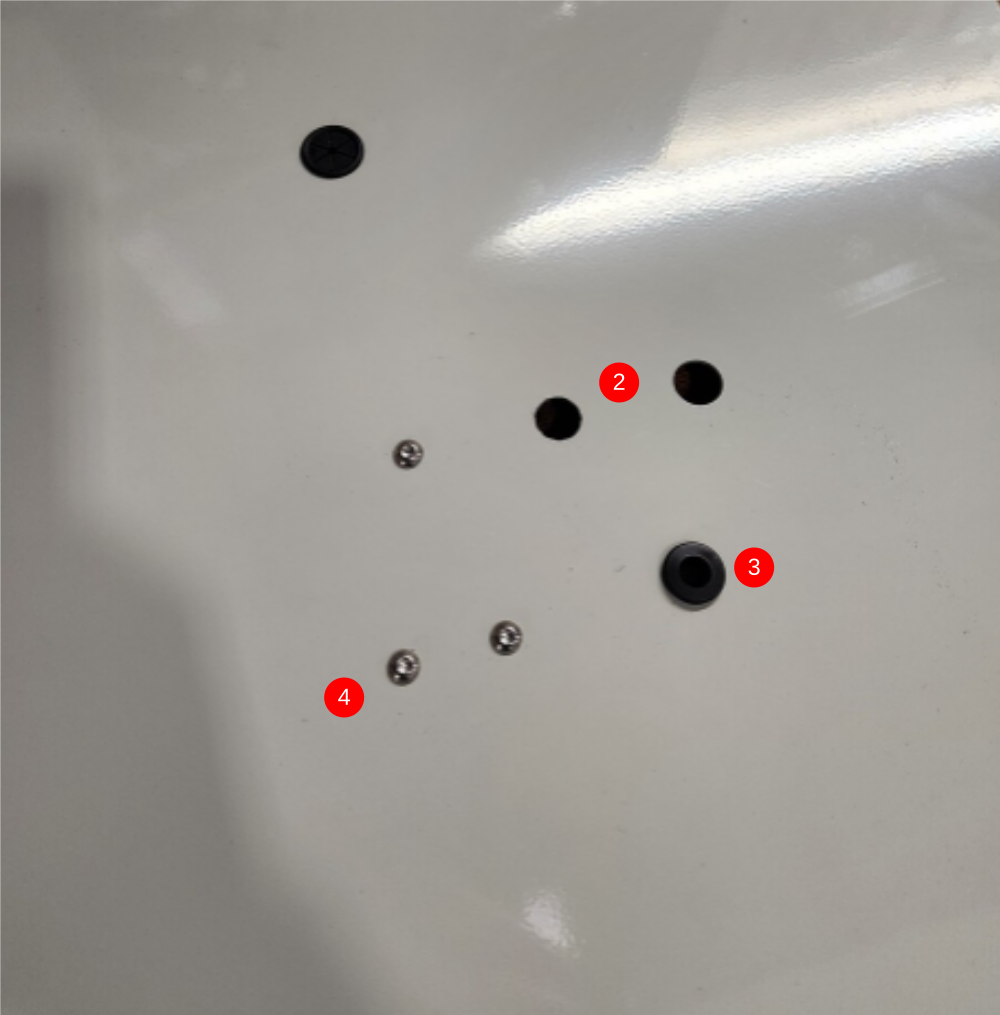
Étape 10 - Assemble chutes
1 Fit blowers to chutes and add connecting 8mm black pipe. Fix with M4 tie base and tiewrap. Fit P0000161 Plug-in Reducer 6mm Tube 8mm Fitting x 2 to rear
2 Add 2 off 6mm bulkheads and tie base for clamp feeds
3 Add grommit for clamp reed switch
4 If present blank redundant M4 holes with M4 x 6 button heads

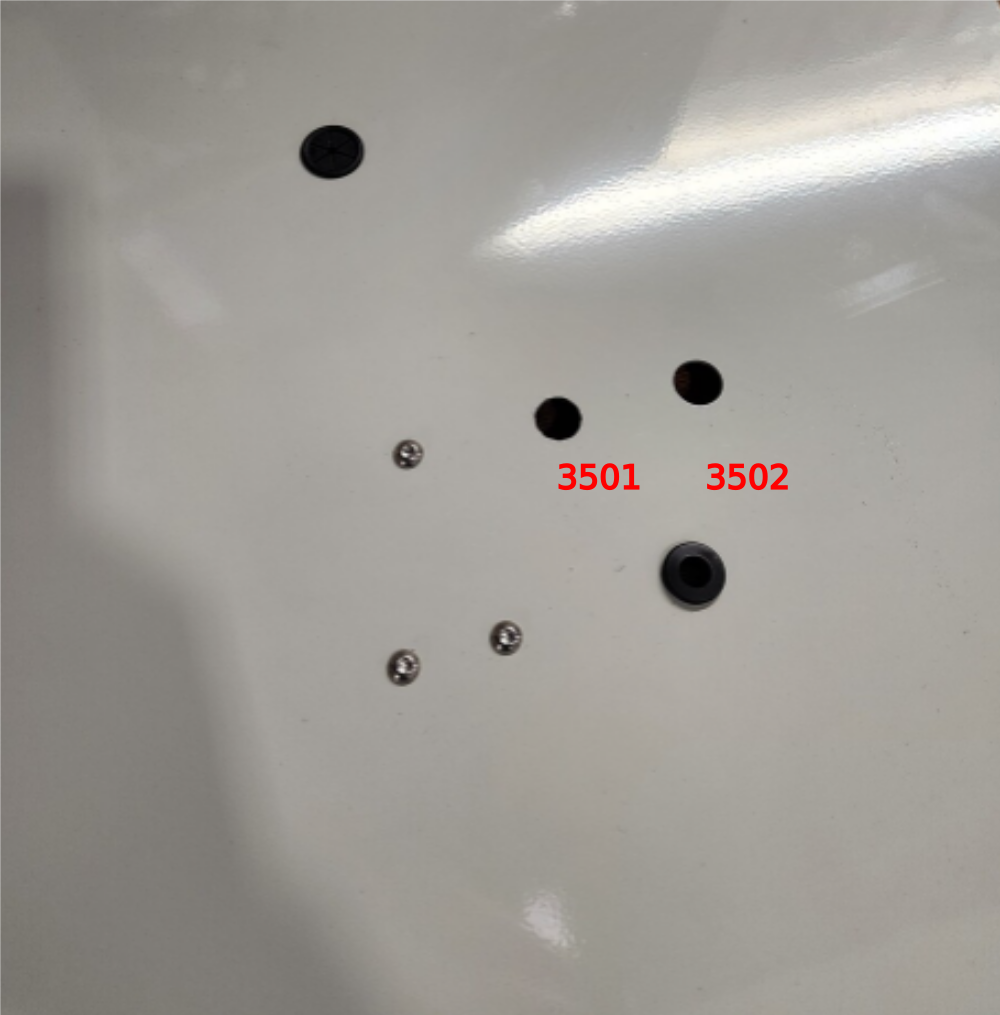
Étape 11 - Label bulkheads both sides of panel
Label 6mm bulkheads both sides of panel as
3501 and 3502

Draft
 Français
 English
 Deutsch
 Español
 Italiano
 Português