| [version en cours de rédaction] | [version en cours de rédaction] |
(Page créée avec « {{Tuto Details |Description=<translate>Instructions to correctly align and mount hepco drive beam</translate> |Categories=Production |Difficulty=Hard |Duration=6 |Duration... ») |
|||
| Ligne 1 : | Ligne 1 : | ||
{{Tuto Details | {{Tuto Details | ||
| + | |Main_Picture=R0015029D_Hepco_Beam_Alignment_Screenshot_2023-07-03_084430.png | ||
| + | |Main_Picture_annotation={"version":"2.4.6","objects":[{"type":"image","version":"2.4.6","originX":"left","originY":"top","left":-50,"top":-11,"width":752,"height":518,"fill":"rgb(0,0,0)","stroke":null,"strokeWidth":0,"strokeDashArray":null,"strokeLineCap":"butt","strokeDashOffset":0,"strokeLineJoin":"miter","strokeMiterLimit":4,"scaleX":0.96,"scaleY":0.96,"angle":0,"flipX":false,"flipY":false,"opacity":1,"shadow":null,"visible":true,"clipTo":null,"backgroundColor":"","fillRule":"nonzero","paintFirst":"fill","globalCompositeOperation":"source-over","transformMatrix":null,"skewX":0,"skewY":0,"crossOrigin":"","cropX":0,"cropY":0,"src":"https://stuga.dokit.app/images/5/5f/R0015029D_Hepco_Beam_Alignment_Screenshot_2023-07-03_084430.png","filters":[]}],"height":449.6221662468514,"width":600} | ||
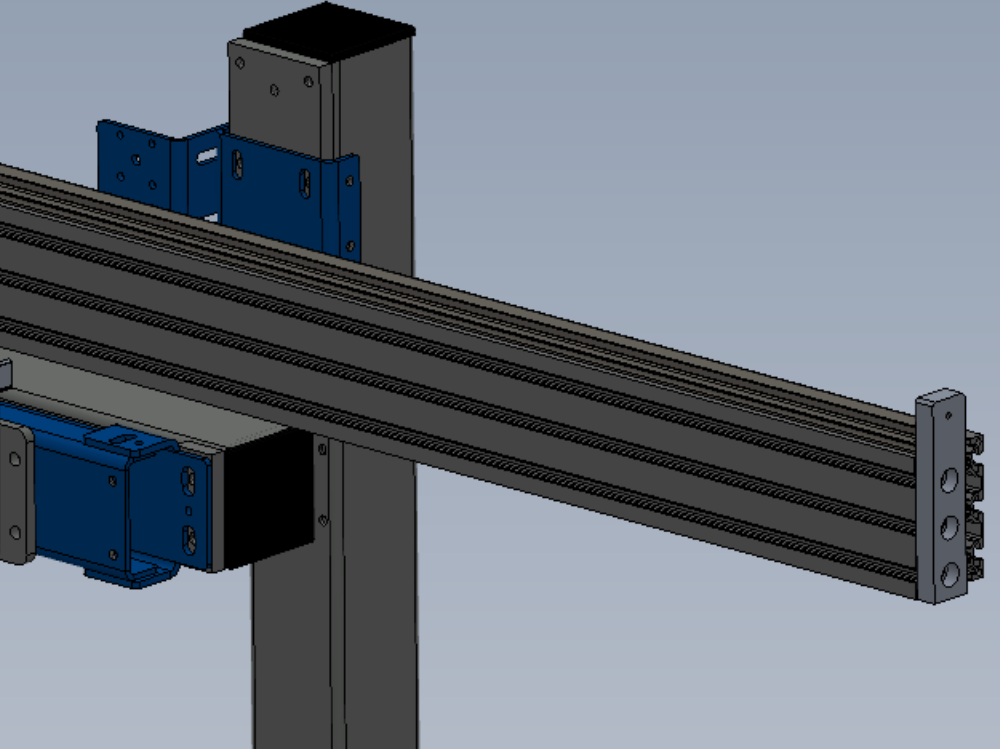
|Description=<translate>Instructions to correctly align and mount hepco drive beam</translate> | |Description=<translate>Instructions to correctly align and mount hepco drive beam</translate> | ||
|Categories=Production | |Categories=Production | ||
|Difficulty=Hard | |Difficulty=Hard | ||
| − | |Duration= | + | |Duration=8 |
|Duration-type=hour(s) | |Duration-type=hour(s) | ||
}} | }} | ||
{{Introduction | {{Introduction | ||
| − | |Introduction=<translate></translate> | + | |Introduction=<translate><u>'''Tools Required'''</u> |
| + | |||
| + | |||
| + | <u>'''Parts Required'''</u></translate> | ||
}} | }} | ||
{{Materials}} | {{Materials}} | ||
{{EPI}} | {{EPI}} | ||
{{Tuto Step | {{Tuto Step | ||
| − | |Step_Title=<translate></translate> | + | |Step_Title=<translate>Unless otherwise stated</translate> |
| − | |Step_Content=<translate></translate> | + | |Step_Content=<translate>Always Use Loctite 243 on all fasteners |
| + | |||
| + | Always use Loctite 570 on all threaded pneumatic connections | ||
| + | |||
| + | Pen mark all fasteners to show finalised</translate> | ||
| + | |Step_Picture_00=R0015086_Assemble_Pneumatics_on_to_electrical_cabinet_loctite_243.png | ||
}} | }} | ||
{{Tuto Step | {{Tuto Step | ||
| − | |Step_Title=<translate></translate> | + | |Step_Title=<translate>Attach Setting jigs</translate> |
| − | |Step_Content=<translate></translate> | + | |Step_Content=<translate>1 Mount setting jigs to channel section in positions shown . |
| + | |||
| + | |||
| + | 2 Position one will require fixing points drilling to channel section . Drill M8 and position to measurement shown</translate> | ||
}} | }} | ||
{{Tuto Step | {{Tuto Step | ||
| Ligne 53 : | Ligne 66 : | ||
{{Notes}} | {{Notes}} | ||
{{PageLang | {{PageLang | ||
| + | |Language=en | ||
|SourceLanguage=none | |SourceLanguage=none | ||
|IsTranslation=0 | |IsTranslation=0 | ||
| − | |||
}} | }} | ||
{{Tuto Status | {{Tuto Status | ||
|Complete=Draft | |Complete=Draft | ||
}} | }} | ||
Version du 3 juillet 2023 à 10:11
Instructions to correctly align and mount hepco drive beam

Difficulté
Difficile
Durée
8 heure(s)
Introduction
Tools Required
Étape 1 - Unless otherwise stated
Always Use Loctite 243 on all fasteners
Always use Loctite 570 on all threaded pneumatic connections
Pen mark all fasteners to show finalised

Étape 2 - Attach Setting jigs
1 Mount setting jigs to channel section in positions shown .
2 Position one will require fixing points drilling to channel section . Drill M8 and position to measurement shown
Étape 3 -
Étape 4 -
Étape 5 -
Étape 6 -
Étape 7 -
Étape 8 -
Étape 9 -
Étape 10 -
Draft
 Français
 English
 Deutsch
 Español
 Italiano
 Português