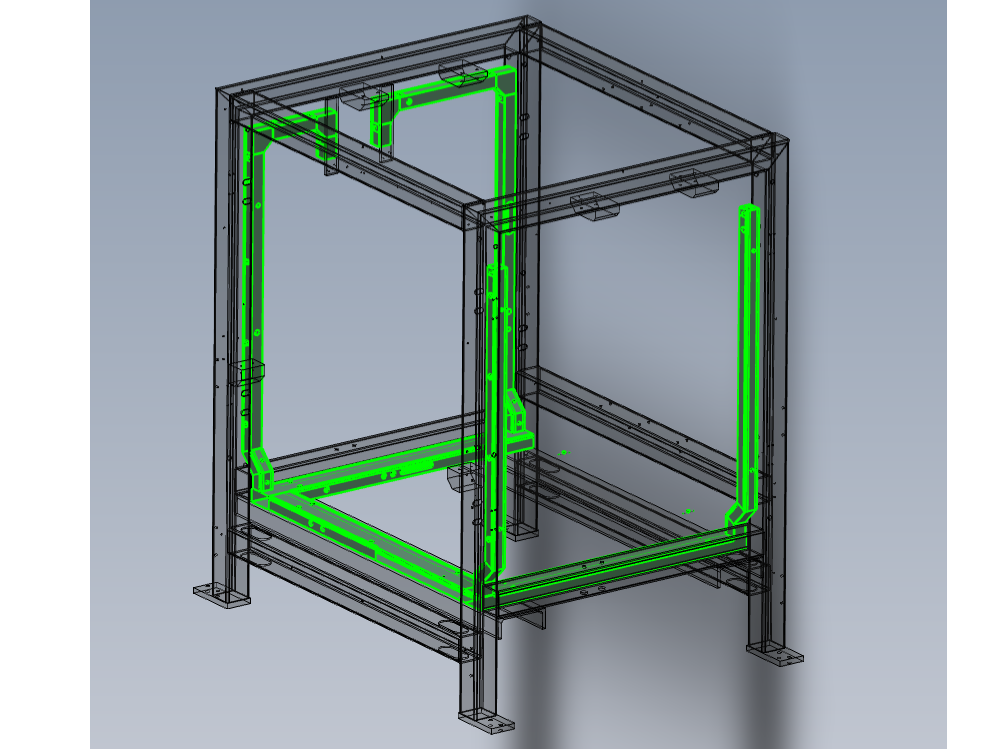
Fitment of trunking to main frame

Difficulté
Moyen
Durée
3 heure(s)
Introduction
Tools Required
Standard hex key set
Standard spanner set
Standard HSS drill set
Standard tap set
Disc cutter
Parts Required
A0000068 Top lid gusset 50x50 bend 90° Armorduct x 4
A0001065 wire basket x 0.5
A0001061 Retainer: Wire Basket Cable Tray x 2
D0000301 M/C centre trunking front lower ZX4 x 1
D0000305 M/C centre trunking rear lower ZX4 x 1
D0000306 M/C centre trunking infeed lower (D8736) x 1
D0000307 M/C centre trunking infeed front offset x 1
D0000308 M/C centre trunking infeed rear offsetx 1
D0000309 M/C centre trunking outfeed front offset x 1
D0000313 M/C centre trunking outfeed rear offset x 1
D0000324 M/C centre trunking outfeed front upper x 1
D0000325 M/C centre trunking infeed front upper x 1
D0000326 M/C centre trunking front drop x 2
D0000327 M/C centre trunking outfeed lower x 1
D0000329 M/C centre trunking infeed rear end x 1
D0000694 M/C centre trunking outfeed rear end x 1
D0007996 Trunking support pillar x 1
Étape 1 - Unless otherwise stated
Use Loctite 243 on all fasteners
Use Loctite 572 on all threaded pneumatic connection
Pen mark all fasteners to show finalised

Étape 2 - Clean threads
All holes on machining centre frame require threads cleaning to remove debris from coating process

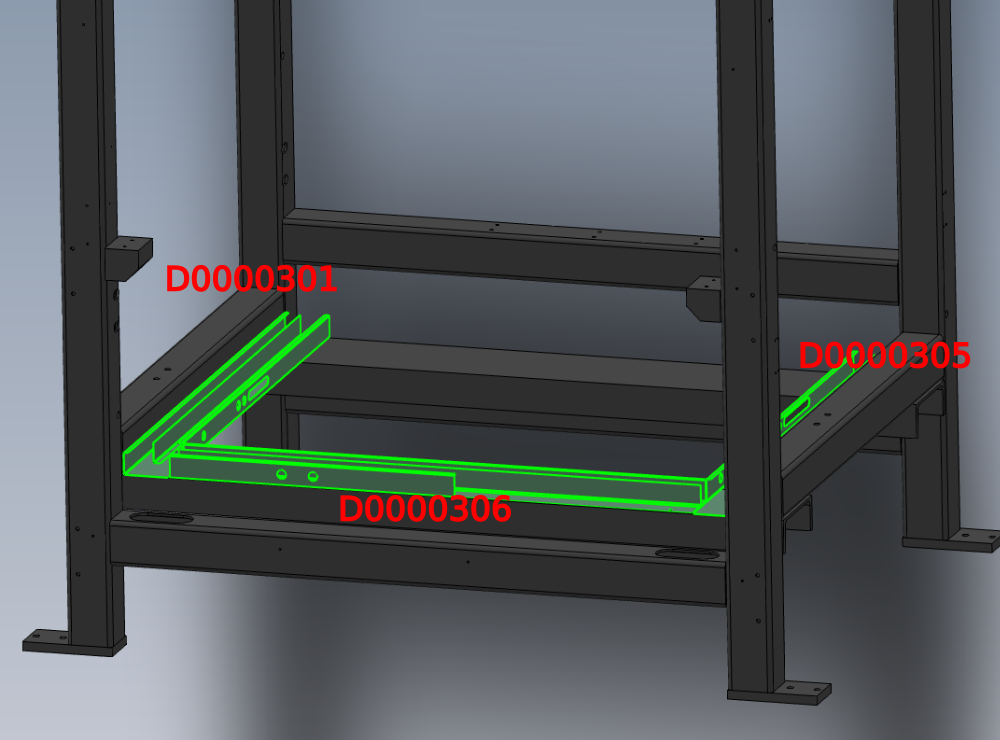
Étape 3 - Mount lower trunking
Use the following parts
D0000301 M/C centre trunking front lower ZX4 x 1
D0000306 M/C centre trunking infeed lower (D8736) x 1
D0000305 M/C centre trunking rear lower ZX4 x 1
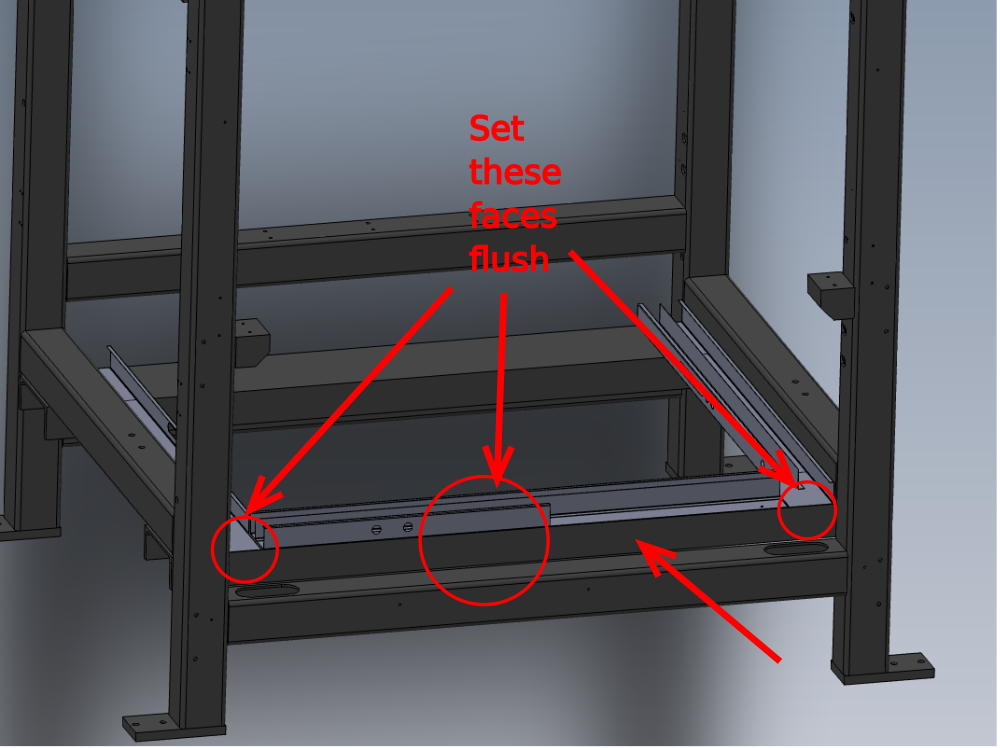
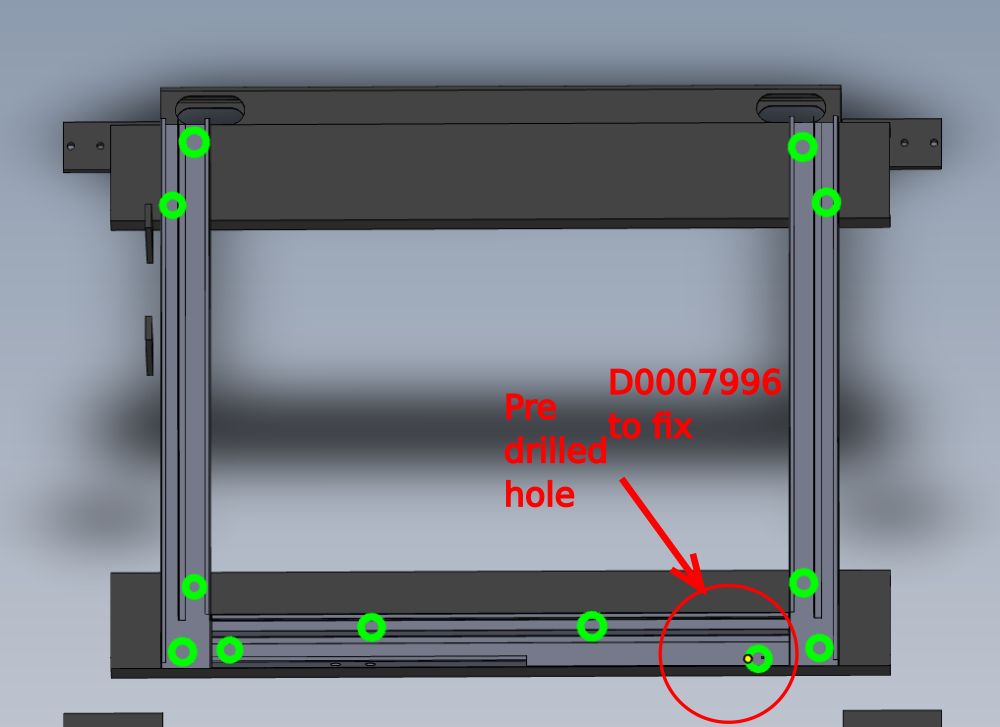
Add 6mm clearance holes to each piece of trunking as indicate to allow M5 fixings to be added to frame frame . Note hole indicated is pre drilled in trunking
Once clearance holes are added to trunking, position trunking as shown and drill and Tap M5 . Use M5 x 10 button sockets and penny washers to fix.
On the pre drilled hole use D0007996 Trunking support pillar x 1 to fix to frame
Once fixed, refit trunking lids to mounted sections


Étape 4 - Assemble upright 1
Draft
 Français
 English
 Deutsch
 Español
 Italiano
 Português