Assembly instructions for installation of main rotary drive ring

Difficulté
Difficile
Durée
2 heure(s)
Introduction
Detailed steps to correctly install rotary gear and journals
Checks for correct installation of oil feed system
Tolerance limits and requirements
Tools Required
Standard hex key set
0-25mm micrometer
Ring support blocks for assembly
Work Table
Parts required
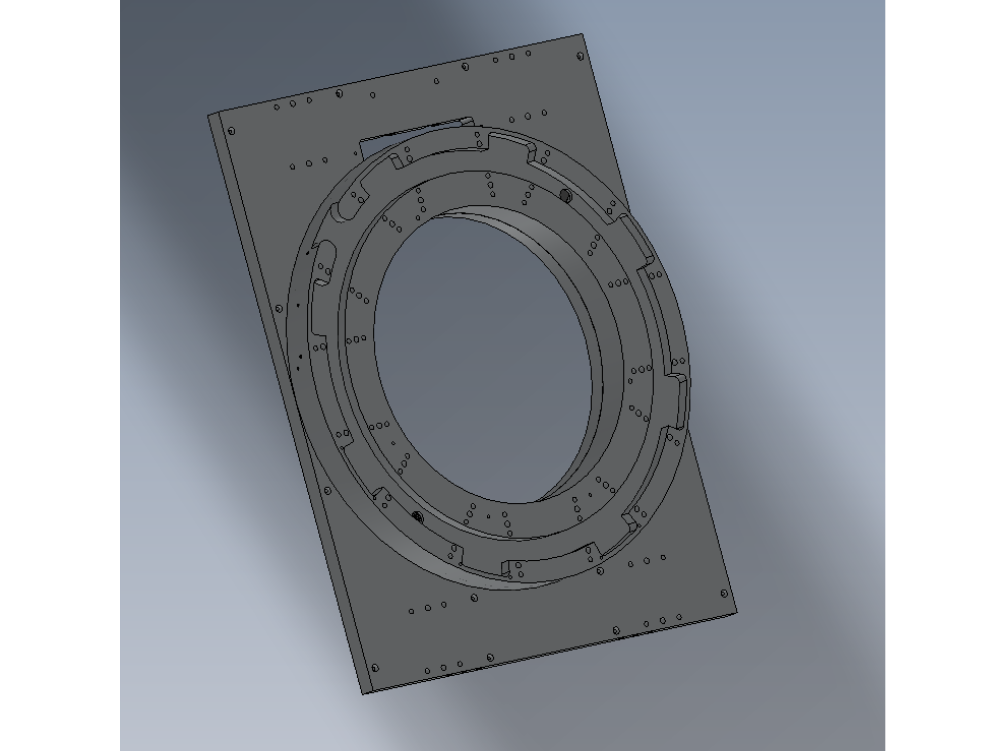
D0006423-2mc Drive ring x 1
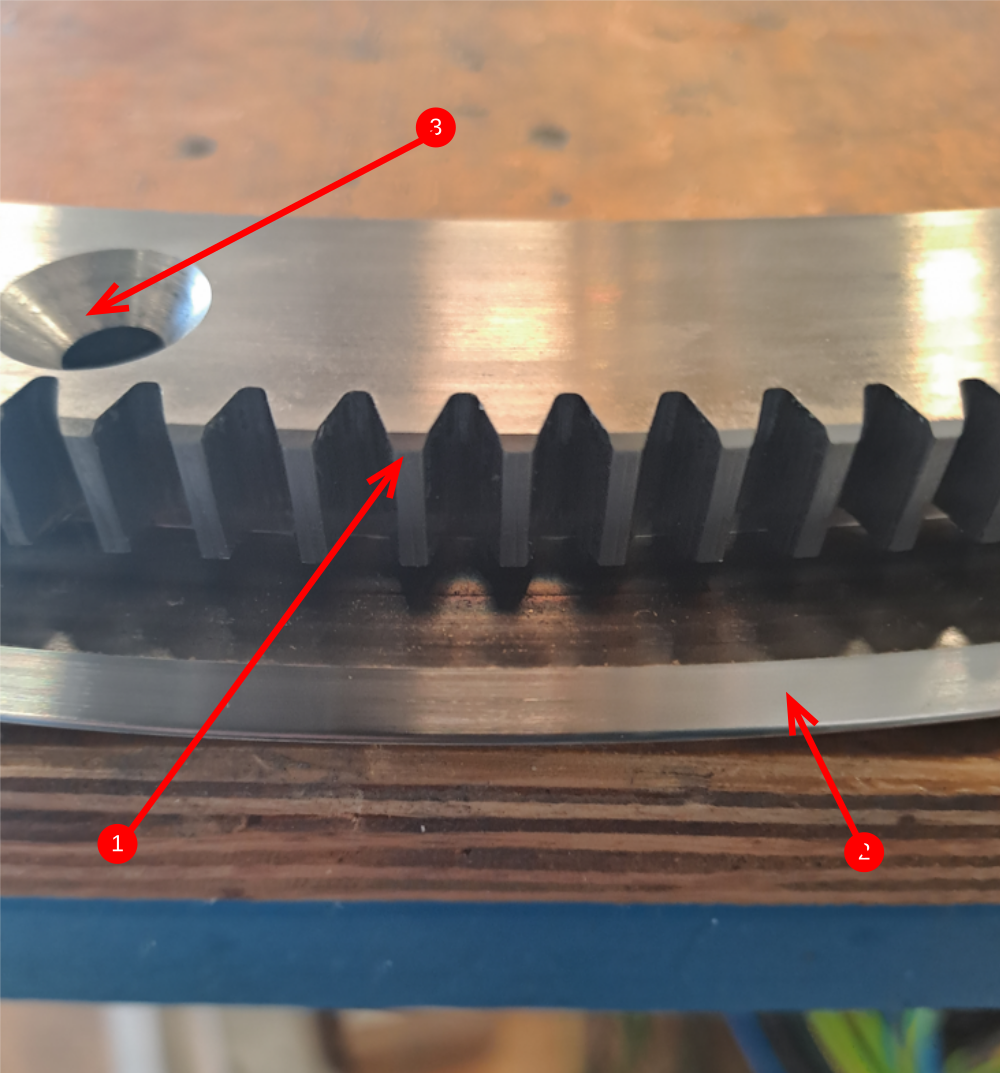
Étape 1 - Quality Check Drive ring
Rotary drive ring needs checking before fitment.
- Check teeth for burrs, damage and debris. Use compressed air to clean all areas
- V edge should be checked for damage. Check entire circumference with fingers to identify any damage, lumps or high low spots
- Check drive ring has been countersunk in the shown area

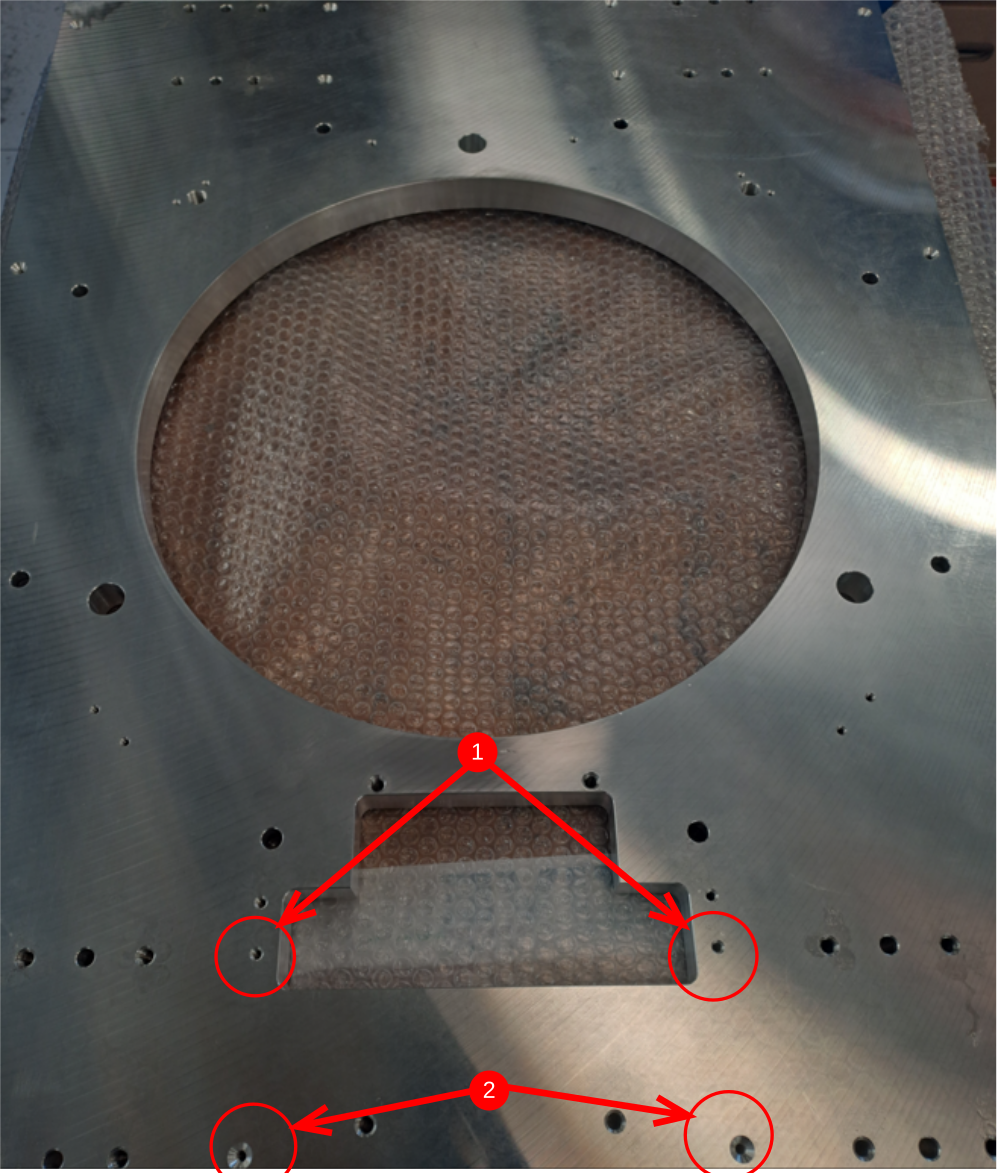
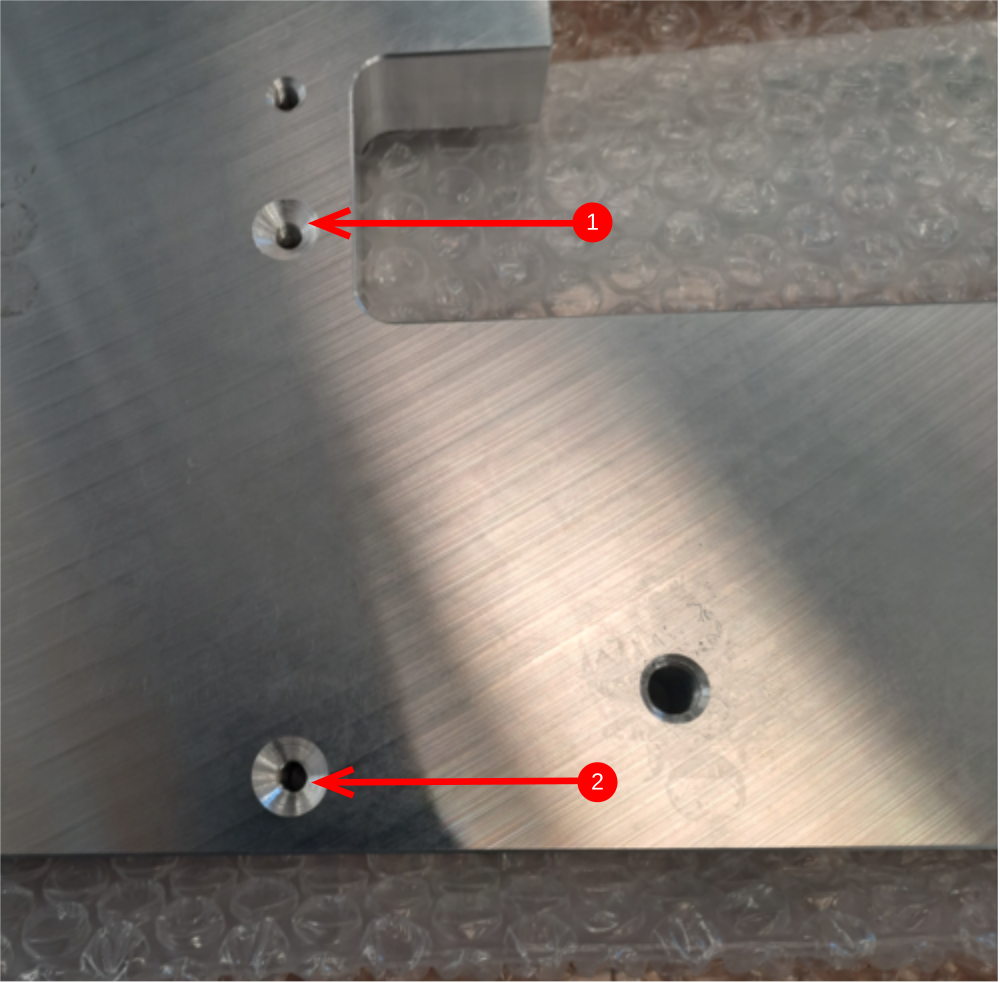
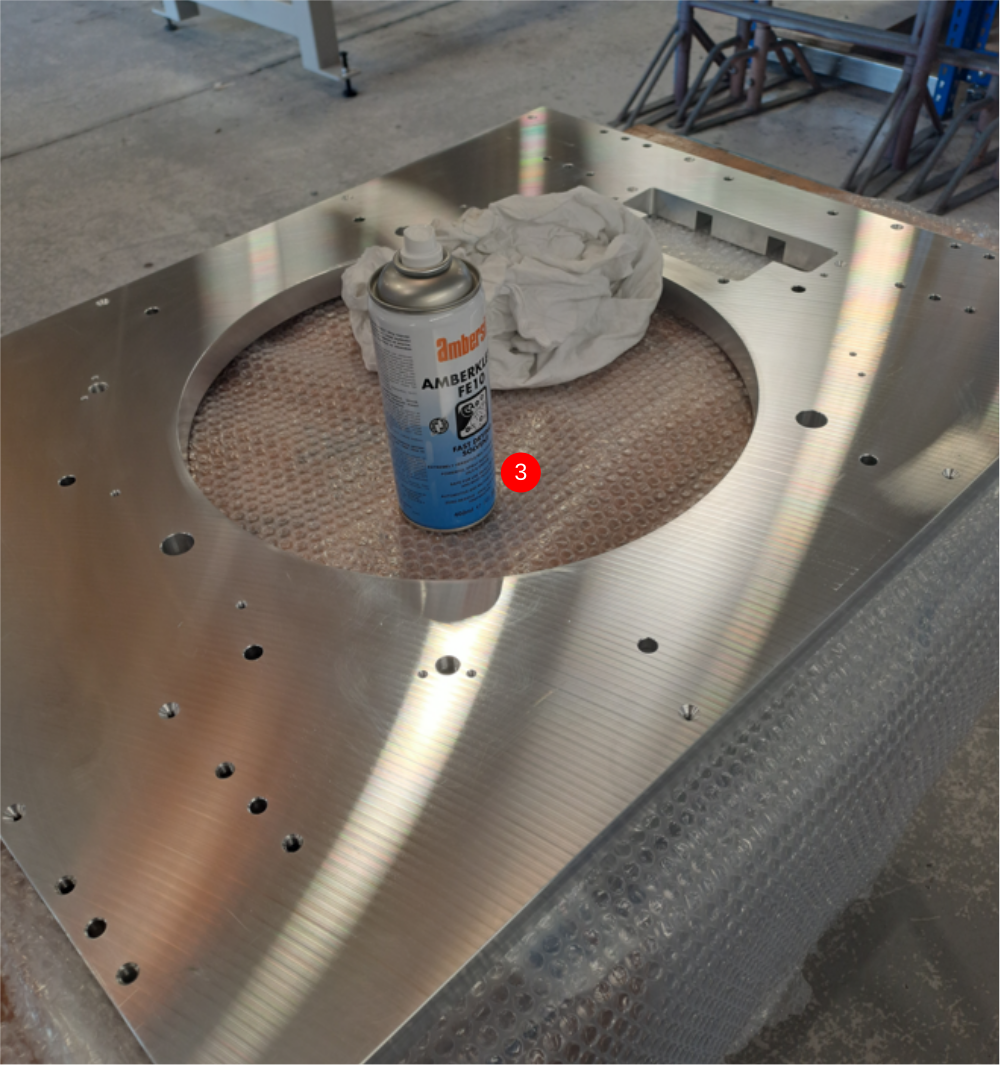
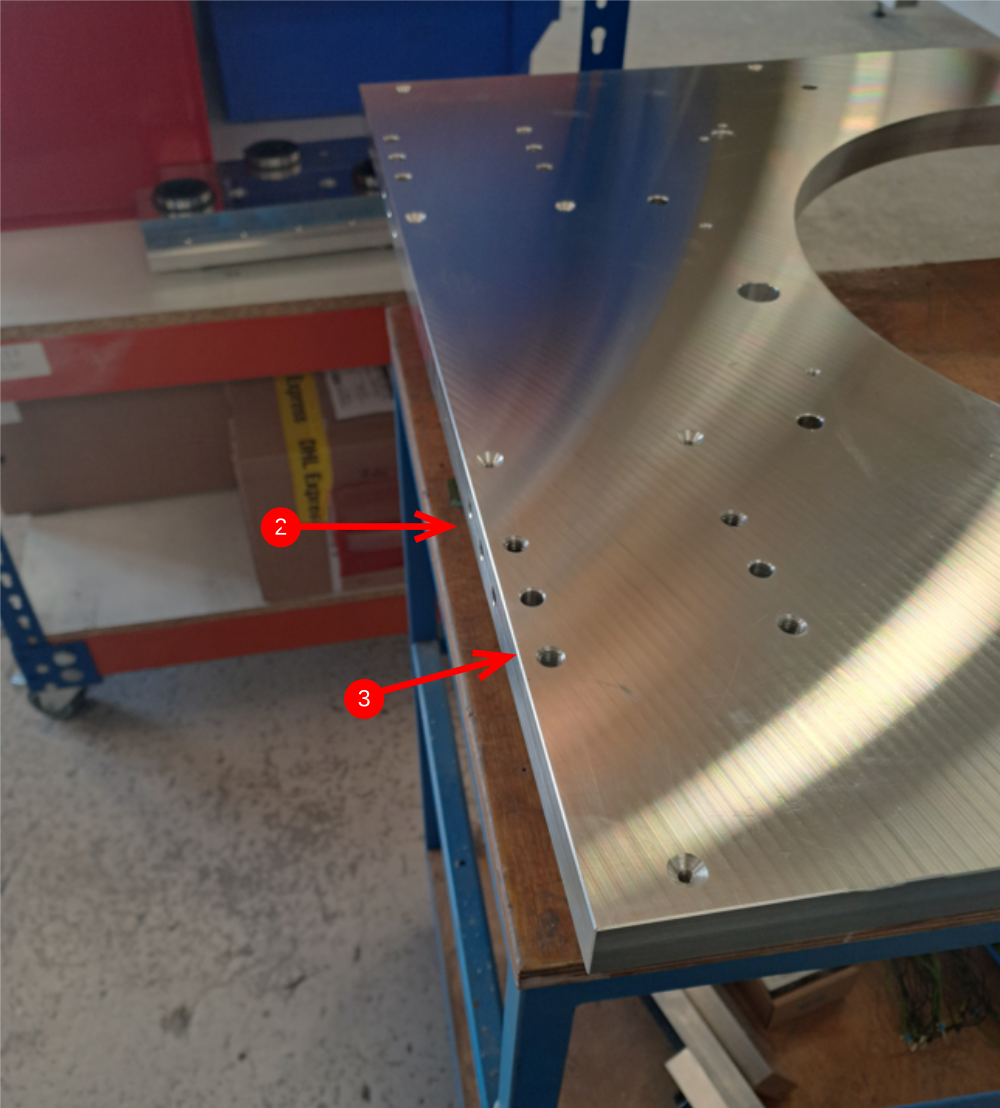
Étape 2 - Prepare Faceplate For assembly
Check that D0007651faceplate holes indicated (1) are countersunk the same as holes indicated (2 ). If not , countersink to correct
3. Clean all holes with compressed air
Thoroughly clean faceplate with solvent

Étape 3 - Inspect Journal washers D0006503
Journal washers should be inspected to ensure all washers supplied are within tolerance .
Thickness of washer should not exceed 0.05mm difference between all washers supplied. Report any that are incorrect via NCR system


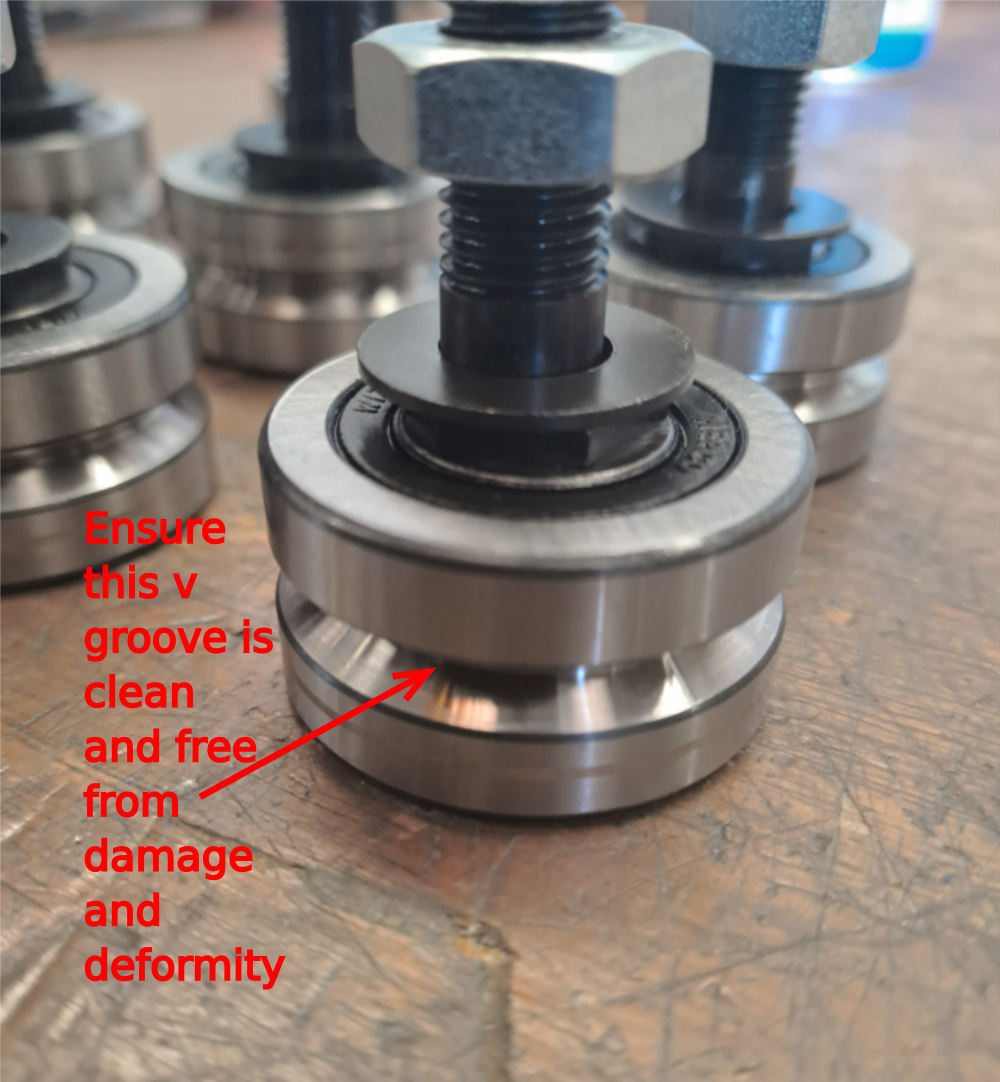
Étape 4 - Inspect Journals
B0000185 and B0000186 journals should be cleaned with compressed air and checked for quality. Visually inspect v grooves of journals for and damage or irregularities

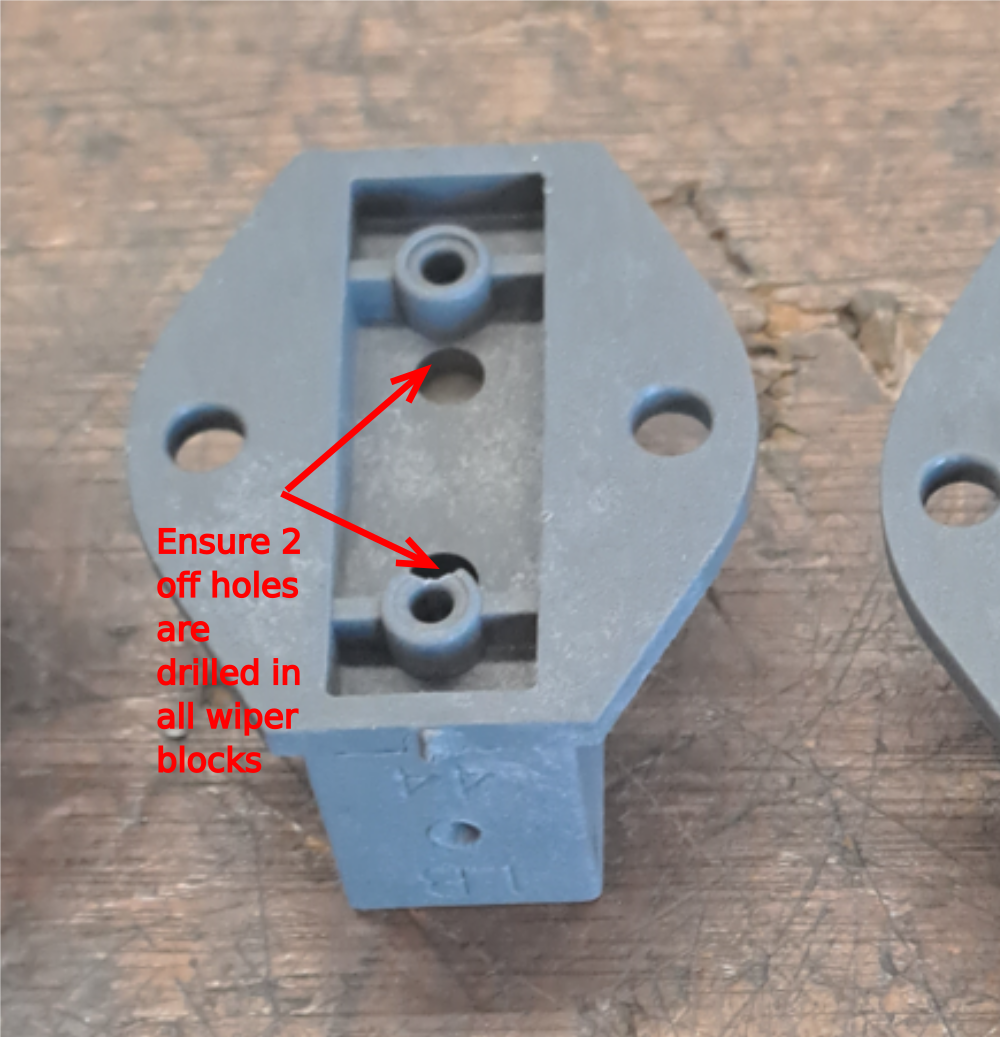
Étape 5 - Check drive ring wipers
D0007692 should be checked for correct machining. Holes indicated are vital to allow oil flow to ring system once assembled.

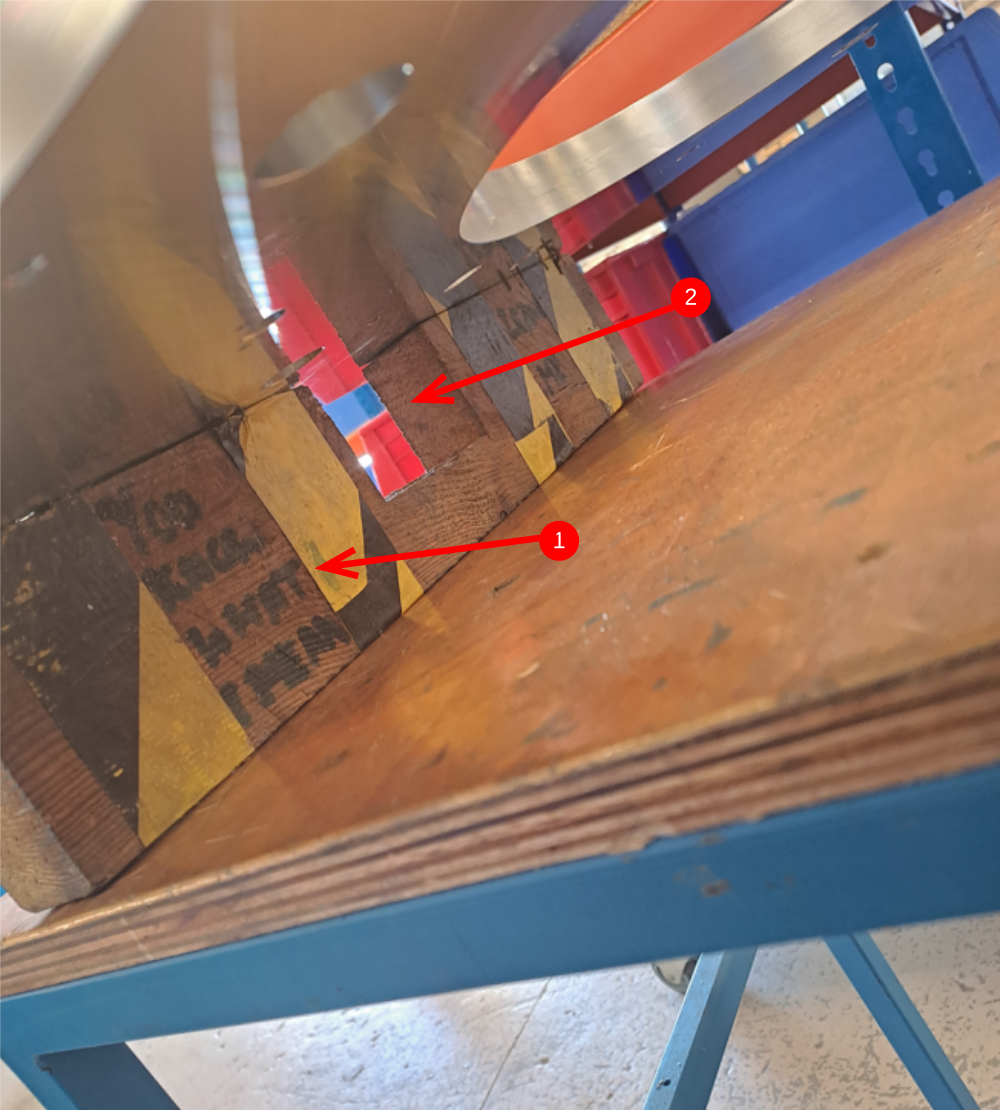
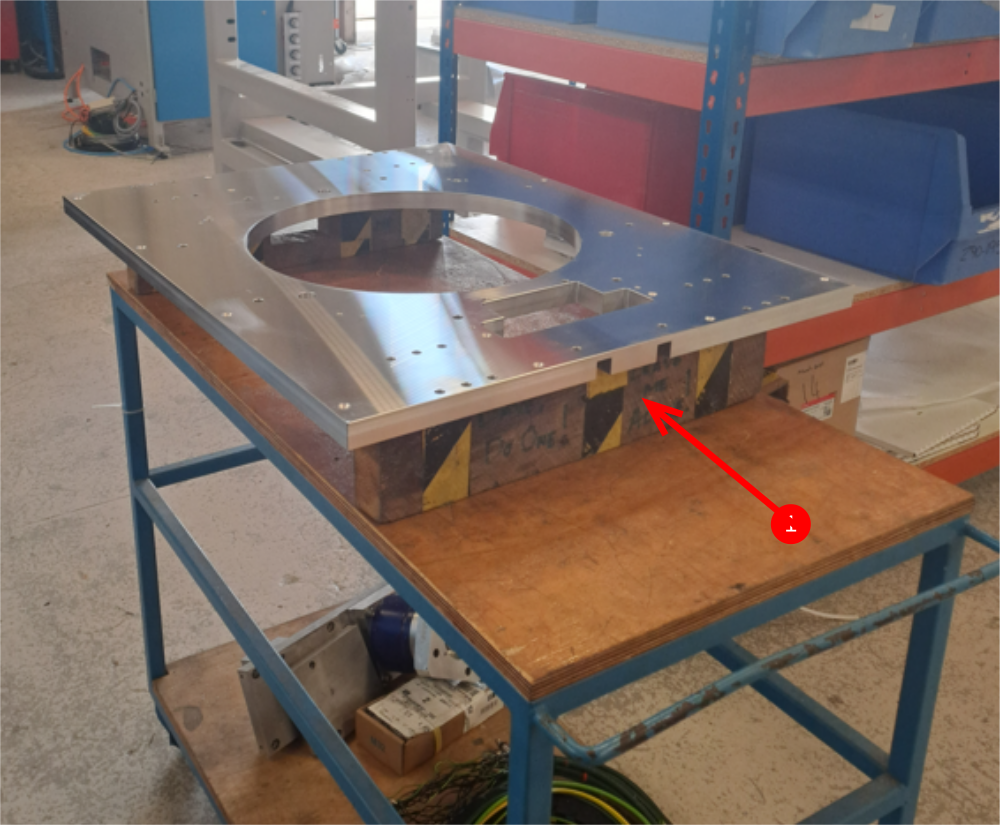
Étape 6 - Position face plate
Face plate should be positioned ready for assembly
1 Support blocks should be placed either end of faceplate
2 Ensure cut out is orientated correctly as per picture. This is the lifting access point.
3 Ensure correct end of faceplate is located at edge of workstation (end with 6 off M8 tapped holes on indicated face)
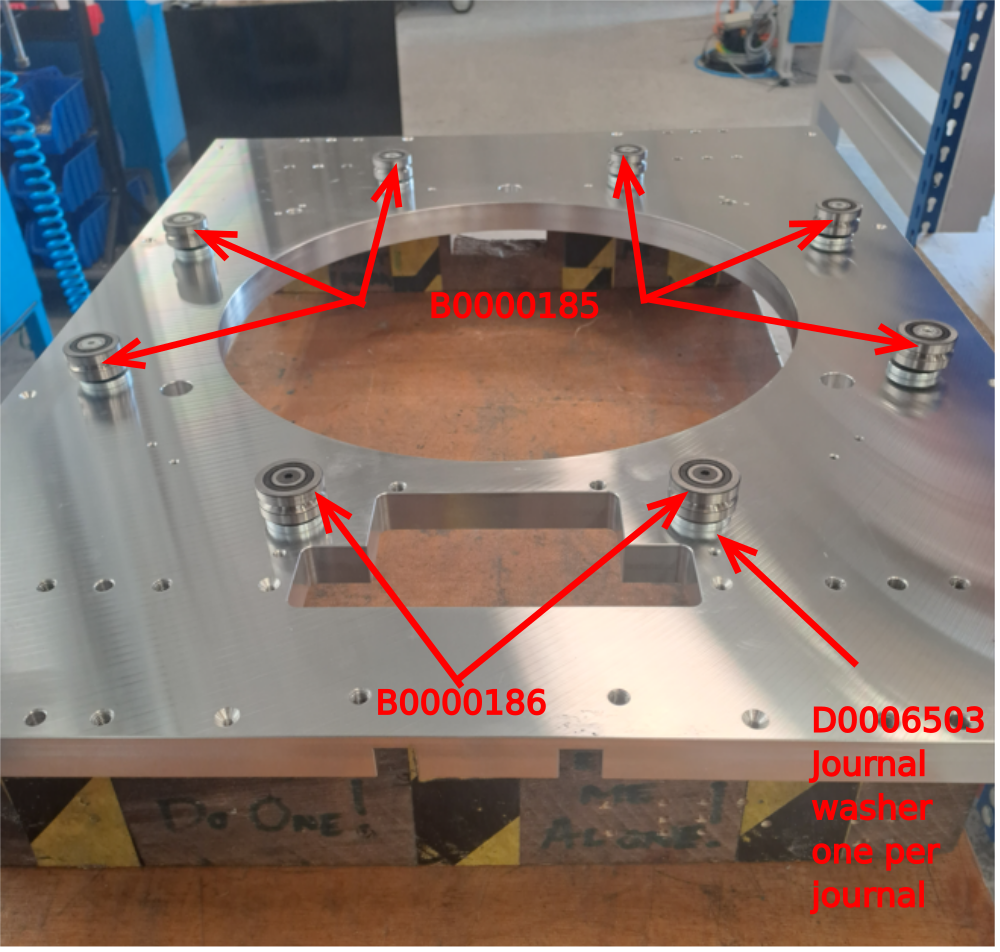
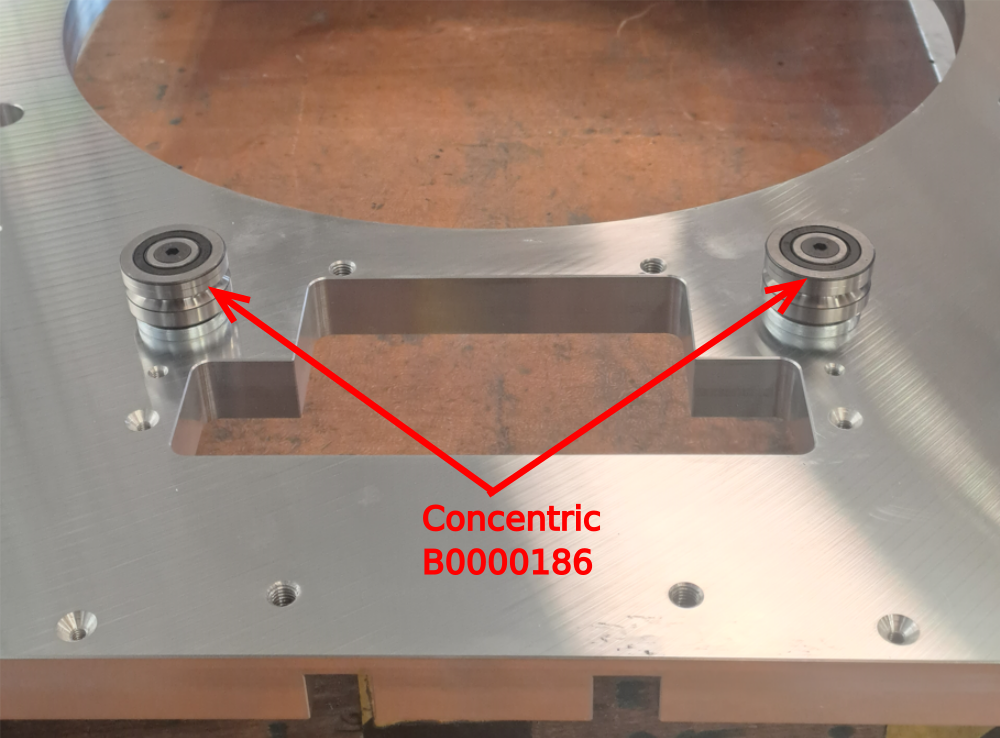
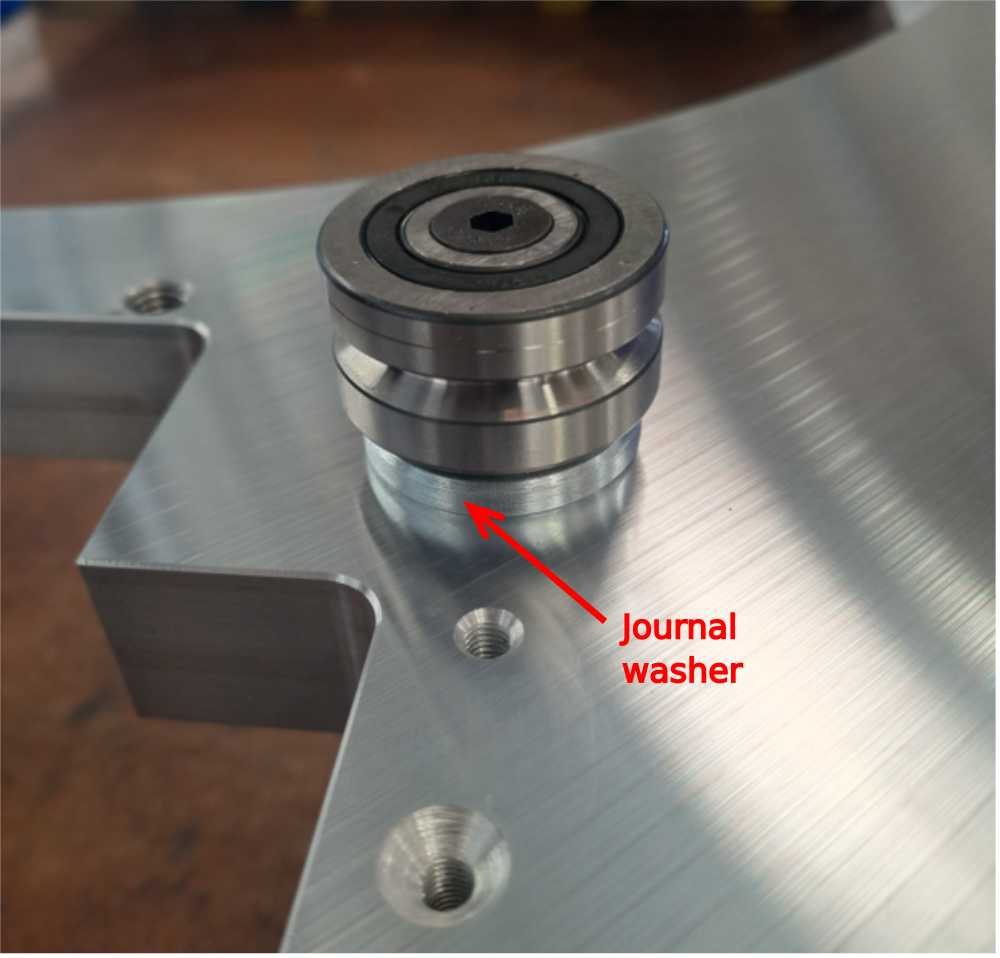
Étape 7 - Mount Journals
Mount journals as shown
Eccentric B0000185 journal 6 off
Concentric B0000186 journal 2 off
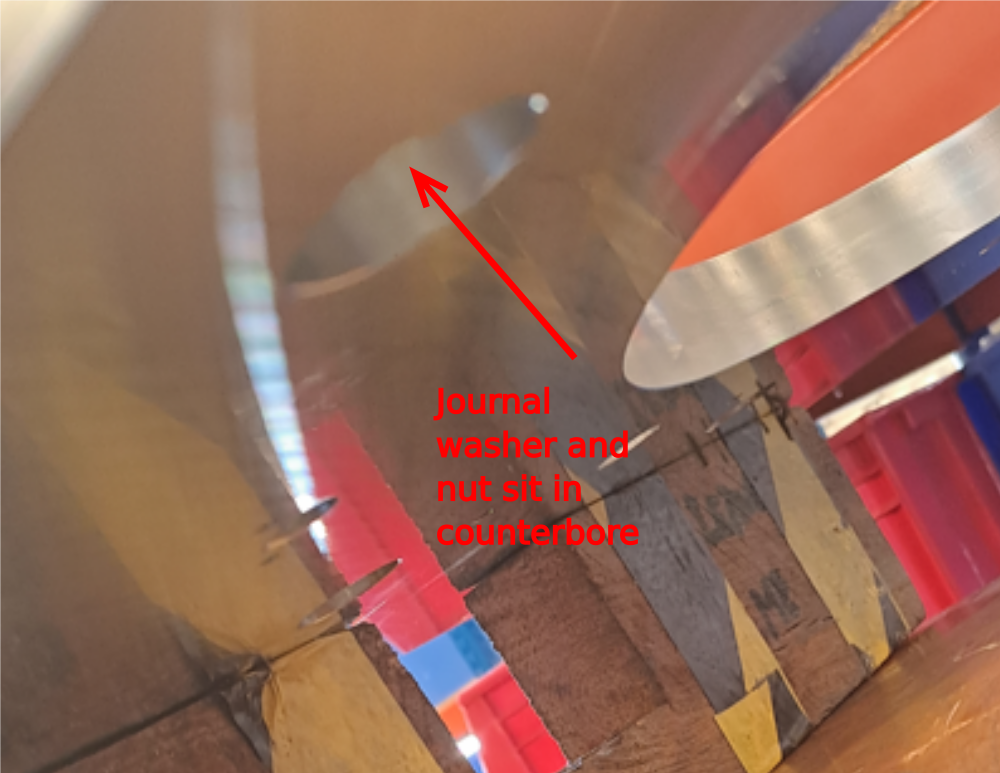
Space each journal with D0006503 journal washer
Fit Journal washer and nut to opposite side of mounted journal .
Add light tension to nut, as adjustment will be required
Draft
 Français
 English
 Deutsch
 Español
 Italiano
 Português